

Repairing a cracked wall plaque with G/5 Adhesive
By Julie Jezowski
Like a lot of people, when I’m at work I like to keep busy. It makes me feel good about myself and the bonus is that the day just flies on by. Having said that, it’s also nice to escape from the walls of my office now and then and head out into the shop to see what the guys are working on. For some reason, this gravitational pull I feel from the shop occurs more when my boss is away. We can just call it an unexplained phenomenon and leave it at that. During some of my excursions to the shop rather than just observing they let me help them with the projects they’re working on, which I absolutely love! They show me how to do things I wouldn’t dream of doing otherwise: routing a tabletop, assisting with a vacuum bagging project, or helping build a stitch and glue canoe. It’s just a nice change of pace from my usual office responsibilities and it’s the perfect opportunity to work with our great products.
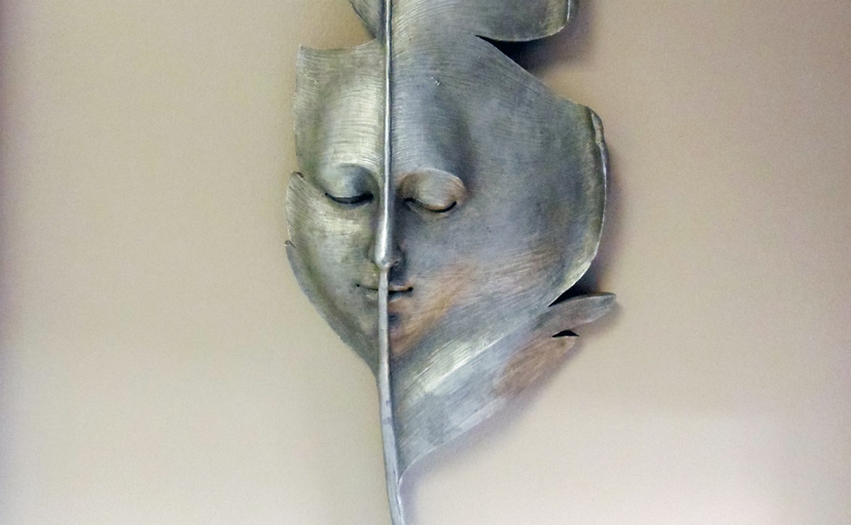
This year we have been very fortunate; we moved from the old digs into a bright, shiny new Technical Building, which meant new offices! They are simply beautiful in their original state but I like to put a few things up on the walls to add a bit of a “homier” feel to my space. (Sans the dirty dishes, clothes, windows, children, animals). Recently I was in the process of hanging a plaque on the wall when whammo…thud! it came crashing down and put a pretty big crack in it. After a few choice words and a deep cleansing breath, I thought to myself “Hmmmmmmm…..broken object? Check. Epoxy? Check! Boss gone? CHECK!” So out to the shop, I went for some expert advice from my Tech buddies.
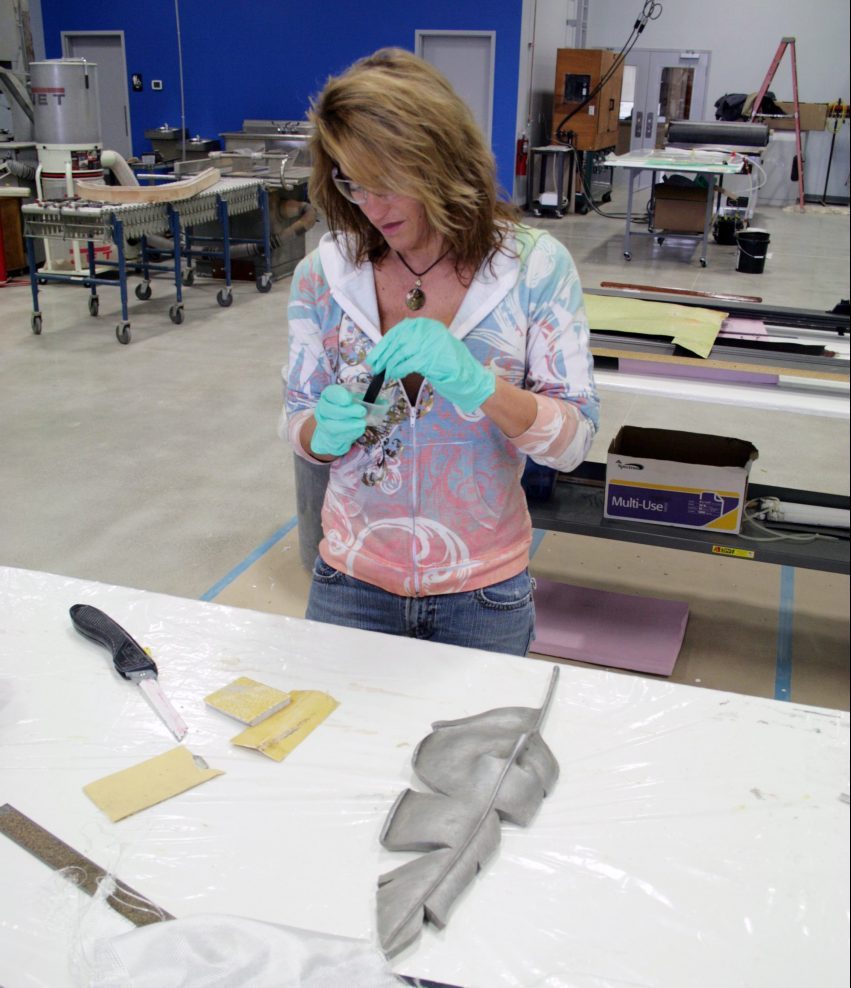
As soon as I showed them the broken wall plaque it was as if we had a code blue in the shop. People were scrambling, the plaque was ripped out of my hands, and a crash cart consisting of all the wonderful things we have here at GBI to fix it was put in front of me. So off I ran to don a pair of neoprene gloves and we were on it like flies on …food, yeah that’s it…food.
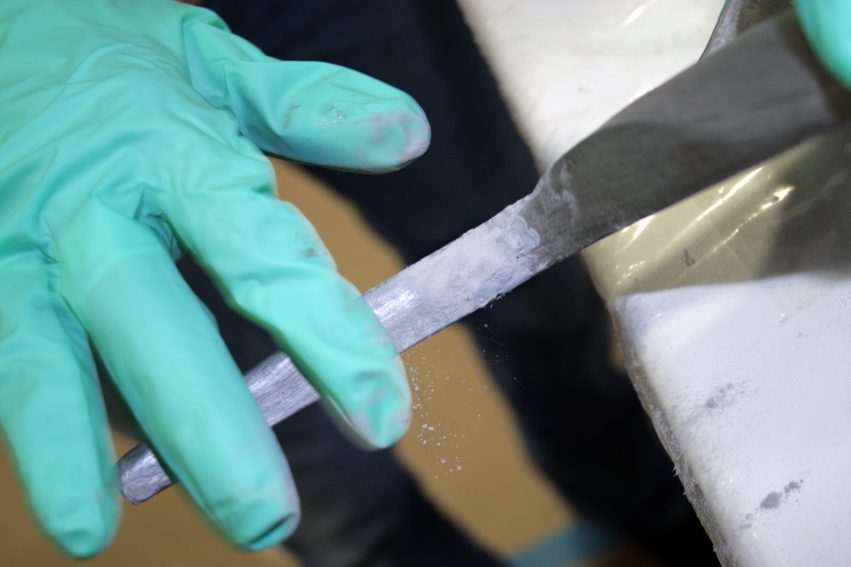
- To prep the wall plaque for repair, I sanded the break with 80-grit to remove any sharp edges and scratch it up a bit to improve adhesion.
- I then mixed G/5 Five-Minute Adhesive resin and hardener and added a touch of our 503 Gray Pigment to match as closely as I could with the metal-like finish of the plaque.
- To make the G/5 more like a paste and help it stay put, I stirred in a dash or two of our 403 Microfibers.
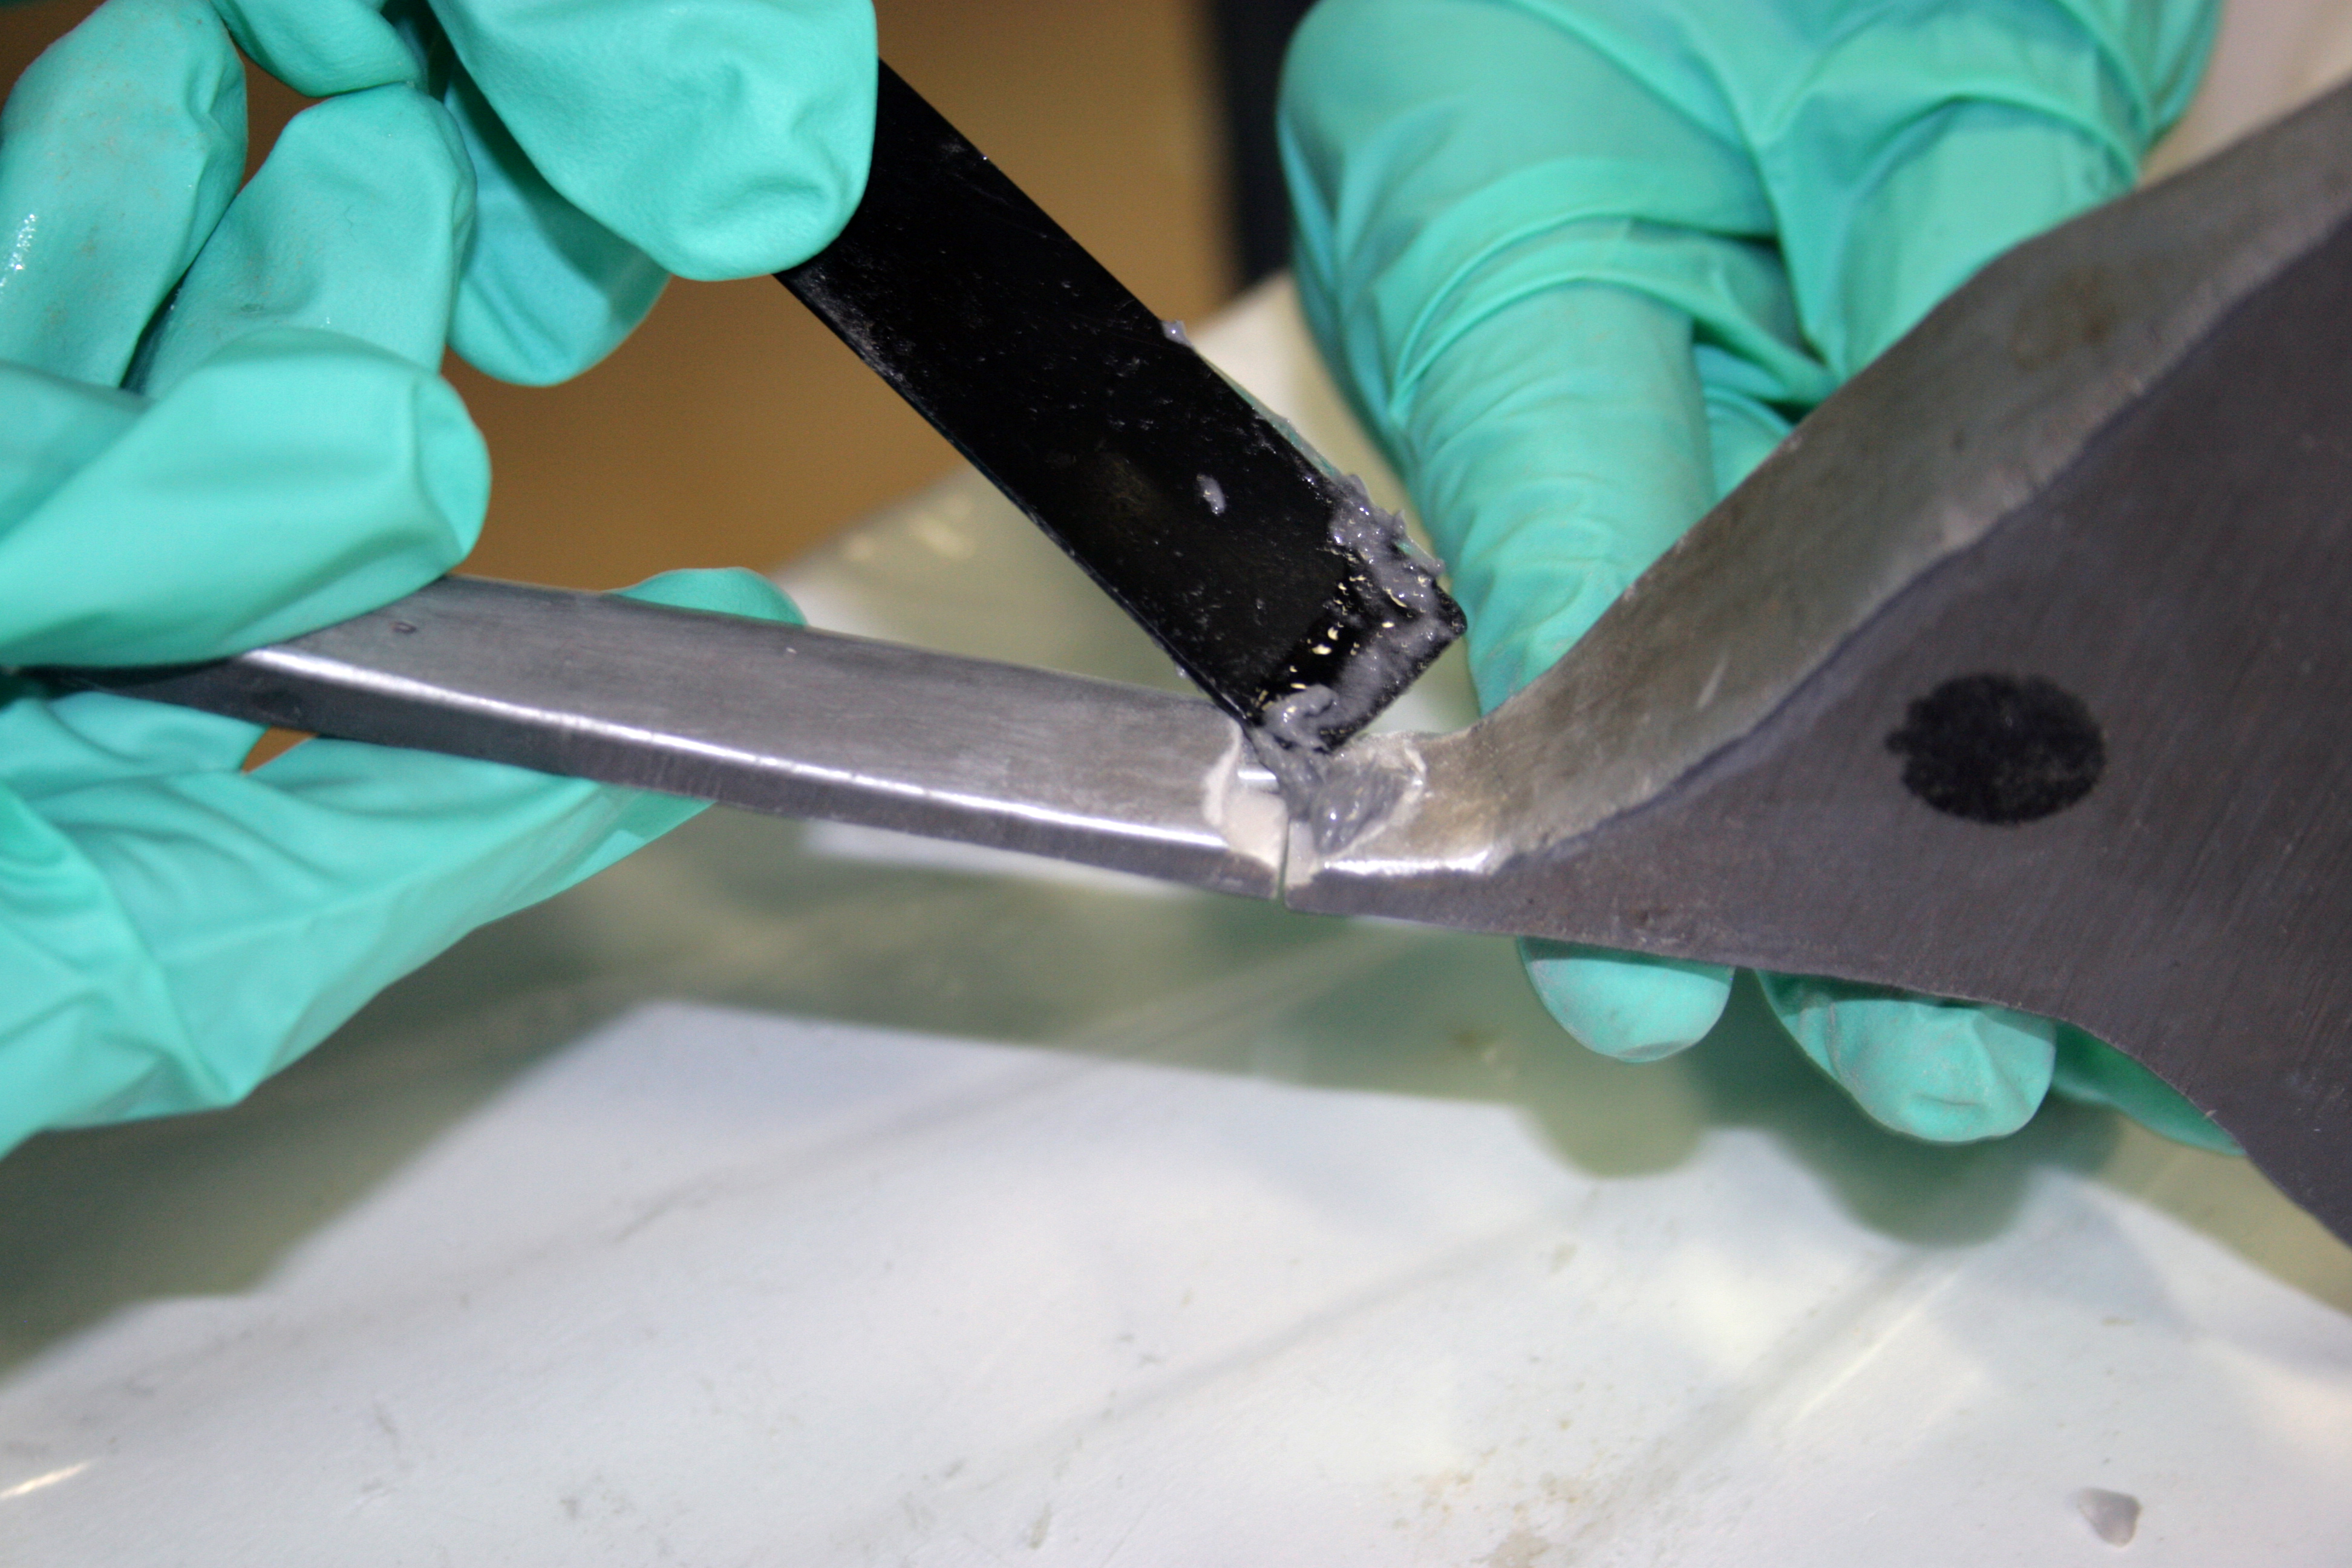
- I spread the mixture into the cracks on both the front and back sides and brought the wall plaque pieces together.
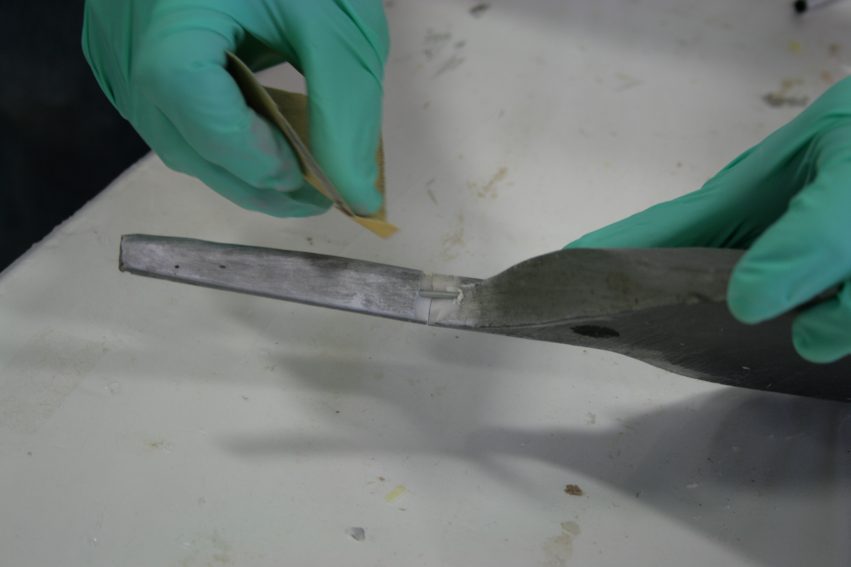
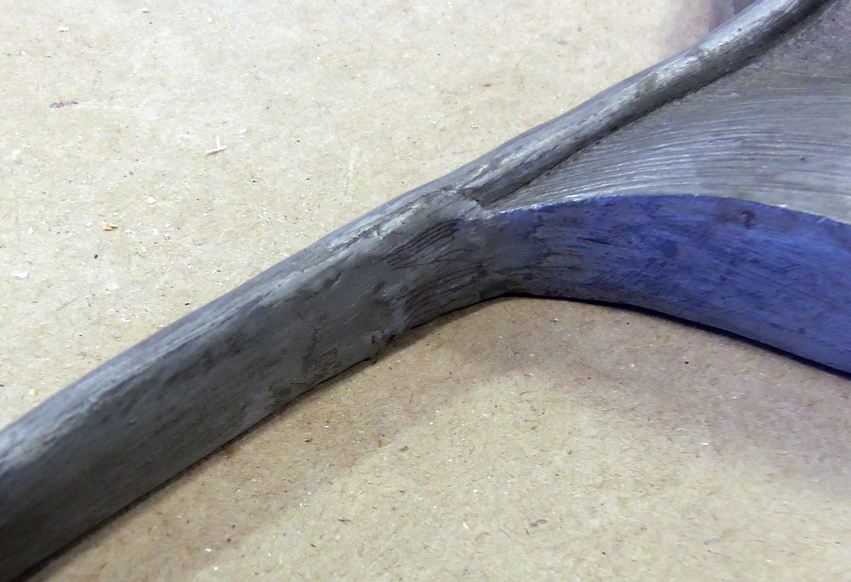
- To make the epoxy conform to the shape of the stem I wrapped it with clear packaging tape before the epoxy had a chance to set.

- After the epoxy had cured for 15 minutes, I pulled the packing tape off and used a box cutter to trim off any excess epoxy, careful to cut away from myself so I wouldn’t accidentally puncture my jugular.

Next, I sanded off any rough spots eagerly waiting to see the end result. The fix was good and solid, however, because of the shiny texture on the dull, distressed surface of the wall plaque, the repair was also pretty obvious. Being the creative thinkers they are someone suggested wiping the patch down with a little more G/5 and, with the epoxy still tacky, dusting it with dry 420 aluminum powder and rubbing off any excess.
Once it cured, I rubbed it slightly with a Scotch Brite pad, and voila! The repaired wall plaque looks perfectly imperfect and I couldn’t be happier about how it turned out.
***Note to my boss: The controversial aspects of this article have been TOTALLY fabricated to enhance the storyline. Honest, I swear… really.


