

by Mike Barnard
In this article, I’ll describe our standards for testing epoxy and how we go about testing epoxy to determine its handling characteristics and cured physical properties.
Epoxy Testing Standards
These are the standards we follow no matter which epoxy we are characterizing.
Two-week room temperature cure
After proper metering and thorough mixing epoxy will continue to cure after it has solidified until all amines have paired up. Over years of testing epoxy, we have found that two weeks of curing at room temperature, which we define as 72°F (22°C), is a good indication of its full strength.
Testing neat epoxy
We perform our tests on neat epoxy mixtures. That is, nothing is added to the resin and hardener because fibers or filler can affect many physical properties.
No post-cure
Allowing the epoxy to cure at room temperature, then curing it further at an elevated temperature is called post-curing. Doing this will improve physical properties in some cases. WEST SYSTEM® Epoxies reach full properties at room temperature, so it is not necessary to post-cure for testing.
Only averages are reported
In order to generate the data we publish, we conduct the same test several times, generating average result numbers. We don’t publish the highest values we achieve. We round our averages to the nearest unit, based on significant figures used.
ASTM standardized tests are followed
The American Society for Testing Materials was founded in 1898 and is now known as ASTM International. This non-profit organization is comprised of more than 30,000 members across 135 countries. Writing and updating over 12,000 test standards, they are recognized as one of the world’s largest voluntary standards developing organizations. The scientific standards they write and maintain are for materials, products, systems, and services. Not only do we adhere to ASTM standards, but we also have several employees who are members and help maintain and write ASTM standards.
Epoxy’s Handling Characteristics
Mix Ratio
The mix ratio is crucial to a proper cure. Severely off-ratio epoxy may not cure at all. Unlike catalyzed resin systems, you cannot add more hardener to make epoxy cure faster. If too much or too little hardener is added, it is quite possible that the epoxy will not cure properly. This process can be simplified by using our 300 Mini-Pump Set. These pumps are calibrated to dispense at the correct ratio of epoxy resin to harder at a rate of 1 pump resin to 1 pump hardener (even though the ratio of resin to hardener is still 3:1 or 5:1).
Mix Viscosity
In order to saturate fabric, the epoxy’s viscosity should be low enough to flow through the layers of fabric. However, if the viscosity is too low the epoxy will not stay in the fabric. For most fabric weights, viscosity between 300 and 5,000 centipoise (Cps) saturates fabric without draining away.
Viscosity is a measure of how a fluid resists shear loads. It can also be defined as the internal forces that keep the fluid from flowing. The higher its viscosity the slower it will flow from one area to another. Water has a viscosity of about 1 Cps, ketchup has a viscosity of about 75,000 Cps and peanut butter has a viscosity of around 250,000 Cps. Almost all liquids will become less viscous (lower viscosity easier to flow) at higher temperatures. Epoxy is no exception.
We use a rotational viscometer to measure viscosity. A spindle rotates in the epoxy to measure its resistance. A thicker fluid will give the spindle more resistance, indicating a higher viscosity.
Viscosity’s effect on fabric wet-out holds true at the dinner table. Spilling a drink on your jeans means your leg gets wet almost instantly. But drop some peanut butter on your jeans and it may never reach your leg. This is due to the differences in viscosity.
Pot Life
Few things are more annoying than when your pot of epoxy cures sooner than it should.
We define pot life as the amount of time you have to work with 100 grams (3.8 ounces) of epoxy in a small container at room temperature (72°F). Timing begins when you start mixing and ends when the material gels. This relationship is dependent on the hardener, temperature, the volume of epoxy, and size of the container. To extend this time, mix smaller batches or after mixing, pour the epoxy into a larger container to dissipate generated heat.
Specific Gravity
This number helps determine your project’s weight. Specific Gravity is the ratio of the density (mass divided by volume) divided by the density of water. We conduct these tests at room temperature so that the density of an object is comparable to the specific gravity.
Testing Epoxy’s Cured Physical Properties
Testing Epoxy for Hardness
Hardness is a measure of how hard the surface of a substance is. The harder the surface of a coating is, the more abrasion-resistant it is. We test for this with a durometer which accurately measures the hardness of the surface of the cured epoxy. We use a Shore D test which specifies a range of hardnesses. Similar tests are conducted on metals where Rockwell or Brinell tests are used. In these tests, a metal point is forced into the material and a numerical reading is given which corresponds to the resistance at the point. Because hardness increases with the degree of cure, the test is conducted after one day and 14 days of cure at room temperature. The results of a hardness test are important for comparative purposes or for determining the degree of cure.
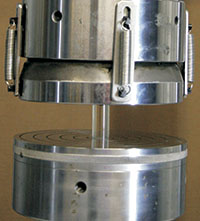
Testing for Compression Strength
Higher compression strength means that the epoxy will be able to support higher loads pushing on it. Compression strength is the load required to cause plastic deformation and is measured in pounds per square inch. Plastic deformation is the permanent change in shape or size of a solid body without fracture, resulting from sustained stress beyond the elastic limit. Similar to hardness, degree of cure is important. This test is also performed after one day and 14 days of cure at room temperature.
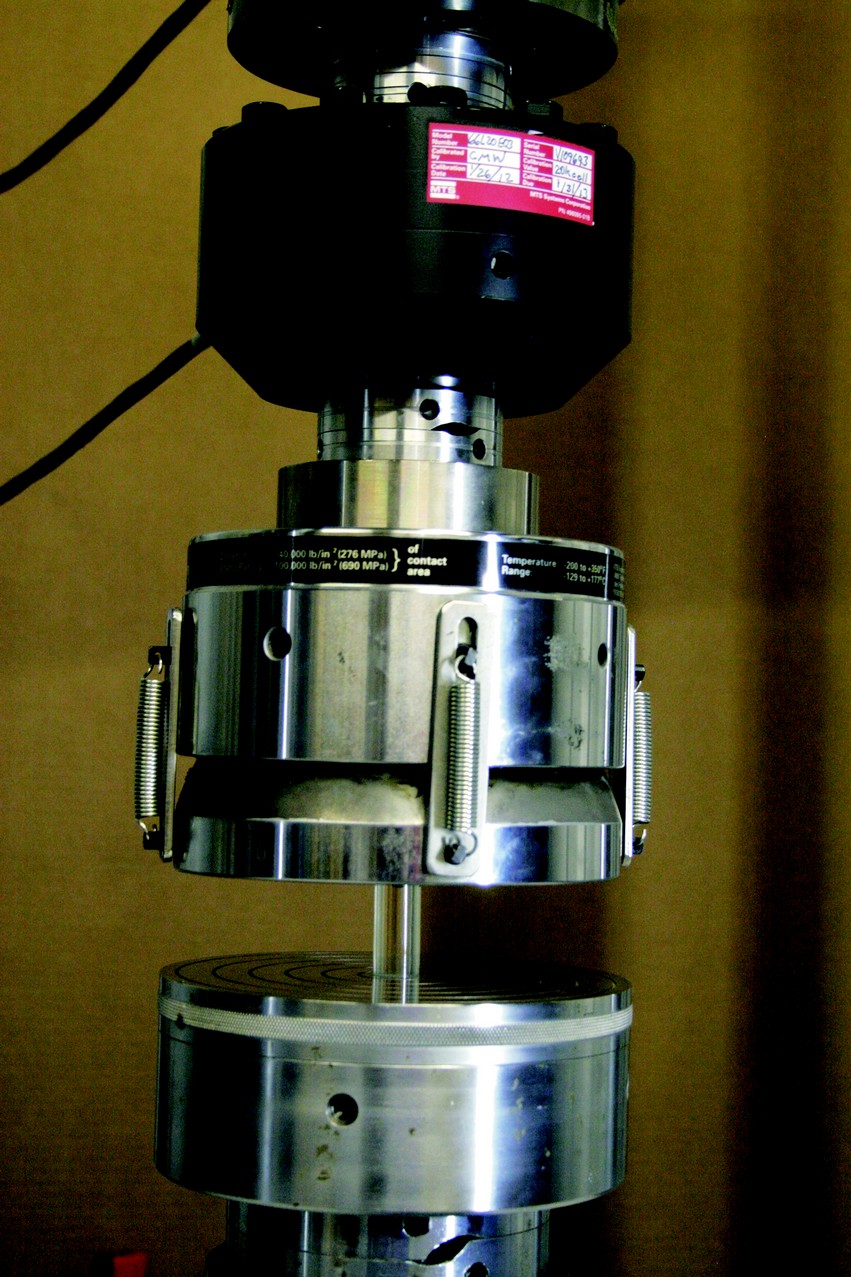
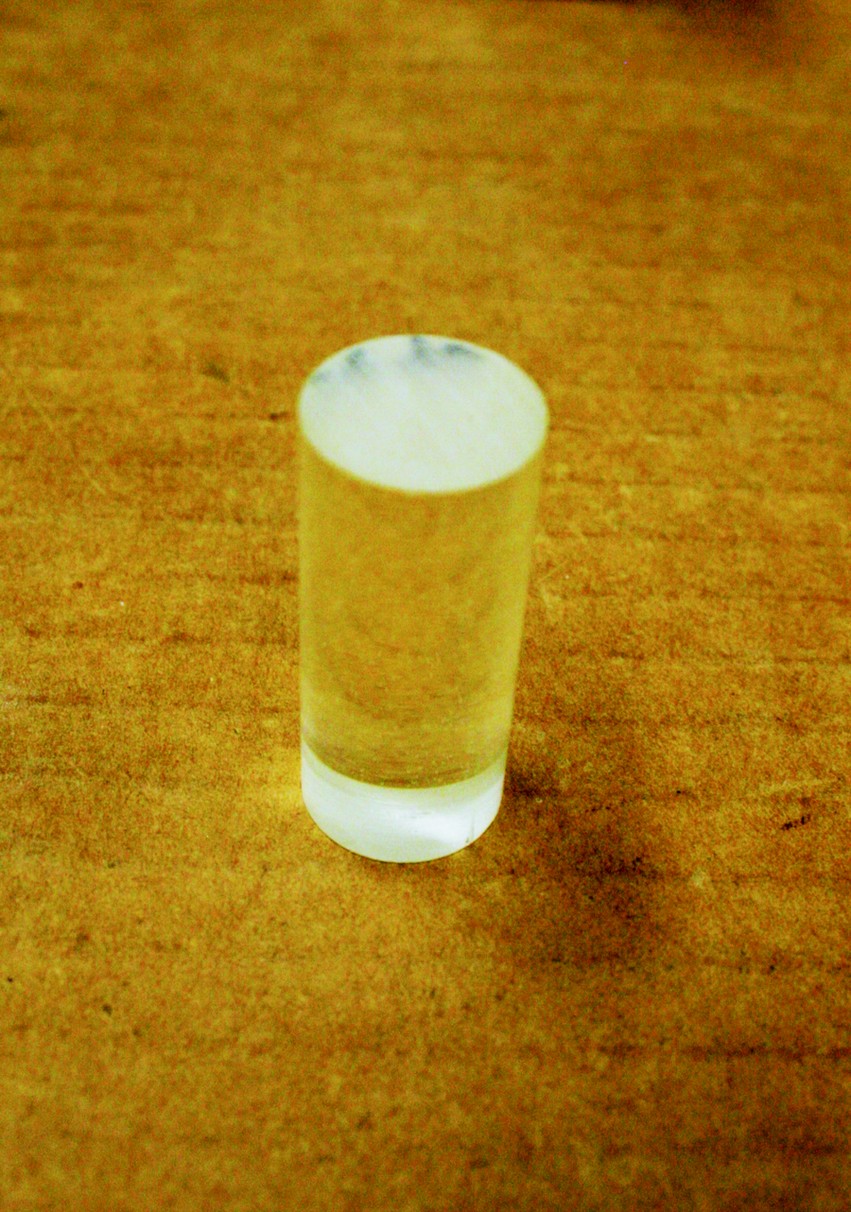
Compression test in progress.A compression cylinder
after testing.
Testing Epoxy for Tensile Strength
Higher tensile strength means that the epoxy will be able to support higher loads pulling on it.
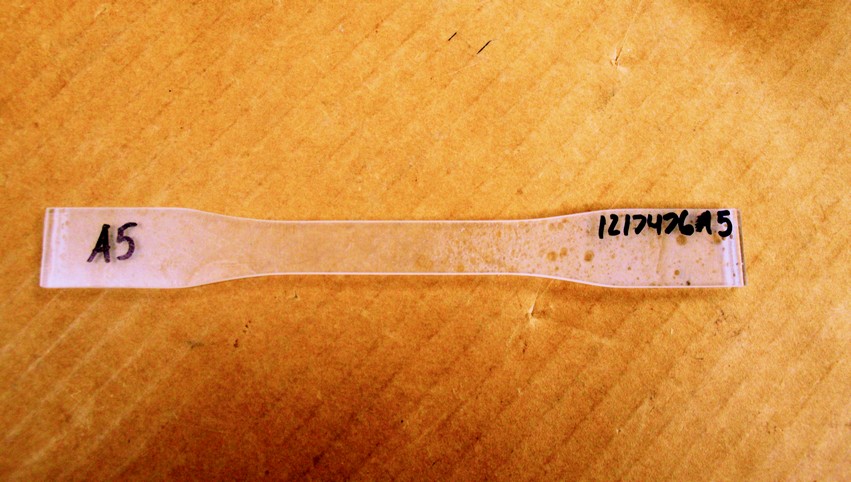
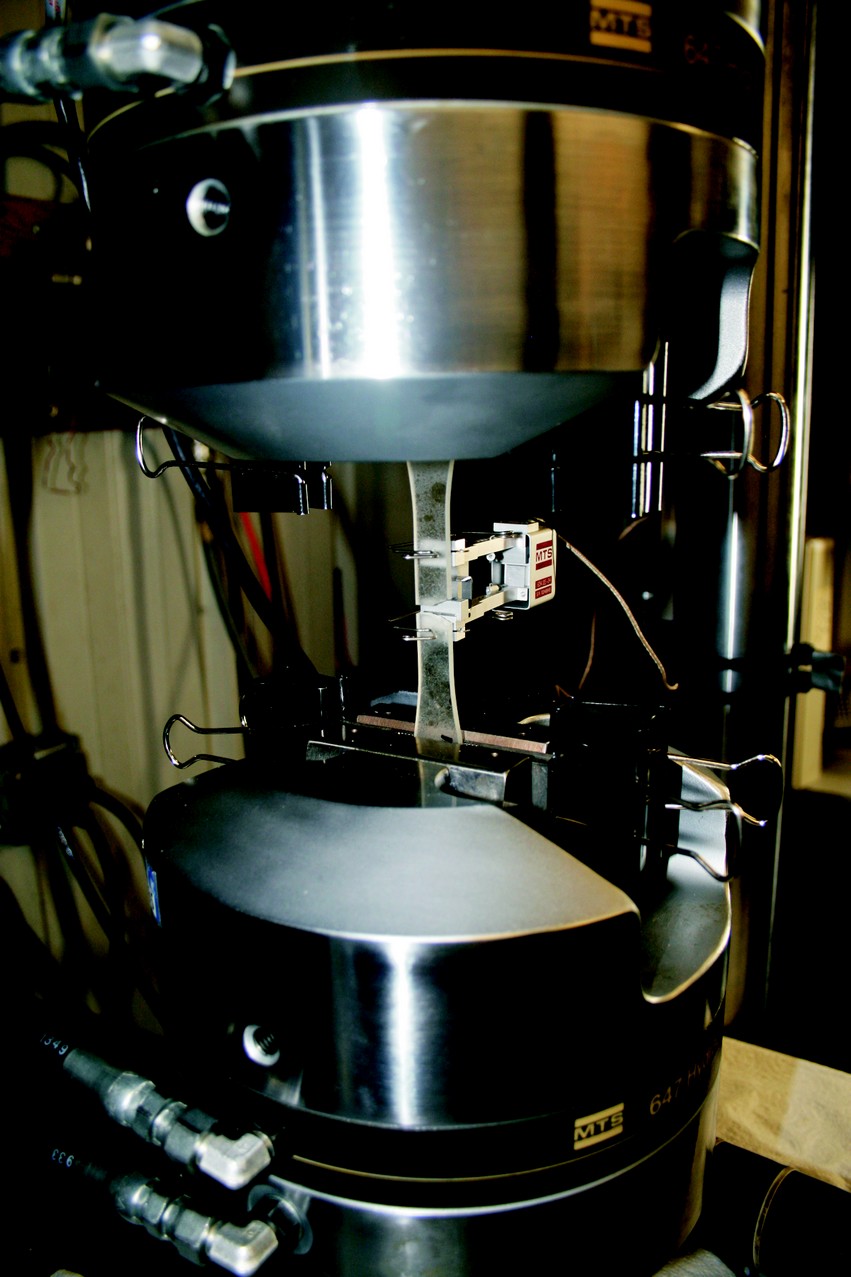
The tensile test specimen is made in the shape of a “dog bone” and fixed into clamps on a machine that will pull it apart from each end. This test continues until a fracture appears. The result of this test is recorded in PSI and is the value at which breakage occurs.

Testing for Tensile Elongation
Higher tensile elongation means that the epoxy will be able to stretch more when being deformed. Higher elongation will often indicate toughness.
Tensile elongation is the change in length of a sample (strain) when loaded to failure. This value is measured at the breaking point, or when the sample has been stretched far enough to fail. For example, if a sample was 10″ long and it stretched 1″ at failure the elongation would be 10%, or .10.
Testing for Tensile Modulus
A higher tensile modulus means that the epoxy will have more stiffness.
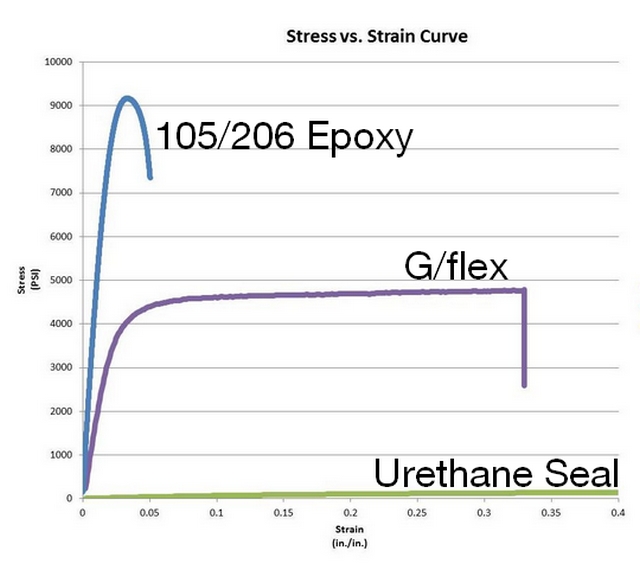
Tensile modulus describes the amount of stretch (strain) in relation to its ability to resist stress. When plotting stress vs. stain on a graph it is the slope of the line. A line that is closer to vertical indicates a stiffer substance. The plot in the Stress vs. Strain Curve above shows modulus as the initial vertical linear portion of the lines.
Understanding the Stress vs. Strain Curve

Stress is the amount of force on a sample divided by the cross-sectional area and recorded in pounds per square inch (PSI).
Strain is the amount of stretch a material exhibits while a load is applied. This property is expressed as a percent of the original length.
Toughness is a relationship between modulus, stress, and strain that corresponds to the amount of energy a specimen can absorb prior to failure. A material can have very high strength and very little strain (105/206) a moderate amount of stress and strain (G/flex) or very low stress and very high strain (urethane sealant). The graph shows three stress-strain curves. The G/flex curve, which contains a mid-level of stress and mid-level of strain, has more area under it. This area corresponds to toughness and shows why G/flex is considered tougher than 105/206 and urethane sealant.
Testing Epoxy’s Flexural Strength
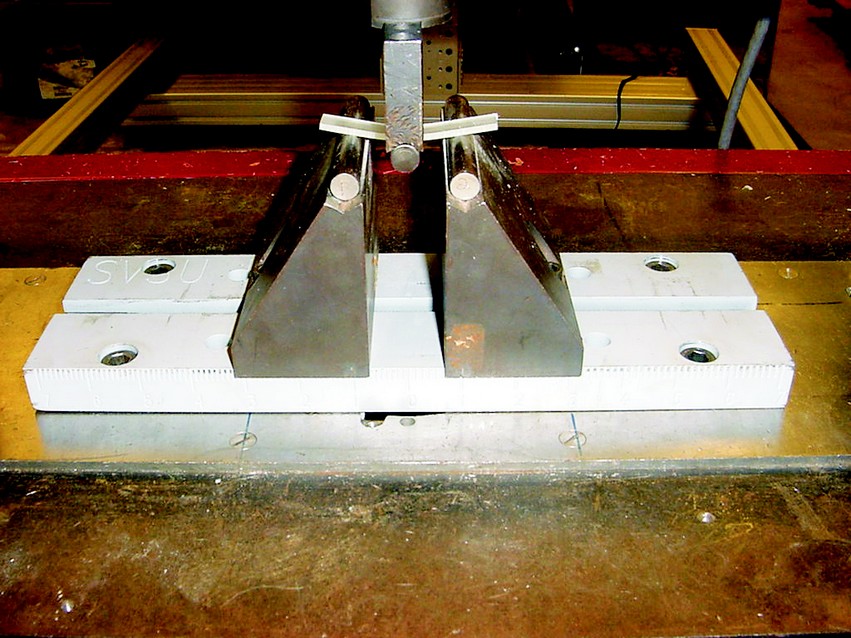
Higher flexural strength means that the epoxy will be able to support higher loads pushing on it while under flex. It is better able to resist fracture due to its ability to bend. Flexure strength is similar to that of tensile strength but instead of pulling on the ends of a dog bone sample, you are pushing down in the middle of a smaller, rectangular sample. The value of stress (in PSI) is recorded at the point at which the material breaks. This test determines max load when forces act perpendicular to the length of the sample.
Testing for Flexural Modulus
Higher flexural modulus means that the epoxy will be stiffer when higher loads push on it while under flex. Flexure modulus is very similar to tensile modulus but the sample is tested in the same way as flexural strength. Instead of testing strength along the length of the sample, it is testing the strength perpendicular to the length.
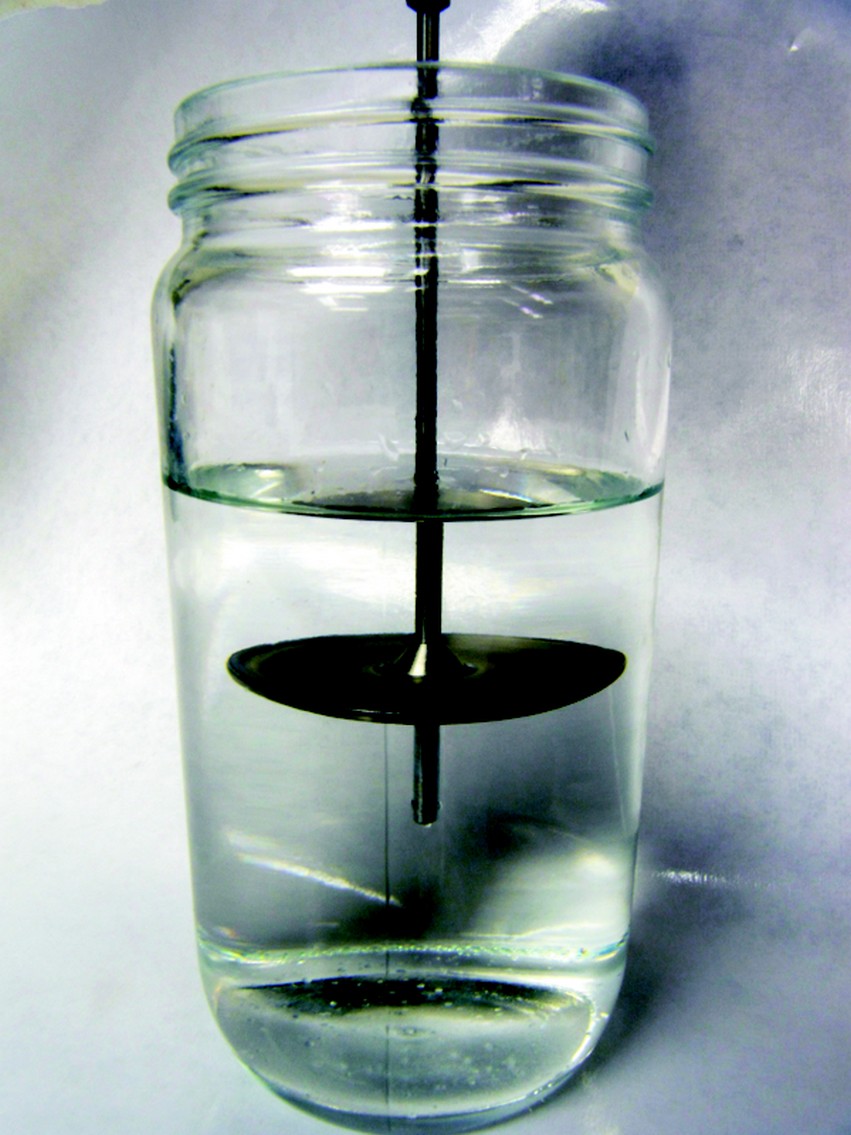
Epoxy’s Heat Deflection Temperature
Heat deflection temperature (HDT) is the temperature at which the epoxy will deform under constant load.
The same type of bar and test that is used for the flexural strength and modulus tests is used to find the heat deflection temperature. This time the sample is submerged in oil at a carefully calibrated temperature and is pushed down with a 264 psi load in the center. The temperature of the oil is then gradually raised until the bar deflects .1″ in the center. This temperature is considered to be the heat deflection temperature.
Testing Epoxy for Onset of Tg
The Onset of Tg, or glass transition, is the temperature at which the epoxy changes from a glassy (solid) state to a soft, rubbery state. It is the “softening point.”
This is another way to measure at what temperature the unfilled epoxy will be affected. A differential scanning calorimetry (DSC) machine is used in this analysis. This test is conducted by placing a fully cured sample in the DSC machine and heating it to 200°C at a pre-defined rate. The heat flow into the sample is measured and compared to another sample of pure air. The “noise” is taken out by removing the results of the air (control) sample from the tested sample. On this heating cycle, there is a decrease in heat flow that indicates a loss of some properties at that temperature. We publish the Tg as the point where this decrease in heat flow begins
Testing for Ultimate Tg
Ultimate Tg is the highest temperature at which the epoxy will have some structural properties. In order to attain this temperature resistance in application, we post-cure the epoxy at a temperature equal to or greater than the ultimate Tg.
Ultimate Tg is basically tested the same as the onset of Tg, with a slight modification. Where onset of Tg is found on the first heat (the first time the sample is heated to 200°C) ultimate Tg is found by heating the sample again up to 200°C. On this heat, the onset is recorded. Because an additional cure has occurred, this temperature will be higher than the onset of Tg.


