


By Tom Pawlak — GBI Technical Advisor
The prospect of fiberglassing overhead when laminating the bottom of a hull can be a bit ominous. Any type of overhead work can be frustrating, but the thought of trying to hold fiberglass in place while applying epoxy can produce nightmares for some people. This is especially true if you will be working alone.
You can fiberglass overhead alone without going crazy in the process. Having faced this demon in the past we struggled until we found a relatively easy method. The technique is similar to hanging wallpaper. We trim the dry fiberglass fabric into narrow strips like wallpaper and wet it out on a flat surface. Then we roll the wet fabric onto cardboard tubes, carry them to our project and unroll them onto the prepared overhead surface.
Fiberglassing large sections overhead
- Precut fiberglass into sizes required for your project. Cut the fiberglass into manageable widths of 24″-30″ (half of a standard 4′ or 5′ wide roll). Roll the dry fiberglass onto cardboard tubes or sections of PVC plastic pipe that are 3″-4″ in diameter. Plan to orient the fabric strips vertically, working from the top down. Gravity will work in your favor if you apply the fabric this way. Label the fiberglass rolls so you’ll know where to locate them later.
- Prepare the surface of the project for epoxy. Be sure the surface is clean and freshly sanded.
- Prepare a flat surface for wetting out the fiberglass by covering a workbench, old door or plywood panel with heavy plastic. Ideally, the surface should be at least as wide as the fabric and located close to your project. Having it nearby will help reduce the time between when you apply the epoxy to the fiberglass and when you unroll it onto the project.
- Apply a coat of unthickened epoxy to the hull but only to as much area as can be fiberglassed before the epoxy gels. When working overhead, it is especially important to wear gloves, protective clothing, and safety goggles to keep epoxy off of your skin, hair, and eyes.

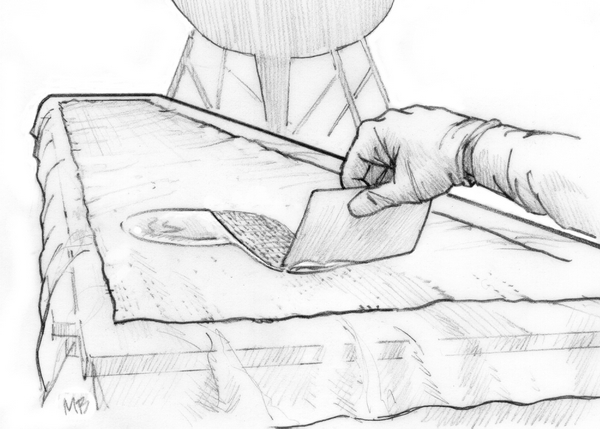
- Unroll a single piece of fiberglass cloth onto the plastic-covered work surface. Wet out the fabric by pouring epoxy onto it and spreading it out with a plastic spreader. Apply a generous coat to ensure thorough wet out of the fibers, but don’t use too much because you’ve already coated the overhead project. Additional epoxy adds weight, increasing the fabric’s tendency to fall or slide off.

- Roll the wet fiberglass fabric onto the pre-cut tubes to allow ease of handling. Carry the fiberglass-covered tube to the project quickly. Epoxy generates heat when confined in mass. There is a limited amount of time to apply the fabric before exotherm (excessive heat build-up) occurs. This can result in epoxy-coated fiberglass curing on the tube.

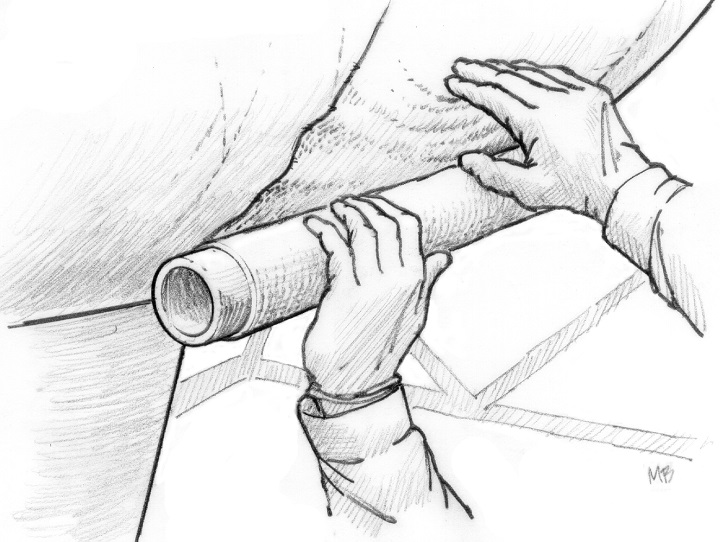
- Carefully position the fiberglass roll at your chosen starting point. Wear protective gloves. It’s generally a good idea to start high and work low. Unroll 6″ of fiberglass from the roll. Press the fabric against the hull. It should stick to the epoxy-coated surface without pulling away. Unroll the fiberglass/cardboard tube onto the surface with one hand. Use the other hand to spread out wrinkles and press the fabric against the surface, removing air.
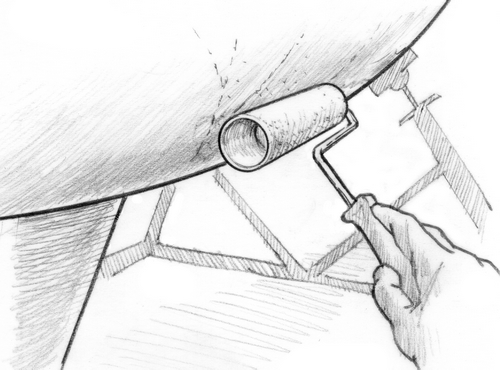
- If the roll is not tracking where you’d like, roll some of the fiberglass strip back onto the tube. This will enable you to redirect the fabric slightly by shifting the short section still attached to the hull. Unroll the fabric again making slight adjustments for position along the way. Use the tube like a rolling pin to press the fabric into the surface. Pick up the roll from the surface to stretch the fabric occasionally. This will minimize wrinkles and make the going easier. Light-weight fabrics will cling to a recently coated surface. Heavier fabrics may require an extra step to get the fabric to stay put. If necessary, after the wet-out coat apply a light coat of epoxy that has been thickened with 404 High-Density filler or 406 Colloidal Silica filler to the hull before applying heavier fabrics. The layer of thickened epoxy gives the wet fiberglass something to nest into.
- After applying the fiberglass strip, use a plastic spreader to press the fabric securely against the hull. Use this step to draw off excess epoxy and force out trapped air bubbles.

If additional layers of fiberglass are required, repeat the process. Apply additional layers while the previous layer is still tacky. This saves time and eliminates the normal wash and sand step required if the epoxy were allowed to cure hard between coats.
You can apply multiple layers of fiberglass-like shingles on a roof. The first piece of the second layer should be narrower than the piece below it, followed by normal width strips so that all of the joints are staggered. Stagger the layers so each edge falls at least 3″ from the nearest edge below or above it. The individual strips can usually be butted because the adjoining layer laps the butt joint. Apply all of the strips using the techniques described above. Repeat the process until the hull is covered.
This technique allows you to stop and start without causing a problem. If you get tired, take a break before wetting out the next piece of fabric. Just be sure to get back on it with additional layers while the previous layer is still tacky. If the epoxy will be past the tacky cure before you get back, consider applying release fabric to the areas. This saves the wash and sand surface prep normally required for bonding to a cured surface.
If it looks like the epoxy will cure too far before you can apply the remaining fiberglass strips, you can buy more recoat time by rolling on a fresh coat of epoxy while the previous coat is still a bit tacky. The period when a curing epoxy surface or coating is still tacky is the ideal time for applying subsequent layers of epoxy, fiberglass, or epoxy fairing putties.
Applying a small patch overhead
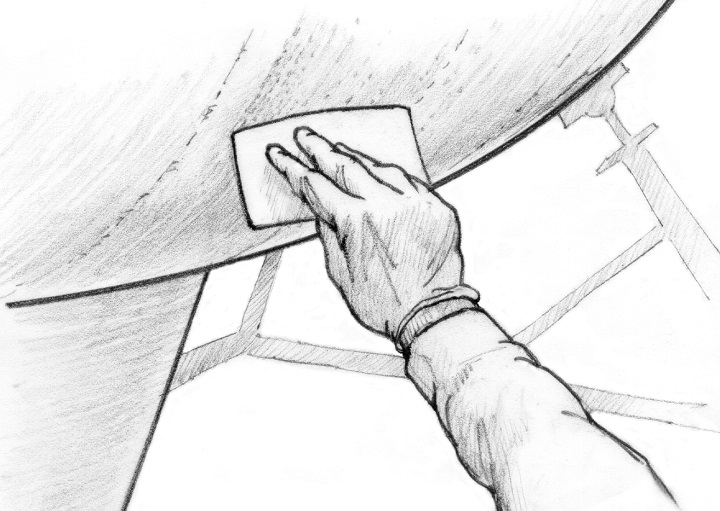
Wet the fabric out on a flat surface covered with heavy (6 mil or greater) polyethylene plastic a bit larger than the fabric patch. Carry the plastic with the wetted fabric on it to the overhead surface. Stretch the plastic and fiberglass fabric in position against the surface.
Smooth the plastic and fabric, from the center to the edges, to remove wrinkles and air bubbles. To remove stubborn air bubbles, puncture the plastic directly above the bubble.
This method is neat (epoxy doesn’t drip all over you) and you can leave the plastic in place and strip it off after the epoxy has cured.


