Shiloh, an Argie 15
Spring 2016

GET STARTED
FREE PRINT & DIGITAL EDITIONS
Spring 2016
by Craig Bousquet
I didn’t know what I was getting myself into when I decided to build an Argie 15 boat. While not exactly a novice—I have owned a 21′ sailboat and am a tall-ship model builder—I’m not experienced in building sailing vessels.
After looking through various plans and decided on the Argie 15 from Dix Designs. This is a stitch and glue boat which looked easy to build, but also gave me a variety of options. I ordered the plans and started to acquire the materials needed to construct and assemble this boat.
The Argie 15 is designed to be rowed, sailed, or used with a small outboard motor. I lofted the lines from the plans and cut out the panels from marine-grade plywood. The Dix Design plans called for the joints to be butt fitted and covered with 2″-wide fiberglass tape and epoxy. I opted to scarf the joints to provide better strength in the panels (two side panels per side and one for the floor).
The first step was to align the floor panel and the two lower side panels and to drill the holes for the wire ties, or stitches, that would hold the panels in place. The next step was to do the same with the upper panels on each side. At this point, it actually looked like a boat.
Now the fun really started. The tasks turned to tightening all the stitches to close any gaps between the panels and checking for proper alignment and symmetry. As a novice in fiberglass techniques, I knew I was in for an experience, and boy was that correct. I began by laying the dry fiberglass on the inside seams using WEST SYSTEM 105 Resin and 205 Fast Hardener. The first batch worked correctly. But when I did the same seam on the opposite side I must have taken just a tad too long as the epoxy uncontrollably exothermed in the mixing cup. In both cases, it was about 70°F in my workspace. I’d used pumps to correctly meter the resin and hardener and it had cured within the time frame listed in the WEST SYSTEM User Manual & Product Guide.
I realized I needed to use 206 Slow Hardener instead to give myself more working time. This required me to make another trip to my local West Marine, where they now greet me by name—shades of Norm in Cheers.
The most important lesson learned on the first go-round: Don’t think you have more working time than what the WEST SYSTEM User Manual & Product Guide states; you really don’t. Now that I woke up and smelled the epoxy uncontrollably exotherming in the mixing cup, I knew that I had to move more quickly and have the strips of glass laid out and taped into position.
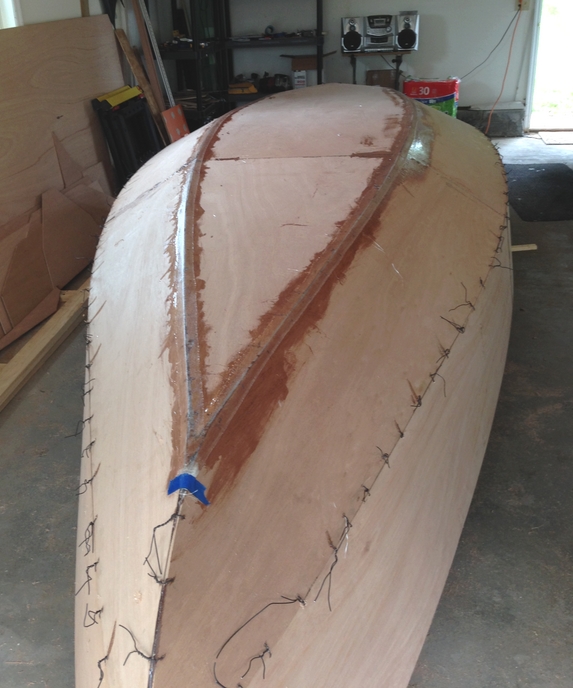
I finished epoxying the Argie 15’s seams on the inside, then turned the hull over and removed the stitches so they wouldn’t interfere with glassing the outside seams. I had great luck pulling the stitches all the way out from the outside without having to cut the fiberglass tape on the inside.

I mixed more 105/206 and blended in 403 Microfiber filler to fill in gaps between the seams, and to flair off the edges of the side panels and floorboard. I epoxied a narrow layer of fiberglass on each outside seam and allowed it to fully cure. I then sanded the fiberglass and epoxied a second, wider fiberglass strip to each outside seam. The increased bonding area of the wider fiberglass improved the strength of the seam reinforcement. I turned the boat over and repeated this process on the inside.
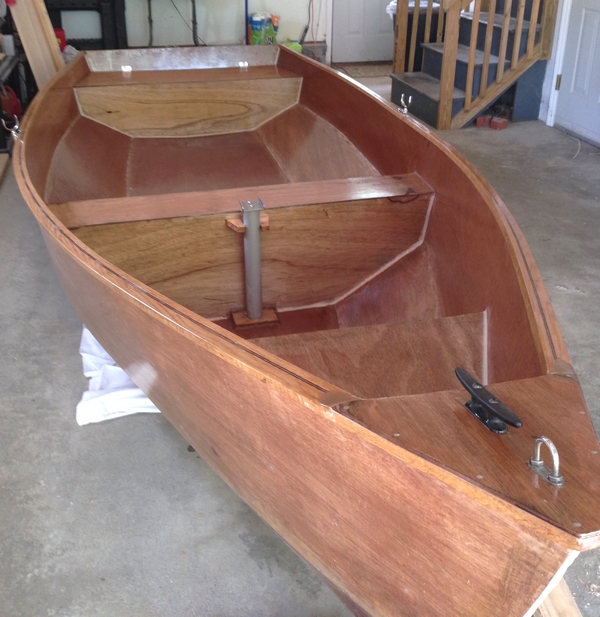
The Dix Designs plan required me to stitch and glue the seat supports to the hull side panels. I didn’t agree with this and decided to fasten stiffeners to the seat supports, and then screw them into place. After all interior panels were in place and attached to the hull, I mixed a batch of epoxy with 405 Filleting Blend and used that to seal any small gaps and fillet the corners. I applied several coats of epoxy to all of the enclosed interior seat areas to seal the wood against moisture.
At this point the chill of winter had set in, and my garage is not heated so I stopped working on the project from November until the following April.
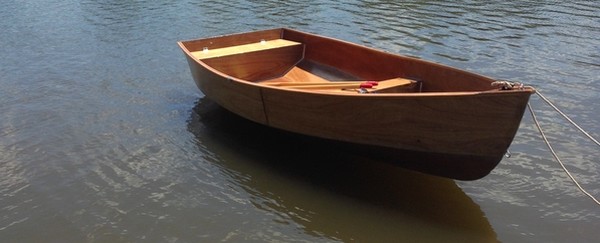
Upon the return of warmer temperatures, I sanded my previous epoxy coats to make them fair. I applied two layers of epoxy over the outside and inside of the hull to seal the wood. The epoxy was rolled on with a foam roller. The hull will be painted in the near future, but I was eager to get it into the water to start enjoying my work.
I recently started on the daggerboard and rudder and anticipate using G/flex Epoxy, as it is designed for constant shifting loads. Currently, I am rowing about four hours a week. The epoxy coat has held up very well, with boat launching and recovery every trip.
The instructions in the WEST SYSTEM User Manual & Product Guide were a great help. I called WEST SYSTEM Technical Support several times with technical questions and they were very accommodating. One of my mixing pumps came apart while dispensing the epoxy and the company sent me a set of new ones.
I named my boat Shiloh which means “peace.” When on the river it’s mostly silent and you can hear the birds and other delightful sounds of nature. Within the next year, the hull will be painted and the mast and sails will be in place, but for now, I have had great fun rowing up and down the Mohawk River in the Albany area of New York.


