Royalex Canoe Repair with G/flex Epoxy
Spring 2008

GET STARTED
FREE PRINT & DIGITAL EDITIONS
Spring 2008
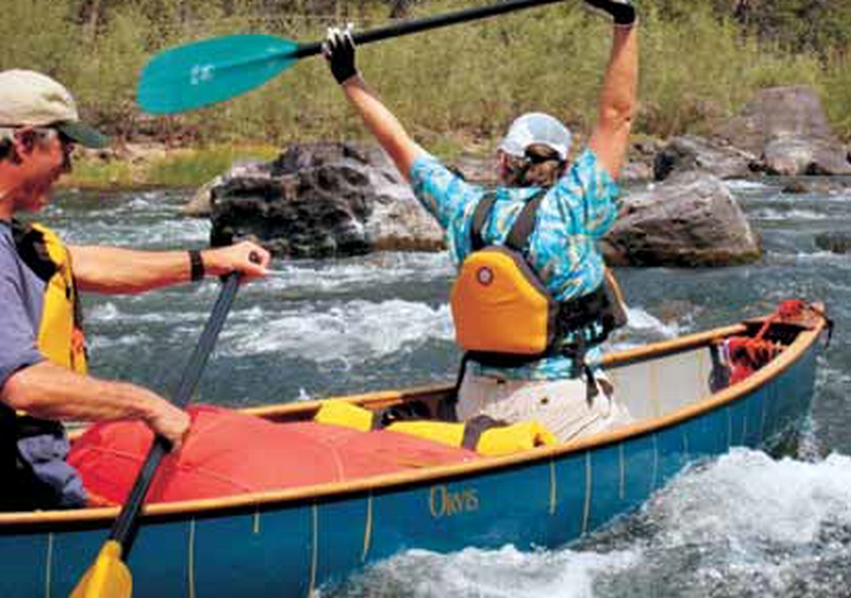
Above: Stan and Glenda Bradshaw in the Mad River Freedom 16′ Royalex canoe repaired with G/flex Epoxy in August 2007 on the Blackfoot River near Ovando, Montana a couple of miles downstream of the Roundup Bar.
The wooden gunwales of Royalex canoes can rip a hull apart if left out in bitter cold temperatures. Somewhere south of freezing, the plastic body of the canoe shrinks while the dampish wooden gunwales expand. Unless the screws affixing the inwale and outwale are backed out, they pin a shrinking hull to an expanding gunwale, and something will give. That something is always the hull.
So it wasn’t a good sign in spring 2006 when our friend Paul called to ask Stan, “Do you know about repairing Royalex?” Paul, lucky guy that he is, received a 16′ Mad River Royalex Freedom with wooden gunwales as a wedding gift. Paul spends his winters in Montana’s Blackfoot Valley which, to put it mildly, gets darn cold in the winter. Luckily, Paul had heard that he should back the screws out of the gunwales before winter hit. Unluckily, he didn’t back them out far enough. His description was, “it’s got quite a bunch of cracks.” “Quite a bunch” turned out to be, at final count, 58 “cold cracks” Ginzu-ing the boat from sheer to beyond the chine. Stan, buffered from the reality of the thing by 80 miles of phone line and never having repaired a cold crack, said, “Sure, I can do that.” If ignorance is bliss, the reality was a serious downer. The boat was a mess. In the words of a normally upbeat boatbuilding friend, “If it were mine, I’d cut it up and toss it in the dumpster.”
Uniroyal’s Royalex is a bonded sandwich of ABS plastic and foam. Many canoe manufacturers employ Royalex to fashion a tough, attractive boat suitable for whitewater paddling. Royalex is relatively difficult to repair (everything about it resists adhesion), and our standard clunky epoxy-fiberglass tape repairs would have added six-plus ounces per crack, or somewhere in the neighborhood of twenty pounds, to the canoe.
The Freedom is a pricey, sweet, moving-water canoe, and we thought it would be worth saving if there was a way to do so—besides, Bruce is retired and Stan is gullible. Our pal, Rob Monroe of Gougeon Brothers, was in Montana for his annual ski trip and thought he might have a new epoxy that could be just the ticket. The new epoxy (which turned out to be G/flex), was attractively labeled “experimental” when we used it, which made things much more exciting and reminiscent of the early days of rocket science. So, hooked on science and with Rob’s help and encouragement, we got started on the job.
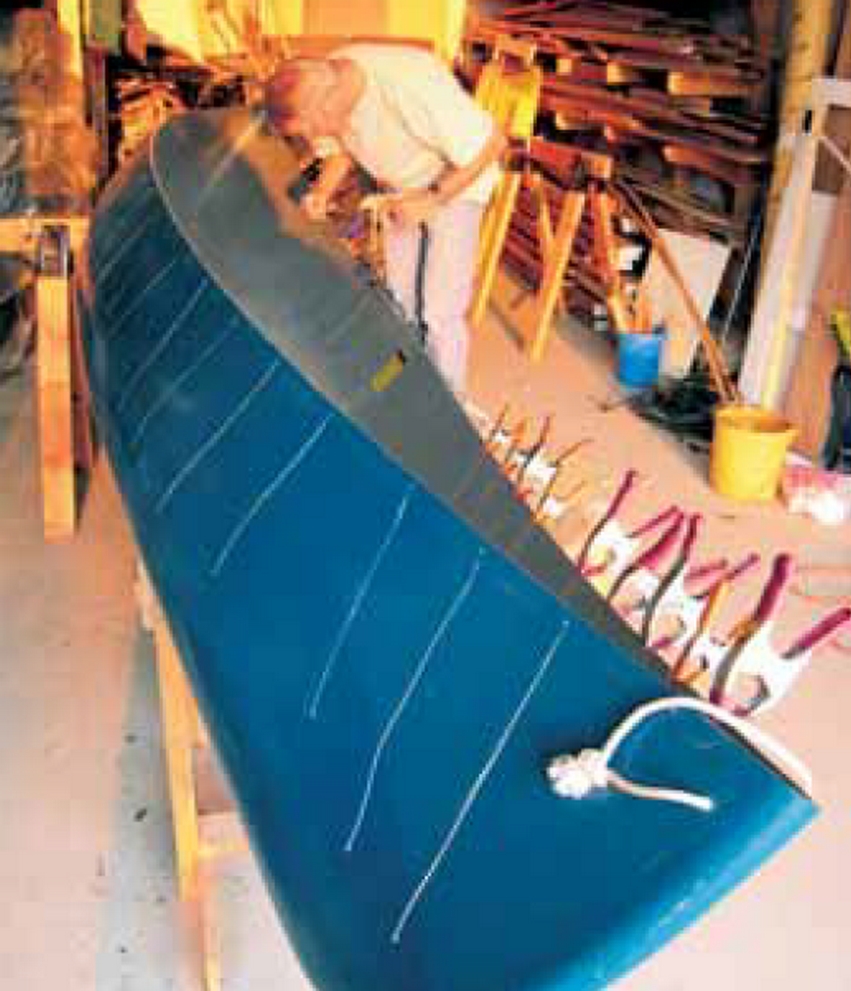
We began by cradling the broken boat in slings—short sawhorse-height stands made for the purpose—and removed the breastplates, gunwales, seats, and thwarts. Without gunwales holding the hull together, the canoe flexed like a snake on muscle relaxants. After the canoe was stripped down to just the hull material, we drilled and countersunk the bottom of each crack so the cracks wouldn’t get any longer, following the procedure used for cracks in metal. (Editors note: Drilling holes at the end of cracks goes beyond what we recommend in our G/flex instructions for plastic boat repair, but it is acceptable and actually a good practice.)
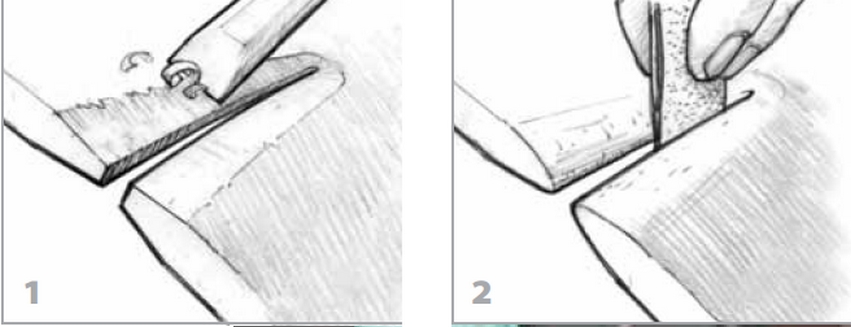
We then used a saber saw to widen each crack. We followed this with either the corner of a 14″ mill file or the corner of a chisel as a scraper to provide a widened beveled edge for each crack inside and out. The file/chisel work was really fun, particularly when the corner of the tool would merrily skitter across the canoe, leaving decorative gouges, and we’d cheerfully cry out, “Don’t tell Paul!” We cleaned up the resulting dumbbell-shaped groove with coarse sandpaper torn from an old belt and wiped everything down with denatured alcohol. The expanded crack made it easier to squeeze in a bead of G/flex 655 Adhesive and gave the glue a larger and keyed surface adequate for adhesion.
On Rob’s advice, we took care to leave the sheer untouched. We clamped each crack along the sheer to maintain the canoe’s factory shape; we began each saw cut in the crack about an inch below the sheer. If we had cut from the sheer down, we would have removed a saw’s width 29 times, shrinking the sheer by several inches. By puckering the sheer (inducing rocker), we would have made it difficult to return the canoe to its original shape. It’s good to have smart friends—Bruce and Stan probably wouldn’t have thought of this.
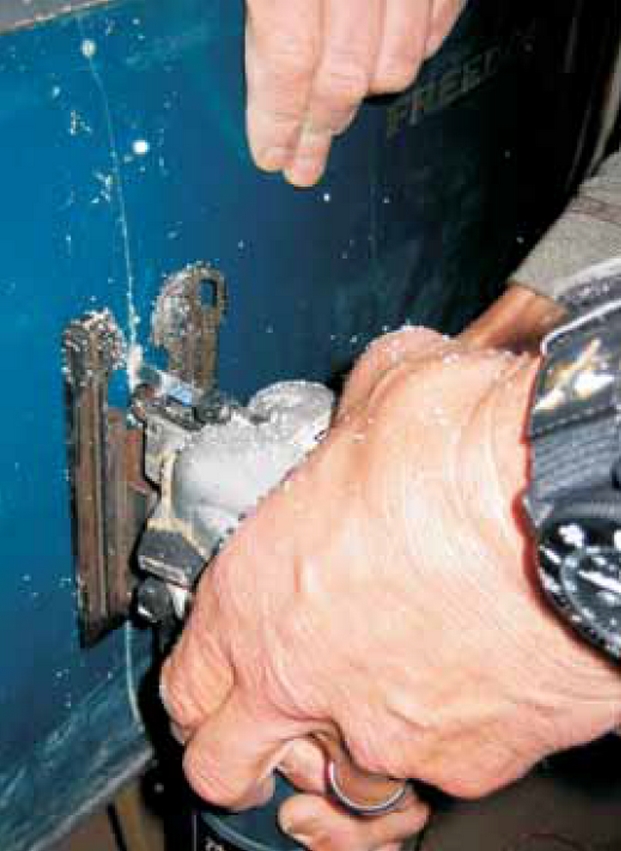
To keep glue off the garage floor, we used cheap clear packaging tape as a backing on the outside of the canoe, and loaded our syringe with nearly bubble-free G/flex using WEST SYSTEM® 804 Mixing Sticks. Clamps along the sheer held the now very floppy hull in its original shape.
From the inside of the cradled canoe, we injected each crack with straight G/flex, taking special care to force the epoxy to the bottom and along the edges of each crack. We ran tape over the wet epoxy to control slumping, to try to create a smooth surface, and to preserve a smooth garage floor. After a few trial cracks, it became clear that it was easier to get something close to a flush surface on the outside of the boat by pressing with a gloved finger along the outside tape as the glue was applied to the inside


After the G/flex cured, we ripped the tape off inside and out. Then we went back and filled voids where bubbles had sneaked in. Epoxy isn’t champagne, and bubbles just don’t add much except possible areas of failure. Come to think of it, after a lot of champagne, the bubbles here too add possible areas of failure.
Following these repairs to the Royalex’s plastic canoe hull, it was rigid again, and we went back to square one, opening up the previously uncut crack from the sheer to the screw holes (usually about an inch of cracked hull), and filled it with G/flex using the same technique as described above. We used spring clamps and C-clamps to keep the hull from deforming side-to-side as we glued up these short cracks. Afterward, we used a small rotary file chucked in a Dremel™ tool to fair glue lines to about 2″ below the sheer, providing a smooth hull upon which to re-attach wooden gunwales. Each repair showed bright yellow against the turquoise hull. We had lacked the wit to weigh the boat before our repair, but our best estimate is that our G/flex repair added perhaps a pound or two to the canoe. We coated the wooden gunwales with a mixture of equal parts varnish, boiled linseed oil, and mineral spirits, and added a drop or two of Japan drier to speed things along. New color-coordinated bow and stern loops completed this extreme canoe makeover.
After re-attaching the breastplates, thwarts, seats, and gunwales, we thought it was time to test our Royalex Canoe repair. It was August, low-water time on Montana’s Blackfoot River. Our favorite whitewater stretch was running clear, low, and very boney—there were rocks everywhere. Given the number of cracks repaired, Bruce thought we had at least a 50/50 chance of the boat actually floating, so he thoughtfully let Stan and his wife Glenda take the first crack at padding the repaired boat. Like tipsy ranchers at a grange dance, they slid over and bounced off more than a few rocks while dancing down a six-mile Class II+/III- stretch of enjoyable waves and eddies. To our amazement and considerable relief, the repair held. There wasn’t even a hint of failure. We had a grand day on the water, and G/flex proved to be a great way to cheat the Dumpster and put a busted-up canoe back on the water.


