by Captain James R. Watson
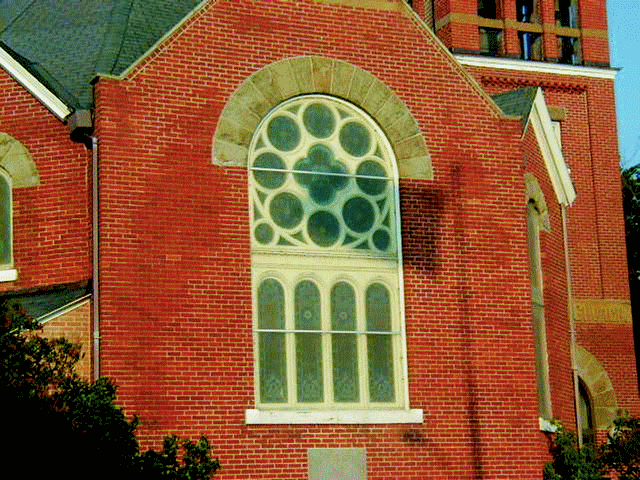
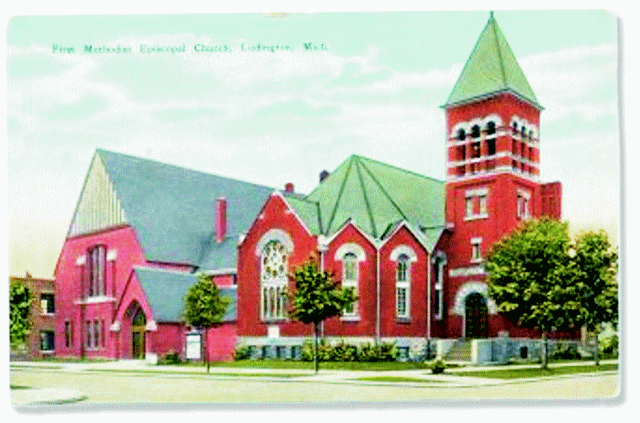
Above: The United Methodist Church in Ludington, Michigan where window restoration was completed with WEST SYSTEM® Epoxy.
Those working on projects that use epoxy for restoration and rot repair often ask, “How long will this last? Will the rot return?” At Gougeon Brothers, Inc., we have lots of in-house test approaches that can analyze tension, compression, shear, and fatigue. We can also predict the consequences of ultraviolet, arid, tropical, and cold conditions. Still, there’s nothing like real-world performance over time to tell us how long a repair will last.
In spring 1972, the young Gougeon company undertook a church window restoration project in Ludington, Michigan. The United Methodist Church was being renovated for its centennial celebration. Masonry, electrical, and carpentry work were underway both inside and out. However, the Romanesque stained glass windows, twenty feet tall, were structurally challenged, and the carpenters’ bids for repairs were beyond the church’s budget. These windows were primarily a wooden structures. Within the wood frame that joined to the masonry were metal mullions that divided and supported the stained glass set in lead.

Many summer rains had moistened the wood as had winter frost and condensation when cold met warm conditions inside the heated church. At some time, acrylic plastic (Plexiglass ™) was placed over the stained glass to protect it from vandals. The result was a sort of humidity chamber, warm and moist.
Rot spores can only exist if specific conditions are met. There must be a food supply (wood fiber), sufficient moisture (over 20%), elevated temperature (76°–86°F/24°–30°C, although rot can be active in temperatures as low as 50°F/10°C), and oxygen. These conditions were met, and rot had prospered in the white pine sills, stiles, and rails of most of the windows of the church. The rails were dangerously weakened and deflected in the wind
Passing vehicles swayed the wooden structure; when the church was built, there was only horse and buggy.
Something had to be done to prevent the loss of the windows. However, to remove and replace the rotted wood—much was ornate molding that no longer existed—would involve removing the stained glass. Handling and care of the stained glass, replicating the old and ornate trim, and the complex carpentry required resulted in cost estimates that were astronomical.
Enter the Gougeons with an economically attractive plan. This was to use their new epoxy technology to reconstitute and reinforce the rotted wooden parts and structurally reinforce the big rails while still in place. The plan eliminated the labor and risk of removal, provided structural reinforcement, and could replicate the detailed molding.
Jan and Joel Gougeon, two other employees, and I loaded the first company vehicle, a silver hearse, with scaffolding, tools, and our new epoxy. The complete project would keep us from home for over a month. We were certainly young then, and WEST SYSTEM® Epoxy products were young also. We had built and fixed boats with the product, but fixing a structure of this magnitude and value was daunting. It was also a learning experience. At that time, many of the epoxy filler products were experimental (I’ve substituted current product numbers or names). This was also before the development of low-cost, easily transported, calibrated mini-pumps. We did have the first prototype Model A Dispensing Pump, but we couldn’t put that on scaffolding, and one pump became a logistical problem since each of us worked on a separate window. So we primarily measured the mix ratio by volume, pouring resin into a cylindrical container until the level reached a mark on a stick that equaled five parts, then hardener to a second mark for one part.
Rot is pretty predictable. In the windows, rot typically occurred from standing water in hollow areas, exposed end grain, and constant contact with masonry. The beam that divided the windows was a hollow box, which collected moisture that infiltrated. With poor ventilation, the rot spores prospered. Moisture entered the wood through exposed end grain—for example, where the end of a piece such as a rail joined the stile or where fastener holes exposed end grain. The sills were soft; in some places, the rot was several inches deep.
In addition to rot, we found some structural issues, typically with butt joints. Wet wood crushes easily when compression forces are applied. Subsequent movement stresses the adjoining joints, resulting in failure.

After inspecting for symptoms of rot—noting peeled paint, thumping the wood and listening for a punky sound, and pushing on surfaces to see if they are soft—we used a paint stripper on all painted surfaces. After decades of paint, it took many applications to get to bare wood. We cleaned the stripper residue with water Rotted areas were excavated with a chisel and Dremel™ rotary tools—these were the days before cordless tools.
Failed butt joints were opened. Where rot went deep, holes were drilled to promote drying, and a hair dryer was used to accelerate the process. (Heat guns are better but draw excessive amperage for long extension cords.)
Where possible, we fashioned a new piece of wood into a diamond-shaped or long, wedged-shaped patch (called a Dutchman) to fill cavities where damaged wood had been removed. We used wood of similar species and/or hardness—in this instance clear white pine. This approach is structurally stronger and less expensive than a solid fill of epoxy. However, in some instances, a Dutchman simply wasn’t possible or would be so small that it was not practical.
When ready to apply the epoxy, we first wetted the surfaces of the existing wood with clear, unthickened resin/hardener and allowed this to soak in. When the wood would not take any more epoxy, we thickened epoxy with 403 Microfibers until it had a non-sag consistency and then filled the cavity flush. (403 was chosen as we were outside, exposed to windy conditions, and needed a filler that is not easily air-born. We placed the filler in cardboard oatmeal tubes—similar to what we now put the product in—put a large nut inside to agitate, and cut flaps in the lid to pour the filler out so little was lost to the wind.) Since temperatures were cool, we kept the epoxy in an insulated cooler with a light bulb to improve its viscosity. When filling large cavities (the size of a golf ball or larger) a slow hardener (such as 206 or 209), should be used to reduce excessive heat from exotherm, which would cause the epoxy to foam up.
Where the wood was damp and the rot deep, we drilled 3 8″ diameter holes until we felt firm wood. By observing the drilled shavings, we could note the wood’s condition both for integrity and moisture. The holes were reamed to extract all the shaving and dust. These holes then served as a conduit for the epoxy. The wood was flooded with epoxy, and the exposed end grain from the drilled holes promoted penetration into the rotted area. When the epoxy filling the holes drained, we refilled until the holes would take no more. Keeping the area warm with the hairdryer further promoted penetration as heat reduces viscosity dramatically. (It is more effective to thin epoxy with heat rather than solvent, which can jeopardize cured mechanical properties.) After the epoxy cured, these areas were solid.
Where components previously had been joined in the windows, laps and an adhesive were used. With time, this adhesive failed and the joints were loose. We lightly pried the joints apart and slid an epoxy-wetted business card (someone else’s as we didn’t have business cards then) into the joint and clamped it together. Where rails butted the stile and were loose, we toenailed with wooden dowels (or threaded rod in high-load areas). If the butt joint could be opened with a saw blade, we worked epoxy in to aid joining, but the dowels yield lots of bonding area to the butt joint and tie the two structural components together. We drilled holes diagonally through the rail and into the stile and then dribbled clear epoxy down the holes. Dowels were cut a little long, then thoroughly wetted and driven in place. Usually, we drilled slightly oversized holes (9/16″ holes for a ½” dowel) so the dowel could be slid into place. After curing, the dowels were cut flush.
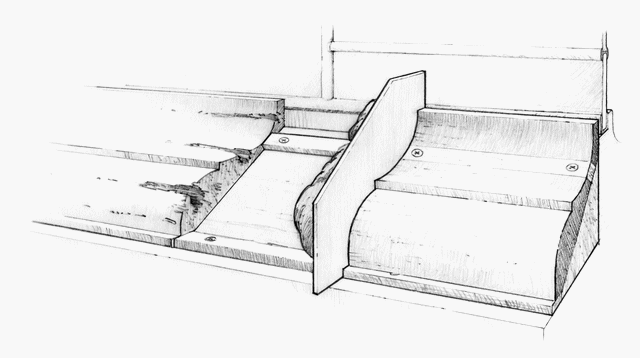
The church windows were decorated with molding and coping made a hundred years ago. Some decorative elements could not be duplicated, even if cost were no issue. We replicated mold profiles using a contour gauge and then transferred this shape to poster board (stiffened with a coat of epoxy) or thin plywood templates. We would use these to spread epoxy, thickened with low-density filler to a non-sag consistency, over the area and carefully sculpted the shape using the replicated profile and blending with the original. Some areas were missing large sections. In these areas, we fastened battens across the area to run the templates across.

We used drywall screws to fasten the battens to the remaining wood (or filler pieces of wood to minimize the epoxy volume). We’d fill the screw head recess with soap, so we could later remove them and fill the holes and any remaining voids with epoxy. We’d clean the epoxy from the spreader before it cured and use the spreader again. Light touch-ups were done with files and sandpaper.
To finish, we abraded the complex surfaces with bronze wool (similar to steel wool but will not rust). Since the original interior and exterior were gray, we simply painted the restored interior surfaces with epoxy tinted with 503 Gray Pigment. We applied this with disposable brushes with bristles shortened with scissors so they were stiff. Again, we placed the epoxy in the old cooler with a light bulb inside to warm it prior to mixing, reducing viscosity for a thin, even application (this also prevented inadvertent spills on the interior church floor). We painted exterior surfaces with a gray porch and deck enamel.
Ludington is a scenic town with a fine harbor, good salmon fishing, and a passenger ferry to Wisconsin. Whenever I travel there, I always take a turn off the main highway onto Harrison Street to look at the church windows. It is reassuring to see how our efforts have held up so well. I’m always impressed by the size of the windows and the beautiful stained glass. I recall working way up on scaffolding in the spring wind. Over thirty years later, the rails are rigid to the wind. The joints remain tight. While the paint has been touched up every ten years or so, there is no peeling and no punky wood in the sills. About 15 years ago, some of the windows that we did not repair were restored using a conventional approach. Later, they contacted us because these had rot problems already, and the church wondered if we would repair them as we did the others. The WEST SYSTEM epoxy-restored windows, we were told, “are still in great shape and we should have used this approach on the others.”


