
By Dan Witucki
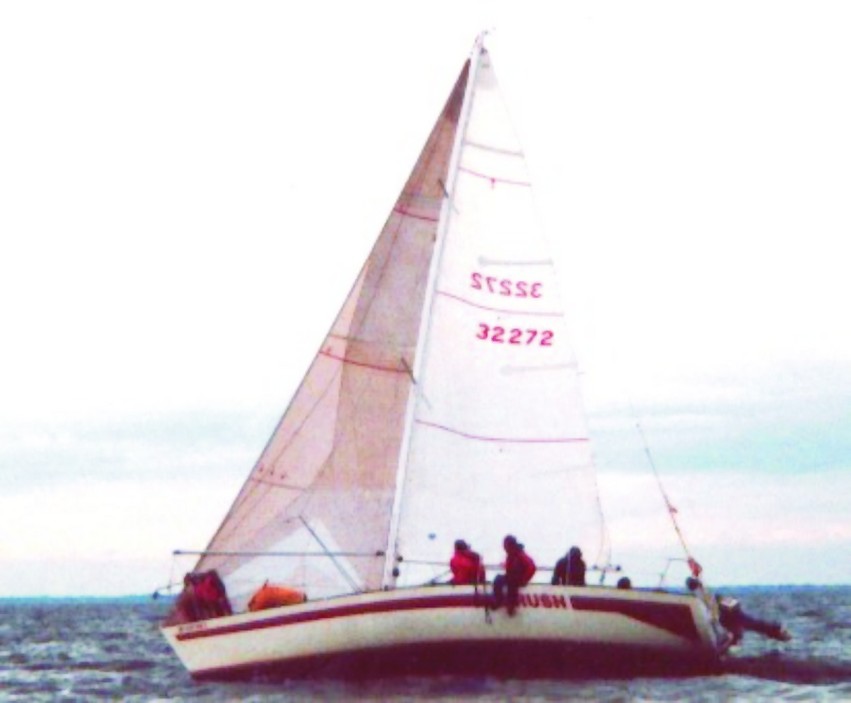
Above: With her damaged bulkheads replaced, the Evelyn 32-2 sailboat RUSH is back in action. Several weeks later, the new bulkheads proved they could handle the stress of a heavy knockdown and a major storm during the infamous 2002 Chicago to Mackinac race.
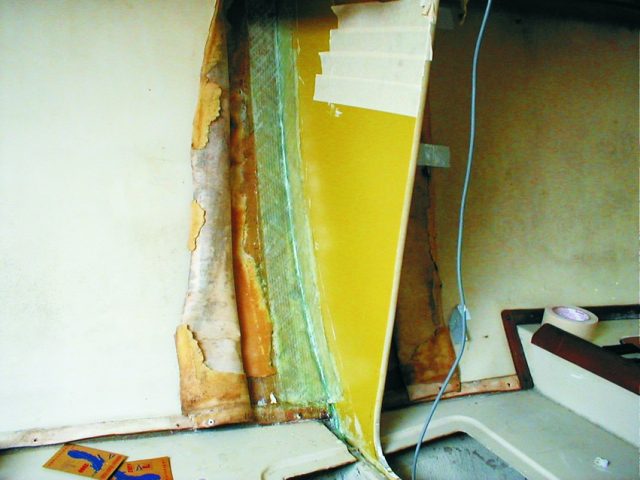
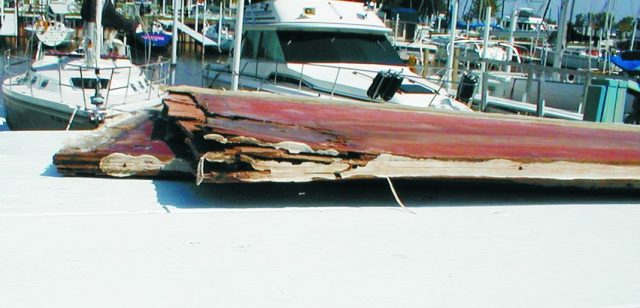
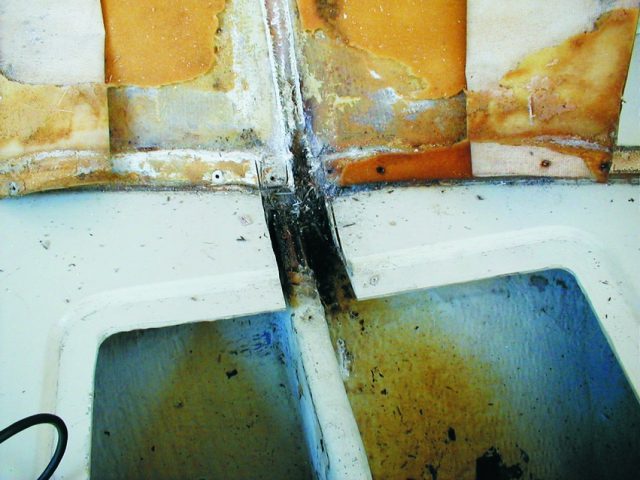
If you race a sailboat long and hard enough, it eventually will reveal its weaknesses, sometimes violently. My friends and I race an Evelyn 32-2 called Rush. Less than a month before the 2002 Mackinaw races, we were competing in the Saginaw Bay Yacht Racing Association, Gravelly Shoals race. Throughout the race, the wind had been building and we were a little overpowered with a full main and 150% headsail. We had completed about 45 miles of the 50-mile race when the starboard chainplate decided it had enough and pulled out of the bulkhead.
Fortunately, Evelyn 32’s are designed with a stainless wire strut running from the chainplate down to near the mast step. This kept the rig from coming down; however, we were definitely done racing for a while.
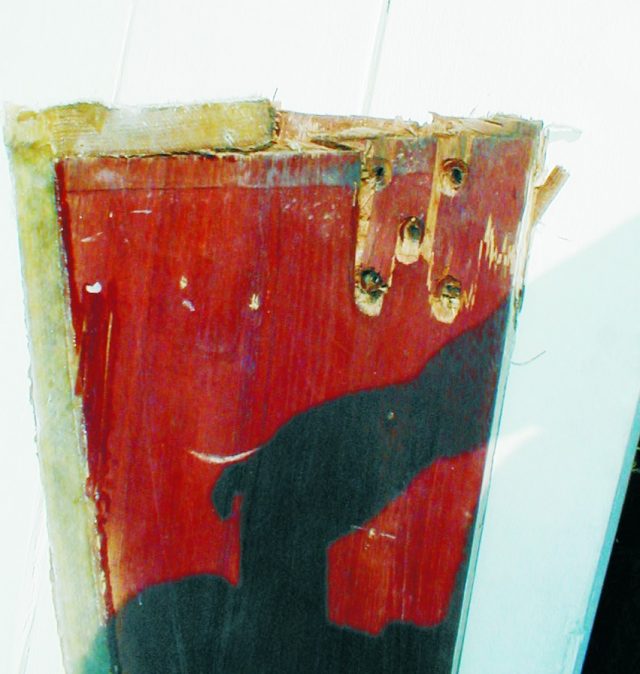
After limping back to the dock and examining the damage, we decided to completely replace the bulkhead on both sides of the boat. Over the years, the chainplates had been leaking and had delaminated and rotted the plywood bulkheads. Before the accident, the bulkheads looked fine, but it was amazing to see afterward how badly they actually had deteriorated. With the end grain of the plywood bulkhead up against the underside of the deck, the chainplate was leaking directly onto the exposed end grain of the wood. Water damage was inevitable.
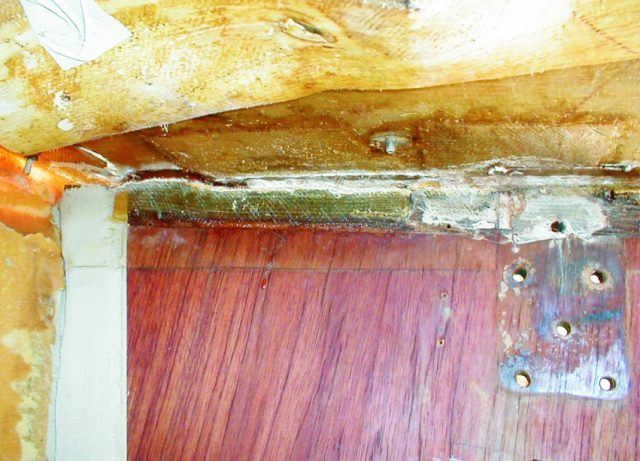
The next decision that had to be made was what material to use for the new bulkheads. The original, damaged bulkheads were made of ” marine grade mahogany plywood. However, we weren’t too anxious to use plywood again. It would be quick and easy, but we wanted something more bulletproof than plywood. After talking to Gougeon Technical Advisor, J.R. Watson, we decided to go with an epoxy/fiberglass composite called G-10. We selected ½” G-10 to replace the 5/8″ plywood. Because of G-10’s strength, we could have gone thinner yet. However, that would have made it more difficult to install and have everything else match up.
Removing the old, damaged bulkheads
Although I usually do most of the fiberglass and fairing work on Rush, John DeWyse did most of this job. The first step was to remove the shrouds and fasten them to the toe rail. Then it was time to go below and take the interior apart.
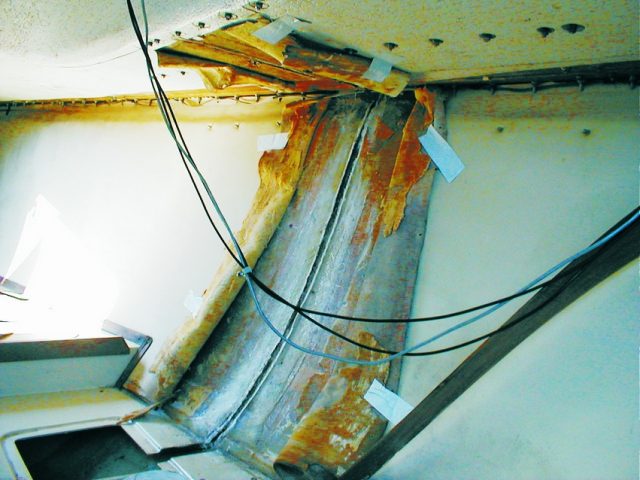
Luckily, Evelyn 32’s aren’t real plush, and this job went fairly quickly. We moved all the sails, equipment, and cushions from the bow and mid-section of the boat to the stern. Then we hung a tarp behind the companionway to keep the dust away from that area of the boat. We placed a large window fan over the front hatch, blowing out. With the companionway open, we had good ventilation. The next step was to carefully peel back the headliner and inner upholstery with a putty knife and tape them back out of the way. To cut the bulkheads free, John used a Roto Zip™ tool. This worked very quickly with minimal dust. He simply went down each side of the bulkhead, cutting the tabbing where the bulkhead met the hull and deck. He had both damaged bulkheads out after about 1½ hours. Then he used a 6″ grinder with a 40-grit disc to remove the old glass tabbing on the hull and underside of the deck. After that, we vacuumed up the dust.
Installing the new bulkheads
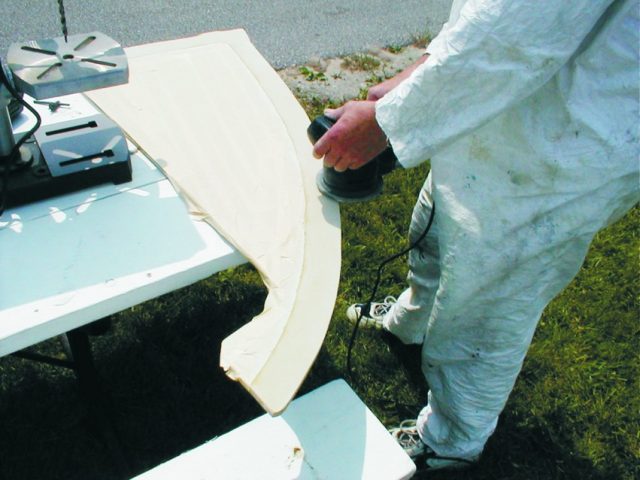
Since John was able to get the bulkheads out without damaging them further, they made perfect templates. When the G-10 arrived, we traced the bulkheads onto the new material using a black felt tip marker, modifying them slightly from the original design. We decided to extend the bottom of the bulkhead so that it could be bolted and glued to a floor frame that was below the original bulkhead. To cut the G-10 composite, we used a reciprocating saw with a carbide grit blade used for cutting cast iron and fiberglass.
Cutting was rather slow; this stuff is tough. Taking turns, we were able to cut each bulkhead out in about an hour. The new bulkheads were taken down to the boat and put into place. After we had ground down a couple of high spots, they fit perfectly. Next, I ground and sanded a radius on the long straight edge, since this edge would be exposed to the interior. I finished preparing the bulkheads by using a random dual action sander with 80-grit paper to sand the edges where the tabbing will bond it to the hull and deck.
With the bulkheads set into place, we cut strips of 738 Biaxial Fabric (with a mat backing) needed to tab the bulkheads into place. We cut enough to do both sides of the bulkheads with two layers of cloth, then set them aside. With the bulkheads still in place, we drilled three holes through the bottom of each bulkhead and through the floor frame. We used 3/8″ stainless bolts to fasten these together, but drilled 7/16″ holes. Later, when we glued in the bulkhead, we filled these holes with thickened glue, inserted the bolts, and tightened them down. This forms a very strong bond with all of the bolts loaded equally.
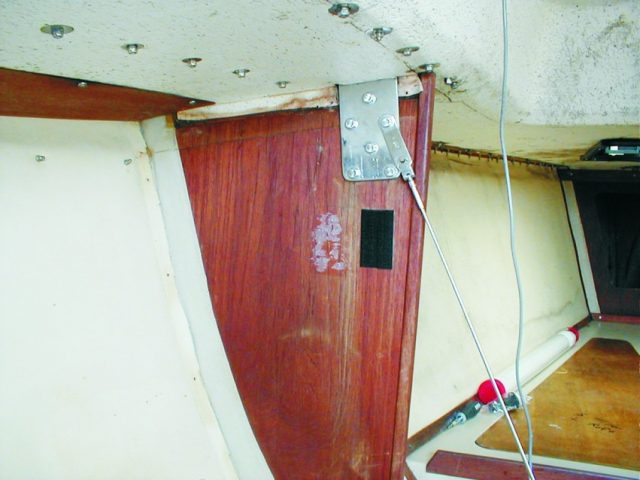
We later mounted the chainplates in the same manner. To glue the new bulkheads in place, we made a mixture of WEST SYSTEM® 105/206 epoxy thickened with 406 Filler to a peanut butter consistency. We removed one bulkhead and buttered the edge where it meets the hull and deck with a thick layer of epoxy using a plastic spreader. We also applied epoxy to the side of the frame where the new bulkhead overlapped it and in the three bolt holes in the bulkhead and stringer. We then clamped and bolted the bulkhead into place. John formed a fillet on both sides of the bulkheads where the glass tabbing would be applied, using more thickened epoxy and a plastic spreader with a radius cut on one corner.
After the epoxy had started to set, John wet out the fiberglass cloth with a mixture of 105/206 and applied the strips. The first strip had 60% of the cloth on the bulkhead and the second layer had 60% of the cloth on the hull side of the joint. This staggering of the glass forms a strong joint without the need to cut two different widths of glass. Air bubbles were worked out with a plastic spreader.
The next day, after careful measurement, we drilled the chainplate holes. Then we glued and bolted in the chainplates as previously described. We later caulked around them on deck. Then we cleaned and put the interior back together. We waited three days before installing the shrouds and tuning the rig. Although this bulkhead replacement job had looked rather intimidating, in reality, it was rather straightforward and we completed it in about 20 hours.
Stress Test
Several weeks later, in the Chicago to Mackinac Island race, we tested our repair. During the second day of the race, the wind had been building and we were surfing, hitting 14’s, when we experienced a hard knockdown that laid the mast in the water. Later that evening, a strong storm tore through the fleet dismasting several 80′ boats, pitchpoling a 40′ catamaran and making a number of sail lofts very happy. We had the full main up and were in the process of taking down our chute when the storm hit. We were told it blew 60-70 knots (we had lost our instruments and masthead unit in the earlier knockdown). The boat and her new bulkheads weathered the storm just fine, and the crew’s nerves are nearly back to normal.