By John M. Thomas
Jan Gougeon’s newest boat, currently called Project X (later christened STRINGS —Ed), is in the home stretch to completion, and Jan is addressing the fine tweaks of coaming and fairing by using a special fairing technique.
Almost 40 years ago Meade and Jan Gougeon opened their doors to a fastener-less method of boat construction using epoxy and various clamping methods. Jans fairing technique is another fine example of Gougeon epoxy innovation.
To create a clean presentation to the wind and waves, Jan needed a way to create a fair surface in and around the structural support cross members exiting the main hull. Historically this was accomplished by using polyurethane foam core material for a buildup layer, covering the shaped core with an FRP skin for gross fairing, and then finishing with a fairing compound. This method is not only labor and materials-intensive, but also adds speed-killing weight. To combat this, Jan concocted the Project X fairing technique.
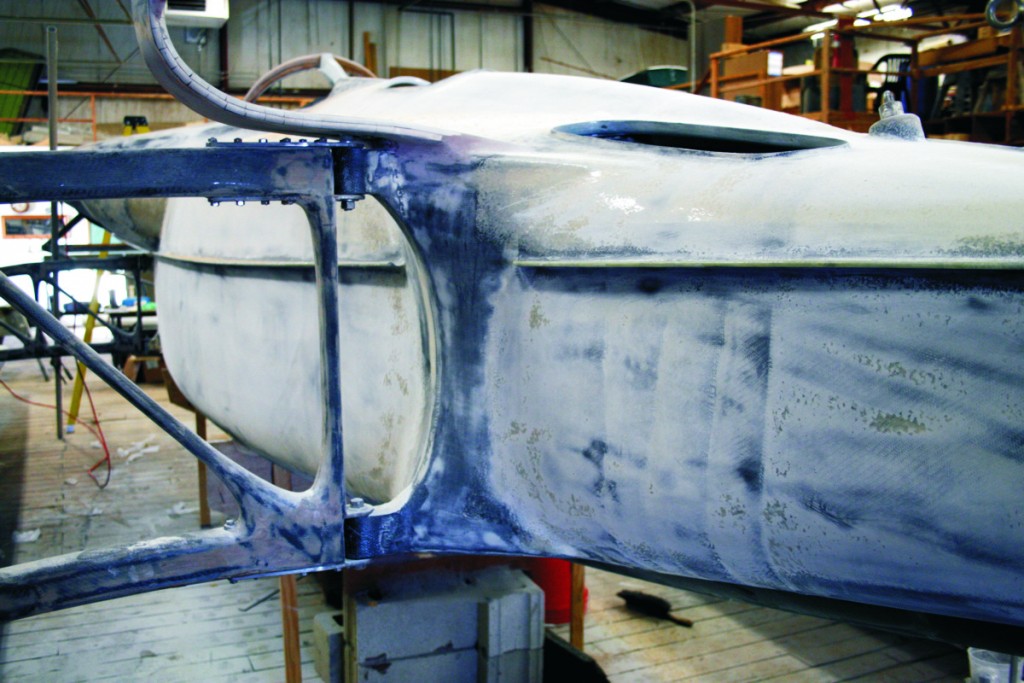
After the initial surface preparation using 80-grit sanding with a random-orbit sander, the rough shape of the fairing is drawn out onto the surface of the hull. This guideline will follow the curve of the hull and provide a sense of what the faired shape will look like.
An oversized swatch of carbon fabric is cut to this guideline. On Jan’s boat, a 12 oz,2×2 carbon twill fabric is used. The twill weave allows the fabric to drape better and accommodate compound curves with minimal effort.
Most importantly in this technique, WEST SYSTEM® 105 Epoxy Resin® and 205 Fast Hardener® are mixed on ratio. Next, in a separate mixing pot, G/5® Five-Minute Adhesive is mixed on ratio and added* to the 105/205 mixture at 30% by volume.

After the two epoxy systems are well blended, 407 Low-Density fairing filler is added to increase the viscosity of the mixture to the consistency of ketchup. This faster-setting concoction is then applied with an 804 Glue Brush following the guideline pattern previously established (Figure 1).

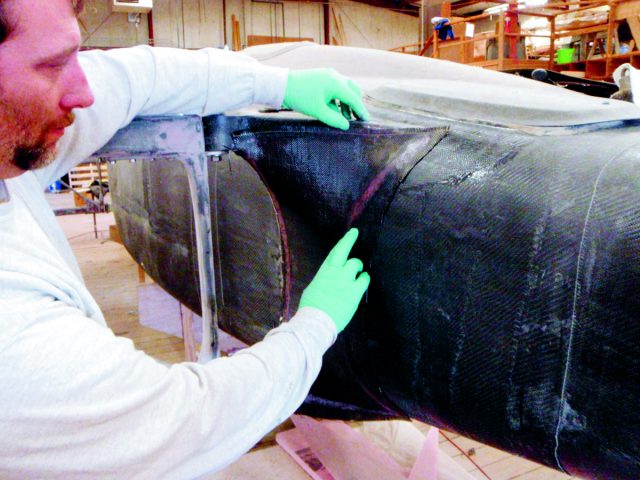
The carbon fiber fabric is then carefully tacked into place (Figure 2). The leftover mixture of 105/205, G/5, and 407 is used as an indicator of when the mixture starts to gel. At this time, the carbon fabric is stretched gently in all directions to remove any slack and put the fabric slightly in tension (Figure 3, at top). While the epoxy mixture is tacking up, the excess fabric is trimmed off and then re-tensioned to the final shape. As the epoxy mixture begins its accelerated through-cure, a final check of tension is performed and adjusted accordingly. After the epoxy has set up, a glue brush is used to is wet out the carbon skin with 105/205 and it is left to cure. When the fairing skin has cured it is faired into the hull with 410 Microlight® (Figure 4).

It may be necessary to drill a small hole to allow differential air pressure to equalize. If the entrapped air heats up it will expand. If the barometric pressure drops below the air pressure in the cavity, the fairing skin will expand. Likewise, during high-pressure conditions, the skin may contract.
*All WEST SYSTEM epoxies may be combined to create hybrid formulas. This practice is not difficult, nor does one need to be a chemist to achieve great results. Just mix the individual systems at their proper ratios, and then combine by stirring well. In this case, the G/5 Five-Minute Adhesive accelerated the cure. This allowed the increasing holding power of the curing epoxy to maintain fabric tension during the stretching phase of this procedure.


