- Boat Building & Repair
- Boat Construction
- Coating
- Boat Repair
- Fiberglass Boat Repair
- Techniques & Tips
Preparing to Fair
Spring 2023

GET STARTED
FREE PRINT & DIGITAL EDITIONS
Spring 2023
Those new to the process of fairing a boat’s hull or deck are quick to mix up a batch of fairing compound, WEST SYSTEM® Epoxy with a low-density filler, and apply it to the surface, so they can start sanding right away. My experience in boat repair and construction has taught me the importance of making a fairing plan and selecting the correct materials before any epoxy is mixed.
It is important to understand the difference between fair and smooth. Smoothness describes the texture and fairness describes the shape. If you run your hand on the surface, and you feel bumps and hollows (or highs and lows), the surface is not fair. Another way to see a fair surface is by using a wood or plastic batten, which is a thin strip of straight grain wood that is ¾” to 1 ¼” square, it will always bend in a fair curve if only held at the ends. An unfair surface can be smooth to the point of being glossy but not look good to the eye. Simply sanding a surface smooth will not provide the fair yacht-like finish many builders desire. Fairing requires attention to the shape of the entire surface and requires planning where to fill and sand.
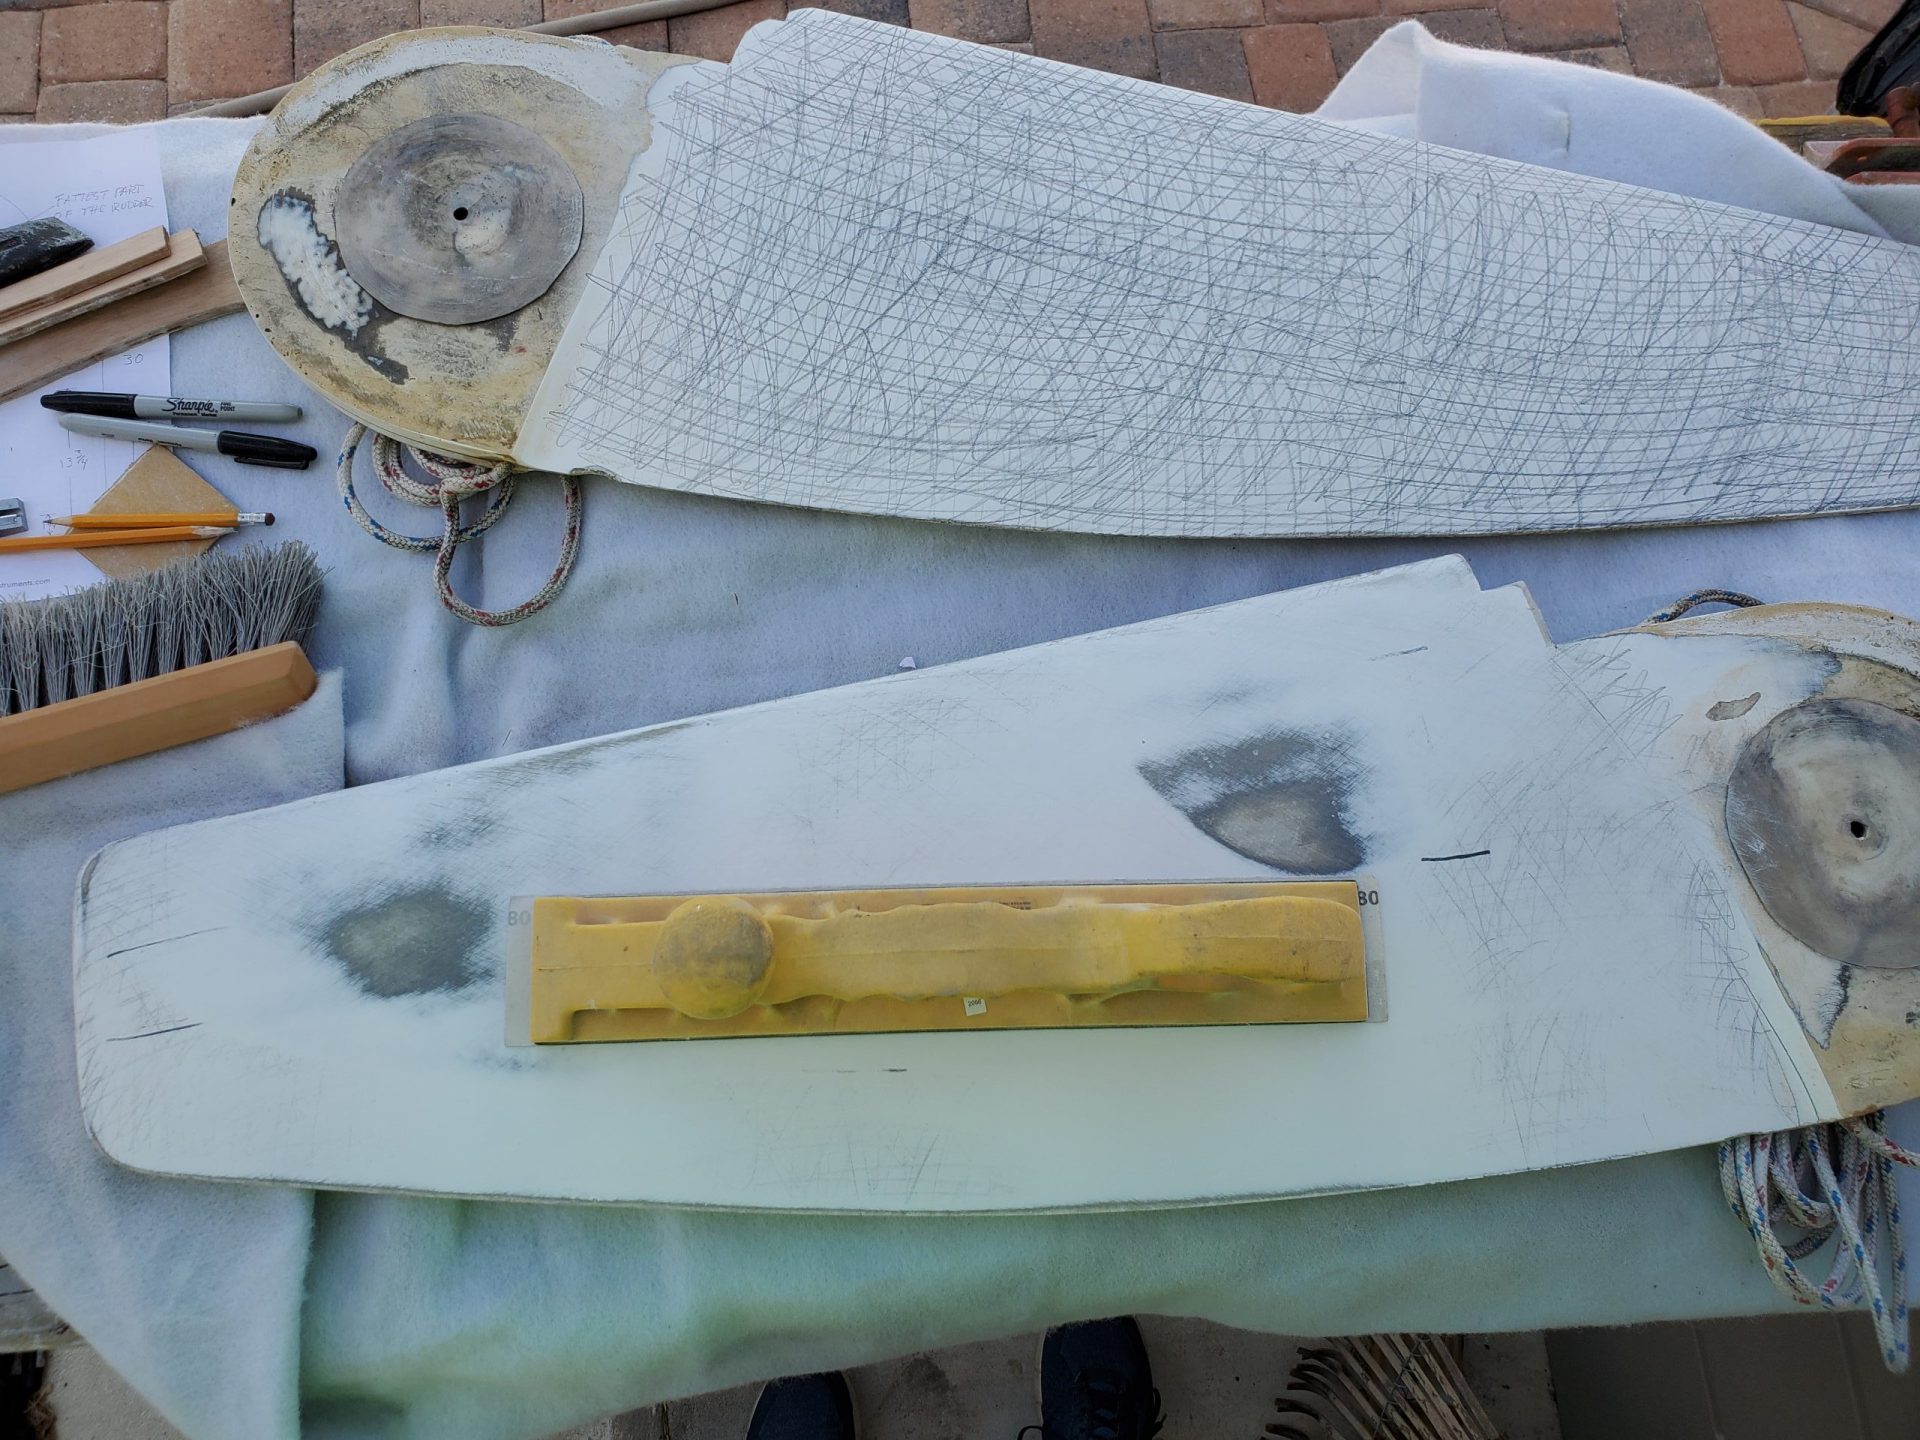
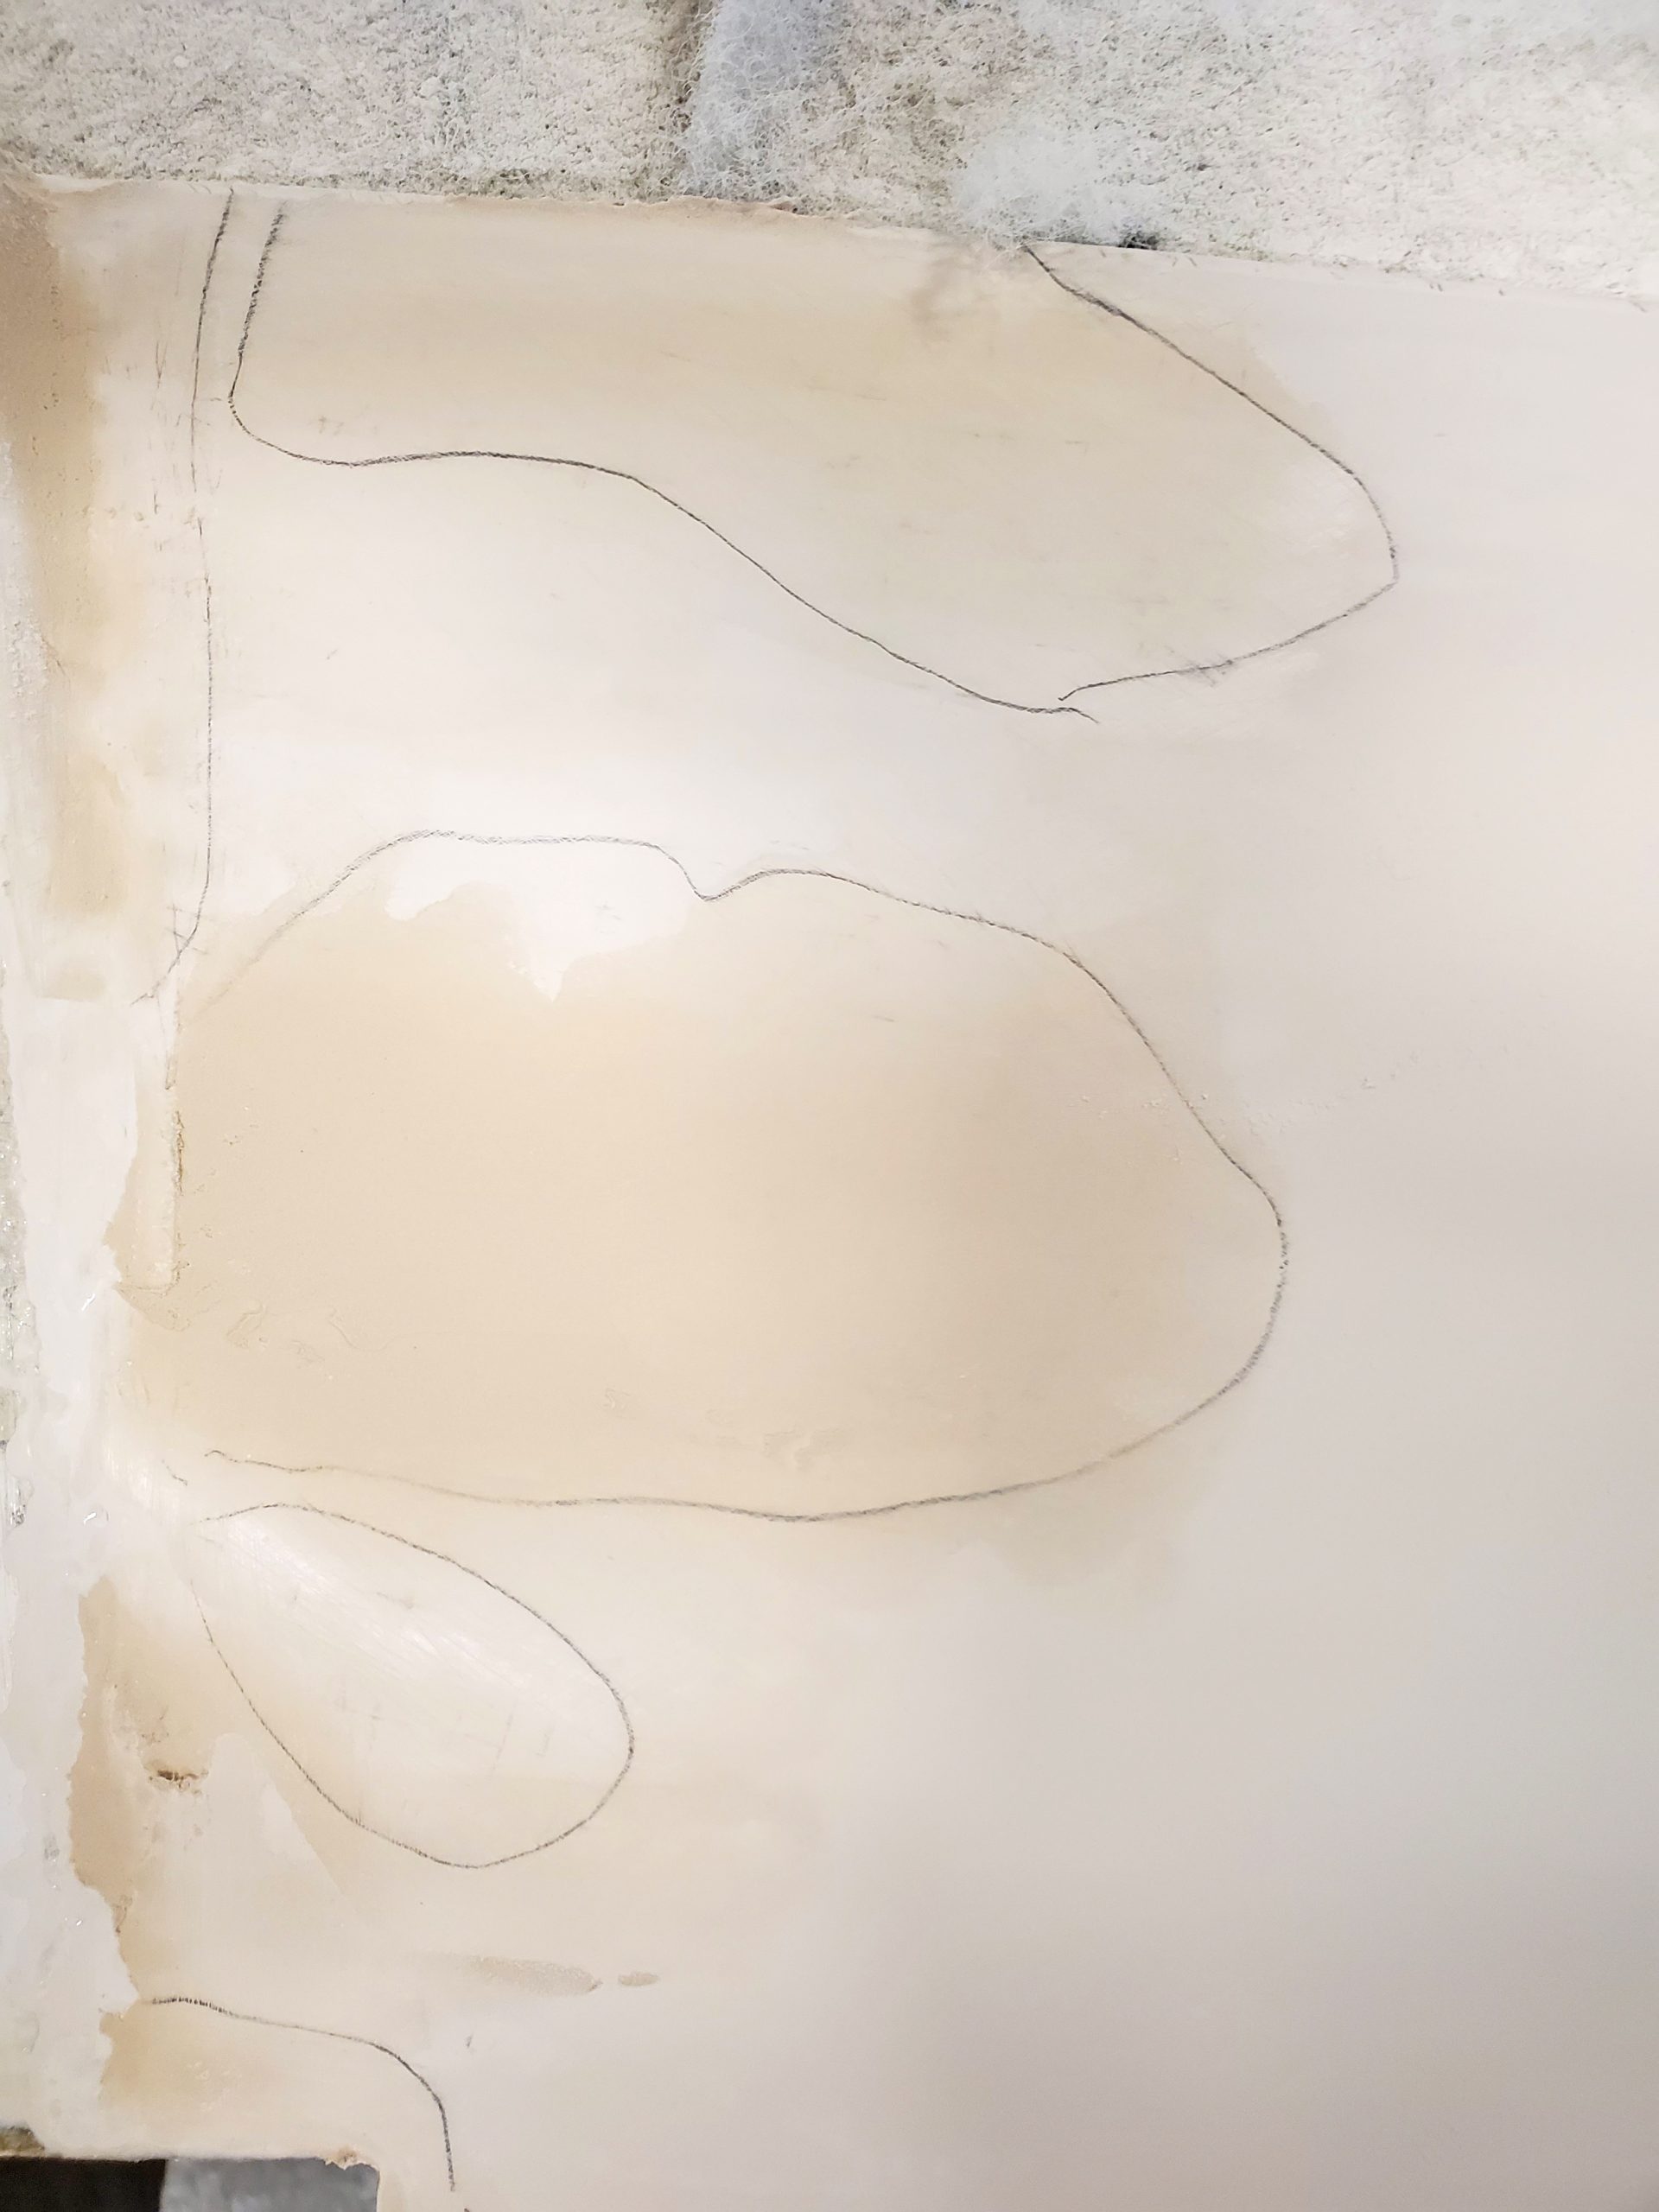
Before you apply epoxy, you can save significant time and fairing compound by marking where the fairing compound should be applied. This requires determining the profile of the surface.
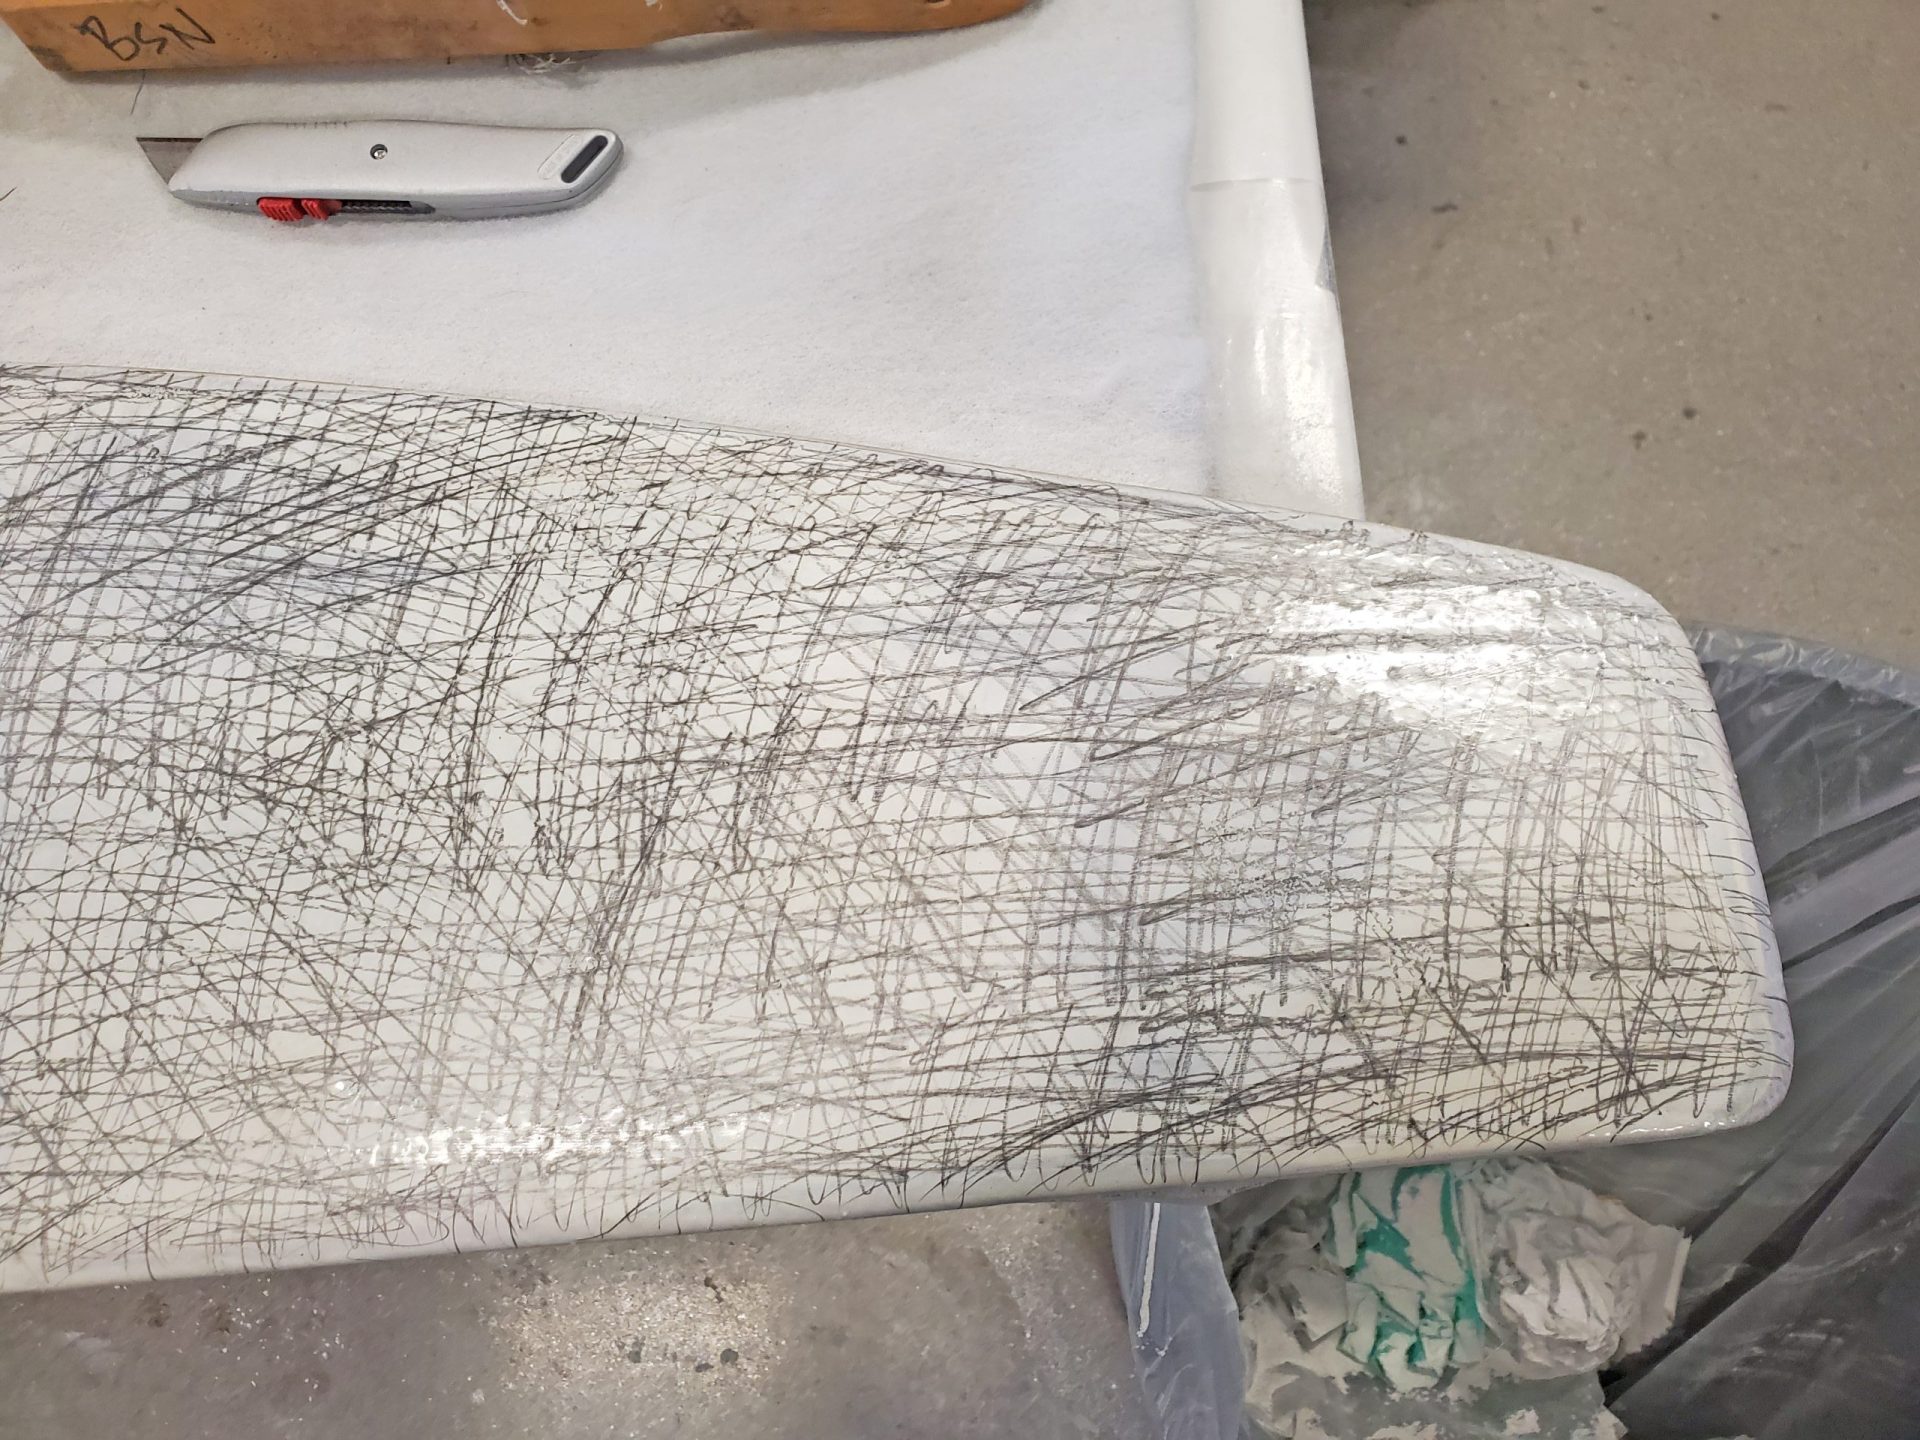
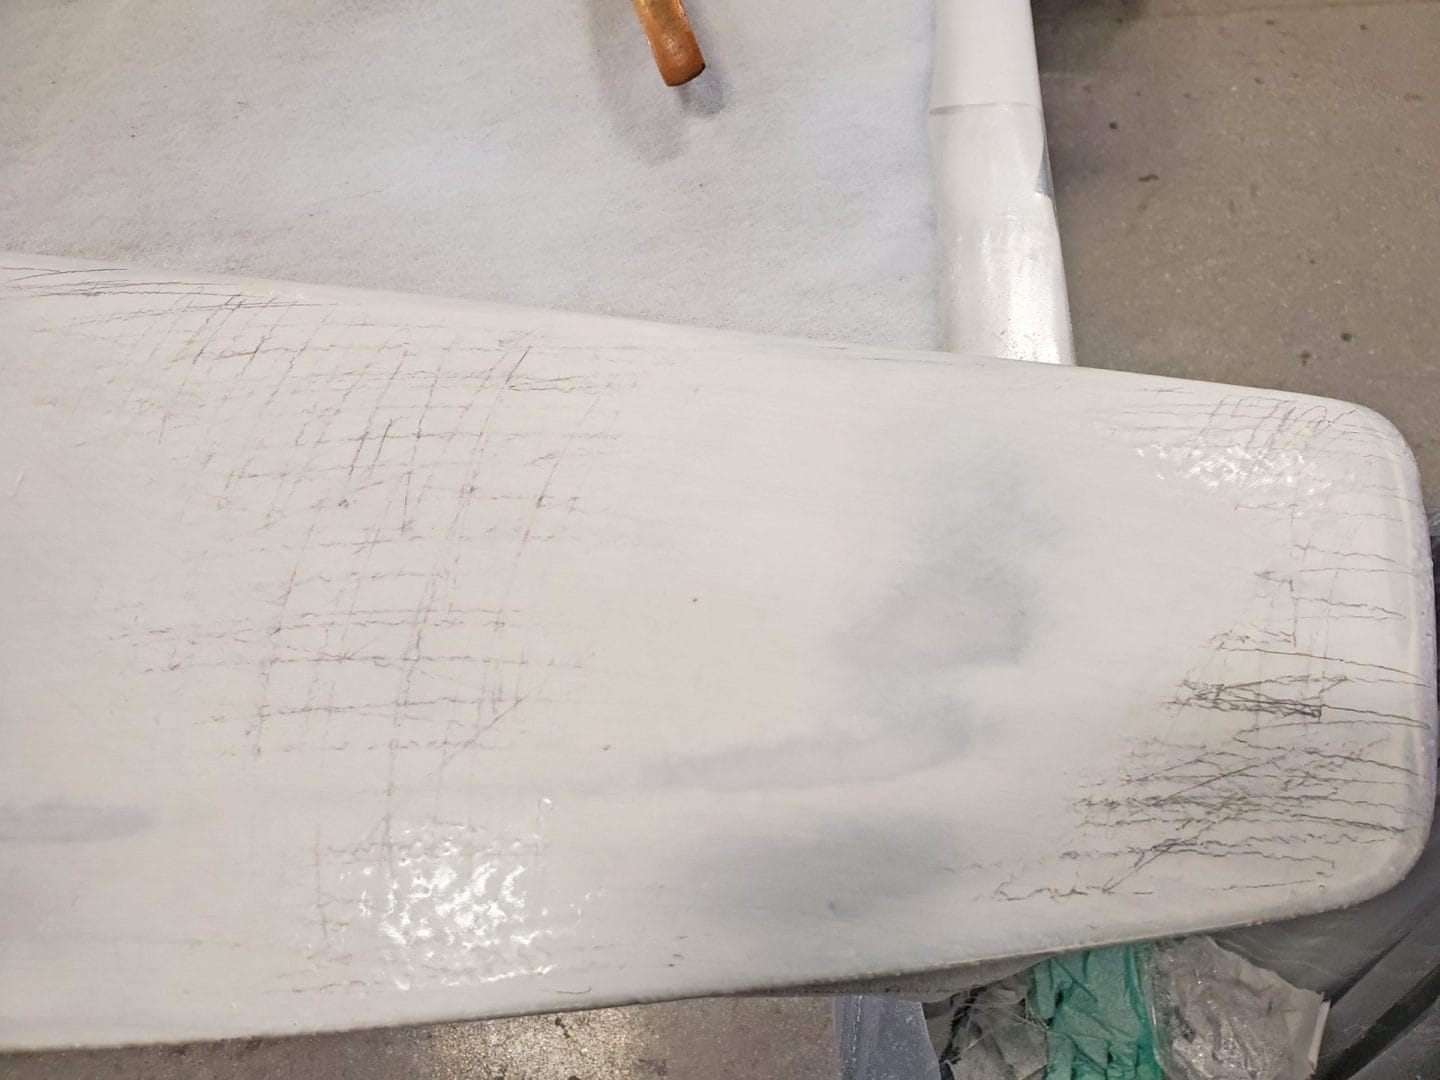
Determining the profile, or fairness, of a surface can be accomplished quickly and save a significant amount of fairing compound and sanding. A common method is to take a pencil and scribble over the entire surface.
The next step is to sand with a longboard. A longboard is often a custom-made board that sandpaper is bonded to. In the case of the rudder in the pictures, a longboard only needed to be about 12″ long. On the hull of a 40′ boat, it may be 3′ to 6′ long and require a couple of people to run. On mega yachts, the boards are often over 10′ and require multiple people to move. The reason for the length is to follow the fair curve of the surface, bridging over any hollows and sanding down only the high spots.
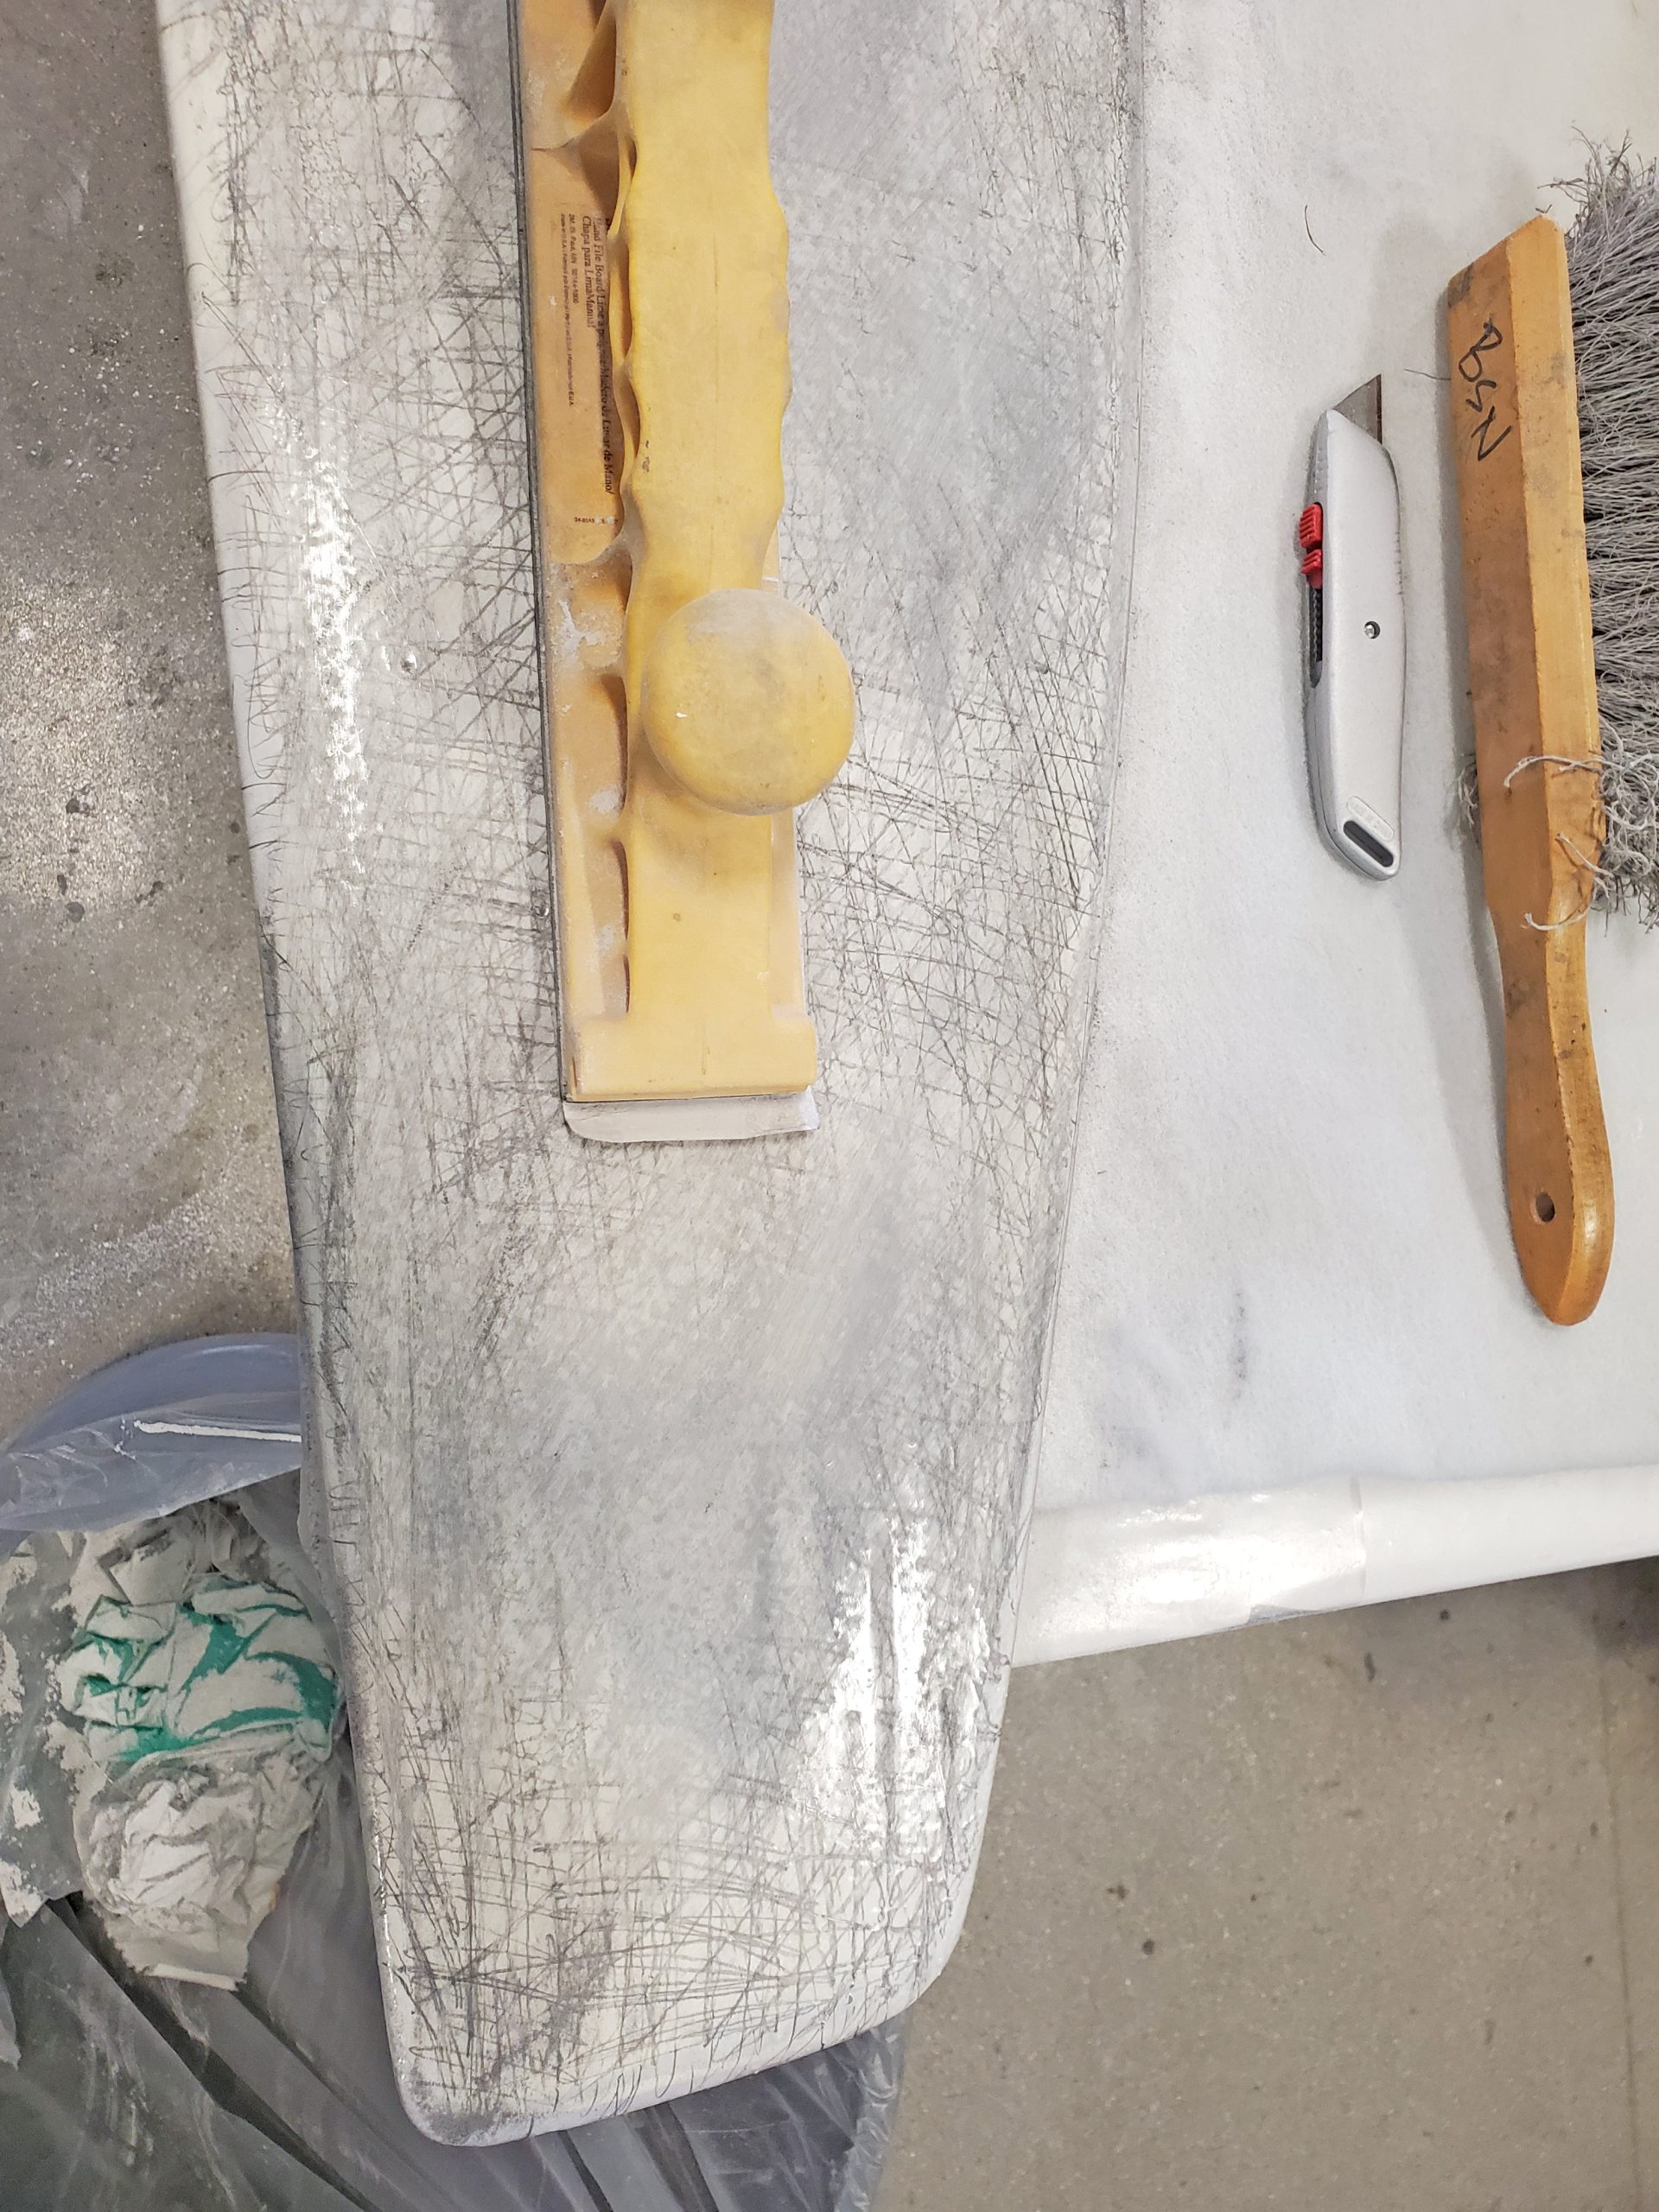
If a simple dual-action sander was used instead of a longboard, the surface would become smooth but the small 5″ pad would follow the highs and lows of the surface. This would result in a smooth but unfair surface.
An alternative to the pencil method is the chalk stick method. This process utilizes a batten that is coated with carpenter’s chalk. By moving this chalk stick back and forth on the surface, the high spots will become visible. This process is described in detail in the Gougeon Brothers on Boat Construction, page 245. Again, both of these methods are performed before any fairing compound is applied.
WEST SYSTEM fairing fillers are added to WEST SYSTEM Epoxy to create a fairing compound. Adding fillers increases the volume of an epoxy batch when blended into the mixed resin and hardener. These fillers are made of microspheres and balloons that are very low-density. This mixture has a lower density than neat epoxy resulting in an easy to sand material.
Generally speaking, when adding 407 Low-Density Fairing Filler to make a thick fairing compound, the volume will be about twice the original volume of the mixed resin and hardener. With 410 Microlight® Fairing Filler it will be about two and a half times the original volume. This information is very handy so you do not overflow your mixing cup or waste epoxy. To learn more about estimating, see Terry Monville’s article “How much Will it Take?”
Note: Just a reminder, surface preparation is required for proper adhesion of the fairing compound. We always recommend sanding the entire surface with 80-grit sandpaper before applying epoxy.
When fairing an area that will have a dark colored topcoat, you will need to consider what filler to use. WEST SYSTEM provides two options: 407 Low-Density Fairing Filler and 410 Microlight Fairing Filler. 410 is easier to sand and very easy to mix into the epoxy. Because of these traits, this filler is not very resistant to high temperatures. Dark colors can become very warm on sunny days, which can cause the surface to distort slightly. 410 can be used under light colors and below the waterline without concern.
If a dark colored, high-gloss finish is desired, consider using 407. WEST SYSTEM 407 is resistant to higher temperatures. 407 is a stronger fairing compound and therefore is slightly more difficult to sand than 410. This can be beneficial on decks or other areas that can see foot traffic, particularly when someone is not wearing boat shoes.
With all fairing applications, once the sanding is complete, the surface should be coated with neat epoxy. This thin coating of epoxy fills pinholes and provides a uniform surface for your primer.
On areas that will have a clear finish, using fairing compound is not an option. Adding fillers to the epoxy will obscure the surface and hide the wood grain. When fairing clear surfaces, the chalk stick method described earlier is an excellent process for identifying high spots. The chalk marks will wipe off easier, so that the epoxy does not over coat the chalk marks.
Since the only option to fair the surface is removing high spots, expert boat builders will emphasize the importance of good craftsmanship—having your mold frames in the proper placement, cutting accurately, and fairing from one station to the next. The strip planks and veneers will naturally take a fair shape if the mold is also fair. With stitch and glue construction, care should be taken to have each piece cut accurately, and the edges checked for fairness before assembly. Keep in mind, with plywood construction, only a small amount of wood can be sanded before you may sand through the top veneer. This can result in an undesirable or spotty appearance under a clear finish.
If the boat is completed, and the clear finished area is not fair, it can still be corrected. The process for fairing a clear finished surfaced was explained in a previous EPOXYWORKS article, “Refinishing a Wood Strip Canoe.”
Simple steps, like a fairing plan, prior to mixing your fairing compound can save time and materials. Taking the time to identify low and high spots on your surface will make your fairing job much easier. Also taking extra time fairing clear finished wood surfaces early in the construction process pays dividends by the time you get to the epoxy process.
Want To Learn About the fairing process?


