One Rotted Antique Door | Pt. 2
Four Common Repairs | Pt. 2

GET STARTED
FREE PRINT & DIGITAL EDITIONS

Four Common Repairs | Pt. 2
Above the mortise lockset area, there appears to have been a vertical deadbolt lock. This area was not nearly as badly damaged as around the door handle, but it needed to be repaired.
There was a hole that ran completely through the door and on one side, the surface had been recessed by about ¼” to mount the lock.
I started with the same approach as the doorknob. I sanded the surrounding surface and inside the hole down to bare wood. In our scrap pile, I found a dowel almost the perfect diameter to fill the lock hole. Using this as my wood plug, I trimmed it to the approximate thickness of the door.
For epoxying this part of the door, I used a hybrid approach of the two processes I considered for the doorknob area. I filled the thru hole with a wooden plug and the recessed area with a layer of thickened epoxy. Again, I applied my tape backer to help hold the plug and epoxy in place. I also applied tape to the edge of the door to prevent the epoxy from running or sagging out of the recessed area. Then it was time to mix the epoxy.
Using 105 Epoxy Resin and 205 Fast Hardener, I wet out the hole and my plug with neat epoxy. I then added 410 Microlight Filler until the mixture reached a mayonnaise/peanut butter consistency. I liberally coated the inside of the hole and the plug with the thickened mixture. I spread the squeeze out from the plug around the surrounding area to ensure the plug and epoxy were proud of the surface. After curing, I sanded it flush.
Before applying my epoxy filler coat to the recessed area, I wanted the plug to cure so I had a solid surface to push against. I wasn’t in a hurry, and this prevented the plug from moving as I worked (which could have potentially created more voids).
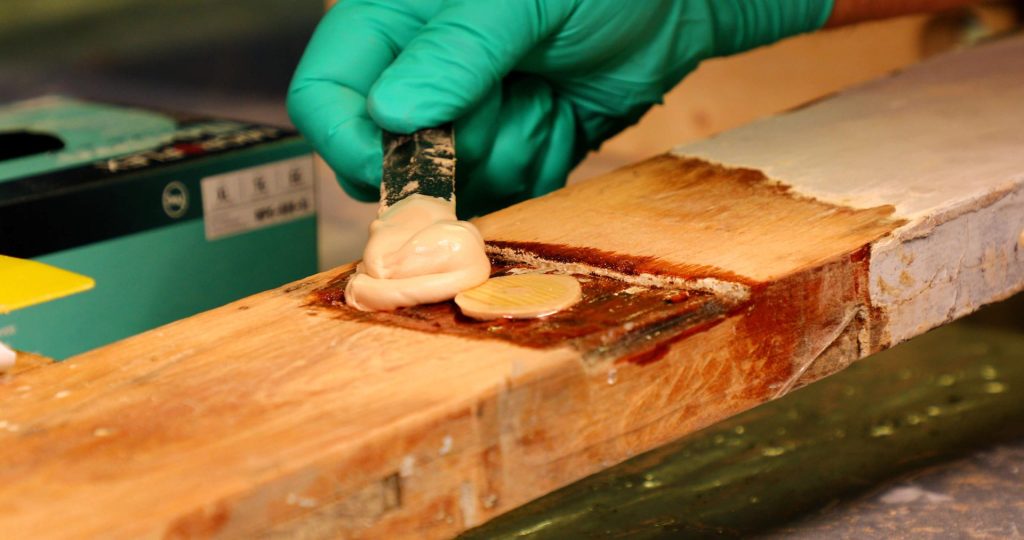
The recessed area was only about ¼” deep, so I was comfortable my epoxy mixture would not overheat once applied. I mixed a batch of 105 / 205 and brushed the neat epoxy onto the recessed area. Then, I thickened the rest of the batch to a mayonnaise consistency with 410 Microlight. I started at the back edge of
the recess and slowly worked my way toward the edge of the door and my tape barricade. This way I minimized the likelihood of trapping air pockets under
the thickened epoxy.
Once this cured, I sanded it flush to inspect. Some touch-ups were needed to fully square off the edge and fill a couple of low spots. I mixed one more batch to apply; which was subsequently sanded flush. Then, I applied a coat of neat 105 / 205 to the entire area to seal the epoxy.


