Casting aluminum- filled epoxy frames
By Joe Parker
To prep our 30-year-old Allied Seabreeze 35 for a paint job, we had to remove the window frames. These frames were cast aluminum and original equipment. The outer frames were thicker and had not been broken. However, once we began to remove the inner frames, it was obvious that they had been removed for previous paint jobs. The aluminum castings had been broken and repaired by simply gluing them back together with an unidentifiable filled adhesive. As we removed them, the inner frames fell apart at the repairs. Two came off in four or more pieces. Close inspection of the surface of the breaks showed that the cracks had been there for a long time. The difference between a recent break, which was clean and bright aluminum, and a preexisting break, which was discolored and dark, was pretty obvious. We debated whether further repairs were really the right thing to do, and decided that we should replace the frames. However, the cost of having them cast in aluminum or bronze was pretty high. Instead, we decided to cast aluminum-filled epoxy frames reinforced with fiberglass.
Making the plug
The first task was to make a plug out of one of the old frames. We glued ¼” plywood onto a sheet of waxed plate glass with WEST SYSTEM® 105/205 to create a base. The best frame was chosen (only one break), and the break was repaired. This frame was glued onto the plywood, again with 105/205. The plywood base allowed space for a 2″ flat flange around the perimeter of the old frame, with a ¼” step down to the glass to stiffen the mold. We created a small fillet where the frame met the plywood, using 105/205 and 406 Colloidal Silica, and coated the frame and the plywood with three coats of 105/205. Next, we wet sanded this surface, starting with 180 grit and working up to 600 grit. Then we applied three coats of mold release, buffing each one before applying the next.
Making the mold
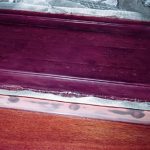
The mold was then laminated on this completed plug. First, we applied a surface coat (105/206 mixed with 404 High-Density Filler added at 15% by weight) to the plug. When this coat reached a tacky stage, we applied a coat of 105/206 with 10% 404. Then we placed a layer of Episize™ 740, 4 oz. fiberglass fabric into the wet thickened mixture. This layer cured for about 2 hours, and then we applied two more layers of the 4 oz. fiberglass. We allowed this to cure hard, about 4 or 5 hours, and applied a layer of Episize 737 Biaxial Fabric. These layers of fiberglass fabric went from the plate glass surface up and over the plywood and cast frame, then back down to the plate glass surface. We let this laminate cure for two days at room temperature. We used a wedge to remove the mold laminate from the plug. Then we cleaned and polished the mold surface and applied three coats of mold wax, buffing each one before applying the next. Now the mold was ready to use.
Casting the new window frames
The first step in making the new parts in this mold was to apply a surface coat for the part. We brushed a mixture of 105/206 with 25% 420 Aluminum Powder and 5% 404 High-Density Filler onto the surface, being careful to make sure the corners had a good coating. This mixture was sticky enough to prevent fisheyes from forming on the mold surface. Then we poured a mixture of 105/206 with 100% 420 Aluminum Powder and 5% 404 High-Density Filler into the mold cavity to fill it within 1/16″ of the top. This casting was allowed to gel. While the surface was still sticky, we applied two layers of 731 (9 oz.) Glass Tape, overlapping from one edge onto the opposite flange, so that only one layer extends out onto the flange on each side. Then we allowed the part to cure for a minimum of 24 hours at 70°F to prevent any distortion when the part was removed from the mold. To release the part, we inserted a wedge between the fiberglass layer extending out onto the flange and the flange. Once the part was removed from the mold, we set up a router table to trim the part close to the corner radius and did the final shaping with sandpaper and a sanding block.
Installing the new window frames
The next problem was marking, countersinking, and drilling the holes for the bolts. The fasteners that hold the inner and outer frames together and hold the window into the boat are threaded into the outer frame. They go though countersunk holes in the inner frame. These holes must line up with the threaded holes in the outer frame. We used a version of the hole-locating tool described by J.R. Watson in his article SImple Shop Tools to Make. Having marked the holes, we drilled the countersink with a spade bit to make a flat bottom recess and then drilled the hole for the bolt, drilling slightly oversize to provide some wiggle room. After the holes were all drilled, we removed all traces of mold release wax from the surface. Finally, we sanded the new frames with 180 to 220 grit paper, painted and installed.
The savings
I had received a quote to cast aluminum frames for about $100 each. We still would have had to mark, drill and countersink the holes and paint the frames. In building our own frames, we spent three to four hours making and finishing the plug, and about an hour making the mold. Each part required about 45 minutes to mold and trim. So rather than spend $400 for the four frames, we spent about 8 hours and a total of $65 in materials making them ourselves.
The biggest gain was the satisfaction of knowing we had made yet another part of the boat our own.