Low-Tech Adhesion Testing
Spring 1995

GET STARTED
FREE PRINT & DIGITAL EDITIONS
Spring 1995
Before beginning a project, it’s a good idea to test the adhesion between epoxy and the materials to be used. Preliminary adhesion tests can help you choose the best materials and surface preparation methods. It can also help to avoid a surprise bonding failure.
At Gougeon Brothers, Inc. we use a Pneumatic Adhesion Tensile Testing Instrument (PATTI) for adhesion tests. After the PATTI test stud is bonded to the test surface, the stud is pulled in tension until it releases. The instrument gauge gives a precise pounds per square inch reading at failure.
You will not get precise results with low-tech adhesion testing, but you can perform some revealing tests using your project materials, epoxy, small wooden blocks, clamps and a hammer.
This is a destructive test that will deface the surface being tested if adhesion is good, so limit it to items or areas you can bear to damage.
The test is useful to judge the suitability of WEST SYSTEM® epoxy over certain stains, bonding to pressure treated lumber and certain tropical hardwoods, and to test the effectiveness of different surface preparation techniques. Conducting this test on the under water area of fiberglass boats may help to reveal something of the condition of the hull laminate.
Begin by preparing the surface you plan to test. Use the same surface preparation for the test that you plan to use for your bonding project. Surface preparation is important in determining adhesion. If you’re using solvent to clean contaminated surfaces, be sure to wipe the surface with plain white paper towels (cloth rags may hold contaminants like wax or silicone if laundered with fabric softener).
A simple block of wood is the key item in performing your adhesion test. For most tests, a ¾” x ¾” x 1″ block works well, but most any size will do. For best adhesion, warm the wooden block to 120°F before applying epoxy to it. This will allow the epoxy to migrate deep into the end grain of the block. The end grain is used because the fiber orientation provides much more strength than face or edge grain does. Coat the end grain of the test block until it absorbs no more epoxy and remains glossy.
Immediately coat the prepared test surface as well. Place the test block on the surface you are testing and clamp or tape with firm pressure until the epoxy cures thoroughly.
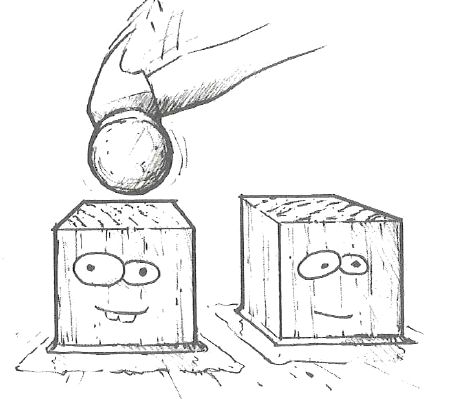
The test itself is simple. Apply some force by tapping the side of the test block with a hammer until it breaks free.
If you have good adhesion, the test block will pull a layer of material off of the surface when it breaks free. The more surface material attached to the block, the better the adhesion. If there is little or no transfer of material from the surface, it would indicate surface contamination or inadequate surface preparation.
On most wood surfaces where you have good adhesion, you should take a nice sized chunk of wood with the test block. Because softwoods typically have lower grain strength than hardwood, the block will remove a bigger chunk of softwood than of hardwood—even though it may take more force to knock the block off of the hardwood. See the previous article for details on bonding to oak.
With good adhesion to fiberglass surfaces with gelcoat, the gelcoat usually comes off down to the glass laminate. The failure mode seldom leaves a uniform film of gelcoat over the entire wood block even if the adhesion is good. The reason is that the side of the block that receives the blow is under tension because that side of the block is lifting up. Part way across the block the gelcoat will go into shear and on the compression side of the block, there may be no gelcoat transfer to the block.
If fuzzy fiberglass is exposed, instead of resin rich laminate it may indicate a problem such as hydrolysis. The weak link, if there is good adhesion, should be the gelcoat-to-mat bond.


