Using the Lost Foam Method
By Brian Knight
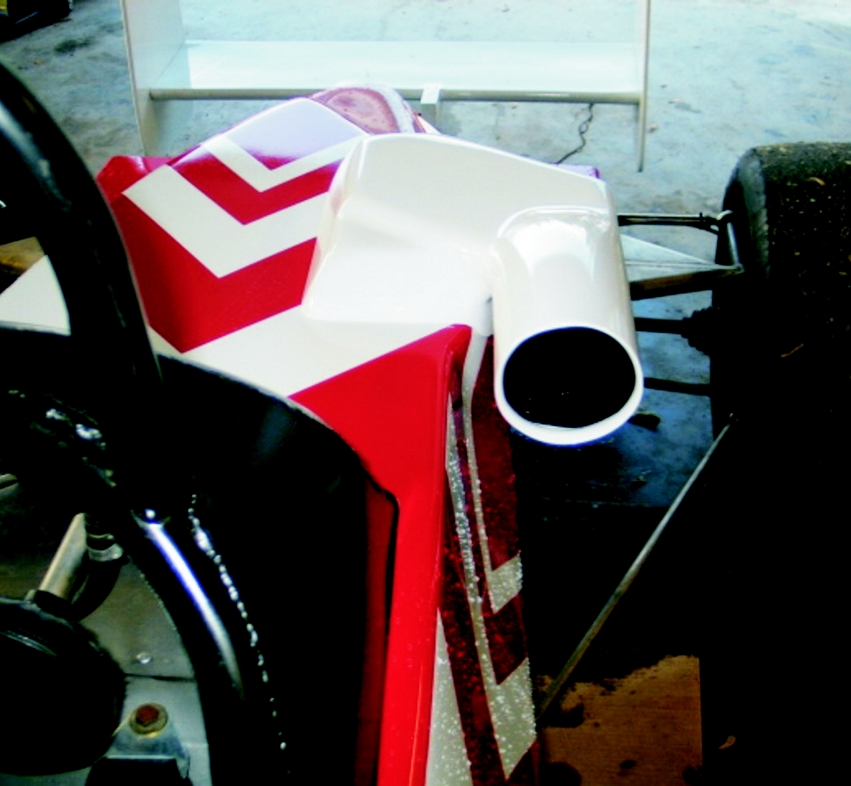
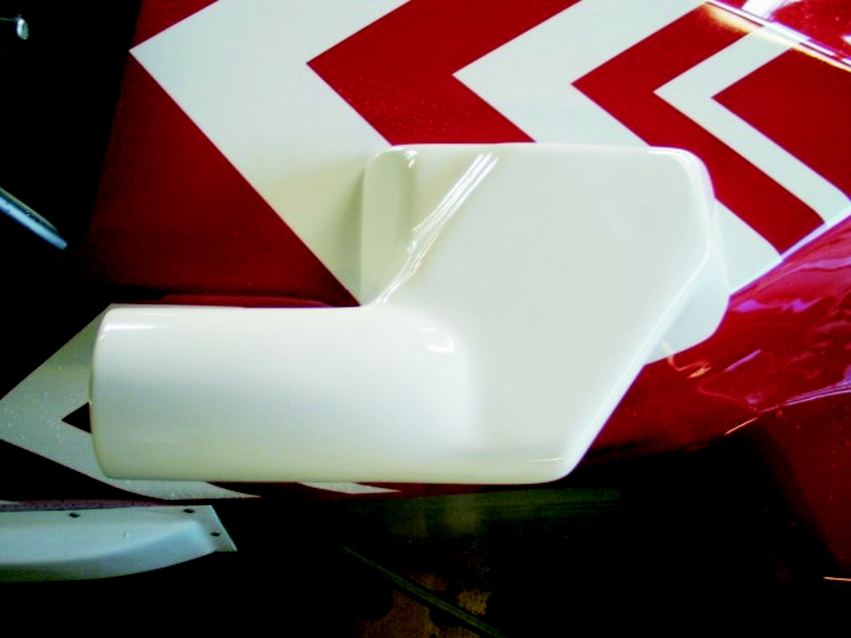
I used lost foam construction to fabricate a fiberglass air scoop for my son’s Formula Continental C race car. Our project started because a modification to the shape of the race car body necessitated the construction of a new air scoop. The air scoop is bolted to the car body so if either the air scoop or the body is damaged (a very likely scenario), the repair will be simpler. To fabricate the scoop, I made a Styrofoam male mold, surrounded the mold with fiberglass, and then dissolved the Styrofoam to leave a hollow part. I used Styrofoam to build the male mold for several reasons. It is readily available at most lumberyards, it is easy to shape with files and sandpaper, and it is easy to dissolve with lacquer thinner.
“Lost foam” composite fabrication uses Styrofoam™ as a male mold, over which composite materials are applied. The Styrofoam Is then dissolved out of the cured part with acetone or lacquer thinner, leaving a hollowed out shell. (Other types of foam may not dissolve, so use styrenated foam exclusively for this process.) It is used to produce custom(one-off ) parts with a molded interior cavity. Since the mold is destroyed after the part is built, this version of the lost foam method is not a production process. With this method, any shape that can be carved or molded out of Styrofoam can be turned into a fiberglass/epoxy composite. For example, this method can be used to fabricate air scoops and intake plenums for combustion engines, masthead fittings, and various types of nozzles or plumbing applications.
Carve/shape the styrofoam blank
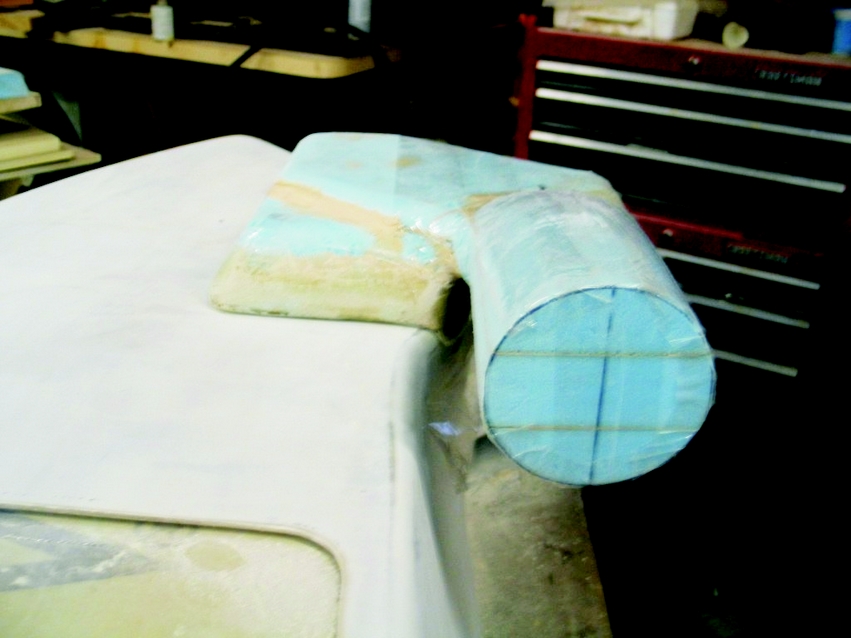
The blank for the air scoop was built up of several layers of Foam and then carved to shape. To build the blank, I used WEST SYSTEM® epoxy because it does not chemically attack the foam. However, the hard glue lines at each layer of foam can cause difficulties when shaping the part.
Styrofoam has a density of about 2 pounds per cubic foot—very low. Unless the density of the glue line approximates the foam, the shaping process will remove foam much more quickly than the glue lines. This leaves unacceptable ridges at each joint in the foam. So to make shaping easier, I used epoxy thickened with 410 Microlight™ to glue the layers of Styrofoam together. Microlight has a very low density and does not make hard glue lines that other fillers might.
I used Surform™ tools, coarse files, and sandpaper to shape the mold. I made no attempt to get a good surface finish on the mold—I just concerned myself with the overall fairness. Since fiberglass will not conform to sharp corners, I used fillets of 410 Microlight on all inside corners, I used fillets of 410 Microlight on all inside corners.
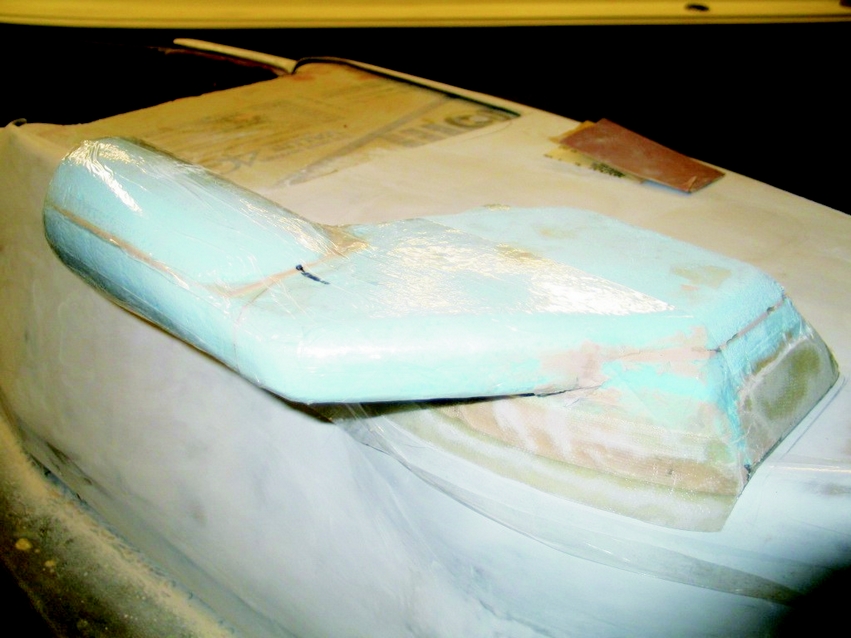
I used clear packing tape as a mold release (photos 1 and 2). One thing to pay attention to—epoxy does not adhere to the shiny side of the tape, but it will lock itself into wrinkles and gaps in the tape. So, do a neat job of applying the tape to avoid difficulty removing the tape from the cured part.
Apply the fabric
I applied a couple of layers of wet-out fiberglass cloth to the bottom of the foam and wrapped it up the sides a few inches. Then I allowed this to cure.
The next step involved sanding the cured edge of the fiberglass where the first application ended. There were lots of sharp “hairs” sticking up as well as several wrinkles in the glass. I carefully sanded this area smooth, taking care not to gouge into the Styrofoam immediately adjacent to the cured glass.
Then I applied several layers of fiberglass to the remainder of the part. These overlapped the previously applied cloth. (Photos 3 and 4)
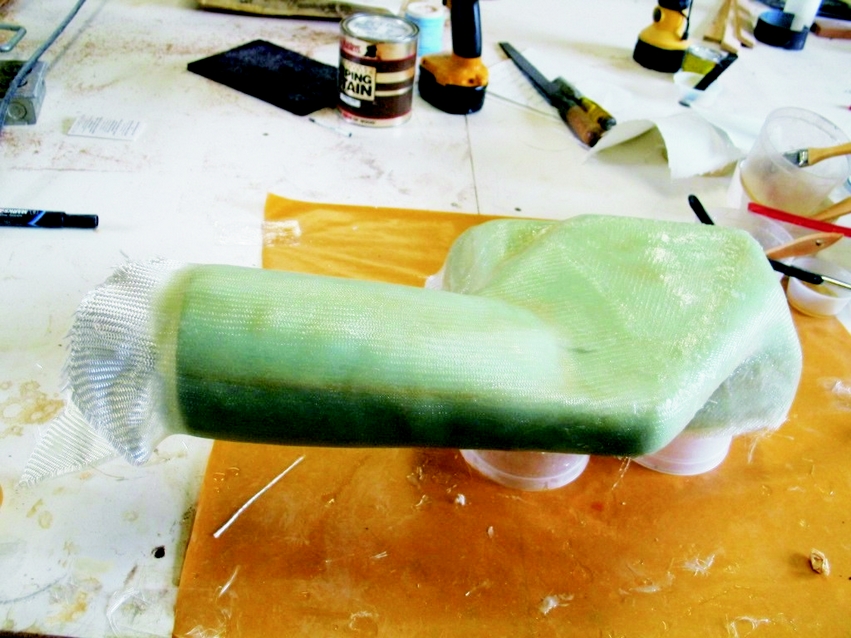
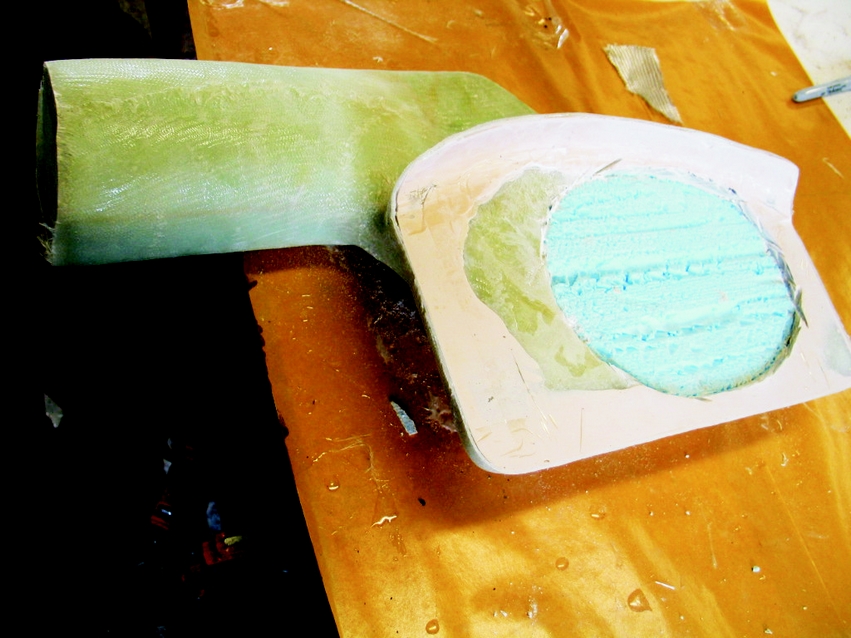
When all the epoxy had cured, I sanded enough so that I could handle the part safely without getting cut on sharp edges and then cut a hole through the bottom fiberglass skin.
This hole was sized to allow the carburetor and air cleaner to fit inside the air scoop. The hole also provided access to the inside of the scoop to make the job of removing the foam easier.
Dissolve the foam and clean up the inside
Lacquer thinner will effectively dissolve Styrofoam. Poured slowly over the foam, the lacquer thinner reduces the foam to a viscous blue liquid. When the lacquer thinner evaporates from the liquid, it leaves a small, hard plastic residue. For the air scoop, I used about a cup of lacquer thinner.
After dissolving the foam, reach in and remove the epoxy “ribs” that are left. The ribs are the epoxy layers (which are not attacked by the solvent) used to laminate the layers of foam. They need to be removed by hand.
The tape will generally remain with the part and will peel off after the foam is destroyed. This will also allow the removal of the fillets that are left after the foam is dissolved.
Finish the scoop
I wanted the air cleaner to fit precisely to the top of the car body. To accomplish this, I applied clear packaging tape to the body, applied a layer of 410 Microlight to the tape, and placed the air scoop in the putty. The 410 did not stick to the tape; it stuck to the bottom of the air scoop. This made a perfect fit between the two parts. Then I removed the tape from the body.
Because this part was built on a male mold, it required considerable fairing. I used epoxy thickened with 410 Microlight to make an easily sanded fairing compound. This was applied with a plastic spreader and allowed to cure. Lots of hand and block sanding later, the part was almost ready for paint. To seal the sanded 410, I applied one last seal coat of neat epoxy.
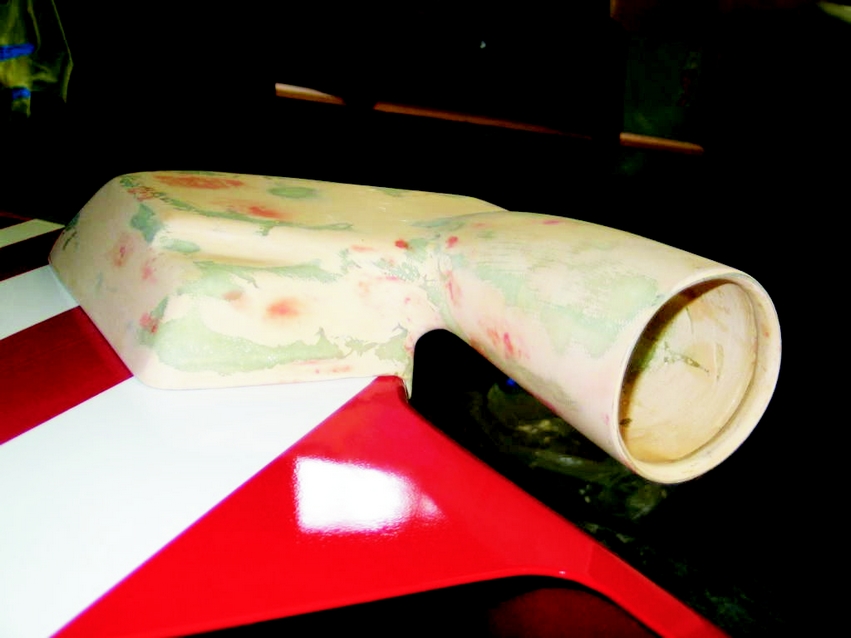
After a final wet sanding of the seal coat, I sprayed several heavy applications of lacquer primer on the part. This was wet sanded and two coats of Omni™ automotive paint were applied. One more wet sanding followed by a coat of Omni Clear finished the job. (Photos 6 and 7)
