By Michael Marquis
At the end of the season this year while riding in a local terrain park, I misjudged the approach to a pipe and ended up crashing the nose of my snowboard into the end of the pipe. Fortunately, I was able to ride away from the impact. Later in the day, I noticed that the nose of the snowboard had been deformed. When I got home, I studied the damaged area closely and determined that it was not safe to ride the board in that condition. The entire nose area had become soft and flexible because much of the wood core in that area had been broken. In addition to the bent nose edge, the top sheet had cracked. Left as is, this would have allowed water to penetrate to the core of the snowboard which would have made it unrepairable. The technicians at my local snowboard shop told me it could be repaired but cautioned that I needed to use an epoxy that remains flexible after it cures to prevent the repair from breaking.

I found WEST SYSTEM on the internet and was drawn to their epoxy because it was slow-cure and remains flexible. I contacted WEST SYSTEM Technical Advisor Don Gutzmer via email and asked if this epoxy would work on snowboards (all of the write-ups I saw were for boat repairs). Don assured me that the product would perform as needed at the temperatures that the board will see.
After planning out the repair process in my head for about three days, I began to actually make the repair.
Bending the metal edging back to its original shape
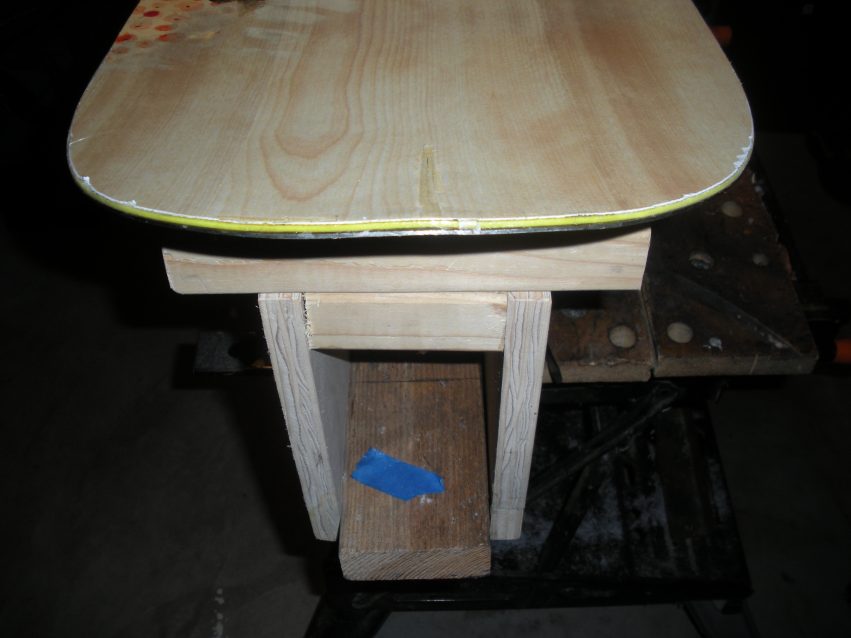
I clamped a steel plate to the underside of the board with 3/8” wood shims between the plate and the board. This allowed me to use a C clamp and over-bend the board and edging. After several attempts, I was able to get the shape close to what I wanted.
Cleaning the damaged area
The broken wood fibers and loose debris in the damaged area needed to be cleaned out before the repair could be carried out. I did this by inserting a chisel and then a pair of screwdrivers between the layers at the damaged section of the nose. I was able to pry the layers apart slightly to allow me to use a pick to remove the loose debris (wood fibers).
Masking and planning a clamping scheme
I applied several pieces of masking tape next to the repair areas to prevent any epoxy that squeezed out from adhering to the decorative top sheet. Once the protective tape was in place, I planned how to best apply pressure to the repair. After several trials, I decided to use a combination of spring clamps and “C” clamps. I wanted to keep pressure on the repair, but not squeeze out all of the epoxy.

Mixing and applying the epoxy
The 650-K Aluminum Boat Repair Kit had everything I needed for this repair including the epoxy, hardener, mixing cups, gloves, and a syringe for inserting the mixed epoxy deep into the repair area. I followed the instructions on the repair kit. G/flex 650 Epoxy was ideal for this repair because it remains flexible in the temperature ranges that my board will see in the winter and bonds very well to dissimilar materials.
After thoroughly mixing equal parts resin and hardener, I poured the mixture into the syringe. I gently pried the snowboard’s top and bottom sheet apart with a screwdriver and stuck the long thin nose of the syringe as deep as I could into the damaged area. The syringe allowed me to apply the epoxy much deeper into the repair area than I could have managed with an applicator stick. Once the epoxy completely filled the damaged area, I worked the screwdriver back and forth in an attempt to get the epoxy to flow even further into the damaged area.
Clamping and allowing the epoxy to cure
With the epoxy in the repair area, it was time to apply the clamps. I started with spring clamps as far away from the edge as I could place them. I then used additional spring clamps and “C” clamps closer to the edge. As I was clamping the board, epoxy started to seep out around the nose. I wiped away the uncured epoxy and left the board standing upright for about 35 minutes (the epoxy has 45 minute working time). I then placed the board on my bench, face-side up. I applied a thin coating of epoxy to the cracked top sheet between the pieces of tape I had placed on the board earlier.
Removing clamps and cleaning up the repair area
After allowing the board and epoxy to sit for 24 hours, I removed the clamps and tape. I was able to use a razor knife to clean up the epoxy that had squeezed out of the joint.
After the repair was completed the area has cleaned up nicely. If you look closely, you can spot the repair, but it is nearly invisible from more than two feet away. The entire nose area of the board has stiffened but has roughly the same flexibility as the tail of the board. I am extremely happy with the results.

I’m looking forward to testing the board on the snow next winter. I did several nose presses on the grass and the board felt and performed like new.


