By Sam Magruder
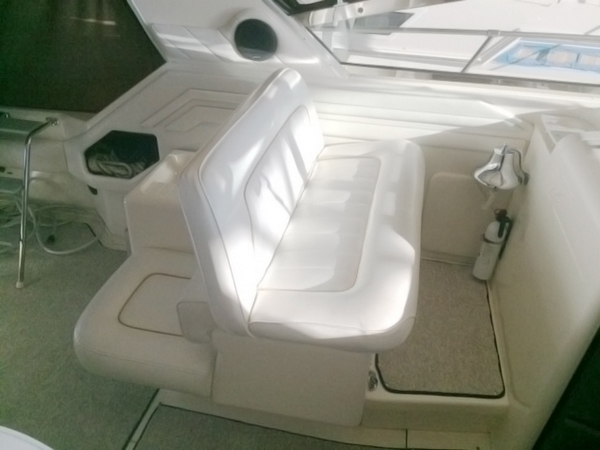
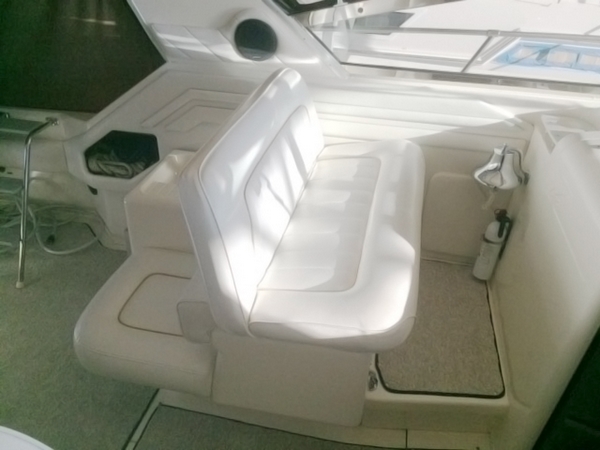
I have a 1996 Sea Ray 400 Express Cruiser that I purchased in April 2014. The vinyl is in excellent condition in the cockpit. However, when someone sat in the front passenger seat (45″ wide) the back looked like it wasn’t attached. I went to the Sea Ray Owners Club website to explore the repairs and a fix for the seat. I learned that if I waited until the seatback broke, the vinyl would be damaged, and it would be costly to replace.
It took me several hours to remove the seat, the vinyl seat cover and the foam. The roto-molded seat shell was severely cracked on each edge. I contacted the manufacturer and learned that a new one could be purchased from Sea Ray for $523 delivered to Atlanta, Georgia. Ultimately I decided to repair the old seat instead and reuse the original vinyl.
On Ship Shape TV I saw an ad about using G/flex Epoxy to glue together a kayak that was cut in half. I thought, maybe they could tell me how to repair my old seat shell! I downloaded the WEST SYSTEM manuals and read as much as I could before calling Gougeon Brothers, Inc., Technical Support office. Gougeon Technical Advisor Don Gutzmer said my seats could be repaired if I followed all the steps and used the G/flex Thickened Epoxy Adhesive (G/flex 655) and some fiberglass tape. I beefed up a few of those steps to make sure my project would be a success.
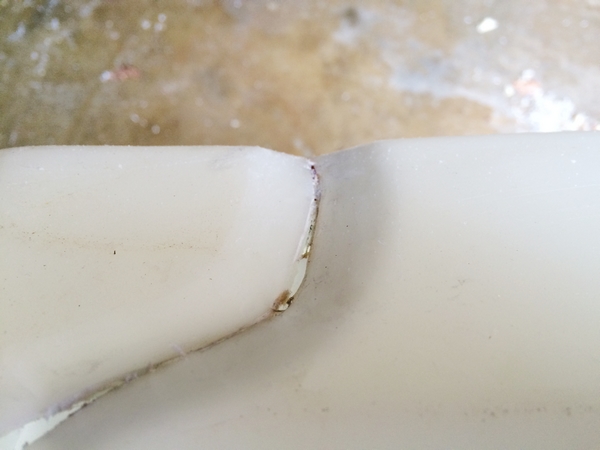
The seat shell was dirty from 18 years of use, and was also covered in foam glue. I used a flat razor blade scraper to remove the bulk of the foam glue where the repairs were to be done. I wanted the shell to appear like new where I would be doing the repairs. After cleaning the repair areas, I noticed the bottom of the seat had five additional cracks that needed repairing.

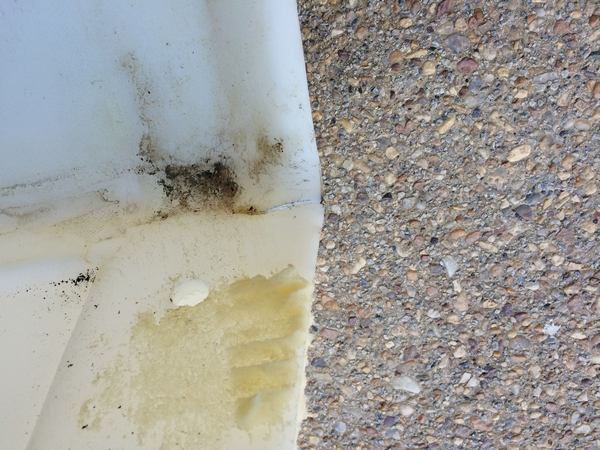
Alcohol would not remove the stubborn glue residue, so I cleaned the seat shell with MEK (methyl ethyl keytone). This is a highly flammable solvent which I had to use outdoors, but it cleaned all of the old foam glue off the seat. I poured some on a white towel and rubbed it on the shell until the shell was spotless. In some cases, I repeated the application multiple times. I used a white towel because MEK can make the dye in a colored towel bleed onto the seat shell.
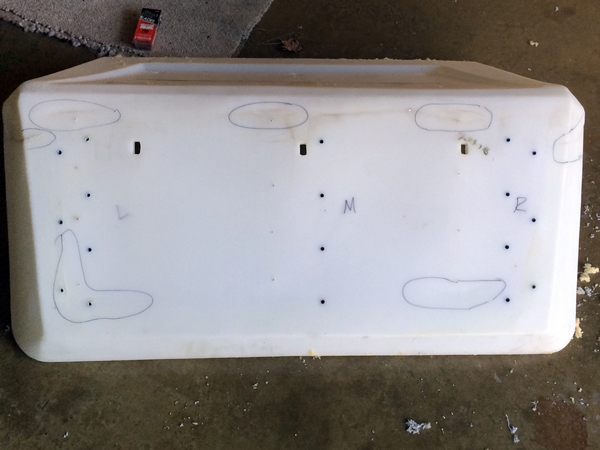
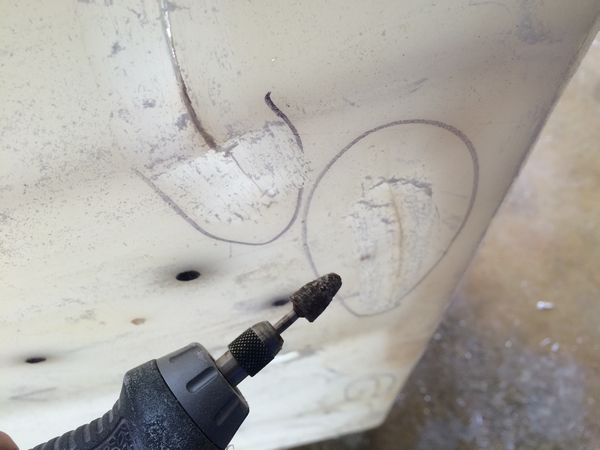
Don Gutzmer advised that I should feather back 1″ from the cracks for the 655 G/flex Thickened Epoxy Adhesive to adhere correctly. Some of these cracks were 12″ long. Because I was prepping a large area, I used a rotary tool (rather than a scraper) to feather the cracks. A faster, rougher tool resulted in the correct shape, and then a finer tool made the shape smooth. I did this for every crack I was repairing. I then drilled a ⅛” hole at the end of each crack to prevent further cracking.
I ordered the quart size (655-2QT) of the thickened G/flex along with WEST SYSTEM 732-10 fiberglass tape (4″ x 10′).
I sanded each joint with 80-grit sandpaper and wiped the entire area surrounding the repair with alcohol to remove dust from sanding.
To flex the seat back into shape I used two ratchet straps. These worked perfectly to get the shell back to the correct angle. After getting the seat to the correct angle, I used the rotary tool to prepare the cracks.
Don had advised that in addition to the epoxy I should use the fiberglass tape to strengthen the repair. On each crack on the bottom of the seat, I used a 1″, 3″, and 4″ wide strips all with the G/flex 655 Thickened Epoxy Adhesive. I used the 4″ wide tape and cut 1″ off the edge to produce a 1″ wide and a 3″ wide piece. This raised the thickness of the repairs to about ⅛”-3/16″. For the side repairs (heavy stress areas) I used strips of 2″ wide tape, staggered 2″, and two each of staggered 4″ wide pieces.
Once the Epoxy arrived I prepped my work area with:
- G/flex 655 Epoxy (1 quart cans of Part A and Part B)
- 3 paint stir sticks about 1″ wide (one for getting part A out of the can, one for Part B, and one for mixing)
- Newspaper spread across a large area of floor to protect it from epoxy
- Cut up cardboard (about 12″ x 12″) to use as pallets for mixing each batch of epoxy
- Disposable latex gloves
- A flat-bladed screwdriver for opening the cans
- Pre-cut fiberglass tape for each repair area
- Propane torch
- Alcohol for the final wiping
- 2 ratchet straps for keeping the seat in shape while it was being epoxied
- An old box to hold the seat bottom in the up position
- Disposable 1″ paint brushes for brushing the epoxy
- 10 large rags for cleanup
Now I was ready to get started. I wiped the seat repair areas, plus an extra 4″ all around with isopropyl alcohol and let that dry for 10 minutes. I then used the blue flame of the propane torch moving at 12″ a second over all the areas that were to be repaired, plus 4″ wider than each side of the crack. The flame treating helps to oxidize the surface to improve adhesion.
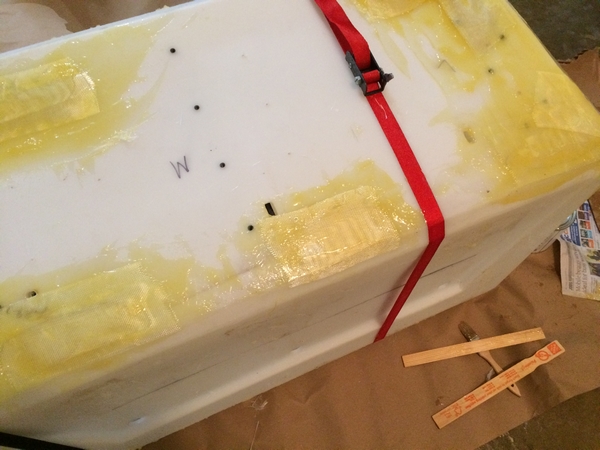
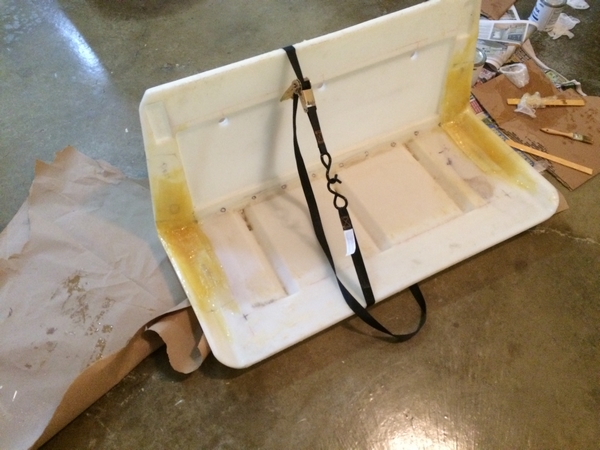
I used separate paint stirrers to glop equal amounts of 655 G/flex Epoxy Resin and Hardener onto a cardboard pallet and worked these together for 3-4 minutes to make sure it was thoroughly mixed and uniform in color. I scraped the separate resin and hardener stirrers with a third stirrer and wiped them clean for reuse.
I applied the mixed G/flex to each repair area way too thick over a 4″-5″ wide area. I then applied the fiberglass tape going from smallest to largest, applying the mixed epoxy between each layer. I used the stirrer to smooth out the epoxy and to apply more to the top of the tape. When I needed more epoxy I added it from the mixed batch on the cardboard pallet. I did this until all 3 or 4 layers were covered with epoxy. I used the paintbrush to smooth any lumps. Once I was done I scraped the repaired area with the paint stirrer until all the tape was covered and fairly smooth.
I made the repairs in two sessions: the bottom and the sides. To the side I applied only the G/flex, not the fiberglass tape. The bottom was flat and easy, but the side stress areas required moving the shell around.
To prepare for the second repair session, I smoothed the cured epoxy using a palm sander with 80-grit sandpaper, alcohol wipe, and blue flame on the raw roto-molded parts.
For the sides of the seat, high-stress areas, I spread epoxy away from the crack 12″ on each side. I also used 4 layers of fiberglass tape. When completed these repair areas had a 3/16″ buildup. I let the epoxy fully cure for 48 hours. With the palm sander, I feathered each edge and the top of the repairs to smooth out any rough spots.
When it was done it felt sturdy and solid. My cost to repair this was about $170 including the epoxy, tape, propane torch, and supplies.
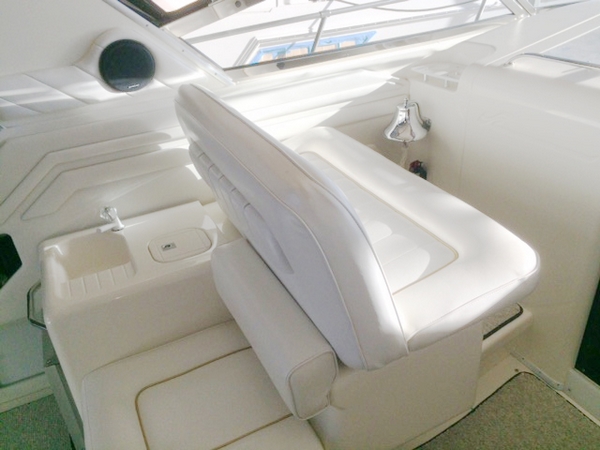
I have done some other fiberglass repairs so I thought this would be similar. However, there are a few things I wished I had known beforehand:
- G/flex 655 Thickened Epoxy Adhesive is thick—almost like sheetrock mud.
- G/flex 655 Epoxy is messy, so change your disposable gloves often.
- G/flex 655 Epoxy could be worked easily for about 30 minutes. Multiple batches may be needed.
- I ordered the quart sized containers of the
G/flex 655 Epoxy and I only have about ⅓ of each can left. - G/flex 655 Epoxy takes several hours to cure and 24 hours to fully cure.
The 655 Epoxy fixed the cracked seat and it is very sturdy. If you follow the directions, the repair is simple.
I want to thank Don Gutzmer of Gougeon Technical Support for all of his help with the repairs. He made it simple and easy.

