By Allan Eugene Mechen
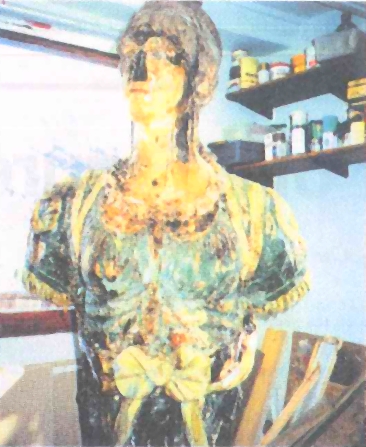
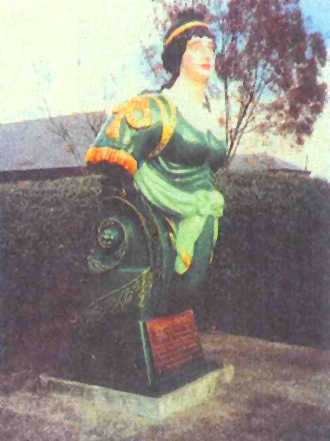
The 200-year-old wooden figurehead from the ship H.M.S. UNITE’ was in a serious state of rot in March of 1994 when restoration experts began work to save her. They completed the painstaking process in October, 1994.
Examining the figurehead on site, we saw that it had been previously sheathed in fiberglass. This was probably done because the 200 year old timber could no longer be maintained using conventional methods and materials.
The fiberglass itself had deteriorated and split over the figurehead’s upper body and head. Water had penetrated the wood through those splits. In some places, the fiberglass shell had acted as a funnel for rain water. Once inside the glass shell, the water could not easily escape.
The splits were probably caused by moisture penetrating the fiberglass, which did not have the proper protection of a finished gel coating.
Removing a limited amount of the shell adjacent to the splits, we did not find a firm basis on which to make good fiberglass repairs. When we removed more fiberglass from the head and torso, the full extent of the shell’s failure became obvious. The figurehead was saturated with water.
At this stage, we agreed that the only way to proceed was with a full restoration.
When we removed the last of the fiberglass shell, we found that the entire figurehead was in an advanced stage of rot. All of the stem mounting was like soggy sawdust. The head and torso were approaching the same state, although a thin crust of firm timber held together. The thin crust probably absorbed enough paint oil over the years to gain a degree of resistance to decay.
Full restoration begins
The torso was the only part of the original figurehead which we thought we might be able to save. The lower half, which included the stem mount and some scroll work, needed to be completely replaced.
We built the lower section replacement in the form of a high backed chair, on which we could fit the remains of the figurehead. To provide a sound attachment for mounting the torso, we included a center box tenon extending from the chair seat up through the body to the chest.
In order to take proper measurements for designing the chair, we had to cut a mortise in the torso despite its saturated state. This involved making two long saw cuts through the whole thickness of the body. The internal rot was so extensive that cutting the torso with a hand saw felt much like cutting into fresh bread.
Our next step was to strap the figurehead down on its back to avoid distortion while natural drying took place. The early cutting of the mortise removed some of the bulk of decayed wood, allowing the remainder to dry more easily.
This preliminary part of the restoration work was carried out in March, 1994.
Resuming restoration work
By August 1994 the figurehead, untouched for four and a half months, had completely dried out. We could now continue the restoration.
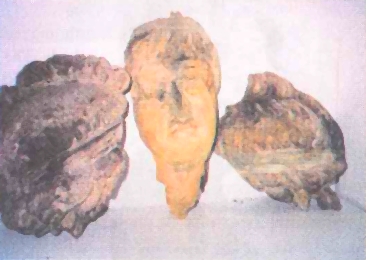
When we removed the strapping, which was by then very loose, the torso fell apart into two main pieces and the head separated into four parts. While initially disconcerting, this partial disintegration enabled us to more effectively stabilize the decayed timber because we could work on all sides of the pieces.
Only the use of modern materials could save this figurehead from complete disintegration. We tested WEST SYSTEM® Epoxy on samples of the decayed timber and found that it provided the degree of penetration necessary to transform the crumbling timber into firm material. This epoxy is a well proven water repellent adhesive. We are grateful to Wessex Resins of Southampton, England for the use of their test laboratory to determine the best materials to use.
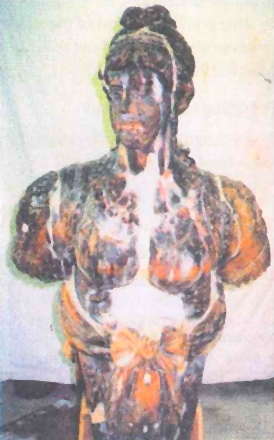
To allow epoxy penetration from the outer surface, we drilled 6mm holes all over the body parts and 3mm holes over the head pieces. We injected the epoxy using different sized syringes for the two sizes of holes. We poured and brushed epoxy into all sides of each piece.
We constructed the lower section chair of 18mm marine plywood. We took its dimensions from sections of the discarded fiberglass shell. We epoxied all joints, then fastened them with brass screws.
Reassembly
Now that we had stabilized all parts and remade the lower section, we could begin reconstructing the figurehead. We carefully matched each piece and bonded it to its neighbor, and to the chair, using thickened WEST SYSTEM epoxy.
It was difficult to get the three main pieces of the head together on what was left of the neck. The long-grained wood of the neck had distorted so much during the drying process that when the head was fitted in its best position, it was looking over its shoulder to the rear. Our careful surgery to take out the twist eventually resulted in the fitting together of all the parts of this puzzle.
The “chair” provided the main strength of the restored figurehead. We bonded a threaded steel rod vertically from the head to the underside of the chair. We fitted a second steel rod horizontally through the body, arm to arm, picking up the chair tenon on its way though. Before epoxying over the nuts, we tightened them.
The figurehead, so far reconstructed, was firm and at one with the lower half.
Although we thought the epoxy-impregnated timber would be impervious to moisture, we had another problem. The earlier shrinkage and collapse of decayed timber inside the figurehead had resulted in large voids inside the head and torso. It was possible that moisture could find its way into those areas. We had to do something to fill those gaps.
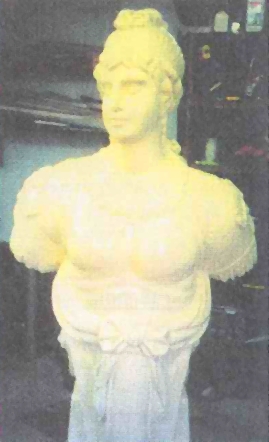
To solve the problem, we drilled large holes through the chair back to add openings in the chest and neck. Next, we injected polyurethane foam adhesive into the voids until its expansion forced excess foam out of all the openings.
Painting and finishing
We abraded the epoxy surface before applying a two-part polyurethane paint. During earlier work, we had discovered that the figurehead’s clothing was originally painted dark green. This information helped us form the basis for coloring the figurehead’s gown.
We used enamel paints because they are highly pigmented and would best resist fading in sunlight. We applied a limited number of paint coats to retain the sharpness of the carved details. For the gilt work, we used 23.75 carat gold leaf. We laid both loose and transfer gold over a yellow chrome base.
To complement the existing scroll work, we extended to the bottom an outline of the acanthus leaves carved on the upper figure. The figure’s dark green gown is trimmed by a light green sash, designed to represent a paler muslin adornment fashionable in classical garb of the late 1700s.
We couldn’t tell what color the eyes originally were, so we first painted them blue. But this didn’t seem appropriate to either the figurehead’s country of origin or to her dark brown hair. We later changed the eye color to brown, which appears much more suitable.
At the figurehead’s base is a title sign giving a brief history of the host ship’s movements. We coated the sign with epoxy followed by a two-part polyurethane varnish, and finished it with conventional marine varnish. The writing on the sign is in gold leaf.
Future maintenance
The figurehead as restored no longer relies on the original timber for its future survival. The epoxy provides strength and weather resistance. As long as the coats of paint are maintained as a barrier to ultra violet light, the epoxy should last indefinitely. Any repairs which become necessary in the future should be made with epoxy.
See, A Brief History of the H.M.S Unite’.
