

By Ed Lewis
In 1947, my parents took me to Gatlinburg, Tennessee for my first vacation. I was fascinated by a woodturner and resolved that I would one day learn the craft. In the early 1970s, I found an ancient used lathe in a flea market. I bought a box set of chisels at Sears and set out to learn the craft. I didn’t have a teacher and I made a lot of mistakes.
During my first 20 years of turning wood, I finished my work with Danish oil, lacquer, varnish, tung oil or polyurethane. In 2003, I switched to West System® Epoxy, and I have never looked back.
I keep a careful record of my work: to date, I have finished over 600 pieces with West System Epoxy. Here again, I didn’t have a teacher, but with my background in chemistry, I understood epoxy materials on the molecular level. I still made many mistakes.
The Technical Advisors at Gougeon Brothers have been very helpful, but there is a limit to solving problems over the telephone. I didn’t know of any other woodturners who used epoxy as a finish. I have since taught a number of others the techniques I have laboriously learned on my own.
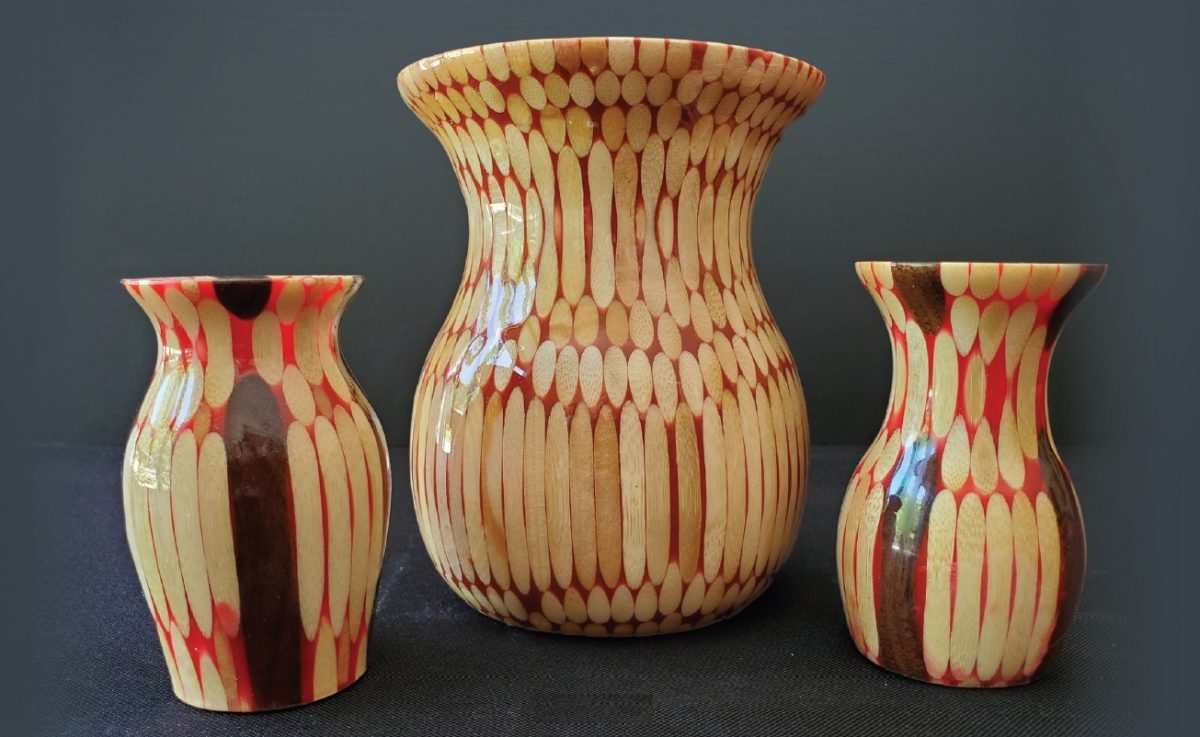
How to create your vase
The materials you’ll need for your wooden vase
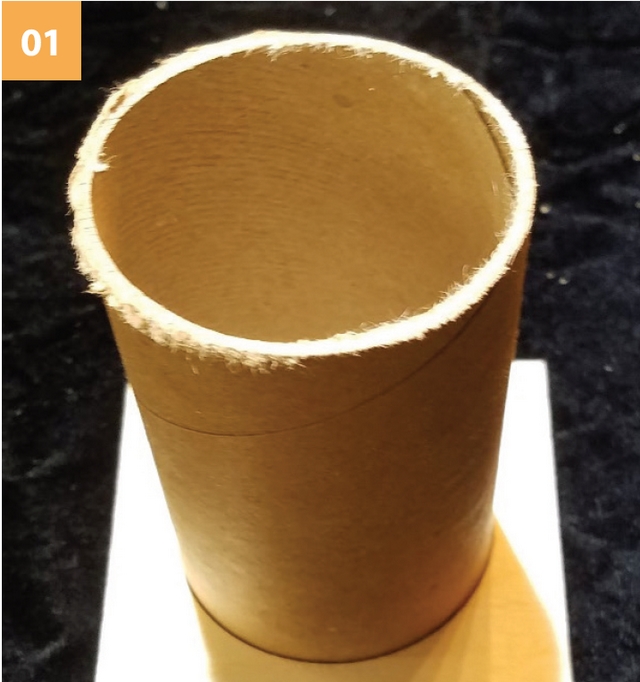
- A 2″ diameter mailing tube, about 4″ long
- A roughly 4″ x 4″ base to which you can adhere the mailing tube
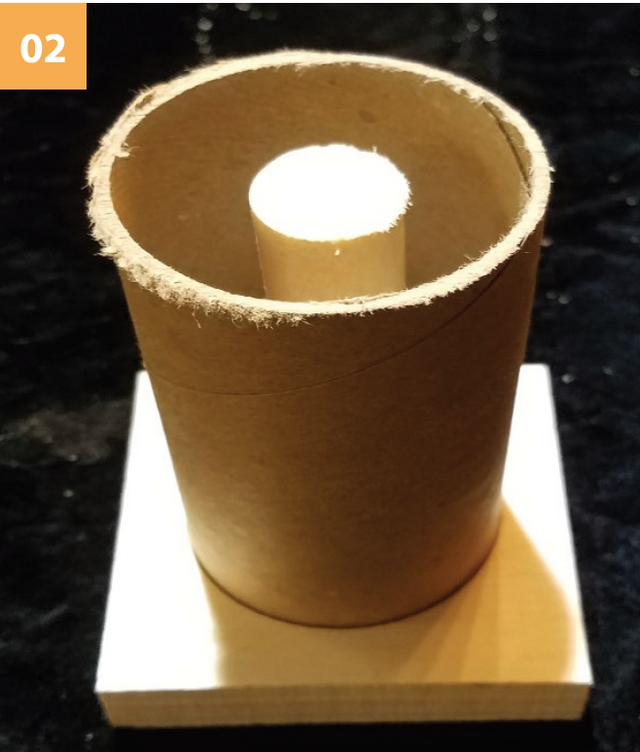
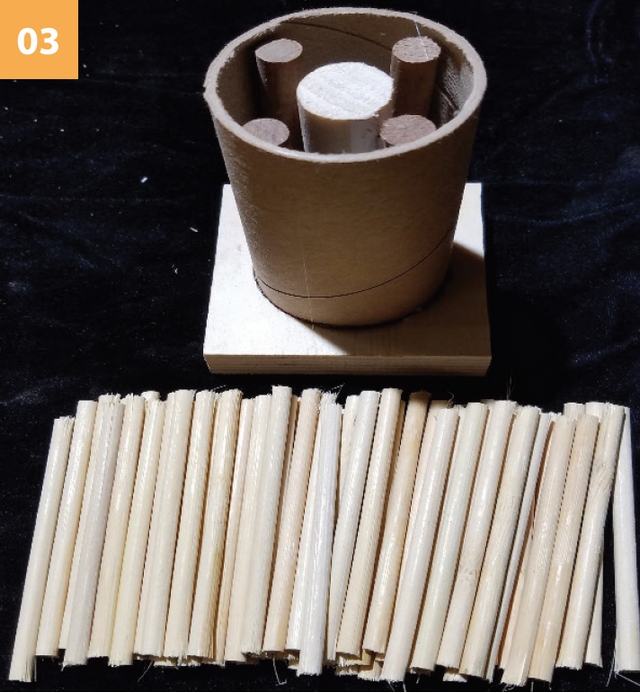
- One ¾” diameter, 4″-long dowel
- Four thinner, darker colored 4″-long dowels
- Several thinner, lighter colored 4″-long dowels
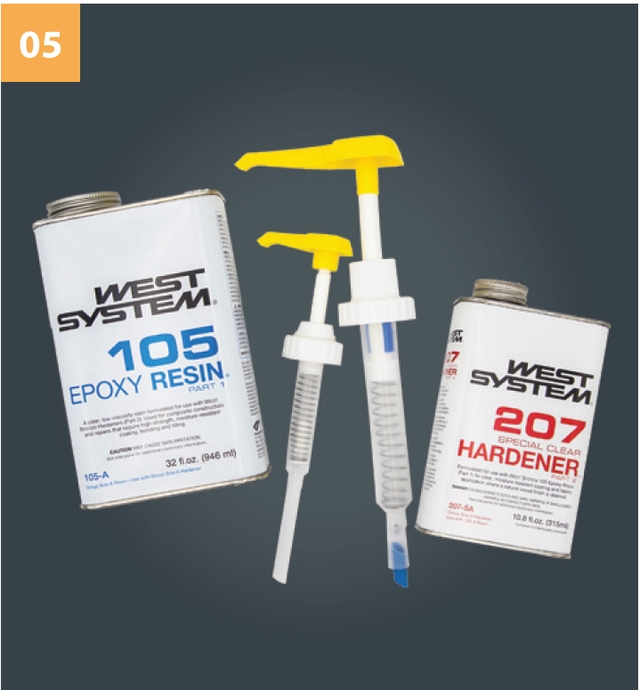
- WEST SYSTEM® 105 Epoxy Resin® and 207 Special Clear Hardener®
- Epoxy pigment such as WEST SYSTEM 502 Black Pigment
- Adhere the tube to the base
Mix a small batch of 105/207 epoxy and adhere the cardboard mailing tube to the wooden base. Allow the epoxy to cure.

- Epoxy the center dowel
Epoxy the 3/4″ dowel to the base, at the center of the mailing tube.

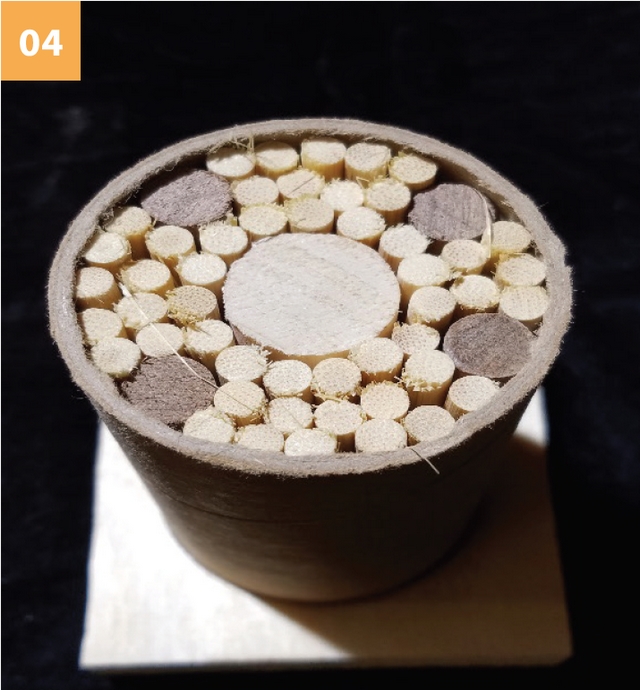
- Epoxy the darker dowels
Epoxy the four darker colored dowels to the base inside the mailing tube, around the center dowel.

- Insert remaining dowels
Insert the lighter colored dowels to fill the remaining space.
- Mix epoxy resin and hardener
Mix 105/Resin/207 Special Clear Hardener, then add pigment.
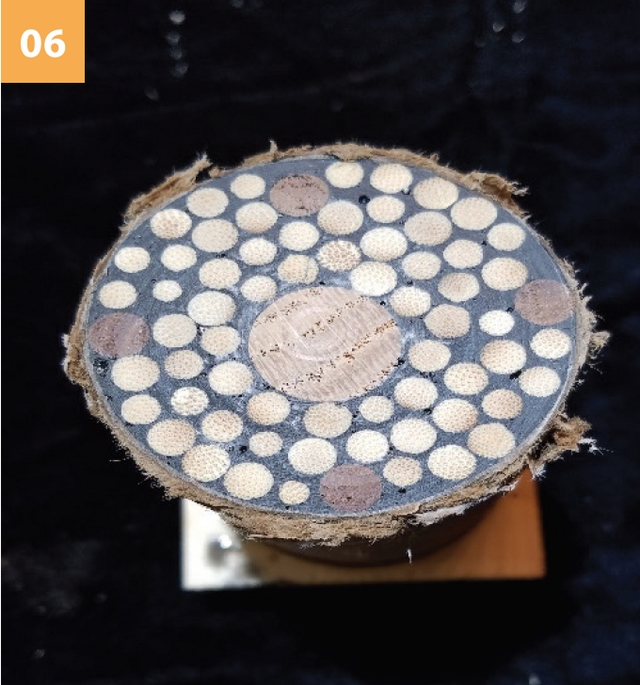
- Pour the epoxy
Slowly pour the epoxy mixture into the tube and allow it to cure. (See tip below for preventing epoxy from overheating.)

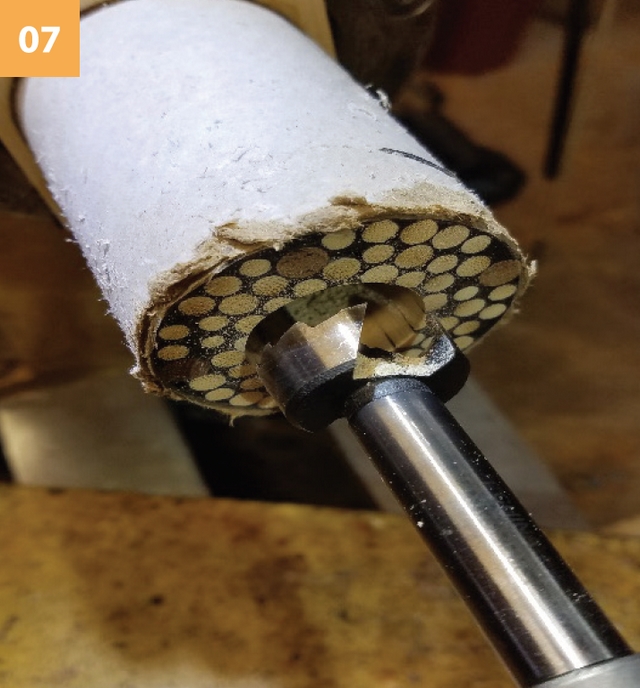
- Begin hollowing process
After the epoxy has fully cured, mount the tube on a lathe and hollow the vase.
- Turn the vase
Turn the wooden vase to the shape you desire.
Tips for success with your wood & epoxy vase
Stir epoxy resin and hardener for a minimum of 2 minutes, scraping the sides and bottom of your mixing container. Stir slowly to minimize introducing air bubbles.
If you’re using fewer dowels and your pour requires a greater volume of epoxy, pour it in multiple, smaller batches. Allow each batch to cool completely and reach the tacky “green” stage before adding the next. This will prevent uncontrolled exotherm (epoxy overheating and bubbling).


