By Tom Pawlak — Retired GBI Technical Advisor
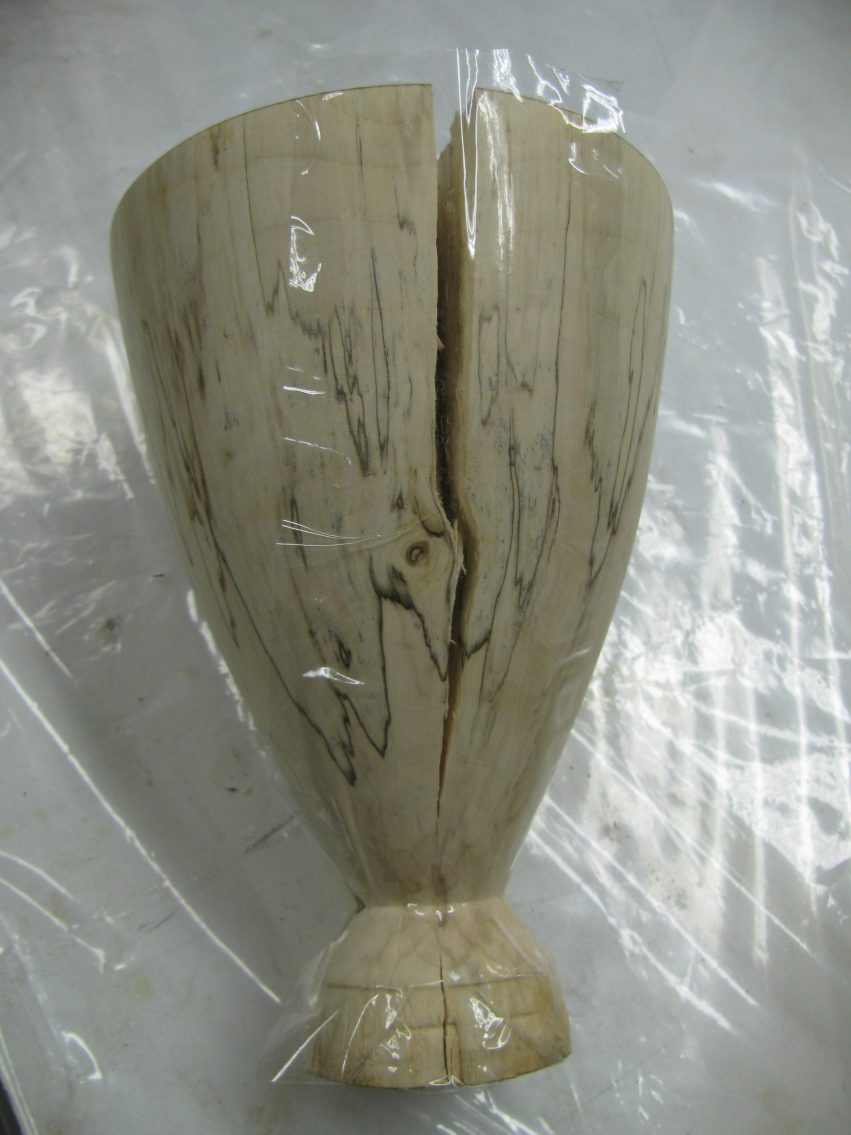
Vern, a good friend of mine, turned the exterior of a wooden goblet made from a nice piece of spalted sycamore. Unfortunately, the blank was not as dry as he thought and it cracked along one edge as it sat uncovered on his lathe overnight. He called to see if there was anything available for gluing it back together. I said I had some ideas and asked him to drop it off at work so I could take a stab at the repair.
I asked if he wanted me to match the wood color or to accentuate the crack by filling it with a dark epoxy. He decided a bold black crack fill might make for an interesting feature in the goblet so I went about setting up for the repair.
The first thing I did was dry the goblet a bit more so the wood would not continue to shrink after the crack was repaired. I put it in the warm/dry environmental hut we affectionately refer to as the Arizona Room. This room is set at 100°F with very low humidity. I meant to leave it in there for 3-4 hours in front of the forced air electric heat source. I came back three days later. (Yes, I had forgotten it over a weekend and the crack had increased in width from 1/8” wide to 1/4” wide- a 100% increase!) Embarrassed by the mistake and for the significantly wider crack, I called Vern to give him the bad news. He said, “That’s OK. It was junk before I called you. Just go ahead and fill the crack.”
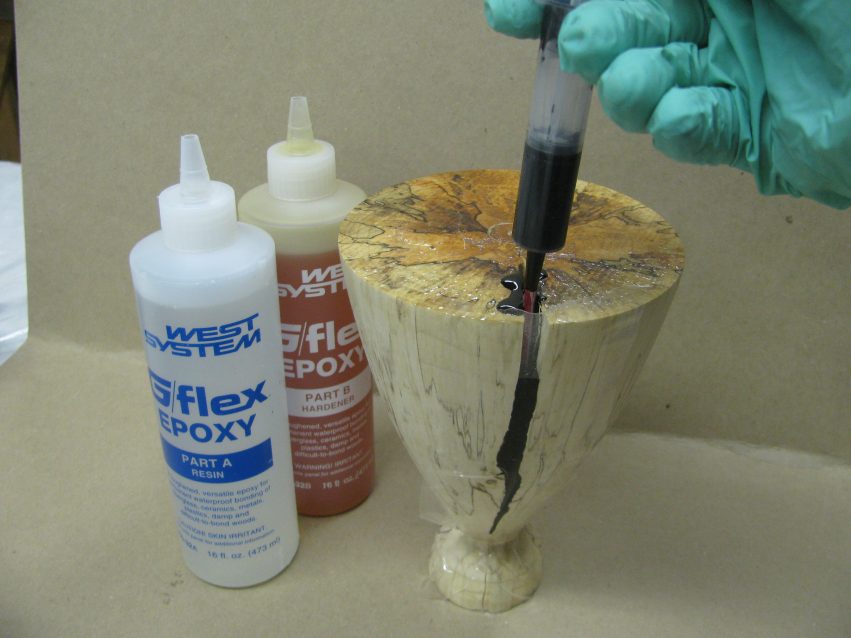
My plan was to use G/flex 650, the liquid version of G/flex, so it would flow down into the crack. I chose G/flex Epoxy over 105 Resin-based epoxy because it is more flexible and not as hard. It machines similar to wood when you cut it compared to 105 Resin/hardener based epoxy that is noticeably harder when cutting/machining. G/flex 650 Epoxy is similar in viscosity to room temperature honey and like honey is thinner when it is warm. I began by warming the goblet to 100°F. I covered the crack with clear Cellophane tape to keep G/flex from leaking and so I could see the epoxy as it filled the crack.

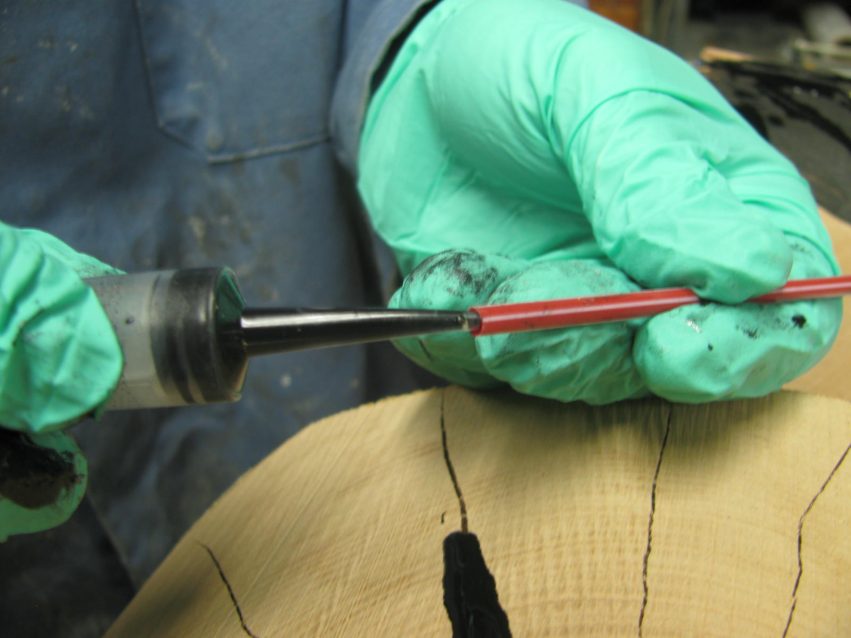
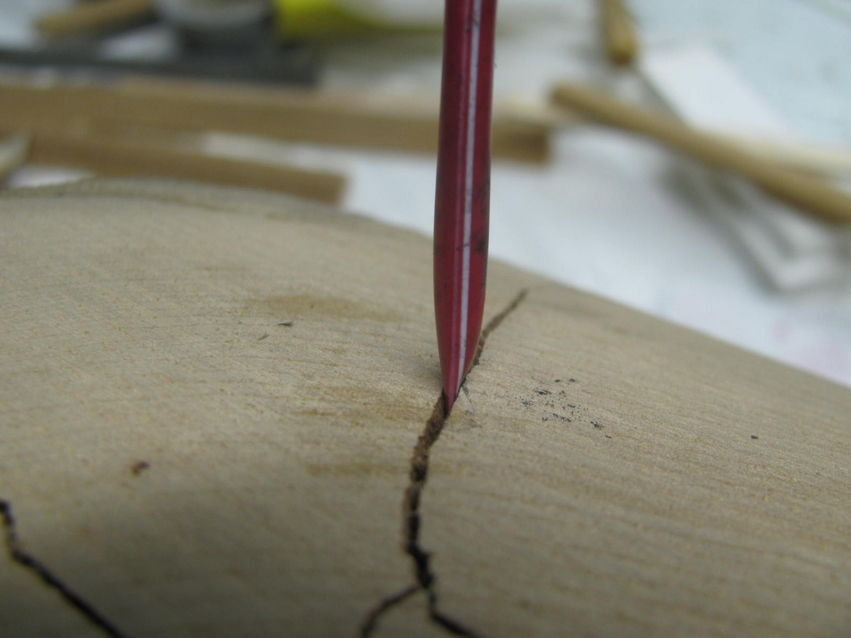
I added a bit of 423 Graphite Powder to the epoxy (see Bruce Niederer’s article Adding Pigments to Epoxy in EPOXYWORKS #21 for more ways to color epoxy). I mixed it thoroughly and used an 807 Plastic Syringe to inject it into the crack. To get the epoxy injected near the bottom of the crack, I slipped a 1/8” diameter plastic straw onto the tapered tip of the syringe (see photo) so the epoxy did not have far to flow.

Injecting the black epoxy into the 100°F wood lowers viscosity on contact which helps it flow into recesses of the crack and lets air bubbles rise to the surface and escape.


I called Vern the following day to let him know his goblet was ready to go. Vern reported later that when he turned the inside of the goblet on the lathe the cured G/flex turned just like wood with the shavings at times coming off the cutter in a continuous ribbon.
Vern eventually applied his favorite wood sealer and wood finish to give the goblet a nice subtle shine. I think from the attached photos you’ll agree that it was worth saving.


