

By Tom Pawlak — GBI Technical Advisor

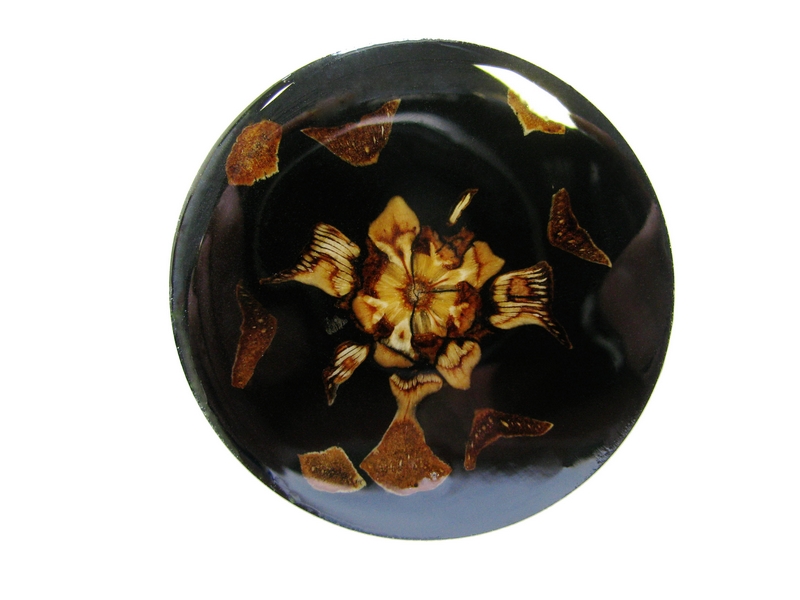
Some years ago I had the curious idea of cutting a dried black walnut in half on a band saw. That first look at the exposed insides of the nut grabbed me as very unusual, even surreal and not at all what I expected. I decided to seal the cut surfaces in epoxy which made them look even more unusual. I’ve made many since and love to see the reaction from people looking at them for the first time. I’ve been told they look like brain scans, polished geodes, and ink blots.
Now I keep my eyes open when I walk in the woods in search of different types of nuts. Like that first one, I bring them home, dry them, and carefully cut them on my band saw to reveal the secrets hidden within. I’ve found that I get a different look depending on if my cut is made parallel to the length of the nut or perpendicular to the length. I’ve even cut some on the diagonal.
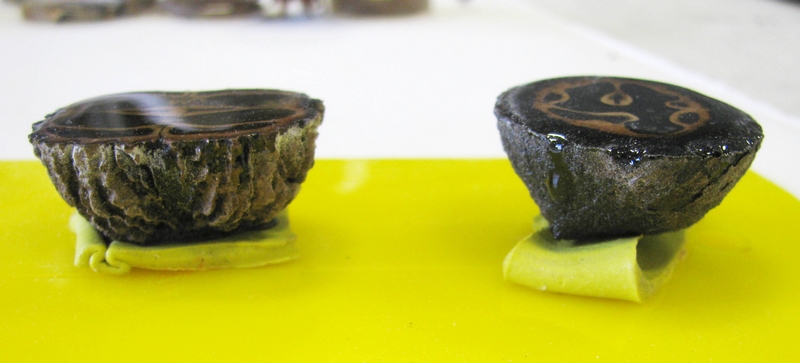
Sometimes I’ll drill a small hole at one end then inject epoxy into the nut to fill it before cutting it on my saw. That way, I can slice the nut into 1/8″ thick “veneers” without the nut meat falling out in pieces. More often, I cut them in half, set the uncut end onto a bit of putty or modeling clay to keep the cut surface level and fill the half nut with epoxy. Once the epoxy cures, I can cut them into veneers before sealing the faces with a generous coat of epoxy.
After years of experimenting by cutting nuts on different angles and using different types of nuts, I’m still having fun. Because of the unique images and the instant reactions people have at seeing them, I realize they have great potential for use in jewelry and art.
I’ve discovered a variety of walnuts, pecans and hickory nuts that range in size from 5/8″ in diameter (think earrings) to others just over 2″ in diameter (think pendant). Black walnuts have a fragile thick outer shell that can add greatly to the overall appearance if you can keep it intact while cutting the nut in half. You can see from the pictures how unusual they are but there is no substitute for holding one in your hand.
I’ve always preferred using WEST SYSTEM 105 Resin with 207 Special Clear Hardener for filling and sealing the ends but on occasion, I use G-5 Five-Minute Adhesive to seal the cut surfaces if I am working with children. That way they can take their “treasures” with them when they go back home.
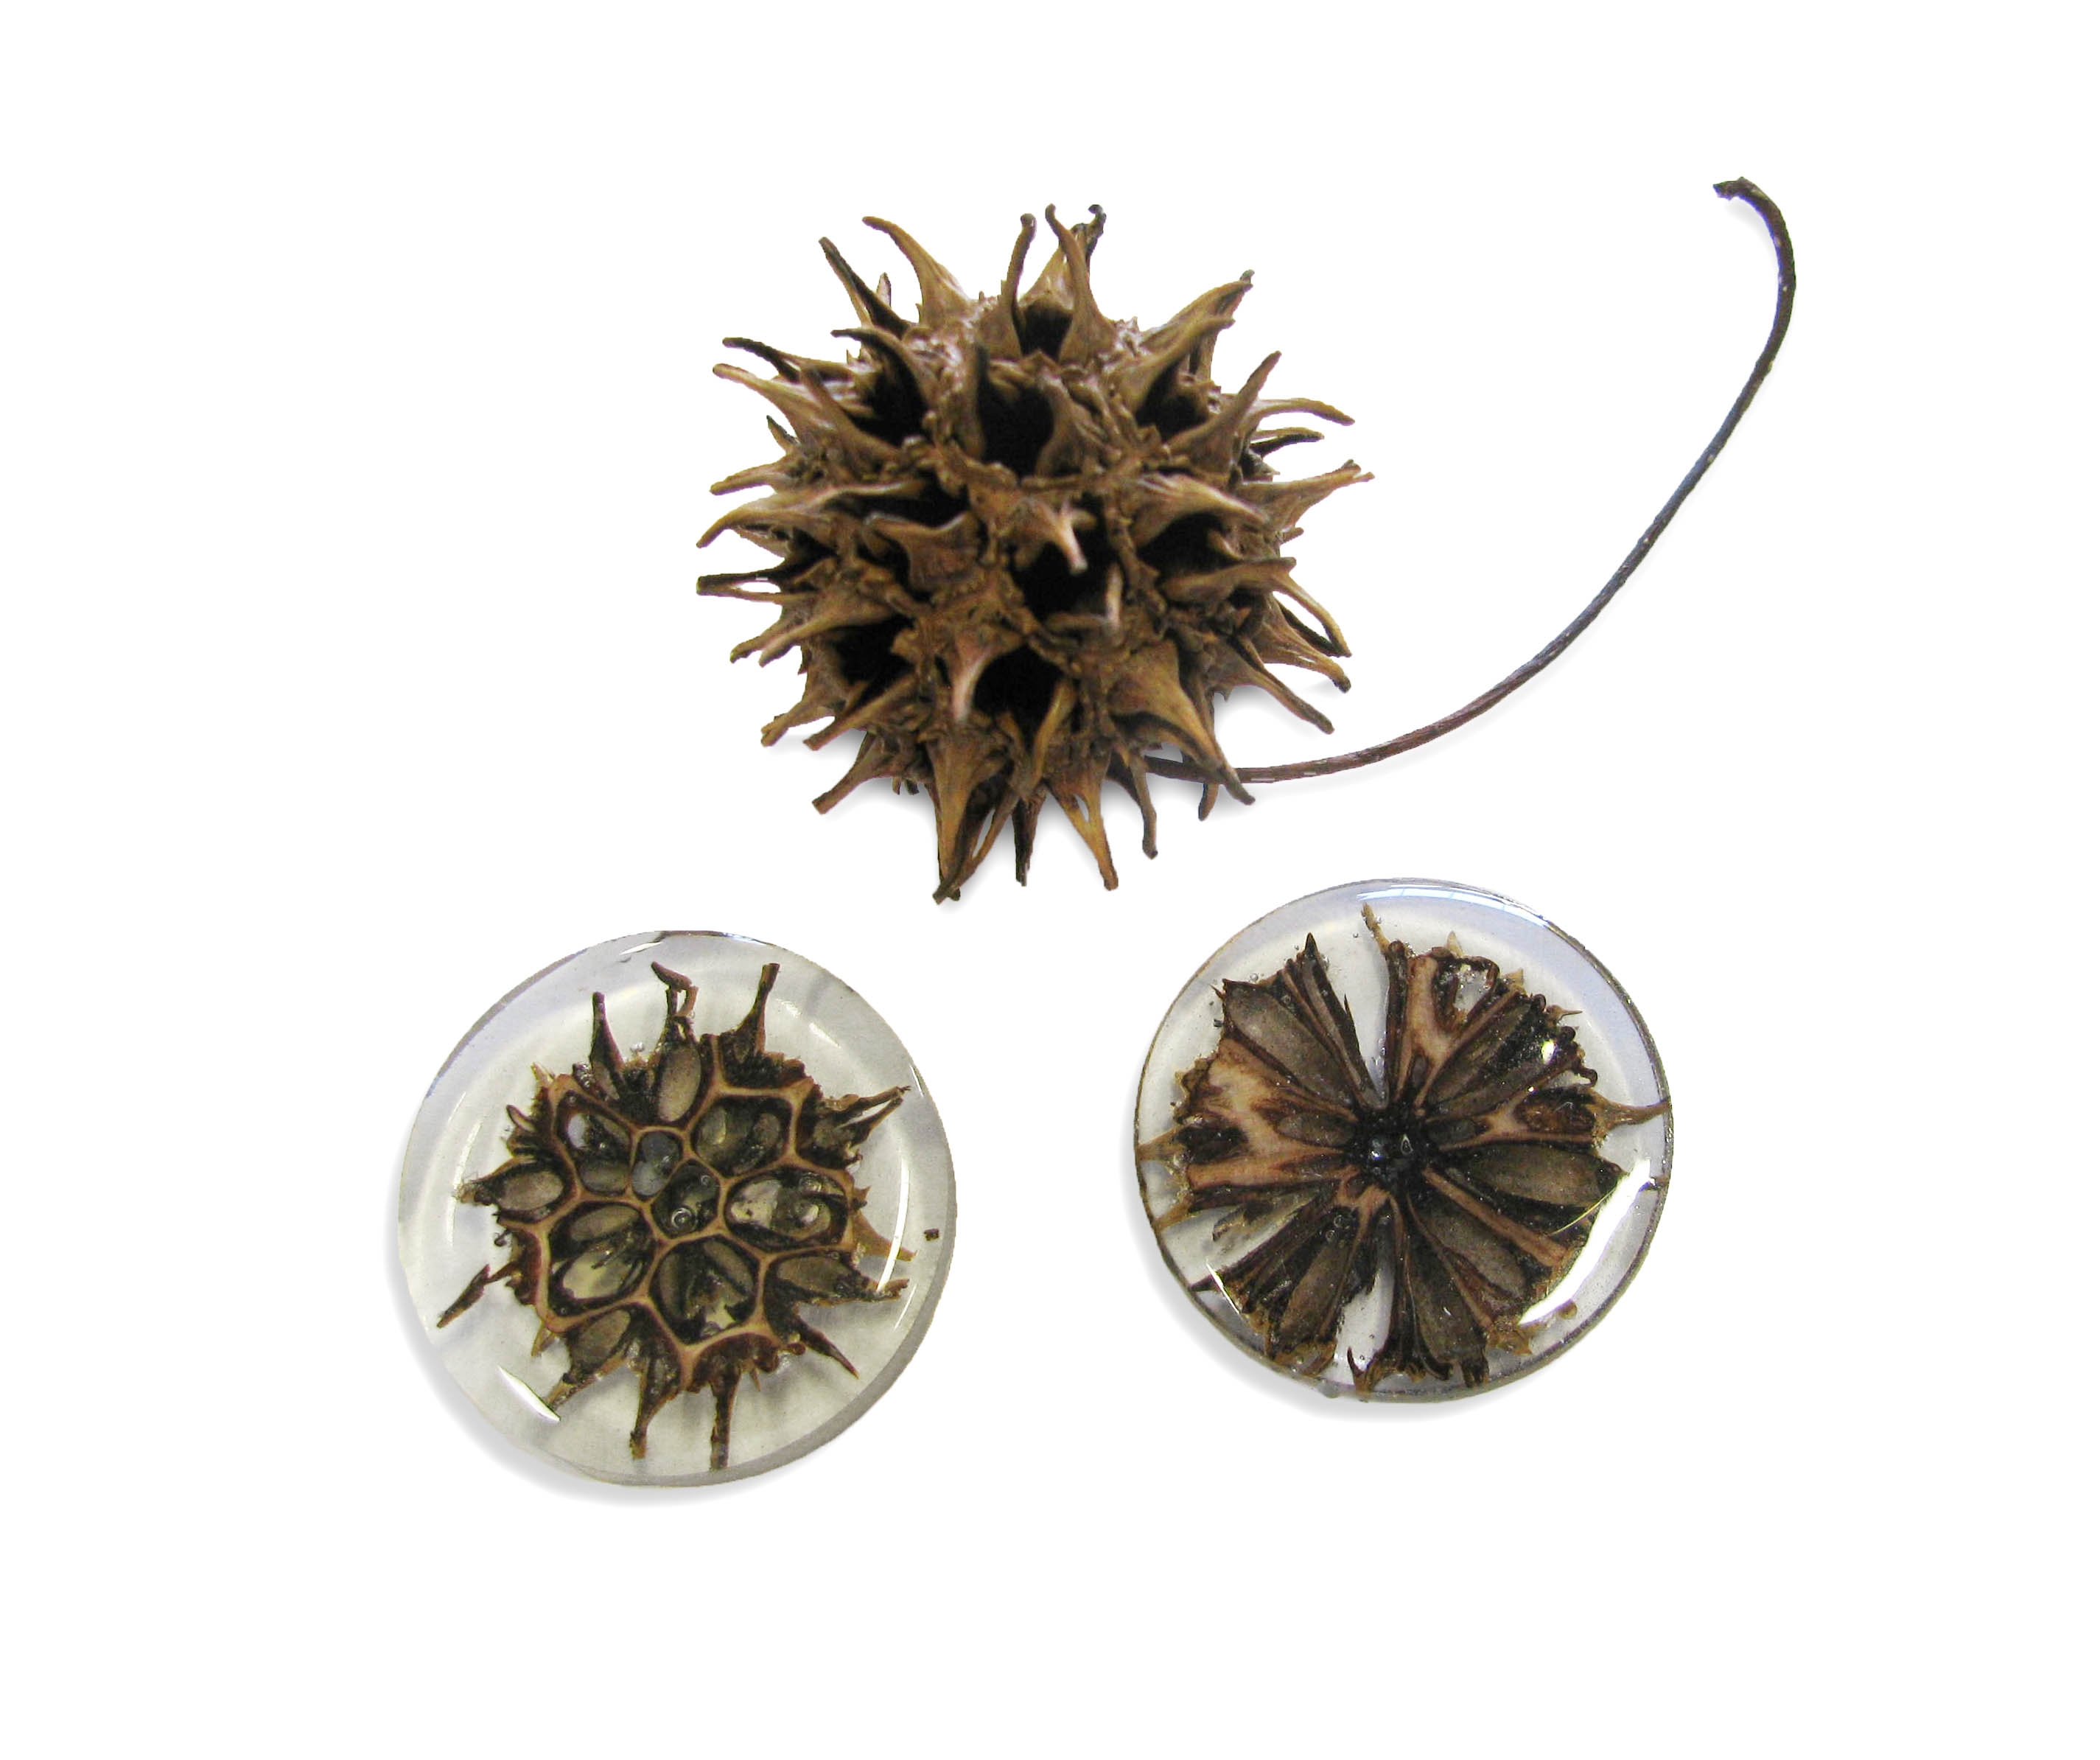
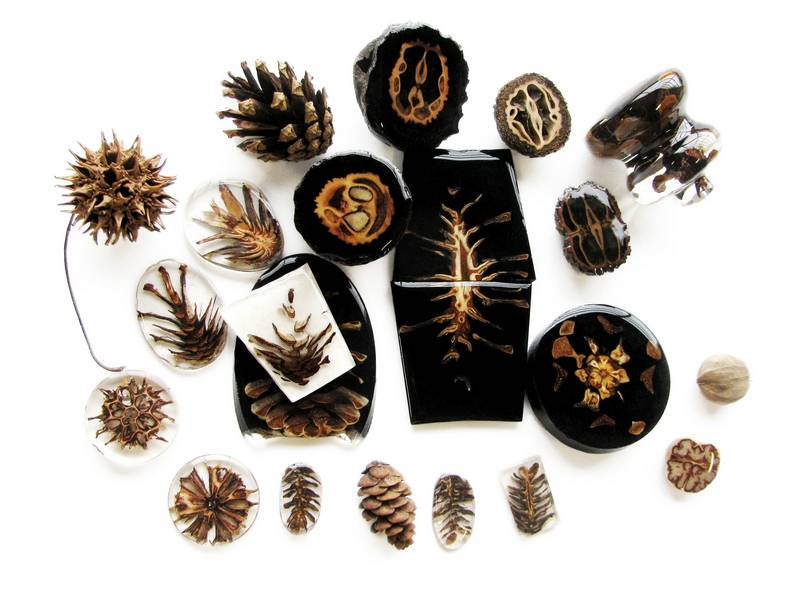
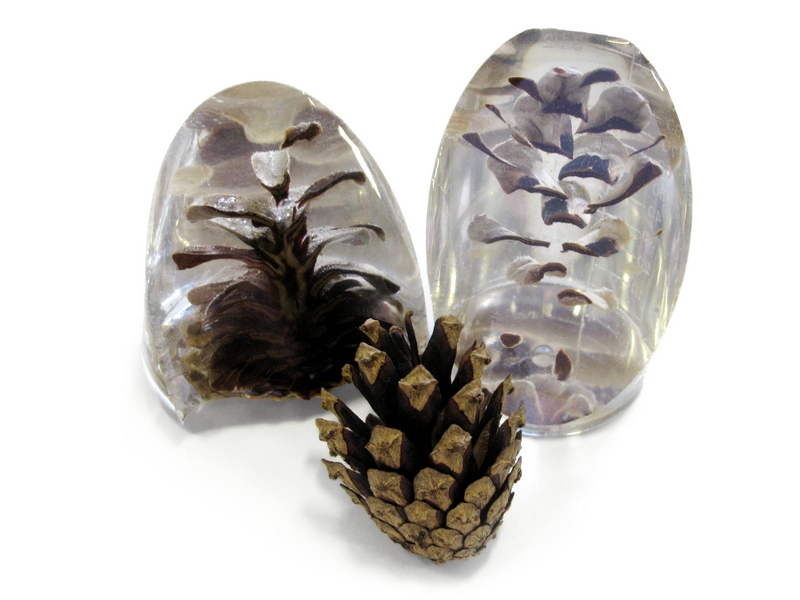
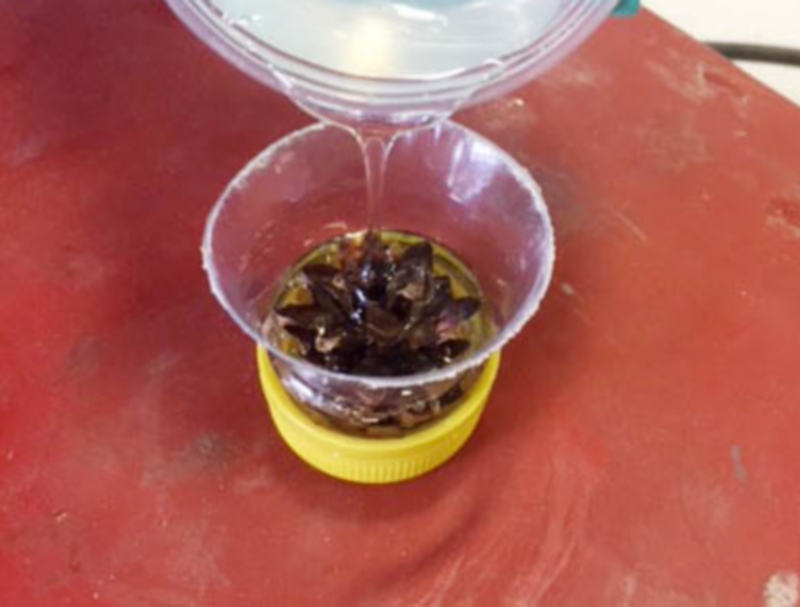
Recently I’ve been casting pinecones, spruce cones, and Sweetgum seed balls into the epoxy, letting them cure then cutting them into veneers. To avoid wasting epoxy, I use the narrow end of a plastic bottle and cast them into that. It allows the pinecone or Sweetgum seed to fit snugly in the neck of the bottle. I carefully pour epoxy over the item to ¼” to 3/8″ depths then set the container on a vibrator table for several minutes to help the air bubbles rise to the surface and escape. After an hour or two, I pour again repeating the process until it’s filled.
Once they’ve cured, I cut them into veneers that are then sealed with 105/207 to produce a rounded lens. The surface tension on the liquid epoxy applied to the cut surface allows it to “dome” a bit giving it a nice finished look after it cures. I use all of the tricks for breaking up air bubbles, including misting the uncured epoxy with denatured alcohol sprayed from a fine misting spray bottle, documented in “Bubble-Free Coating” (Epoxyworks 34) and “Bubble-Free Casting in Knotholes and Cracks” (Epoxyworks 45).
The photos show the fun I’ve been having. I hope the pictures inspire you to try making something similar for yourself.


