


When I retired three years ago, I had plans to do a lot of camping. We have a small travel trailer that we love, yet there are times when camping alone that I prefer to keep things simple by leaving the trailer at home. Sleeping in the back of my small SUV works fine for me. There is even room to bring my canine pal along.
One of the challenges with car camping is getting fresh air without allowing mosquitoes in for their blood-letting endeavors. I decided to devise a simple window screen that can be easily attached and removed. The screen panels that I came up with can be made in a weekend. The thing I like most about them (besides the fact that they keep the mosquitoes out) is that they store flat and unnoticed under the mat in the back of my car.
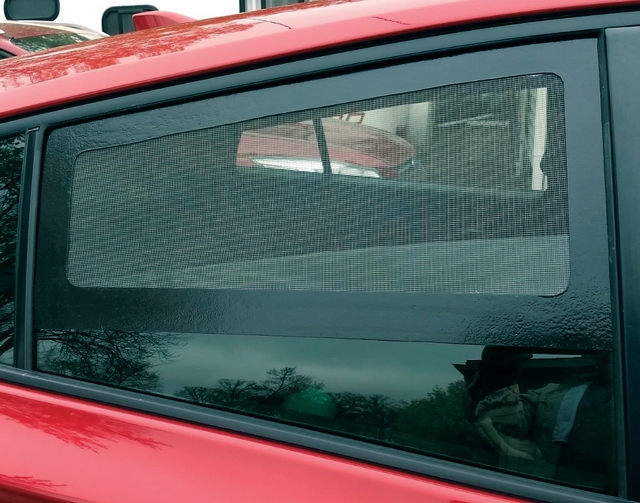
My plan was to design a screen frame that was thin enough to fit between the car windows and the rubber seal that the window slides up and down as the windows are raised and lowered. The window screen frame would need to be no more than 1/16″ thick.
The window screens work extremely well. While you can purchase window screens for cars online, to me these look like a one-size-fits-all approach that is bulky and time-consuming to install.
I made a set of custom window screens for each of our cars. One set of screen frames were made from leftover fiberglass scraps and epoxy. The other set of frames were made with 1/16″ thick cardboard (not corrugated) that I saturated with epoxy. Once the epoxy on the frames was cured, sanded smooth, and painted, I glued a flexible plastic window screen to the inside of the frame with West System® G/5® Five-Minute Epoxy.
I think you’ll agree that they look good. Best of all, they store flat and out of the way when not in use. If you are interested in making a set for your vehicle, here’s how:
How to make DIY window screens for your car
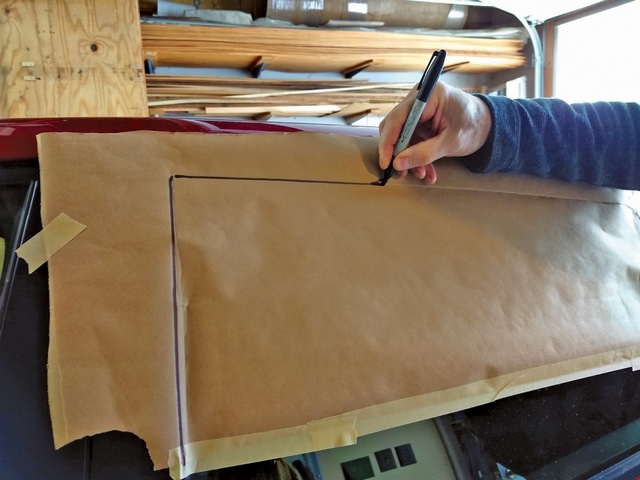
- Create a template
Create a template using clear plastic film or craft paper on the car window opening. Make the template large enough to cover a half-opened side window.

- Trace the edges of the car window
Hold the plastic film or paper in place with tape while tracing the edges of the window. Add a ½” or so on each end to extend under the rubber seal.
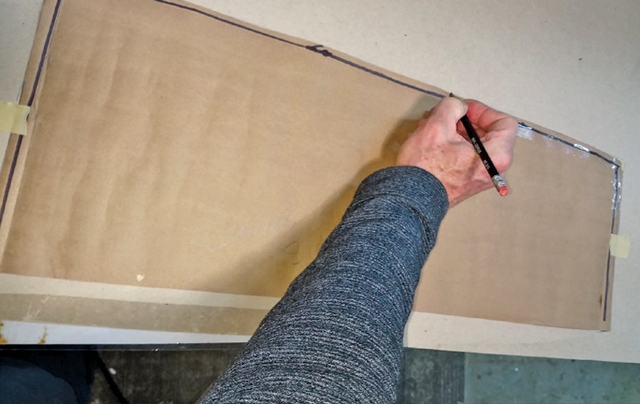
- Cut to shape
Transfer the template to your cardboard or fiberglass screen frame stock. Cut to shape with scissors, snips, or a utility knife.

- Test the fit
Test the fit on your car window to make sure the frame lays flat against the window after the edges have been slid under the rubber seal. Trim as needed.
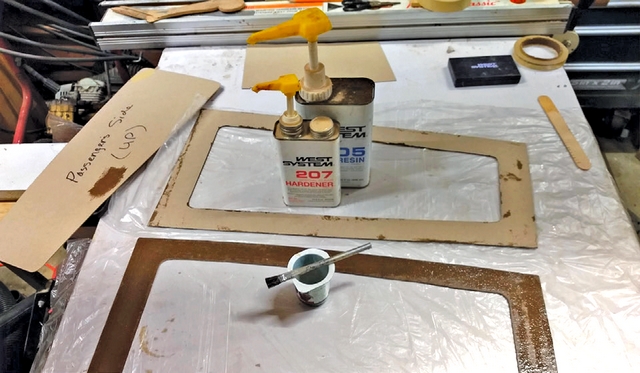
- Apply a slow-setting Epoxy
Apply a slow-setting WEST SYSTEM® Epoxy such as 105 Resin® with 206 Slow Hardener® or 207 Special Clear Hardener® to the cardboard. Keep applying epoxy, letting it soak in until the cardboard is saturated. (Alternatively, you could use two layers of 10 oz. or three layers of 6 oz. fiberglass cloth saturated with epoxy if you have fiberglass scraps on hand.) Be sure to work on a flat surface protected with thick plastic film or protect the surface with multiple coats of a mold release like Carnauba wax.

- Complete the epoxy coating
Allow the epoxy to cure, then flip the frame material over and coat the other side. Continue applying epoxy as it soaks in, and remember to apply epoxy to the edges as well.
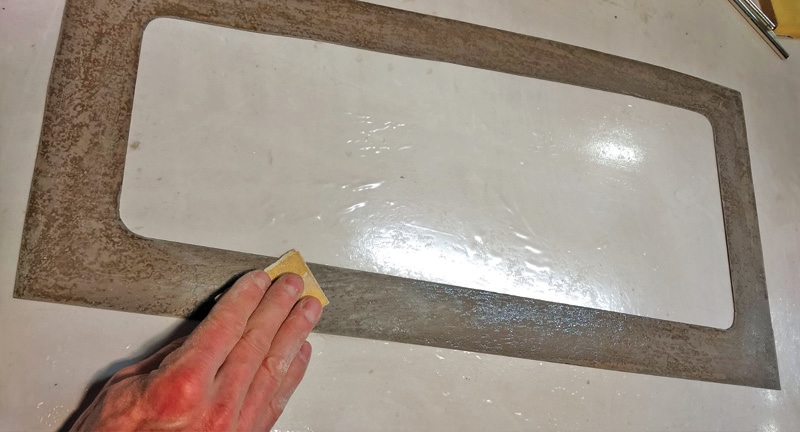
- Sand the surfaces dull
Allow the epoxy to fully cure, then sand surfaces dull and remove any burrs from the edges.
- Apply paint
Apply a plastic-compatible paint such as Rust-oleum® Universal Paint and allow it to dry. I like their Hammered Finish Paint because it provides a uniform dimpled finish that hides scratches and imperfections extremely well.
- Glue in window screen material
Flip the screen frame over, dull the backside with sandpaper, and glue in plastic window screen fabric (available at hardware or building supply stores) with G/5 Five-Minute Epoxy.
Installation
To install the new screen frame on your car, begin by lowering the window a bit. Slide the front edge under the rubber seal, then work the back edge of the screen frame under the rubber seal. Slide the screen frame up and under the seal at the top of the window opening. All is good if the frame fits a bit snug under the rubber seal and the bottom edge of the window screen lays flat against the top two inches of the window glass.
If the screen frame bubbles up along its bottom edge, you likely need to trim it slightly so it can be slid a bit further under the window seal. Keep trimming and test fitting until the bottom of the screen frame lays flat on the top edge of the window. Once that is done, you have successfully completed your own set of custom car window screens. Congratulations!
In the event of rain, your car windows can be raised while the screen frames are in place.


