Common Errors in Fiberglass Laminate Repair
Spring 2014

GET STARTED
FREE PRINT & DIGITAL EDITIONS
Spring 2014
While most of our customers are successful when using WEST SYSTEM Epoxy to repair a damaged fiberglass laminate, we have become familiar with some common errors that are easily preventable. These mistakes are made by both professionals and amateurs. The information discussed in this article is available in our Fiberglass Boat Repair Manual and WEST SYSTEM User Manual, and on the WEST SYSTEM website.
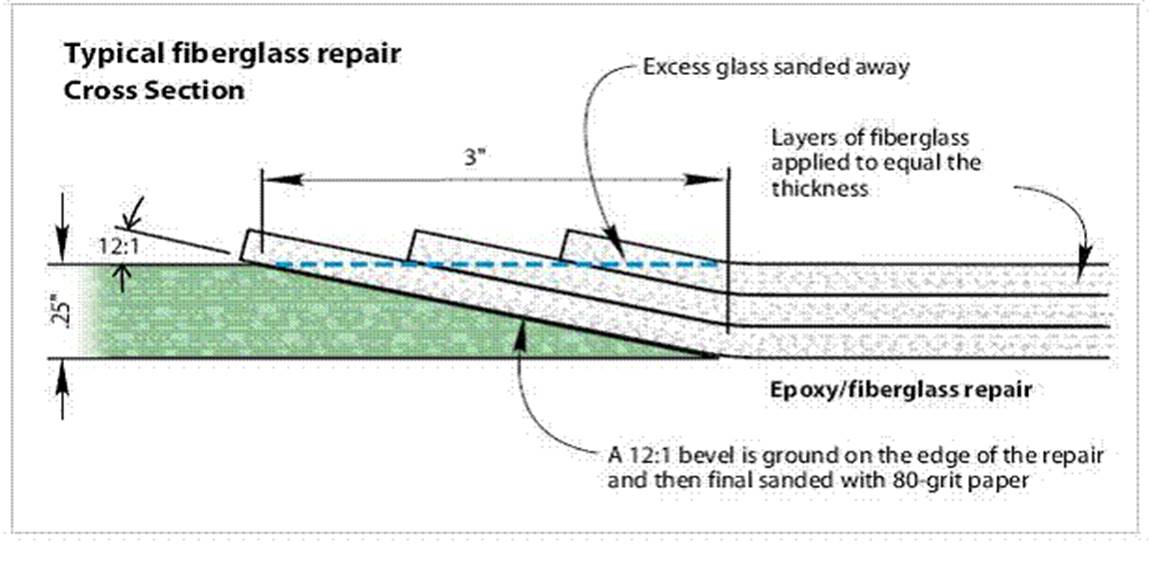
This diagram illustrates how we recommend laminating a repair after the damaged fiberglass has been removed. It is critical that the scarf angle is at a minimum ratio of 12:1 and that the patch thickness matches the original laminate. Matching the original thickness ensures that the stiffness will be the same as the surrounding area, reducing the chance of a crack around the repair area.
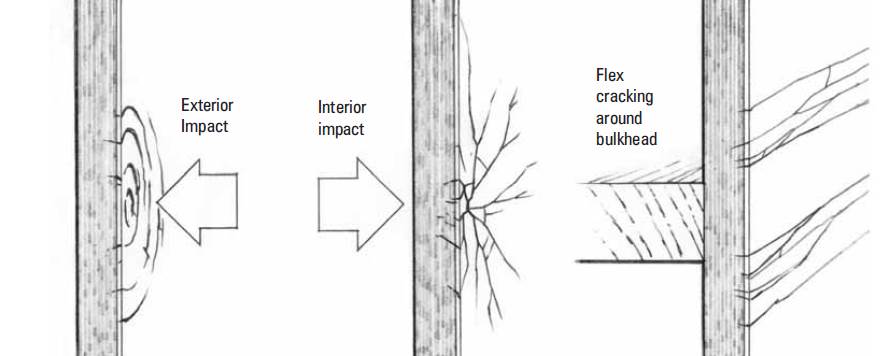
Finding the root cause of the damage can ensure that your repair holds up well for years. Stress cracks can help us understand what caused the damage. They may indicate whether something inside the boat has broken loose and caused the damage or if it was caused by something hitting the boat from the outside. The cracks can also point to a structural defect that must be corrected.
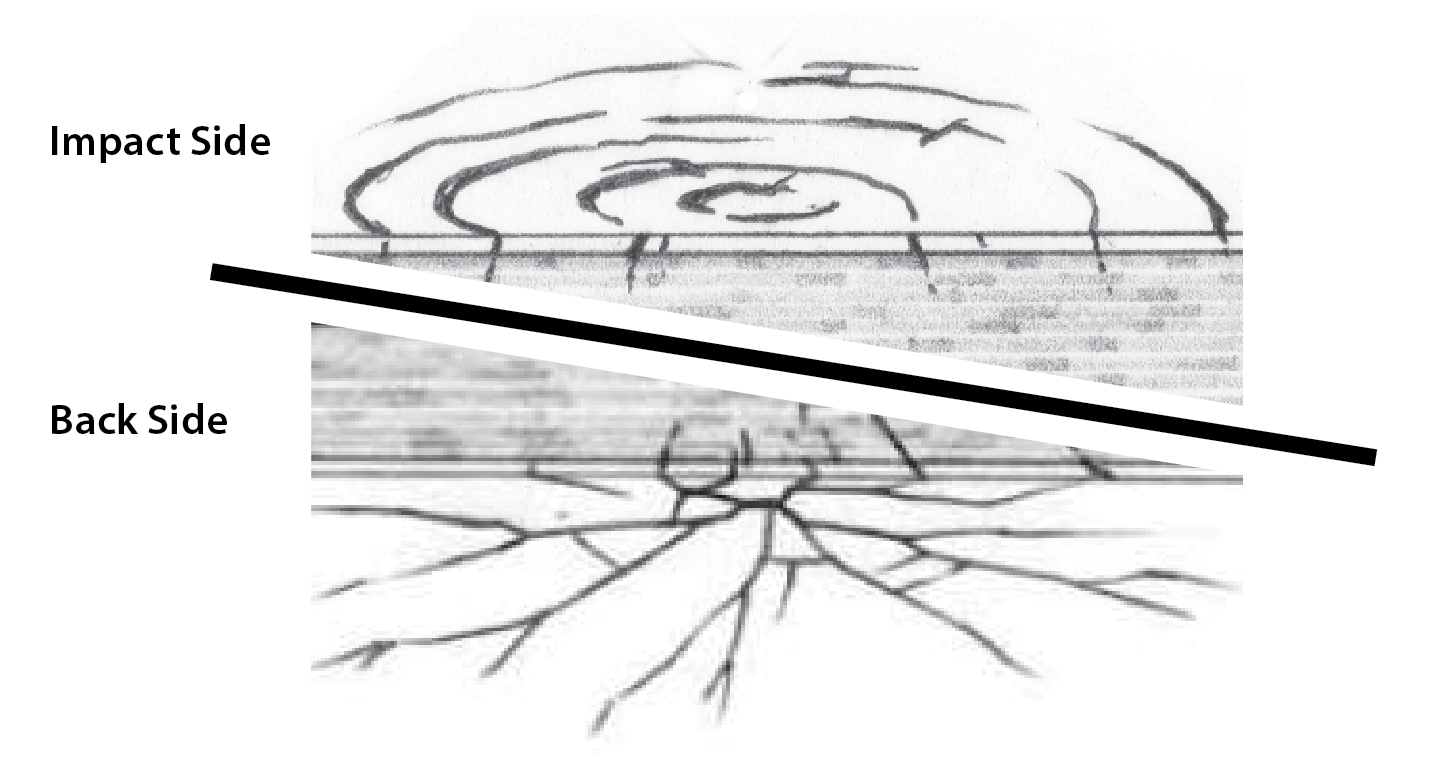
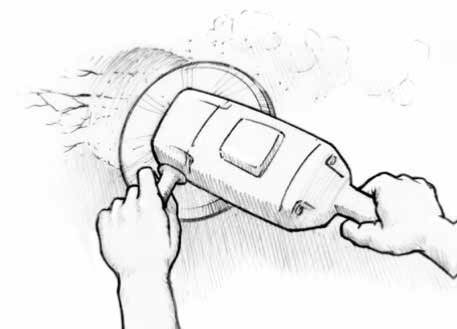
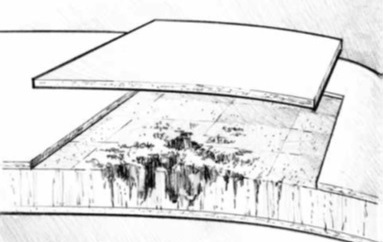
With a cored composite, damage can be hard to evaluate when just looking at the outer skin. To fully assess the damage inner and outer skins and the core must be seen. These pictures show a fiberglass/wood/fiberglass laminate that looks only slightly damaged on the impact side, but the back side has a significant amount of broken fibers. When there is no access to the back side, you may need to grind away the outer skin and core to inspect the inner skin.
Adhesion failure in the repair laminate is the most common failure mode for fiberglass repairs. To ensure good adhesion it is critical that the repair patch is adhered to undamaged laminate. This requires identifying and removing all damaged material.
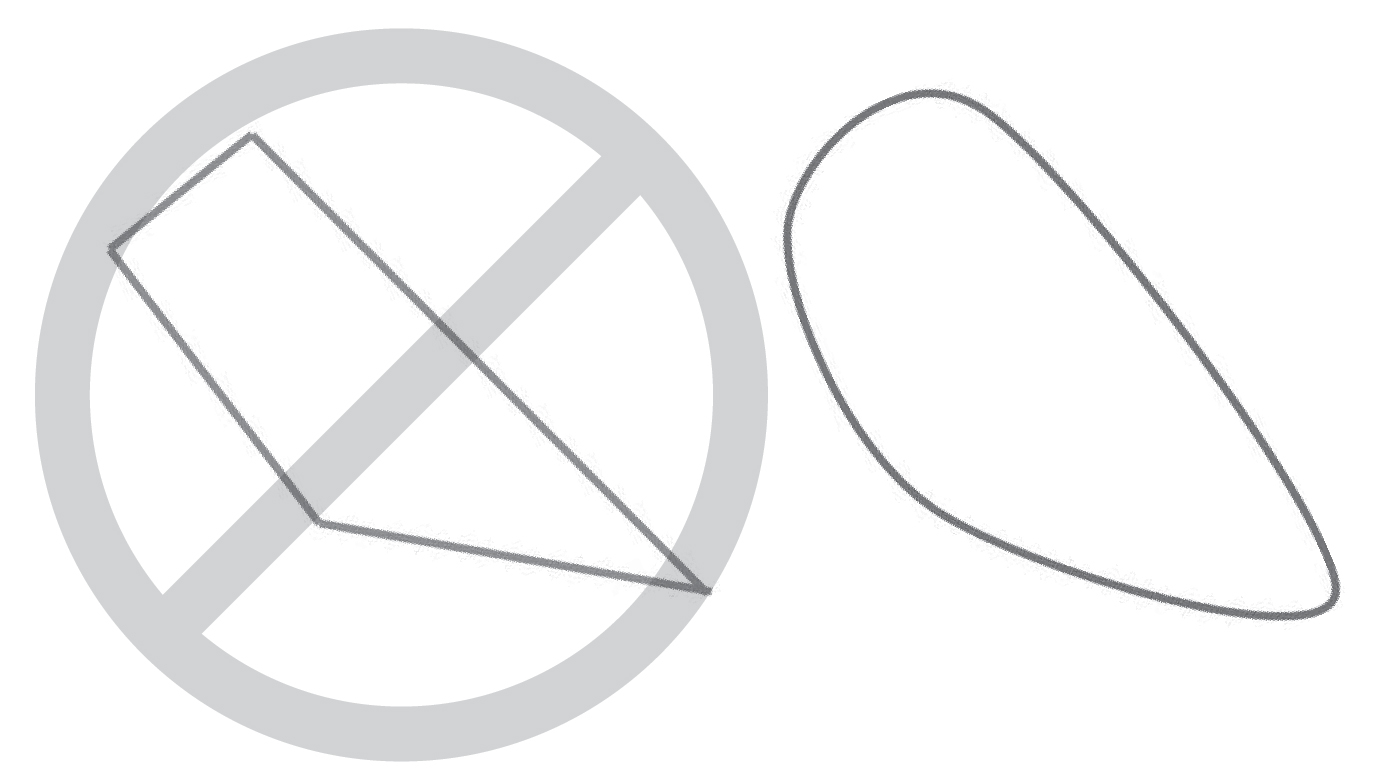
Corners can be described as stress concentrations. Machinists know this and avoid creating any sharp corners, machining a radius whenever possible. The same principle applies to fiberglass repair. Before grinding the scarf onto the surface, take the time to create a nice rounded shape to the repair area.
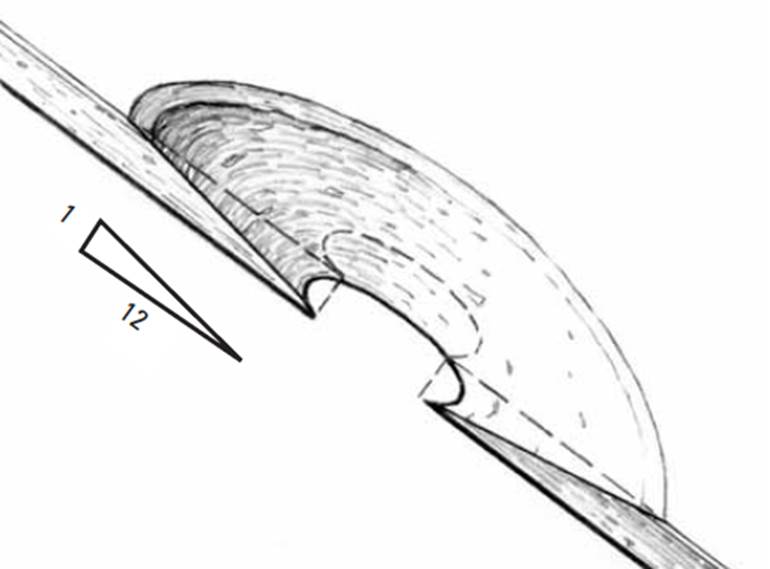
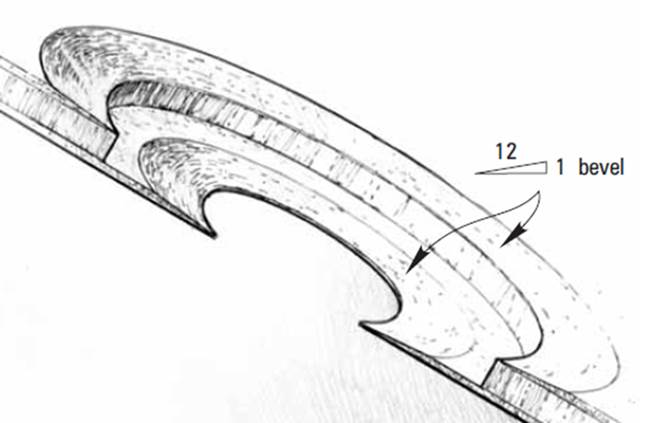
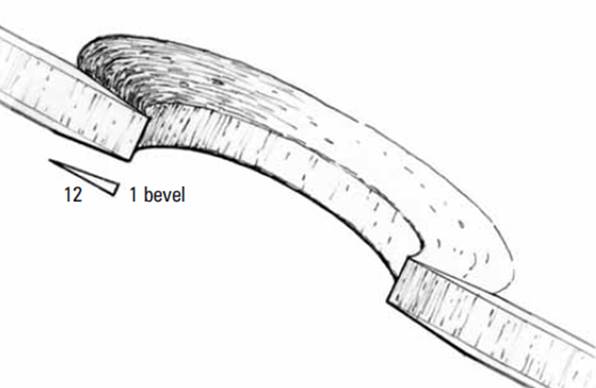
The scarf on the original laminate helps in many ways. It creates a substantial amount of surface area for adhesion and provides a transition zone so that the difference in properties of the new and original laminate are not concentrated at one point. We suggest a minimum 12:1 ratio between the length of the scarf and the laminate thickness. This ratio applies to both skins when repairing a cored laminate.

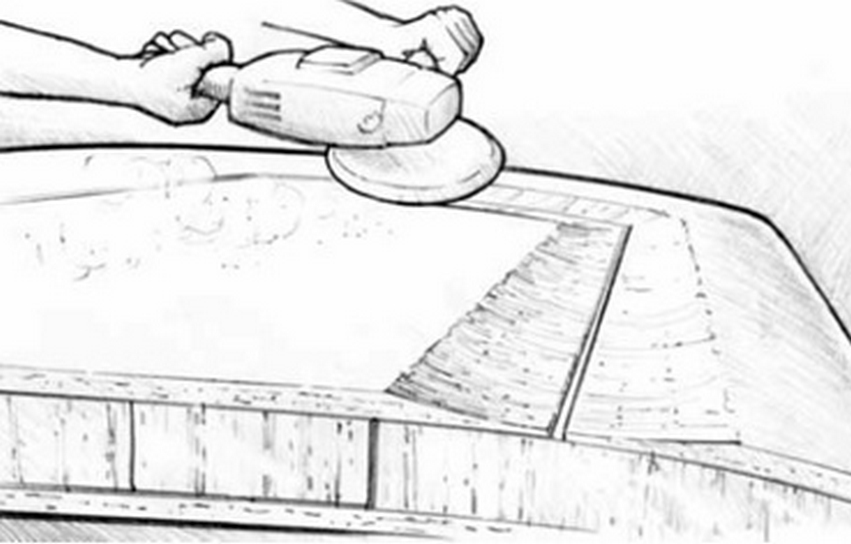
The removal of the damaged fiberglass laminate and creation of the scarf can be done with electric or pneumatic grinders and a 36-grit abrasive disc. Once everything is machined to the proper shape, the surfaces should be sanded by hand with 80-grit sandpaper. This is important because the high RPM power tools can generate significant heat that can soften the surface, resulting in a less-than-ideal surface profile for adhesion.
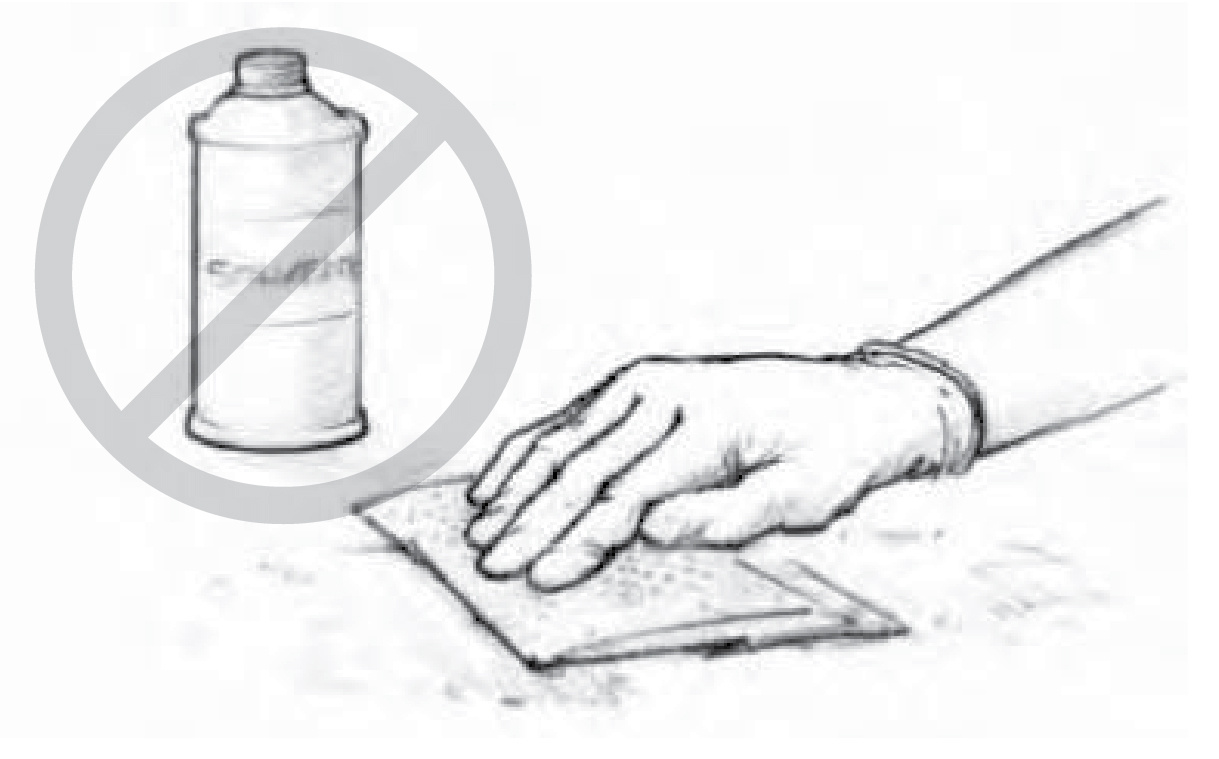
The final hand sanding with 80-grit sandpaper results in an ideal surface for WEST SYSTEM Epoxy adhesion. The sandpaper has exposed resin and fiberglass that has only been touched by the sandpaper so there are no contaminants on the surface. Wiping it with solvents increases the risk of introducing contamination either from the rag or a recycled solvent.
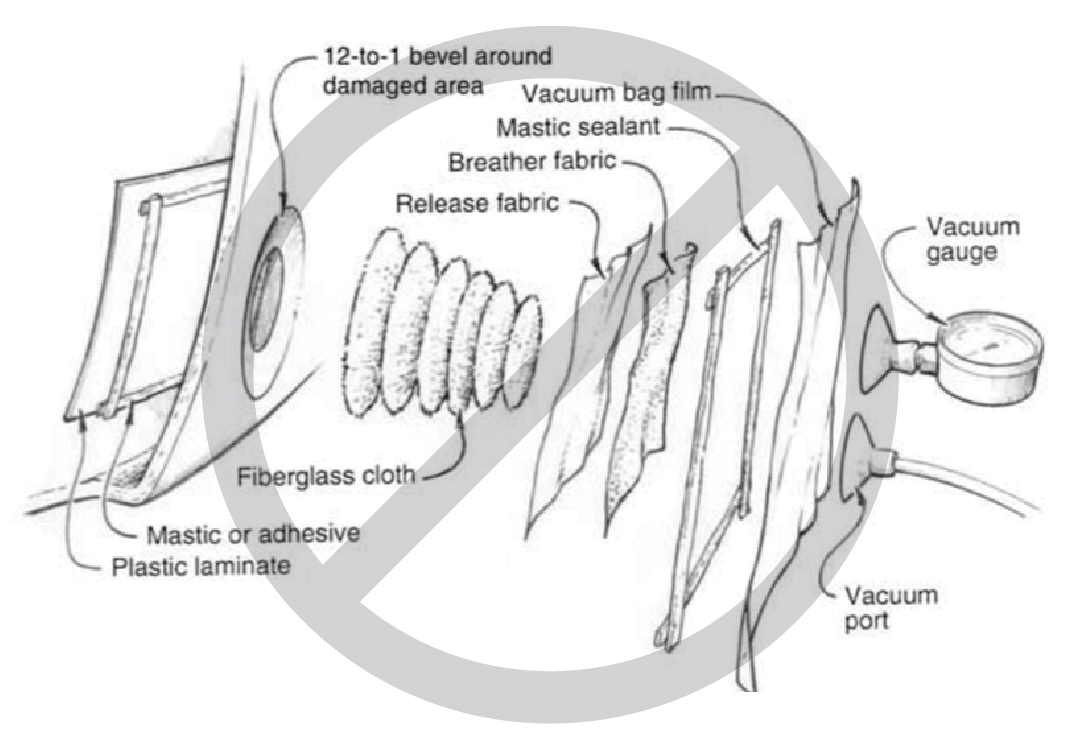
When using a vacuum bag the surface that the bag is sealed against must be airtight. This can be difficult enough when using a mold so in the case of vacuum bagging to a laminate the risk of a leak is substantial. If there is a leak then too much epoxy will be pulled out of the laminate leaving a dry, weak repair patch. It is also important to match the thickness of the repair laminate to the original laminate. If the repair laminate is too thin from being compacted by a vacuum bag it may not be as stiff as the original laminate; if the repair is thicker than the original, it may be much stiffer which can concentrate stress around the perimeter, possibly resulting in cracks.
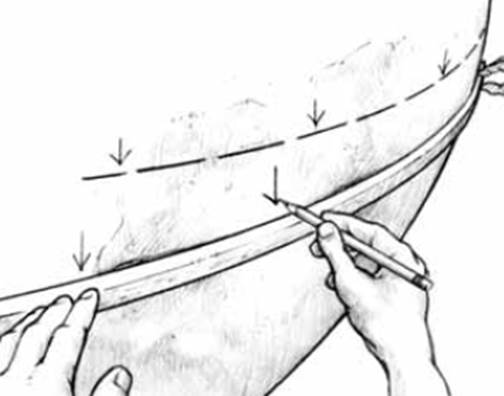
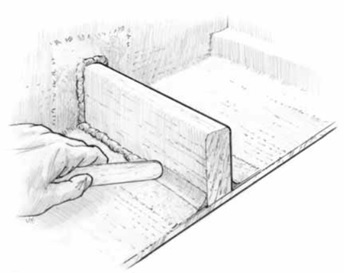
It is well worth spending the time to find the high and low spots before applying fairing compound. This is accomplished by using a long batten, as shown in the picture. When the high and low spots are defined it is easier to develop a strategy of what locations need fairing compound and where added thickness is not needed, resulting in less sanding. This also increases the likelihood that the repair will be fair with the unrepaired areas. The WEST SYSTEM Final Fairing & Finishing manual is an excellent guide to saving time and getting great results when finishing the repair.

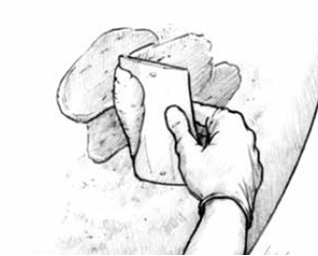
It is important to use a longboard when fairing large flat areas. In many cases, sanding tools designed for automotive bodywork will not work well because boats often have much larger areas to sand. Also, in automotive work the original metal surfaces are much harder than the body filler. In fiberglass boat repair the repair area may have hardness very similar to the original laminate and you can accidentally change the shape of the surrounding area. Plan on using a variety of sanding tools if you are dealing with a repair that bridges both a flat area and a detailed area such as a chine or gunwale.

A common fiberglass laminate repair is replacing a damaged core, often because of water absorption. In many of these repairs, the fiberglass “skins” are in great shape but need to be peeled off to replace the core. Bonding the original skin back onto the new core can save significant time and money. The only fiberglass required will be around the perimeter of the removed skin. This is a very nice technique when dealing with molded non-skid patterns.
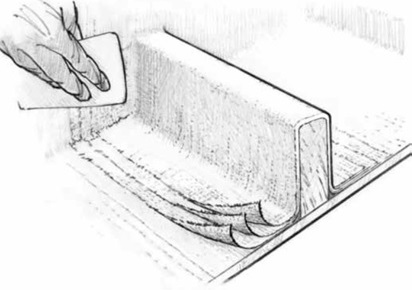
Sharp corners can cause a problem in the laminate just like they can in the shape of the repair area. Smooth the transitions with thickened epoxy to make a fillet on inside corners. Also, when tabbing stringers and frames into place, taper the layers to create a nice thickness transition.
When fairing the repair, plan on applying at least three applications of fairing compound. Applying thick layers of fairing compound can trap air bubbles and cause you to lose the shape of the surface that you have carefully mapped as mentioned earlier. Although applying fairing compound in multiple layers may seem to take more time, you’ll actually spend less time sanding. Multiple layers will make it more obvious where the fairing compound needs to be applied. We also recommend completing the fairing work with a thin coat of unthickened epoxy to provide a nice solid surface for the final finish.
Download a free copy of WEST SYSTEM Final Fairing & Finishing


