Coating Small Parts
Spring 2021

GET STARTED
FREE PRINT & DIGITAL EDITIONS
Spring 2021
Pre-finishing parts with WEST SYSTEM® Epoxy before installation is a technique that was popularized by guess who? The Gougeon brothers. It can save time and increase the quality of the finish. Coating small parts can also be a challenge, but it’s much easier if the parts are held in a way that provides good access for roller and brush coating.
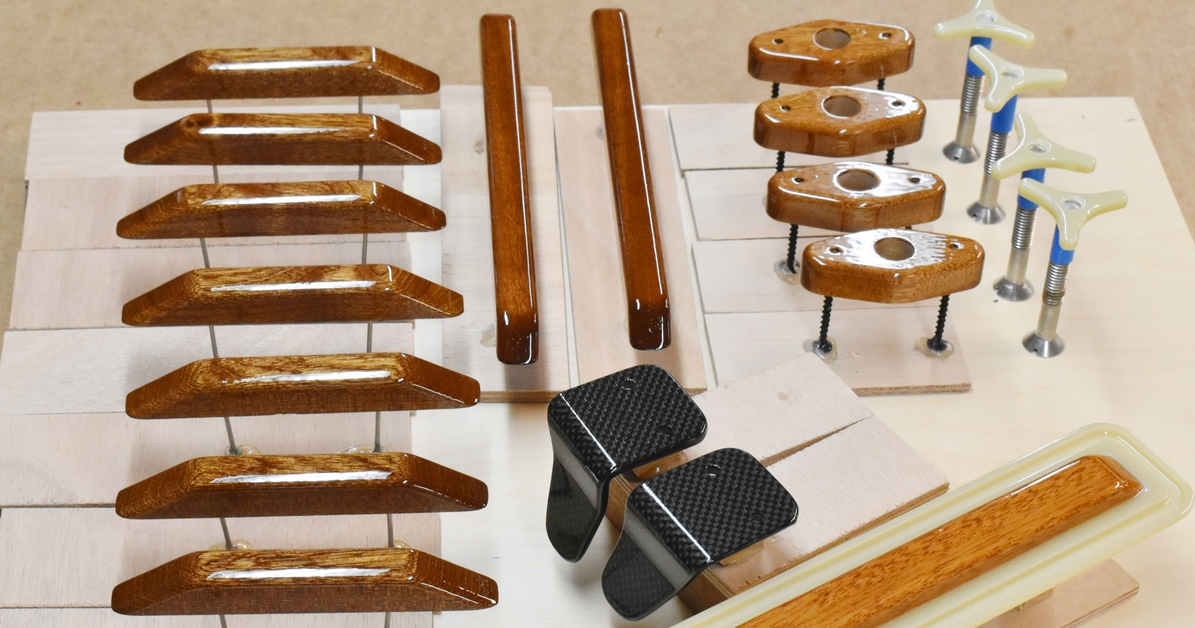
Our Port Townsend Watercraft dinghy kits have a lot of small parts; foot braces, oarlock riser blocks, alignment clips, daggerboard trunk cap, etc. Some of these parts must be pre-finished before installation, but I find that even parts that could be done later are often easier to finish before installing.
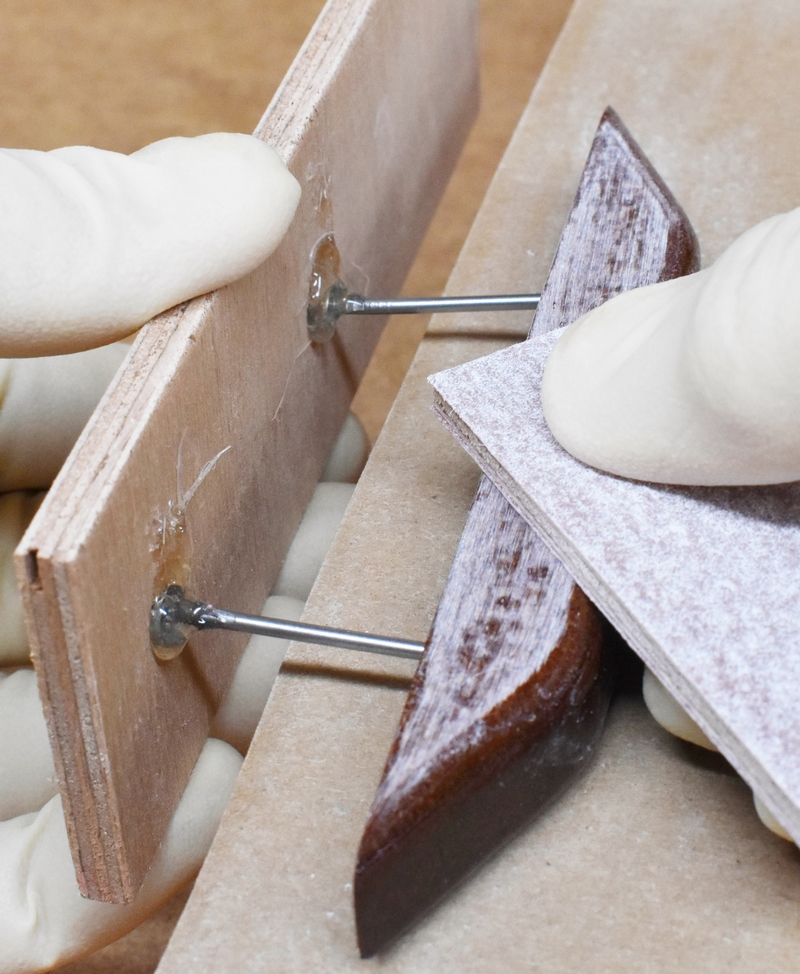
When fixturing (holding) the parts for coating, allow good access to the surfaces that need coating and provide a base that can hold the part upright and be used as a handle. There are many ways to do this, but I often use a hot melt glue gun, scrap plywood, nails, screws, and dowels to make bases for the parts.
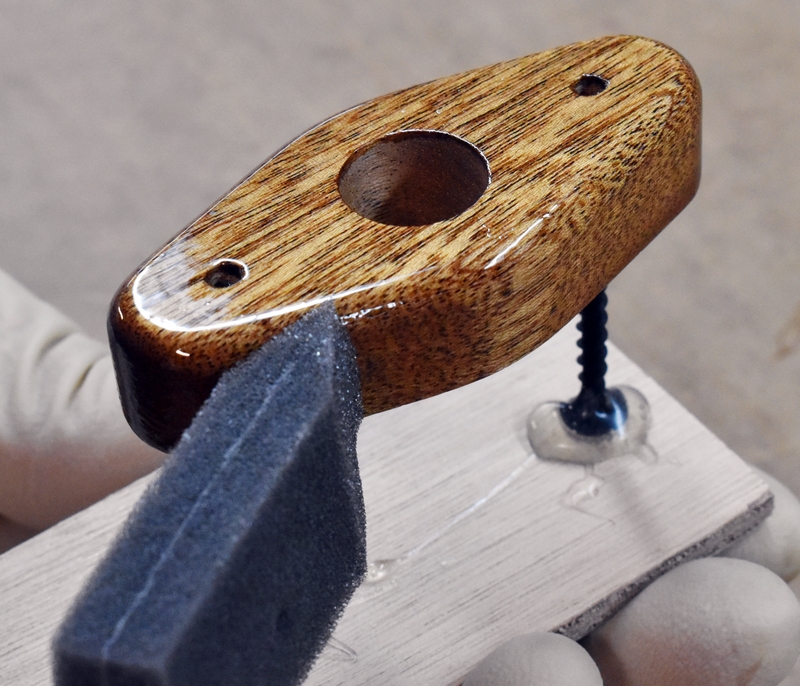
Some of the parts shown are affixed to a base (a strip of scrap plywood) with nails. The nails were tapped into pre-drilled holes in the bottom of the parts and then the heads of the nails were bonded to the base with hot-melt glue.
Small sticks and hot-melt glue could be used instead of nails, but good access to the surfaces and the ability to get the surfaces clean, especially before the final coat, is important.
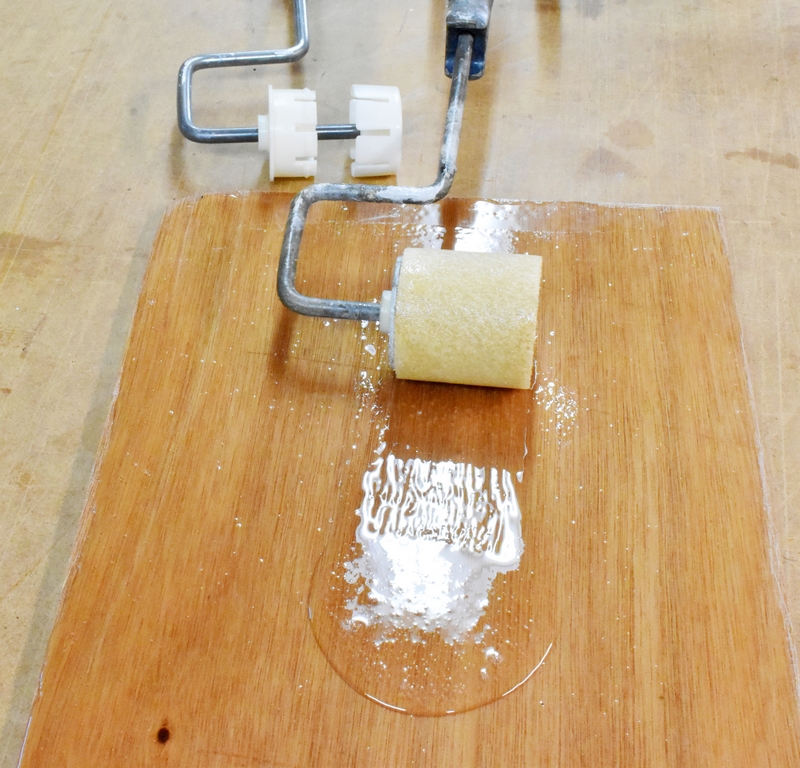
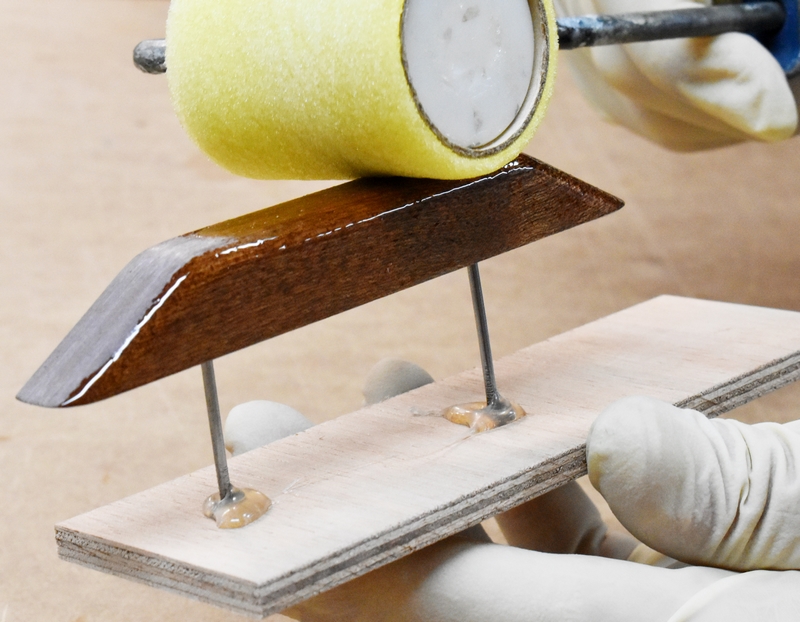
Why use a roller for such little parts? Because the roller can apply a very even coating of epoxy quickly. The roller must be evenly saturated with an appropriate amount of epoxy to achieve a consistent film thickness. Using a palette made from scrap plywood (instead of a roller pan) for wetting the roller allows the most control and limits waste. The palette can be “nurtured” by rolling the remaining epoxy all the way to the edges every time it is used. To get even saturation, pour a puddle of epoxy on the palette, 105 Epoxy Resin® with 207 Special Clear HardenerTM for a clear finish, and then pull epoxy from the edge of the puddle with the roller to form a “ramp” of wet epoxy on the palette.
Using a roller cover that’s just wide enough for the job can reduce waste of epoxy and covers. Roller covers can be cut to different lengths using a bandsaw, fine-tooth pull-saw, or even a sharp knife if you are brave. A roller frame without the cage is necessary for narrow roller covers.
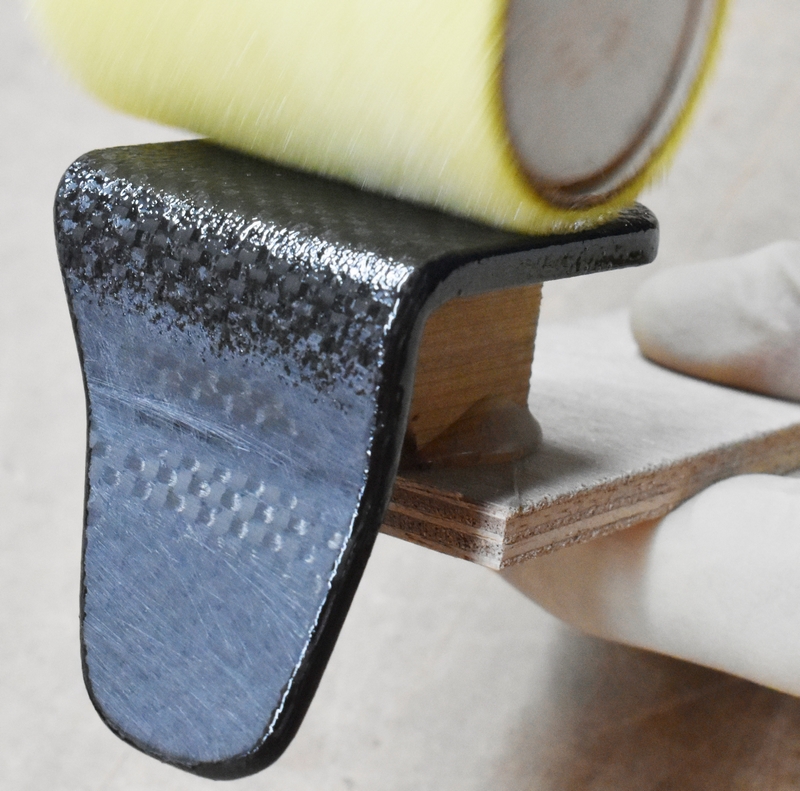
How much epoxy should you apply? Too much and it will run, forming drips or a bead along the lower edge of the part. Too little and it won’t add much film thickness and won’t flow out to a glossy surface.
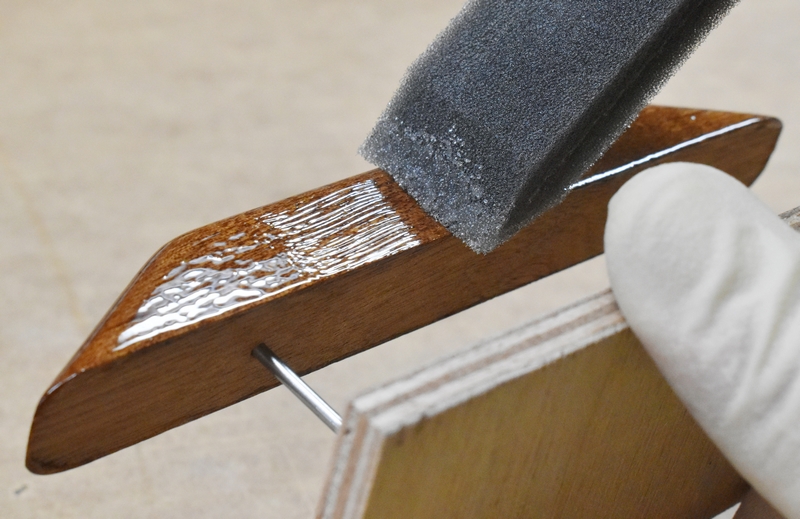
For the epoxy to flow to a shiny, varnish-like surface it must be tipped. Foam brushes work well for tipping. I wet both sides of the end of the brush lightly (on the palette) before use and brush from the middle toward the ends to maintain film thickness on the ends of the part.
Wooden parts that are meant to look good need to have all scratches removed with fine sandpaper before the first coat and should be sanded between coats as well. Using fine (180-220 grit) sandpaper between coats helps prevent sanding through the coating. (Note: 80-grit sandpaper is recommended when preparing surfaces for structural bonds.) Edges and corners should be sanded very lightly or prepared with small pieces of maroon-colored abrasive pad (made by either 3M® or Mirka®). When coating wood, the first coat will raise the grain, meaning the surface will be a bit rough and require some sanding before you apply the second coat. I usually plan on three coats, but prep for the final coat should require only very light sanding, or even just removing the gloss with an abrasive pad.
Techniques that I use for bonding these small parts in place will be the focus of my next submission to Epoxyworks.


