By Don Gutzmer – GBI Technical Advisor
When using WEST SYSTEM Epoxy as an adhesive it is important to make sure pieces are held in position while the epoxy cures. Here are some tips for best results when clamping.
There are many different forms of clamps: spring clamps, c-clamps, quick clamps, pipe clamps, bar clamps, and parallel clamps to name a few. All are designed to hold objects together. Knowing the functions and limitations of different types of clamps will help you choose the correct style of clamp for the job at hand.
There are many ways to hold pieces in position, but the important considerations when working with epoxy are:
- Even clamping pressure
- Avoiding excessive clamping pressure
- Ensuring some epoxy squeezes out from the joint
Even distribution of clamping pressure over a large area helps create a reliable bond. This can be accomplished by making a caul (pad) out of pieces of wood to be placed between the clamp jaws and the stock.
Inserting a caul between the clamp and the stock being clamped will prevent clamp marks from appearing in the face of the stock. When applying clamp pressure, tighten the clamps slowly until some adhesive squeezes out. There is no need to apply excessive clamping force (as with yellow glue) to an epoxy glue up. In fact, excessive pressure can squeeze too much glue from joint, leaving you a glue-starved joint.
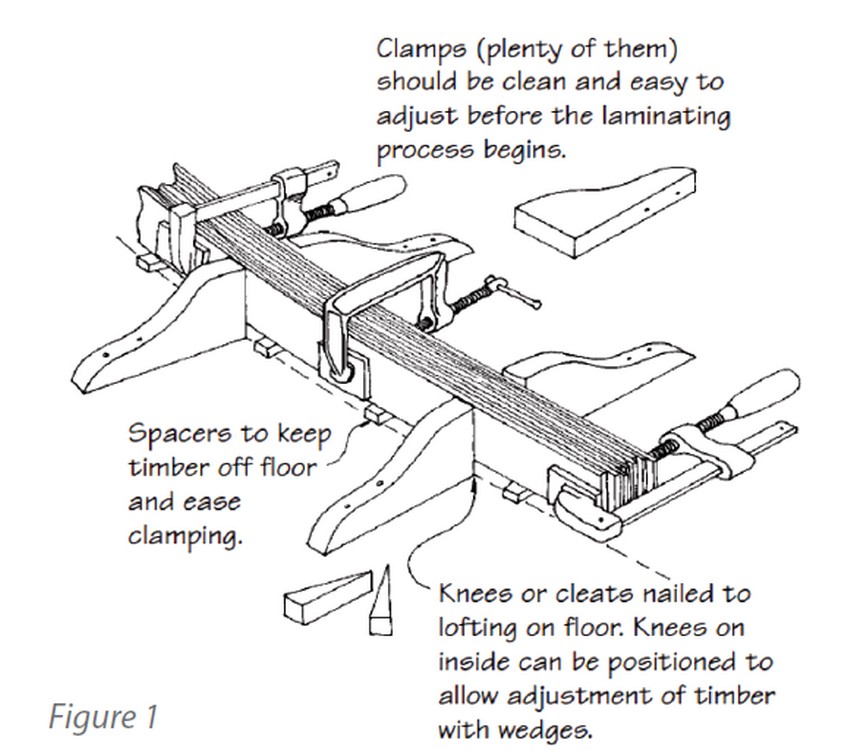
A simple clamping fixture utilizing wedges (Figure 1) is an effective way to get even pressure over the entire glue joint. You can use screws or staples to prevent materials from slipping while clamps are being tightened.
Holding a piece of curved stock in place with clamps (as shown in Figure 2) will help distribute clamping pressure evenly across your joint. If you have lots of scarf joints to clamp, it may be worth laminating a curved caul.
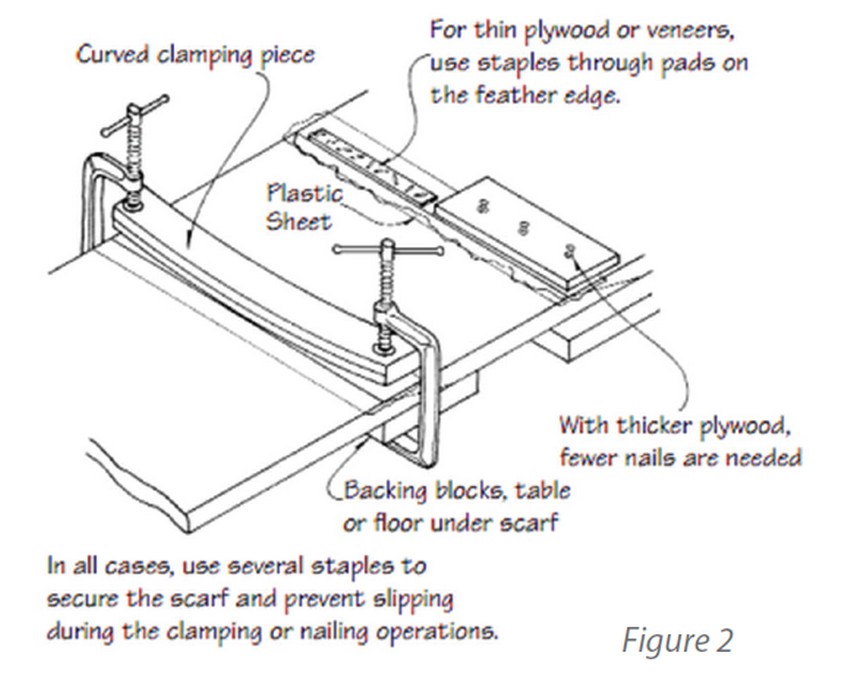
The degree of curvature involved when gluing bent laminations will determine how much clamping pressure is needed to overcome the natural tendency of the substrate to resist the bending forces. To generate enough pressure to pull the bonding surfaces into contact, drill pilot holes through the clamping strip and scarf joint into the receiving member, then insert wood screws. Use washers to further distribute the pressure. Applying wax or another release agent to fasteners will make them easier to remove after the epoxy cures. Covering the clamping strip and receiving member with polyethylene plastic sheeting or clear shiny packaging tape will allow for their removal later.
All assembly and clamping should take place during the open time (while the epoxy is still wet and workable) to ensure a dependable bond. Structural, gap-filling thickened WEST SYSTEM Epoxy makes it possible to laminate materials with little clamping pressure. It is good practice to pre-coat all bonding surfaces with unthickened epoxy prior to applying thickened epoxy. This method is called 2-step bonding.
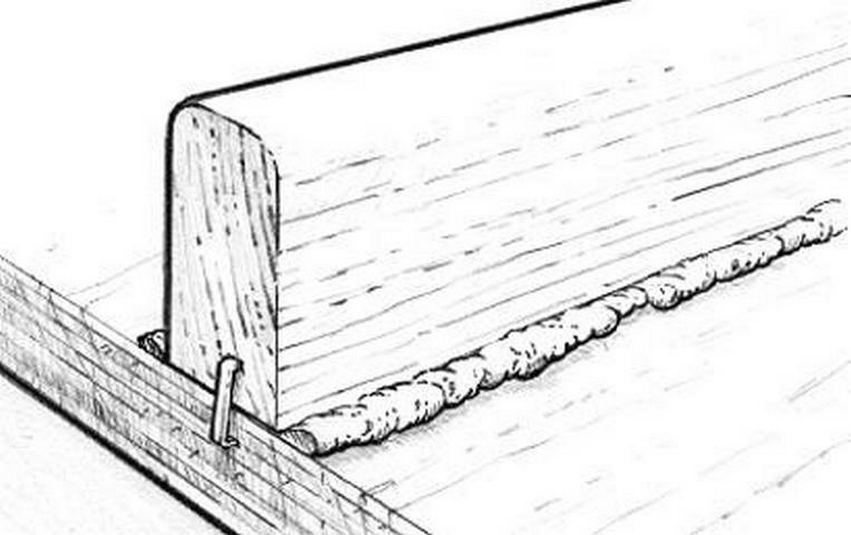
When clamping pieces together a small amount of the epoxy mixture should squeeze from the joint, indicating that the epoxy is making good contact with both surfaces (Figure 3).