By Don Gutzmer — GBI Technical Advisor
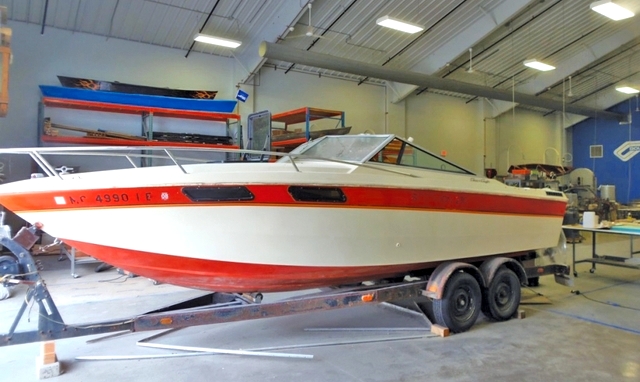
Here’s how we recently repaired a rotted Chris-Craft transom. The boat* had rotted stringers, transom, cockpit sole, and other problems common in fiberglass boats. I’ll explain the process we used for replacing the transom to provide some direction on tackling similar projects.
To prevent future issues, it was important to investigate why the wood in the transom had rotted. The water intrusion appeared to be coming from the screws holding the rub rail onto the boat. To evaluate the extent of the damage to the transom, we needed to remove the inner fiberglass laminate. We pulled out the motor and removed the transom assembly to gain access to the inner laminate. This way, enough of the structure was left intact so the hull maintained its shape. The trailer was supporting the hull so additional blocking was not needed and we only worked on the transom. Our plan was to repair the plywood in the transom from the inside so we wouldn’t need to perform cosmetic repairs to the outside fiberglass laminate; it’s difficult to color-match gel coat and to get the repair perfectly fair.
In addition to the transom, the entire cockpit sole had such bad wood rot that, in some places, you could step right through it. We removed the sole during the demolition phase, making it easy to access the entire transom.
A vibrating multi-tool was effective for cutting the inner fiberglass laminate into small sections for removal. Using a hammer and wood chisel, we peeled the laminate away from the plywood.
Measuring the Chris Craft transom’s original inner fiberglass laminate with slide calipers, we determined the thickness needed to make the new fiberglass laminate. The 1 ¾” plywood transom needed to be entirely removed because it was rotted and damp in many areas. I found that a small circular saw, set to the depth of the plywood, was efficient for cutting out the wood in manageable sections. Wood chisels, a flat bar, and a hammer were useful tools for removing the rotted wood. We quickly filled multiple trash bags with all the small wood pieces.
To prepare the outside polyester laminate for excellent epoxy adhesion to the new plywood, we used an orbital sander at a low speed with 80-grit.
Next, we made a cardboard template for tracing out the new plywood pieces. The new plywood consisted of two layers of ½” and one layer of ¾” Okoume marine grade plywood BS1088. We chose marine-grade plywood instead of exterior-grade plywood because marine grade is free of voids and higher in quality. In order to match the original laminate stiffness, we needed to match the original plywood’s thickness. We cut three separate pieces of plywood per layer to help make it manageable to install. The butted vertical plywood seams were staggered by at least 3″ from one layer to the next, providing uniform strength across the entire transom.
Draping plastic sheeting over hull sides helped keep the hull free of epoxy drips while we installed the first layer of ¾”-thick plywood into the transom. Unlike the original, we beveled the top of the plywood for easier installation. So we’d have enough assembly time, and to get good contact between the plywood and fiberglass laminate, we installed only the first layer of ¾” plywood into the transom during the first epoxy operation. WEST SYSTEM® 105 Resin® and 206 Slow Hardener® provided sufficient working time for epoxying the plywood.
Greg Bull helped with mixing the epoxy, which cut down on mess since I didn’t have to climb in and out of the boat to get more epoxy. If I’d tried to worked solo in the warm temperatures, the epoxy would have kicked off too fast and more cure cycles would have been needed to complete the project.
Greg coated both sides of the ¾” layer of plywood with neat epoxy at the same time I applied neat epoxy to the transom. Then I thickened the epoxy to a mayonnaise consistency with 406 Colloidal Silica Adhesive Filler and applied it to the transom with an 809 Notched Spreader to achieve a consistent thickness. Greg handed me the first layer of panels to bond into place.

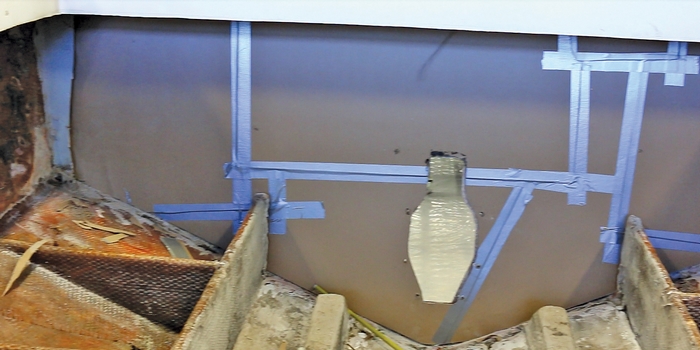

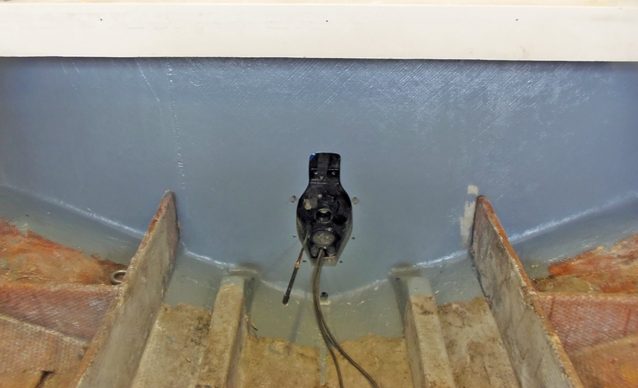
Using the existing holes for the swim platform, we drew the plywood against the fiberglass laminate with screws and large washers. I then laid a short 2″ X 4″ covered with cellophane tape (to prevent the epoxy from sticking) across the opening for the outdrive assembly. We used C-clamps to hold the 2″ X 4″ in position until the epoxy cured.
The following day, we sanded off the epoxy that squeezed out between the seams. Using the same procedure as we did for the first layer of plywood, we installed the remaining two layers of ½” plywood. Next, we braced and clamped them in place and waited for them to cure.
To create a transition from the new plywood transom to the hull sides and bottom, we applied a fillet of WEST SYSTEM Epoxy thickened with 406 Colloidal Silica filler to a non-sag consistency. An 808 Flexible Plastic Spreader with one corner cut to a 2″ radius made a great filleting tool.
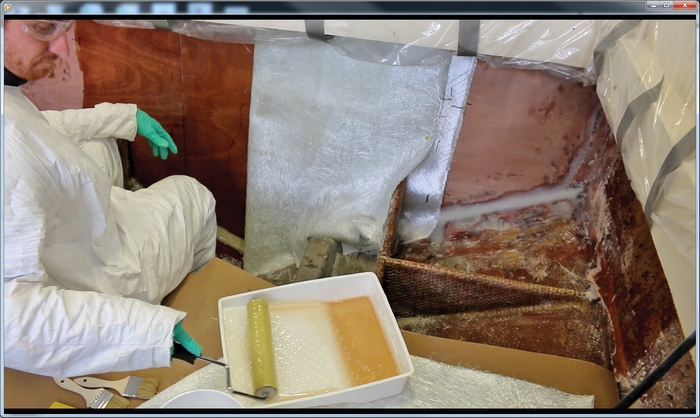
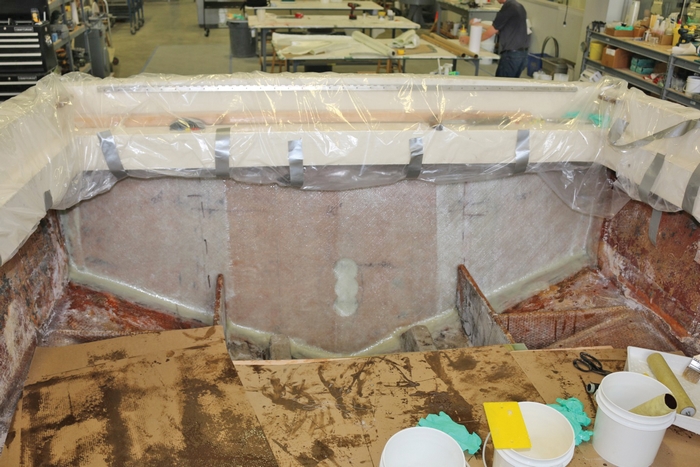
The laminate required two layers of 17 oz. biaxial fiberglass fabric with mat (WEST SYSTEM 738) to match the original inner laminate thickness. To save time cutting the fiberglass layers to be installed over the new plywood, we modified the cardboard template we’d used when we traced out the plywood. The first layer of fiberglass fabric extended onto the hull sides and bottom by 3″ and the second layer extended 2″, creating a gradual transition. The fiberglass fabric was overlapped on the vertical seams by 2″ and the overlaps for each layer were staggered.
Using a black indelible marker, we marked each piece for proper alignment. We applied neat epoxy with an 800 Roller Cover to each side of the fiberglass fabric, completely wetting out each layer. Dragging a plastic spreader over the fabric at a 45-degree angle forced the fabric against the plywood, ensuring it was thoroughly wet out with epoxy. The last layer of fiberglass received three coats of epoxy, filling the weave of the fabric.
After the epoxy cured, we cleaned the new inner fiberglass laminate with water and a 3M Scotch-Brite™ pad, sanded it dull, and applied gray marine bilge paint. To prevent future damage from wood rot, we epoxy coated the outdrive and swim platform holes drilled into the transom.
The transom repair was a good start to a multitude of future projects that will need to be completed before this Chris Craft gets back on the water.
*In order to demonstrate proper repair methods, our Technical Department purchased a neglected 1980 Chris Craft Scorpion 230 in need of a complete restoration.

