
Using a car body mold to modify a race car demonstrates this approach to building composite parts using different kinds of molds.
By Don Gutzmer – GBI Technical Advisor
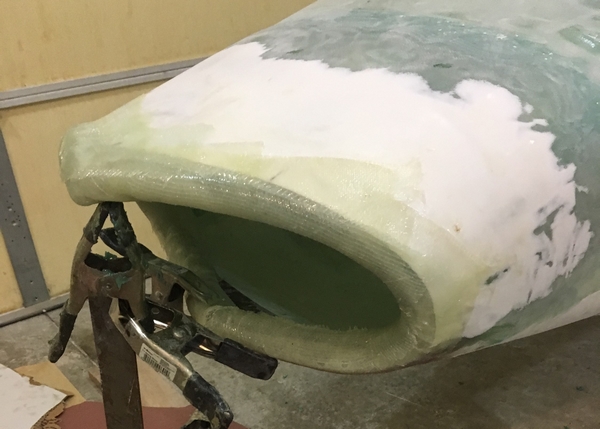
Featured image (above): A scrap of curved fiberglass panel was the perfect piece to extend the nose of the car body to match the new profile.
Creating things has been a passion of mine over the years, and I continue to improve my skills and grow more proficient at building composite parts. I also enjoy the challenge of helping others create one-off composite parts. I’m happy to share some of the materials and techniques I’ve used over the years to build composites with WEST SYSTEM Epoxy and provide an example of a recent project.
When I am building composite parts, most of the time I will use a mold. There are a couple of different kinds of molds, a male mold (sometimes referred to as a plug or buck) and a female mold. Each mold will offer a different finished part. A male mold is a form built to the desired shape of your part and then your laminate is laid-up on it. The part will then need to be finished after the laminate is cured if a smooth final surface is desired. A female mold will provide a better cosmetic finish because you lay up your laminate on a smooth mold surface and the mold side of the part becomes your finished surface. I’ve built female molds of solid fiberglass laminates (no core) when I’ve needed to pull only a handful of parts. The laminate schedules I typically use are on the lighter side because I am usually okay with touching up the part after removing it from the mold. One advantage of using a female mold, instead of a male mold, is that after removing the part you shouldn’t need to do much more than trim the edges and apply a UV-stable topcoat.
Fairing
When I need to build a mold from an existing part, I first make sure the surfaces are fair. I use WEST SYSTEM 407 Low-Density Fairing Filler and 410 Microlight Fairing Filler for fairing applications. Stirring these low-density fillers into the 105 System to the desired consistency makes the cured epoxy much easier to sand.
I have learned that sanding with an orbital sander should only be used to create profile and not used to fair a surface. Long sanding blocks work best for fairing to prevent creating low spots. I may check the fairness of the surface using a large metal ruler or a wood batten as a straight edge to see whether I need to add or remove additional material. If there are pinholes in the fairing compound, I use a plastic spreader to force epoxy into any small voids before rolling on coats of epoxy.
Applying Epoxy
To seal the faired surfaced, I roll multiple thin coats of epoxy onto the surface creating a smooth, uniform, bubble-free coating. The WEST SYSTEM 800 Roller Cover works well for applying a thin coat. I tip off the coated surface by lightly dragging a foam brush or a section of roller cover over the wet epoxy coating.
To prepare the mold for the release agent, I wet sand the epoxy coating with 180-grit wet/dry sandpaper and may go to 600-grit to create a higher quality, smoother finish on the final part. I’ll apply five or six coats of paste release wax if creating a part from the finished mold for the first time. I wait at least 30 minutes between coats, rubbing a thin coat of wax on the mold surface and wiping it off right away. For extra insurance, I will sometimes brush on a thin coat of PVA (polyvinyl alcohol) to ensure the parts will release from a new mold. Applying PVA in a thin film with a bristle brush prevents runs in the coating. The PVA is water-soluble and therefore can easily be removed from the part and the mold with water.
Epoxy does not adhere to certain plastic surfaces very well, so clear cellophane packaging tape or flash tape also makes a convenient release agent for some applications.
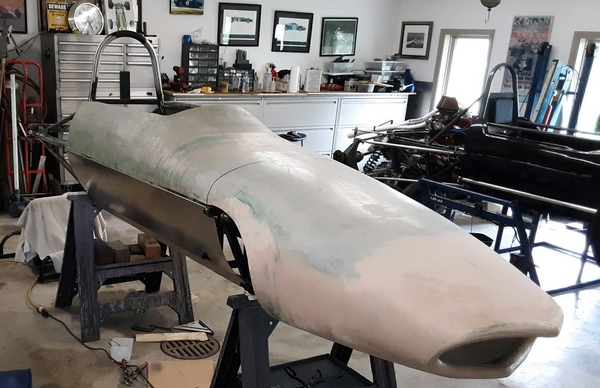
Modifying a Car Body
My recent project, modifying a fiberglass, open-wheel, race car body for a friend demonstrates my approach to building composite parts using different kinds of molds.
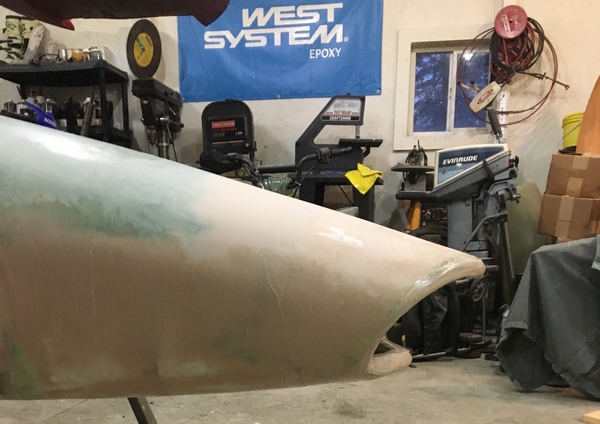
My friend wanted the fiberglass body to look similar to a 1967 Gurney Eagle F1 car body. To achieve that, he let me borrow an older car body to get the general shape and dimensions needed to fit the car’s metal tube frame. The back half of the body needed to be built taller with an integrated cockpit fairing in front of the driver. The nose section needed to be flattened slightly and brought to a point creating the characteristic eagle’s beak shape.
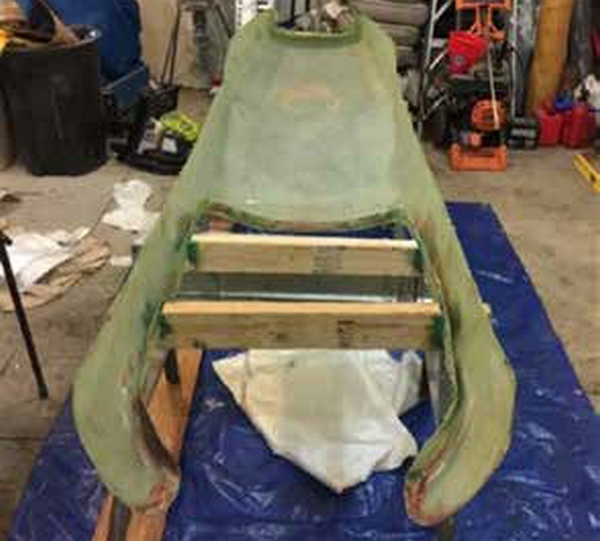
I first started by building a quick female mold off the borrowed car body. The female mold gave me the ability to build a body that could be modified to replicate a 1967 Gurney Eagle F1. Once the duplicate body was built, I decided to start tackling the project by creating the taller sides of the car body and cockpit fairing as one fiberglass piece to be bonded on with thickened WEST SYSTEM Epoxy.
Using drywall screws, I temporarily attached an old Plexiglas® windshield to the car body to serve as a mold surface for the fiberglass fairing and a guide for the height increase around the driver. I taped a thin layer of cardboard over the drywall screws so the surface would be smooth. Next, I applied flash tape over the entire surface to seal it. In order to make the surface as smooth as possible, I applied a layer of fairing compound with a plastic squeegee.
While the fairing compound is still soft, I use a cheese grater to help remove material quickly if needed. There is not a long wait for it to cure between coats, so I don’t worry about trying to make the first application perfect.
Based on the size of this part, I like using sanding blocks ranging from 12 to 24 inches long to fair the surface. If the part had been larger, like the hull of a yacht, longer sanding blocks may be needed.
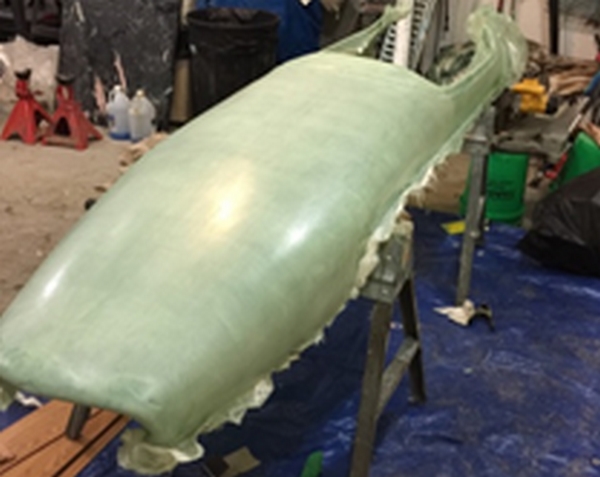
Next, I sealed the entire fairing layer with two coats of unthickened WEST SYSTEM Epoxy. Once that cured, I wet sanded it smooth. This provided me with a uniform, sealed work surface. I then applied paste wax over the epoxy-coated mold to ensure that the fiberglass part I was about to make would release from the mold. Years ago I learned the hard way that even when a release agent (like paste wax) is used over fairing compounds, the part can still adhere to the mold. Sealing it with a coat of epoxy, then applying a release agent to the epoxy, prevents this from happening.
I determined that I needed a laminate schedule around 50 oz. to be thick enough to provide adequate stiffness. I decided that four layers of 12 oz. fiberglass cloth were needed to make the fairing and higher sides around the back half of the body. I used WEST SYSTEM 105 Resin and 206 Slow Hardener, and a plastic spreader, to wet out each layer of fiberglass over a flat workbench, then draped it onto the mold I built onto the car body. To avoid sanding between layers, I applied each layer wet-on-wet, one after the next.
Once the fiberglass part had cured for a day, I removed it from the mold and trimmed around the perimeter of the part with a jigsaw. I sanded the underside of the part with 80-grit to prepare it for bonding to the car body. I removed the temporary mold from the car body (the windshield, tape, and drywall screws) and wiped the surface with acetone using clean, white paper towels to remove any contaminants like residue from the tape. Then, I sanded the surface of the body with 80-grit where the part would be adhered.
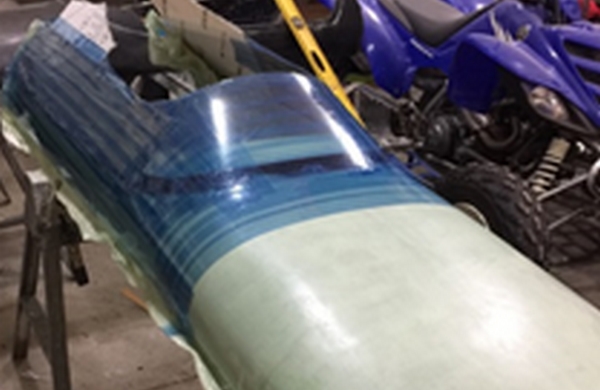
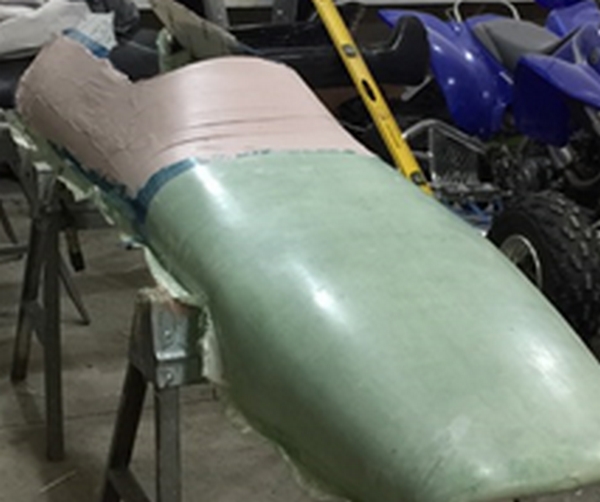
Using 105 Resin and 206 Slow Hardener thickened with 406 Colloidal Silica to a non-sag consistency (like gel toothpaste), I bonded the cockpit fairing and sides to the car body and allowed the epoxy to cure over the weekend. To reinforce the joint, I then applied a couple of layers of 12 oz. fiberglass tape around the outer edge of the cockpit fairing/car body seam. Using epoxy mixed with 410 Microlight to create a fairing compound, I smoothed out the surface then sanded it to create the final shape. My friend will provide the final preparations for paint.
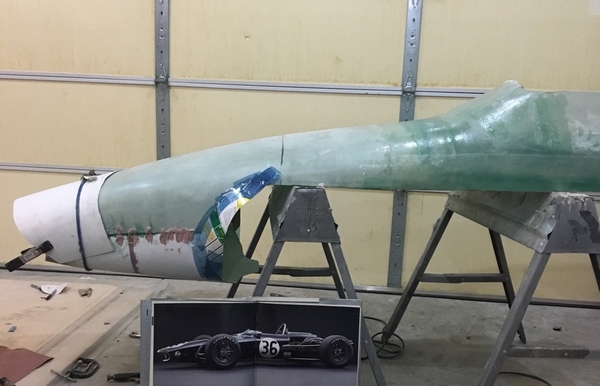
Fabricating the Nose
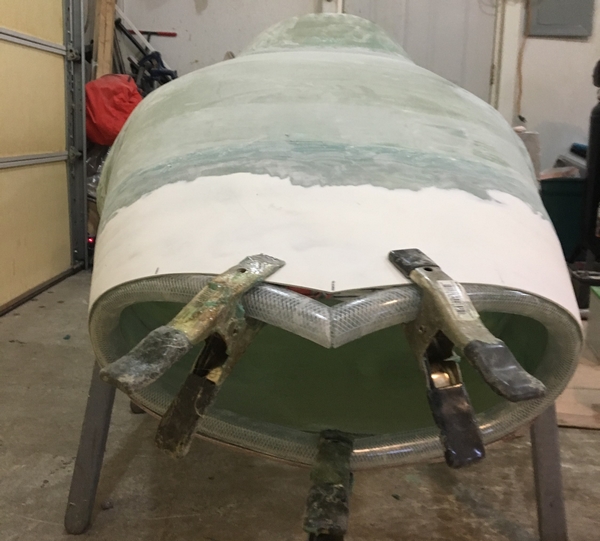
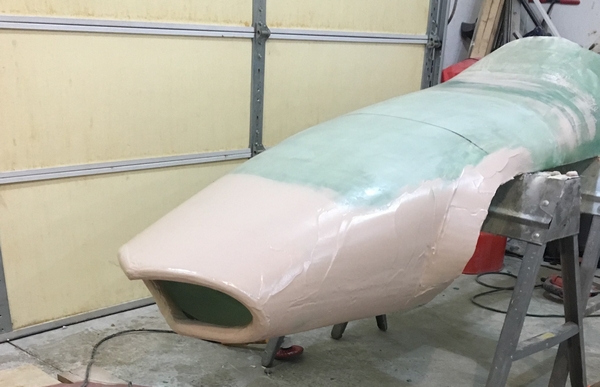
The nose of the car body needed to be pointed, similar to an eagle’s beak, so I had to find a way to recreate the desired shape. I decided the best approach would be to trim the nose of the original car body off about 3 inches before the end to create a large enough opening for the new shape.
For the rounded edge of the new nose opening, I used a reinforced plastic hose as a mold. I simply bent it to the desired “beak” shape and mitered the points at approximately a 90-degree angle in the center of both the top and bottom of the opening.
I had a curved fiberglass/epoxy panel laying around the shop that worked perfectly to bridge the gap between the cut off section of the old nose and the shape of the reinforced tubing of the new nose. With a bit of clamping and some epoxy thickened to a non-sag consistency, I epoxied the curved fiberglass panel to the car body. I applied a release agent to the reinforced hose, then wet out multiple small strips of 10 oz. fiberglass cloth and wrapped them halfway around the hose and back onto the fiberglass panel.
I faired the nose with WEST SYSTEM 105 Resin/206 Slow Hardener thickened with 410 Microlight, which I applied with a 12″ drywall knife. This helped maintain a fair surface and reduced the need for much sanding after it cured.
Once the epoxy had cured, I then removed the reinforced hose I had used to create the curved beak-shape opening.
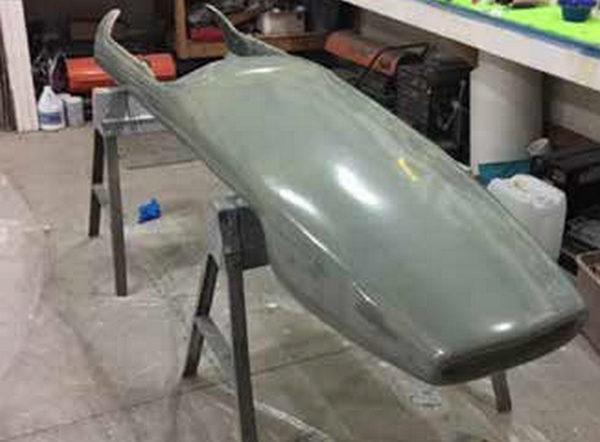
The fiberglass car body was a fun challenge to tackle using multiple different molding techniques and I think it turned out well. My friend was very happy with the new look of the car body and is excited to paint his new car body.