Camper Panel Repair
Spring 2009

GET STARTED
FREE PRINT & DIGITAL EDITIONS
Spring 2009
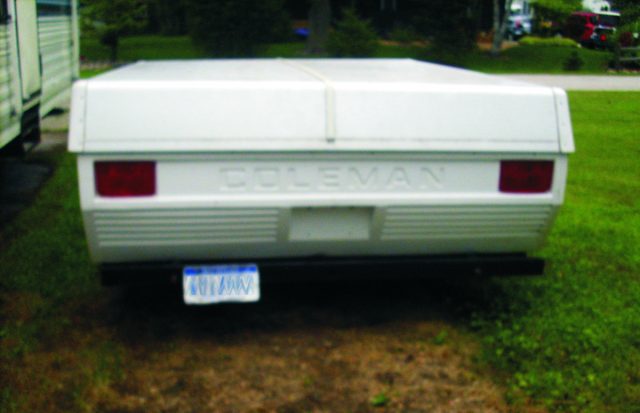
Above: The repaired camper panel is back in place on the camper. A coat of Krylon Fusion® textured, plastic-compatible paint completed the camper repair.
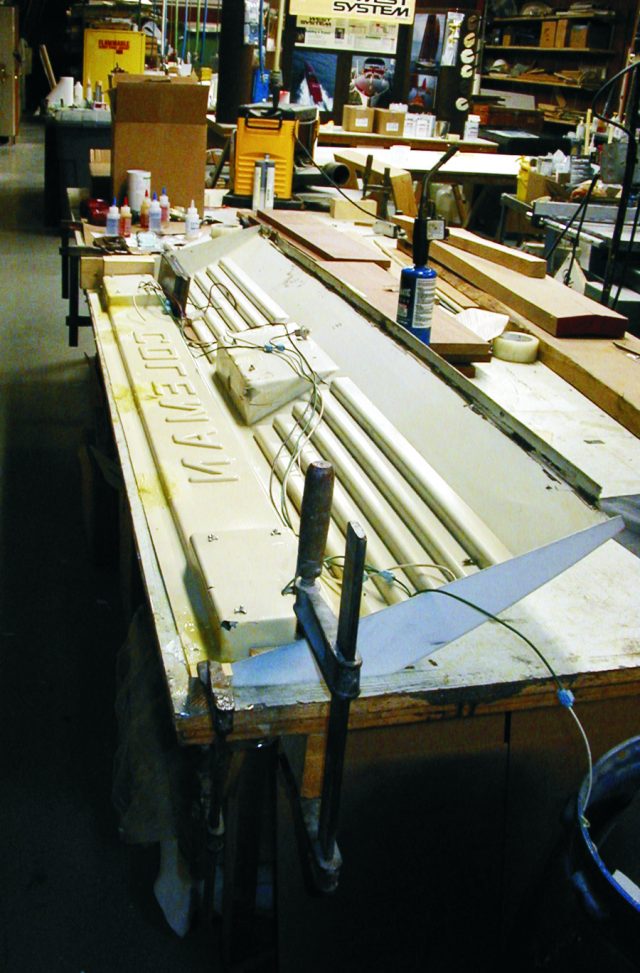
Todd Lynch, one of our valued employees, brought in a damaged plastic panel from the back end of an 11-year-old pop-up camper and asked if it was worth fixing. It came from his hunting camper which had been rear-ended. He just wanted it to be functional. The impact had made cracks at nearly every screw hole for holding the panel in place, making it doubtful it would last another trip down the highway.
Opinions within our tech staff varied as to whether Todd’s camper panel was worth fixing. I thought it would be easier to repair it than build a new one out of plywood. Others on the staff weren’t so sure.


The panel was made with thermal-formed plastic and was likely built using a vacuum-formed sheet-molding process. Plastic sheet that’s roughly 1/16″ thick is heated to the point of softening, placed over a mold, and drawn into the form under vacuum. The reshaped plastic is then allowed to cool before it is removed from the mold and trimmed to final size. This process is still in use today to make simple molded shapes like inside panels for refrigerator doors. I was pretty sure the plastic was ABS or PVC, which WEST SYSTEM Epoxy adheres to if it is sanded or exposed briefly to the flame of a propane torch.
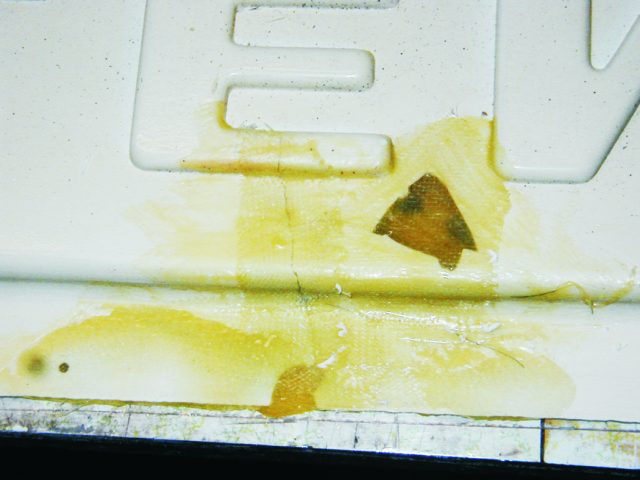
To be sure the epoxy would stick, I performed a quick adhesion test with G/5 Five-Minute Adhesive®. If G/5 worked, I knew G/flex® would stick even better but I would get my answer the same day instead of waiting overnight for G/flex to cure. First, I sanded the portion of the surface, then sanded plus flame treated (with a propane torch) another portion. Next, I glued fiberglass laminate strips (1 16″-thick × ¾”-wide × 2″-long) in place. I glued only half of each fiberglass tab to the plastic, leaving the other end free so I would have a short handle to pull up on to cause something to break. As I had hoped for, the break occurred in the G/5-to-fiberglass bond and not in the bond to the camper panel.
The sanded surface achieved the same result as the sanded and flamed surface. To minimize cosmetic work later, we did the repairs mostly on the backside of the panel so they would be out of view when the panel was reinstalled on the camper. However, there were missing pieces of plastic in the corners of the panel requiring attention from both sides.
Many of the holes around the perimeter were cracked and split. To repair these, we ground into and beveled the cracks about ½” back with a 2″ diameter sanding disk mounted on a drill motor. We filled these dished-out areas with G/flex 655 and before it cured, set in a 1″ diameter patch of 4 oz fiberglass cloth.

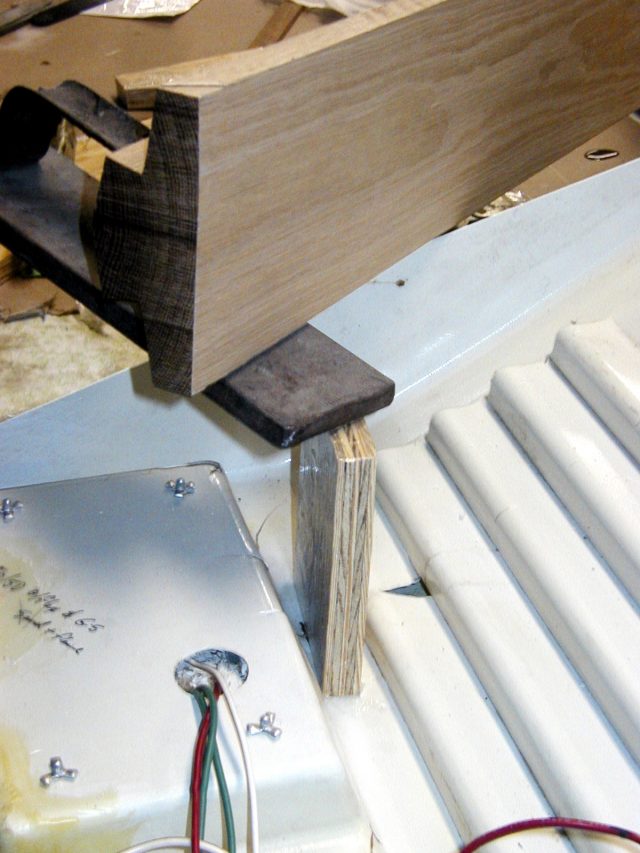
Repairing the missing sections required a backer mold to support the epoxy while it cured. Cellophane tape applied to flat plywood panels made an excellent mold and release surface for repairing flat sections of the panel.
The camper panel had warped slightly, so we weighed it down flat to make good contact with the mold. If we hadn’t forced tight contact the cured repair would have required lots of sanding before it could be painted.
To repair missing sections involving the rounded corners, we made very lightweight fiberglass laminates off of similar shaped and undamaged sections along the edges of the panel. We covered with shiny plastic packaging tape the undamaged part of the panel that we needed to recreate. Next, we brushed G/flex 655 onto the surface and set a couple of layers of 4 oz fiberglass cloth into it. Then we applied more epoxy before setting in the second layer. When cured, these appropriately shaped laminates were removed from the grill, trimmed to the shape of the missing piece, sanded, and glued in place with G/flex 655.
Todd spray painted the repaired panel with white textured Krylon Fusion™ plastic-compatible paint. He reinstalled it and says it now looks brand new.