For a Community Sailing Program
By Bruce Niederer — GBI Technical Advisor
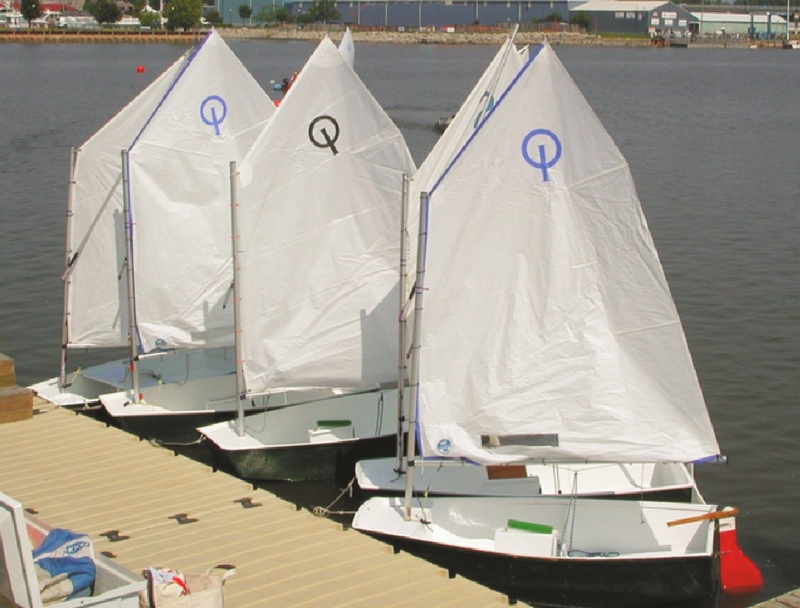
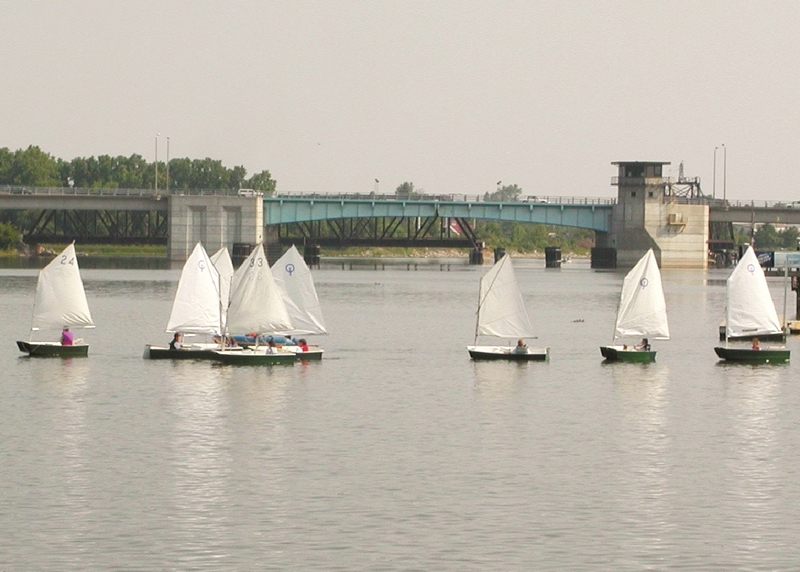
Above: Optimist prams built by the SBCSA in the Gougeon boatshop, sailing before the Liberty Bridge on the Saginaw River.

The Saginaw Bay Community Sailing Association (SBCSA) was founded in 1995 by a group of local sailboat racers who shared a vision of a grassroots organization to provide area youngsters and adults a low-cost introduction to sailing. We began that first season with three Transfusion 547’s purchased for the association by Gougeon Brothers, Inc. (GBI) and a half dozen used Optimist prams donated by the Saginaw Bay Yacht Racing Association.
As our summer training program grew, SBCSA needed more prams to accommodate all the kids interested in taking lessons. During the last two winters, Gougeon Brothers, Inc. has provided space in their boat shop for a Monday night boat building class. The classes were open to any member, including youngsters (with their parents), with no experience necessary. The class met 3–4 hours per night, twice a month, for three months. During the two winter classes, the students and instructors built five new plywood/epoxy Optimist prams to replace older boats and repaired or rebuilt the remainder of the fleet.
The stitch and glue method
The new prams were built using the stitch and glue (tack and tape) method of construction. This is an easy method for beginners to learn and is a good introduction to the uses of WEST SYSTEM® Epoxy. Few materials are needed and building Optimist prams is a fairly simple process. In fact, a local high school shop class using stitch and glue construction built two other SBCSA prams. Plans for the Optimist pram are available from the class association (www.optiworld.org).
Materials for building Optimist prams
The basic hull (bottom, sides, transom, and bow) was originally designed to be cut from two sheets of plywood. We altered this construction scheme just a bit to ‘beef up’ the boats due to the heavy and sometimes less than loving use they would endure as part of a community youth sailing program. We cut the bottoms from 6 mm mahogany plywood and used 4 mm for the sides. For the bows and transoms, we used two layers of the 4mm stock that we laminated together. This gave us an 8mm thickness in the ends to better withstand the many high-speed docking approaches beginning sailors often seem to favor. We also built the centerboards and rudders with two layers of 4 mm plywood. Another modification we made was to build an airtight bow compartment, as explained later. For the gunwales, transom supports, and tillers, we used dimensional clear pine lumber.
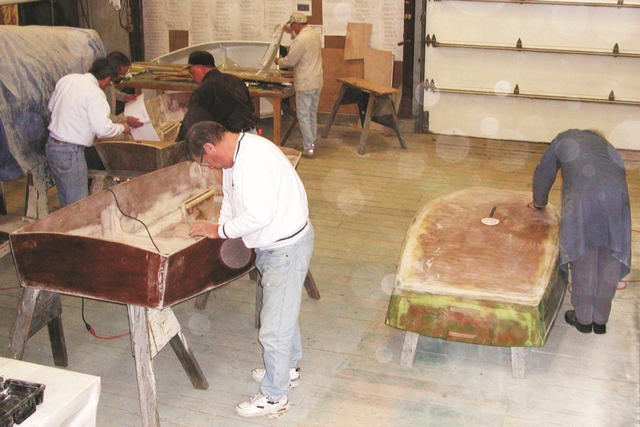
Throughout, we used WEST SYSTEM 105 Resin/206 Slow Hardener. We added various fillers depending on the application—404 High-Density and 406 Colloidal Silica for structural applications; 407 Low-Density and 410 Microlight™ for nonstructural and fairing applications. We used WEST SYSTEM 745 (10 oz) fiberglass fabric on the outside of the hulls, 742 (6 oz) fabric on the inside, and 733, 6″ wide glass tape over corners and fillets. Disposable supplies included mixing cups, stir sticks, flexible spreaders, gloves, sandpaper, and cleaning solvents.
Layout
The first step when building a boat is the layout. Since we planned to build multiple Optimist prams, we first drew the shape of the pieces that would form the prams on the backside of 4’×8′ sheets of paneling which, once cut, became a durable template for all the prams we would build. Each student learned how to transfer dimensions from a plan on paper to a piece of plywood by first establishing a centerline from which to base the remaining measurements. After careful measurement, the various shapes were drawn with pencil and then cut out using a jig saw. Students learned to cut outside the pencil line so that the rough edge could be sanded back to the line. This technique helps to form a fair, smooth, and splinter-free edge.
Using the templates, we next outlined the parts and cut them from the mahogany plywood. We cut enough parts for three prams so we could get one started and on its way before starting another. This way, if someone missed a session, he or she would still be likely to get involved in all the steps of building a pram. Next, we laminated the 6 oz fiberglass fabric to the inside surface of these panels and let the epoxy cure. The double 4mm bow and transom were glued together and glassed in one operation. We did this while the parts could lie flat because it’s much easier than trying to laminate the glass inside a formed hull. It’s important to remove the excess glass with a fresh razor knife while the epoxy is still relatively green and easy to cut—an advantage of using the GBI boathouse was that I could walk over first thing the next morning to trim parts.
See Estimating epoxy amounts to determine the amount of mixed epoxy required to apply fiberglass cloth and three coats to fill the weave of the cloth.
Stitching
During the following class session, we drilled holes along the adjoining edges of the plywood panels about 1″ in from the edge. Holes in the bottom must line up with the holes in the sides, bow, transom, and so on along all mating edges. The panels are now ready to be ‘stitched’ together using 16 gauge copper wire. Starting with the transom, we threaded a piece of copper wire about 6″–8″ long through the top hole and also through the mating top hole in each of the side panels. We pulled the pieces into the general shape desired, and then twisted the wire on the outside just like a garbage bag tie. We connected the bottom holes on the transom and sides the same way. We repeated the step on the bow panel and sides. We placed these pieces, which were loosely held together at the corners, on the bottom panel and begin stitching wire through all of the mating holes. Eventually, the entire bottom edge (the chine) is stitched all the way around the hull, and all four corners are fully stitched as well. Because the Optimist prams have quite a bit of rocker, meaning the bow and stern are curved up from the center of the hull, pulling these pieces into shape while inserting the copper wire stitch proved to be quite a wrestling match.
The last item needed to form the hull shape we wanted was a temporary spacer bar secured across the top of the widest point of the beam. We used a 2″×4″ with notches cut at the proper width so the top edge of the hull sides fit into the notches. This gives the sides a little outward flair and helps provide the overall final hull shape we were looking for.
Epoxying
Now, with the hulls stitched together, we were ready to apply thickened epoxy to the joints. This is the ‘glue’ part of stitch and glue. First, we scrubbed all the bonding surfaces (about 3″ on either side of the joint) with water and a ScotchBrite™ pad and dried the areas with plain white paper toweling. Then we mixed 105/206 and added enough 404 High-Density filler to form a paste about the consistency of mayonnaise and then a bit of 406 Colloidal Silica to thicken to a non-sag consistency much like peanut butter. We used this mixture to apply fillets on all of the inside joints. (A fillet looks like the inside corner molding used when installing paneling in a house.) Using a spreader we modified for this purpose (see Filleting Tool in Epoxyworks 10), we applied enough so that the inside radius of the fillet was about 1″, deep enough to encapsulate the copper wires.
The final step for the night was to cut 6″ wide fiberglass tape in lengths that would fit and cover all the fillets we had just made. The tape extends about 2″ beyond the fillet’s edge and acts to spread the load over a larger surface area and strengthen the joint. We wet out each piece of glass tape on a piece of Visqueen™ (heavy gauge plastic sheeting—about 6 mills will work) before placing it over the fillet and squeegeeing it down with the same modified filleting tool. Installing the tape while the fillets are still uncured saves having to sand and prep the fillets after they cure and provides a good primary bond between the tape and the fillet.
Applying fiberglass cloth to the hull exterior
All this work had cured nicely by the next class session, which meant the hull shape was now permanent. We removed the brace across the beam and flipped the hull over. Using side cutters, we cut the copper wires off flush and tapped in any protruding ends with a nail punch. We rounded all of the outside corners with an electric sander so that we could laminate 6″ fiberglass tape over the corners more easily. Then we filled the holes from the copper wire with epoxy thickened with 406 Colloidal Silica.
Before we laminated tape over the corners, we cut 10 oz fiberglass cloth pieces to fit the sides, bow, transom and bottom and set them aside. We wet out the tape on Visqueen with neat (unthickened) 105/206. Then, using a foam roller, we wet out the wood along each edge about 4″ out from the joint and covered the joints with the wet-out tape. We then wet out the bottom panel with epoxy and carefully placed the precut piece of fiberglass fabric over it with the outside edges overlapping the edges of the tapes by about an inch. We finished wetting out the fiberglass with more epoxy and removed the excess with a flexible spreader. We applied the fiberglass cloth to the bow, stern, and sides in the same manner and then allowed everything to cure.
Fairing the taped seams
We began the next session by marking and cutting the opening for the centerboard along the centerline from bow to stern. Then we washed the entire hull with a ScotchBrite pad and water, dried it, and sanded down rough spots along the seams with a palm sander. Turning the hull right side up, we gave the inside the same washing and sanding treatment. While the hull was turned up, we took measurements and laid out the placement of the bulkhead, centerboard trunk, and bow compartment. Some folks then worked on the inside of the hull applying a putty of 105/206 thickened with 410 to the consistency of peanut butter along all the seams inside the hull, taking care to feather the edges of the tape out smooth. Others set about making the parts we had just laid out.
The modified bulkhead and mast step
The bulkhead in our pram was modified a bit. It provides lateral support for the hull and acts as an anchor point for the stern edge of the centerboard trunk like the original design, yet is a very low profile so as not to restrict movement in the boat while sailing (photo, below). The technique of bonding the bulkhead in with epoxy fillets along its entire length results in a very strong and stiff structural component that, unlike the typical higher profile bulkhead, is quite unnoticeable while sailing.
The mast step was also modified to create an airtight “box” in the bow of the boat which adds an amazing amount of buoyancy in case of a capsize, a significant safety improvement. Traditional prams have a board that goes across the bow, like a bench seat, with a hole in the center for the mast. The mast base is usually a 4″ piece of 2″×4″ with a hole in the center for the end of the mast. The base is secured to the bottom directly below the hole in the bench. We modified this concept by enclosing the space around the mast. We cut the bench seat piece so that it could be bonded with fillets to the bow and sides. Small cleats were installed for the board to rest on and hold it level while the glue cured. They simply stayed in place afterward, completely hidden inside the box. Once the fillets had cured, we cut the hole in the center and lined up the mast base using a temporary guide, and then bonded the base in place.
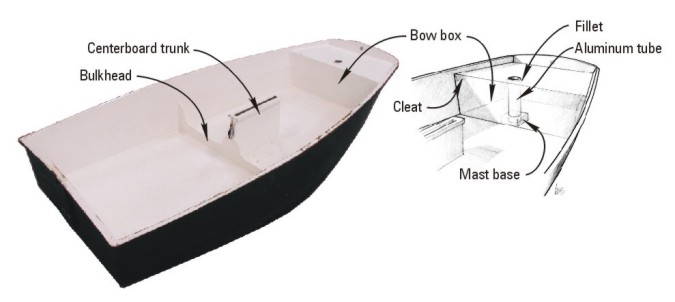
Then we bonded in place a length of aluminum tubing with the correct inside diameter into which our new aluminum rigs could fit snugly but easily. The hole in the bench and mast base was slightly greater than the outside diameter of the aluminum tube. We spread thickened epoxy uniformly about 1/2″ thick in the bottom of the mast base and then lowered the tube through the hole in the top and carefully inserted it into the mixture. Next, we applied a fillet around the tube to help secure it to the mast base and ensure a watertight and airtight connection. This mast step arrangement was then left undisturbed to cure. Later, we cut off the top of the tube, leaving it about 1/2″ proud of the seat, and applied a fillet around its edge to complete the water/airtight integrity of the tube. Finally, we enclosed the space by bonding in a carefully fit bulkhead at the back edge of the bench.
Installing the centerboard trunk
The centerboard trunk is simply a rectangular box about 12″ long ×1″ wide (inside dimensions) and high enough to be just below the level of the side rails. We fitted its bottom by trial and error, shaping it with a belt sander to conform to the hull shape. Then we drilled holes at the bow and stern edge of the opening in the hull and used wood screws to temporarily hold the trunk in place while we applied fillets and allowed everything to cure. Then we backed the screws out and filled the holes with epoxy. The installation of the bulkhead, mast step, and centerboard trunk took place over 3 or 4 class sessions.
Making the other parts
During these class sessions, other jobs got done as well. We sanded the fairing mixture already applied. We applied a second coat of unfilled epoxy to the entire inside surface to fill the weave of the fiberglass. Later, we faired and filled the outside of the hull in the same manner. To build the centerboard and rudder, we bonded two layers of 4 mm mahogany plywood together as we had done with the bow and stern. Once this had cured, we drew the shapes in pencil according to the dimensions from the plans. Then we cut the parts out with a jigsaw and sanded them with power sanders and by hand to achieve the desired profile and foil shape.
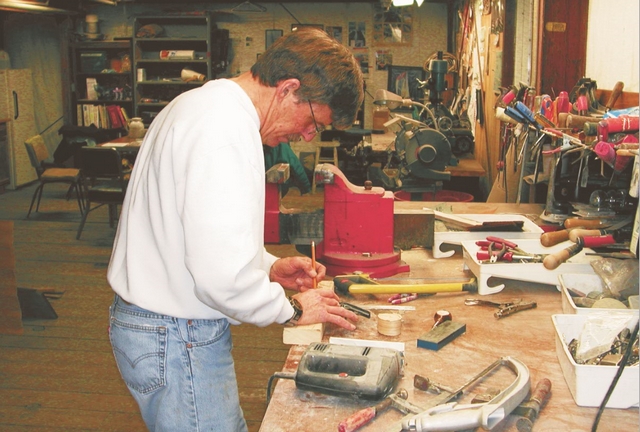
Although the centerboard and rudder are not intricate profiles to cut and shape, forming the rounded edges and somewhat elliptical shape of these foils takes a little bit of craftsmanship and artistry, and our students were up to the challenge. We used 2″×2″ pine stock for the tiller handle and simply sanded it into the shape we wanted. We cut a slot in the butt end to fit over the rudder top and drilled holes for the bolt. After these pieces were completed, they all received three coats of neat epoxy.
Installing the gunwales and rudder boards
We used clear 1″ pine stock for the gunwales and cut strips 1″ wide and about 6″ longer than the distance along the rail from bow to stern. After sanding the edge to be bonded, we brushed a 105/206 mixture, thickened with 406 Colloidal Silica to a mayonnaise-like consistency, on to the mating edges. The gunwales were held in place, flush with the top edge of the side panels, with lots of spring clamps. Once the epoxy had cured, we cut the extra length off each end and sanded the rails to shape. The tops of the centerboard trunk and centerboard were trimmed with pine stock in a similar fashion. The rudder boards were simply 1″×6″×10″ pine stock encapsulated with three coats of 105/206 epoxy centered on the stern and bonded in place.
Final finishing
The boats were now ready for paint. We gave them each the once over with 150-grit sandpaper followed by washing with clear water and a ScotchBrite pad. After drying, the boats were clean and dust-free, which allowed the paint to be rolled on very easily. All the prams are Forest Green outside and White inside.
The last step was to install stainless steel gudgeons and pintles on the rudder and rudder board, bolt the tillers into place, and install some small blocks for the traveler and sheet. We drilled properly sized pilot holes for all the screws and applied a 105/206 mixture to the inside of each hole with a pipe cleaner. These screws are the only fasteners in the entire boat.
So the SBCSA started its 2001 season with 10 new and rebuilt Optimist prams all freshly painted and fitted with new aluminum rigs and sails. Although these prams are purposely somewhat overbuilt to withstand the rigors of training 40–60 kids each season, they are surprisingly lightweight and fast. The students and volunteers had a good time building them and learned a few things along the way. All of us involved with the Saginaw Bay Community Sailing Association owe a sincere debt of gratitude to Meade, Jan, and Joel Gougeon, and GBI employees, for their support over the years in helping us foster and train the next generation of homegrown sailors.
