By Spiros Polemis
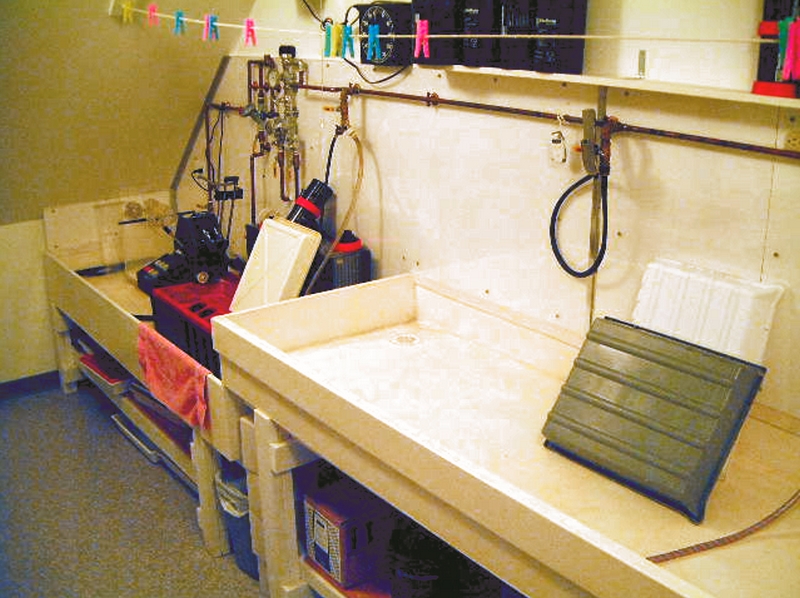
Above: The second darkroom sink is 86″ x 30″ x 7.5″ deep x 31″ high.
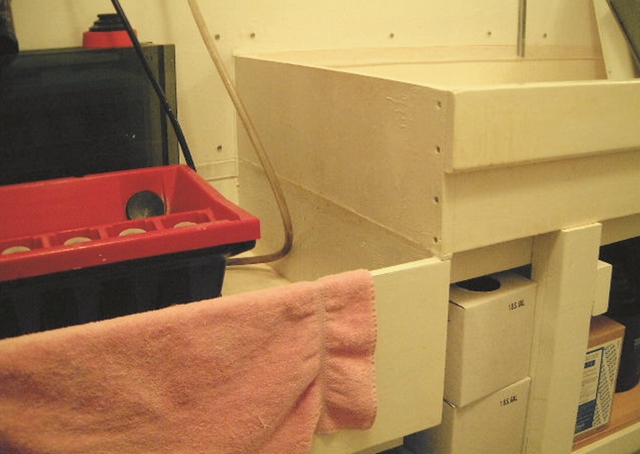
We built two darkroom sinks using WEST SYSTEM® Epoxy: one for tray developing photographs, the second to hold our Jobo film processor, and two archival print washers. The two sinks are end-to-end on one wall of the room and fit flush with waterproof caulking, the taller sink sitting on top of the side of the shorter one.
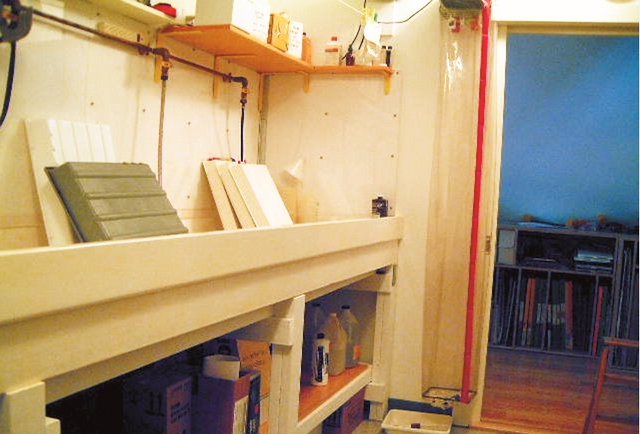
The inside dimensions of the first tray sink are 114″ × 30″ × 6.5″ deep (below). The top of the sink is 41″ above the floor. This sink has a ¾” thick board attached to the front face, flush with top to provide a shelf to rest our elbows and forearms on while we rock the trays and otherwise work on things in the sink. The sink is sized to hold a maximum of four trays for 20″ × 24″ material (24″ × 28.5″ each), although we typically never work with materials larger than 16″ × 20″.

The second sink (at top) is 86″ × 30″ × 7.5″ deep with the top of this sink 31″ above the floor. This sink is lower to allow more comfortable access to the Jobo processor and the print washers inside.
Both sinks were made the same way: build an open-top box from biscuit-joined ¾” plywood pieces for the bottom and pine for the sides. We followed the WEST SYSTEM User Manual instructions for applying fiberglass cloth and tape. We used sheets of fiberglass fabric for the inside. Then we applied the resin/hardener mixture with opaque white pigment added.
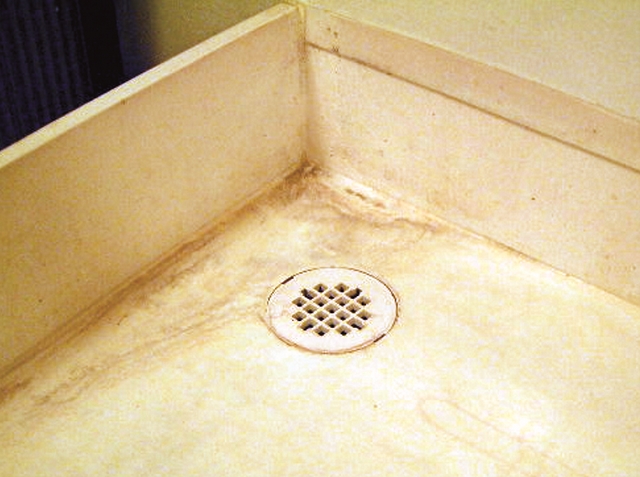
We gave the sinks several coats inside and a couple of coats outside. Both sinks are supported by 2″ × 4″ lumber and each has one shelf below for storage. The floor surface below the shelf is available for additional storage. Both sinks rest on frames that place each sink at the appropriate angle to drain where they meet. Large white ABS darkroom sink drain hardware (Delta) was obtained from a photo supply company and fitted by the plumber (left). The sinks drain toward each other so the drains could be connected to one common drainpipe.

Backsplashes consist of sheets of ¼” Plexiglas screwed to the walls and fitting 2″ down into the sinks at the back and sides. Where Plexiglas pieces join, there is extruded aluminum hardware to hold the edges and corners. Caulk was applied to the screw holes and aluminum extrusions to keep things watertight. The water supply is mounted on the rear wall with storage shelves above.
The one problem we have had is staining of the white surface. For some reason, if the indicator stop bath concentrate spills and is not cleaned up, it stains the surface purple. This happened when our stop bath cubetainer spigot leaked overnight. Since then, we leave all cubetainers turned with the spigots up. We have not been able to remove this stain and have not yet tried to recoat in a darker color (gray) to cover.

Editor’s note: Our research into darkroom sinks has shown that some photographers prefer white sinks, which reflect more safe light and provide more visibility in the room. Others prefer black sinks, with 423 Graphite powder as a coating additive, so photo paper shows up more easily in the bottom of the sink.—JRW


