FREE PRINT & DIGITAL EDITIONS

SUBSCRIBE

Building Components with Kevlar Braid

By Hugh Horton

Braided Kevlar®, or composites with Kevlar and carbon braid, are used for joints and many components of my sailing canoes. These include the hull/deck joint, cockpit coaming and spray deck rims, the leeboard bracket and retaining pin, the attachment of the mast step to the hull, the gunter’s yard heel fitting, and the seat and its major parts. (My source for Kevlar braid is A&P Technology, 4595 East Tech Drive, Cincinnati, Ohio 45245-1055, phone 513-688-3200. Their website is www.braider.com.) The techniques shown here can be adapted to many other projects.

Because of the variety of Kevlar and carbon braids available, forming intricate shapes is easy. However, after Kevlar has cured, shaping is difficult because of its toughness. Tools and abrasives must be kept sharp. Here’s how I did it.

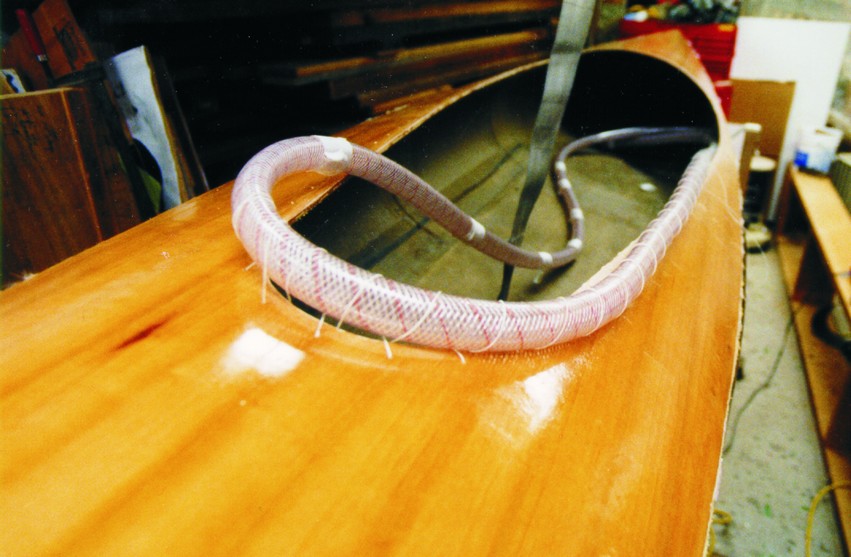
Building the cockpit rim

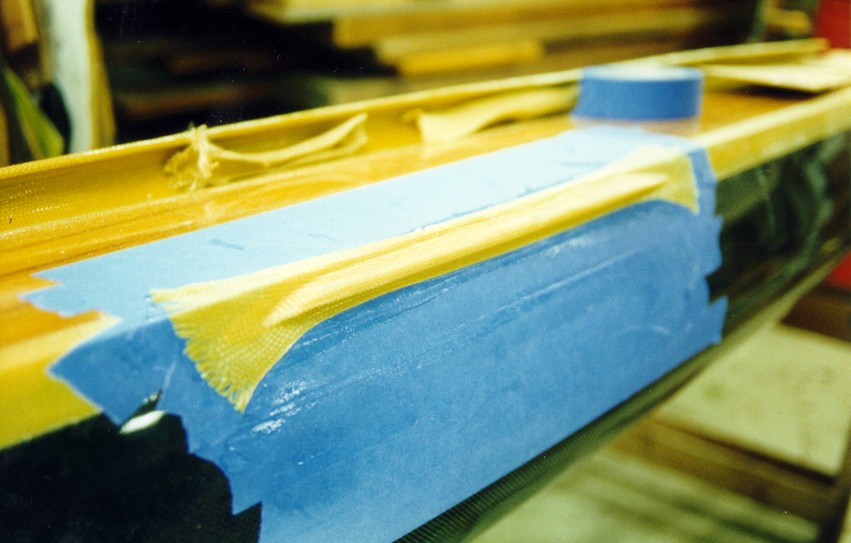
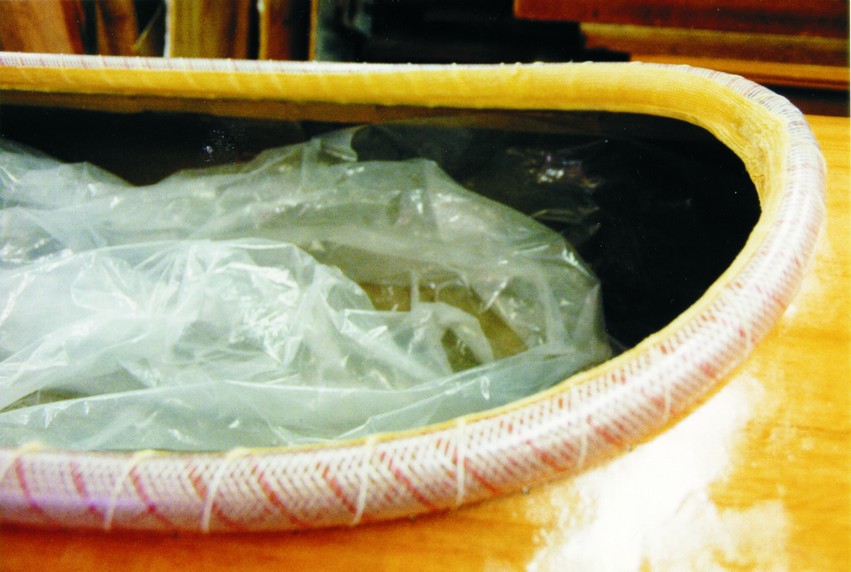
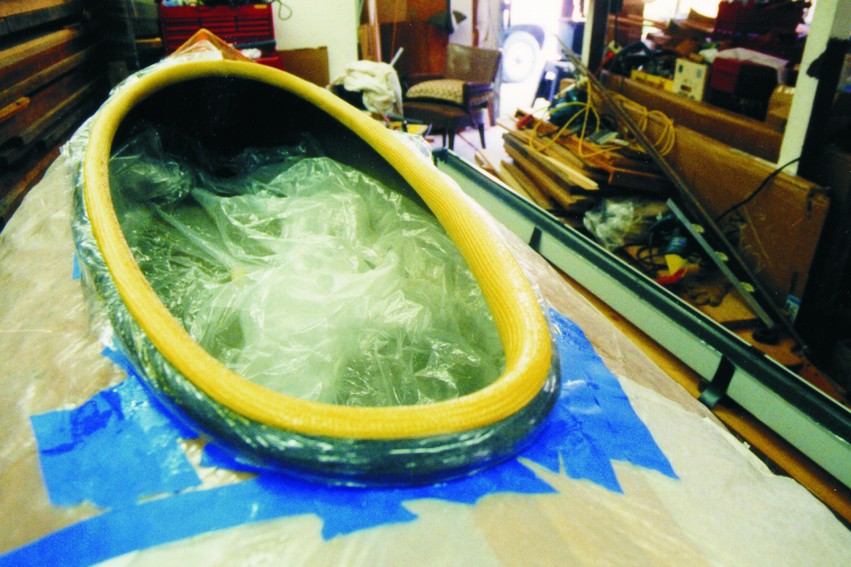
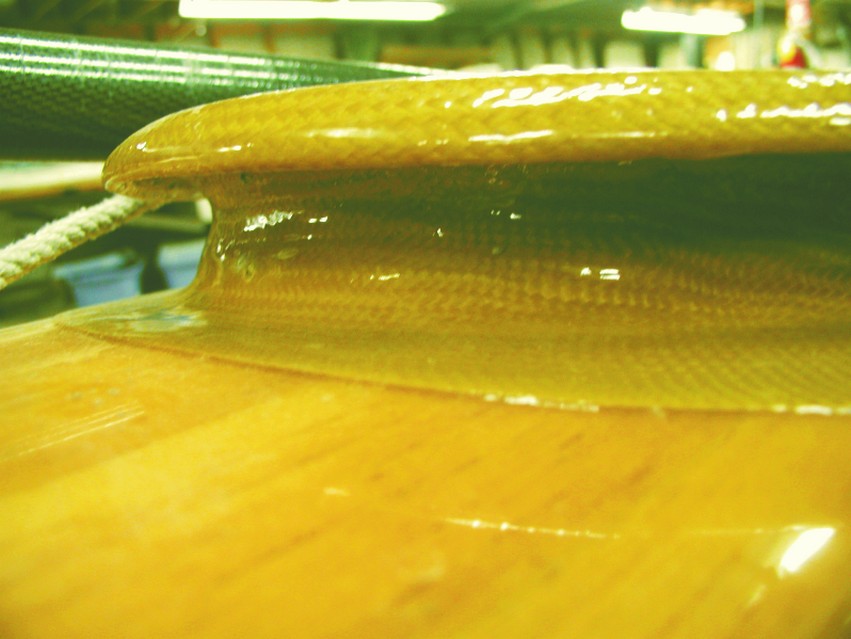
A hose is used as a mold. I pick a hose that is smooth, 1 1/8″ to 1 1/4″ in diameter and capable of bending fairly. I precisely layout the cockpit opening and fair the cutout as perfectly as I can. I round over the underside edge of the deck, although this is difficult because of the layer of kevlar. It is very important to align the hose precisely, getting it exactly at the edge. I lace the hose in position with marline, a fine thread that is strong enough to pull tightly. (Top image)

Notice the fairness of the hose layout. The joint at the aft end is connected and aligned by a piece of heavy copper electrical wire bent as needed for a fair joint. Before gluing, remember that it is easier to be too cautious wiith masking rather than clean up later, especially after the epoxy has cured.
The first layer of Kevlar tape overlaps the underside of the deck. I keep checking the hose to be certain of its position. After this first tape cures, I cut and remove the marline so subsequent layers don’t show the marline bulge. I apply a secound thin tape, overlapping the first, carefully positioning the tape’s outside edge. It will be the determining edge for the next layer, a heavy Kevlar braid. After this tape has cured, i re-move the hose/mold and fill and fair the marline grooves inside the curve before proceeding.
I apply a 3 1/2 diameter braided Kevlar hose over the cured tape layers. This is the primary structure of the rim. The aluminum roof gutter to the right is used to wet out the Kevlar hose. When it’s thoroughly wet out, i wrestle the heavy, warm, very slippery snake into position, rather than trying to wet it out in place. The shiny black material under the rim is foam pipe insulation wrapped in plastic film, which i use to clamp the edge of the hose where it tucks under the rim. It’s important to not deform the first tapes by forcing the insulation under too tightly.
After this cures, I apply a final thin tape under the rim, overlapping from inside the rim curve to the deck.

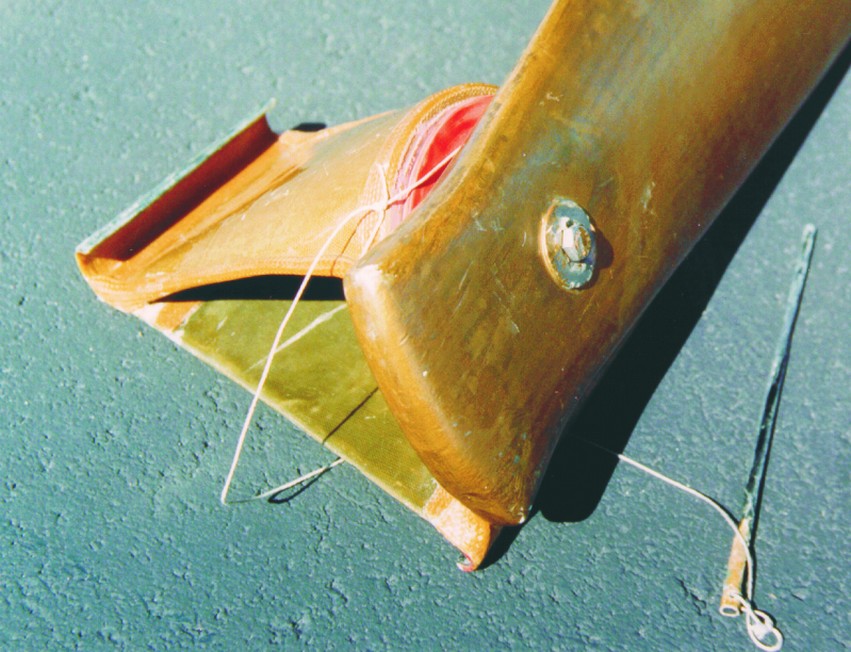
Building the leeboard bracket

The leeboard bracket is designed to transfer all of the side loads of the board through the hub and into the hull without being permanently attached to the hull. I used the hull as a mold to get perfect alignment of the attachment points.

I built a permanent lip on the sheer which is grasped by the bracket.
I formed the deck piece of the bracket by molding a layer of carbon fiber fabric to the deck, which was protected with plastic. The upper edge is molded into the curve of the rim and the lower edge is wrapped over and below the lip at the sheer.
A carbon plate, the vertical face upon which the leeboard pivots, is attached to the deck piece. The laminated plate is clamped to a piece of stiff plywood, which is aligned plumb and parallel to the centerline of the boat and holds the plate to the deck piece. I use every trick i can to assure alignment accuracy-note the string centerline, a level, and the plywood. I first glue the plate to the deck piece with a fillet, then apply tape to reinforce it.
I formed the deck piece of the bracket by molding a layer of carbon fiber fabric to the deck, which was protected with plastic. The upper edge is molded into the curve of the rim and the lower edge is wrapped over and below the lip at the sheer.
After i remove the cured upper piece from the mold, i then bond it back in place with fillets and tape the joints and edges with Kevlar tape.
I drilled a hole for the axle bolt through the board and bracket. large rubber washers between the board and bracket provide plenty of bearing surface, allowing the board to be raised and lowered easily, but held firmly.
The lower edge of the bracket locks under the lip that was bonded to the hull .
The upper edge of the bracket slips under the cockpit rim. Once in place, I determine the position of eye straps attached to the hull on either side of the bracket. A single pin through the eye straps traps the inboard joint of the bracket and holds the bracket firmly in place on the hull.