Building a Soaking Tub
Spring 2023

GET STARTED
FREE PRINT & DIGITAL EDITIONS
Spring 2023
By James Thomas
After a long time in the planning stage, my son Adam and I began work on a tiny house in 2022. While it was possible to purchase small, modular shower pans and enclosures, small soaking tubs were virtually impossible to find. I’ve built several small boats using wood and WEST SYSTEM® Epoxy, so it occurred to me that building a small tub might be possible.
On YouTube® I found videos of several do-it-yourself hot tubs made from 2×4 cedar strakes. Because these were made for mounting outside on a deck, there was no need for adhesives. They relied on steel bands, and the natural swelling of the cedar, to enable the tubs to hold water. Since our tub was going to be inside a tiny home, it needed to be waterproof. The construction would be similar to a boat, however the goal would be to keep the water in rather than out.

The bottom of this tub is made of 2×6 tongue and groove pine. These were epoxied together with WEST SYSTEM 105 Epoxy Resin® with 209 Extra Slow Hardener®. I chose the Extra Slow Hardener for the glue-up of the tub base and the vertical strakes forming the walls of the tub so I had sufficient working time for assembly—first the base and then the walls.Once the base was cured, I traced the dimensions of the tub interior, plus ½”, onto the base. This additional ½” accounts for the loss due to the dado I planned to cut into the vertical strakes later. Then I cut out the tub bottom using a sabre saw.
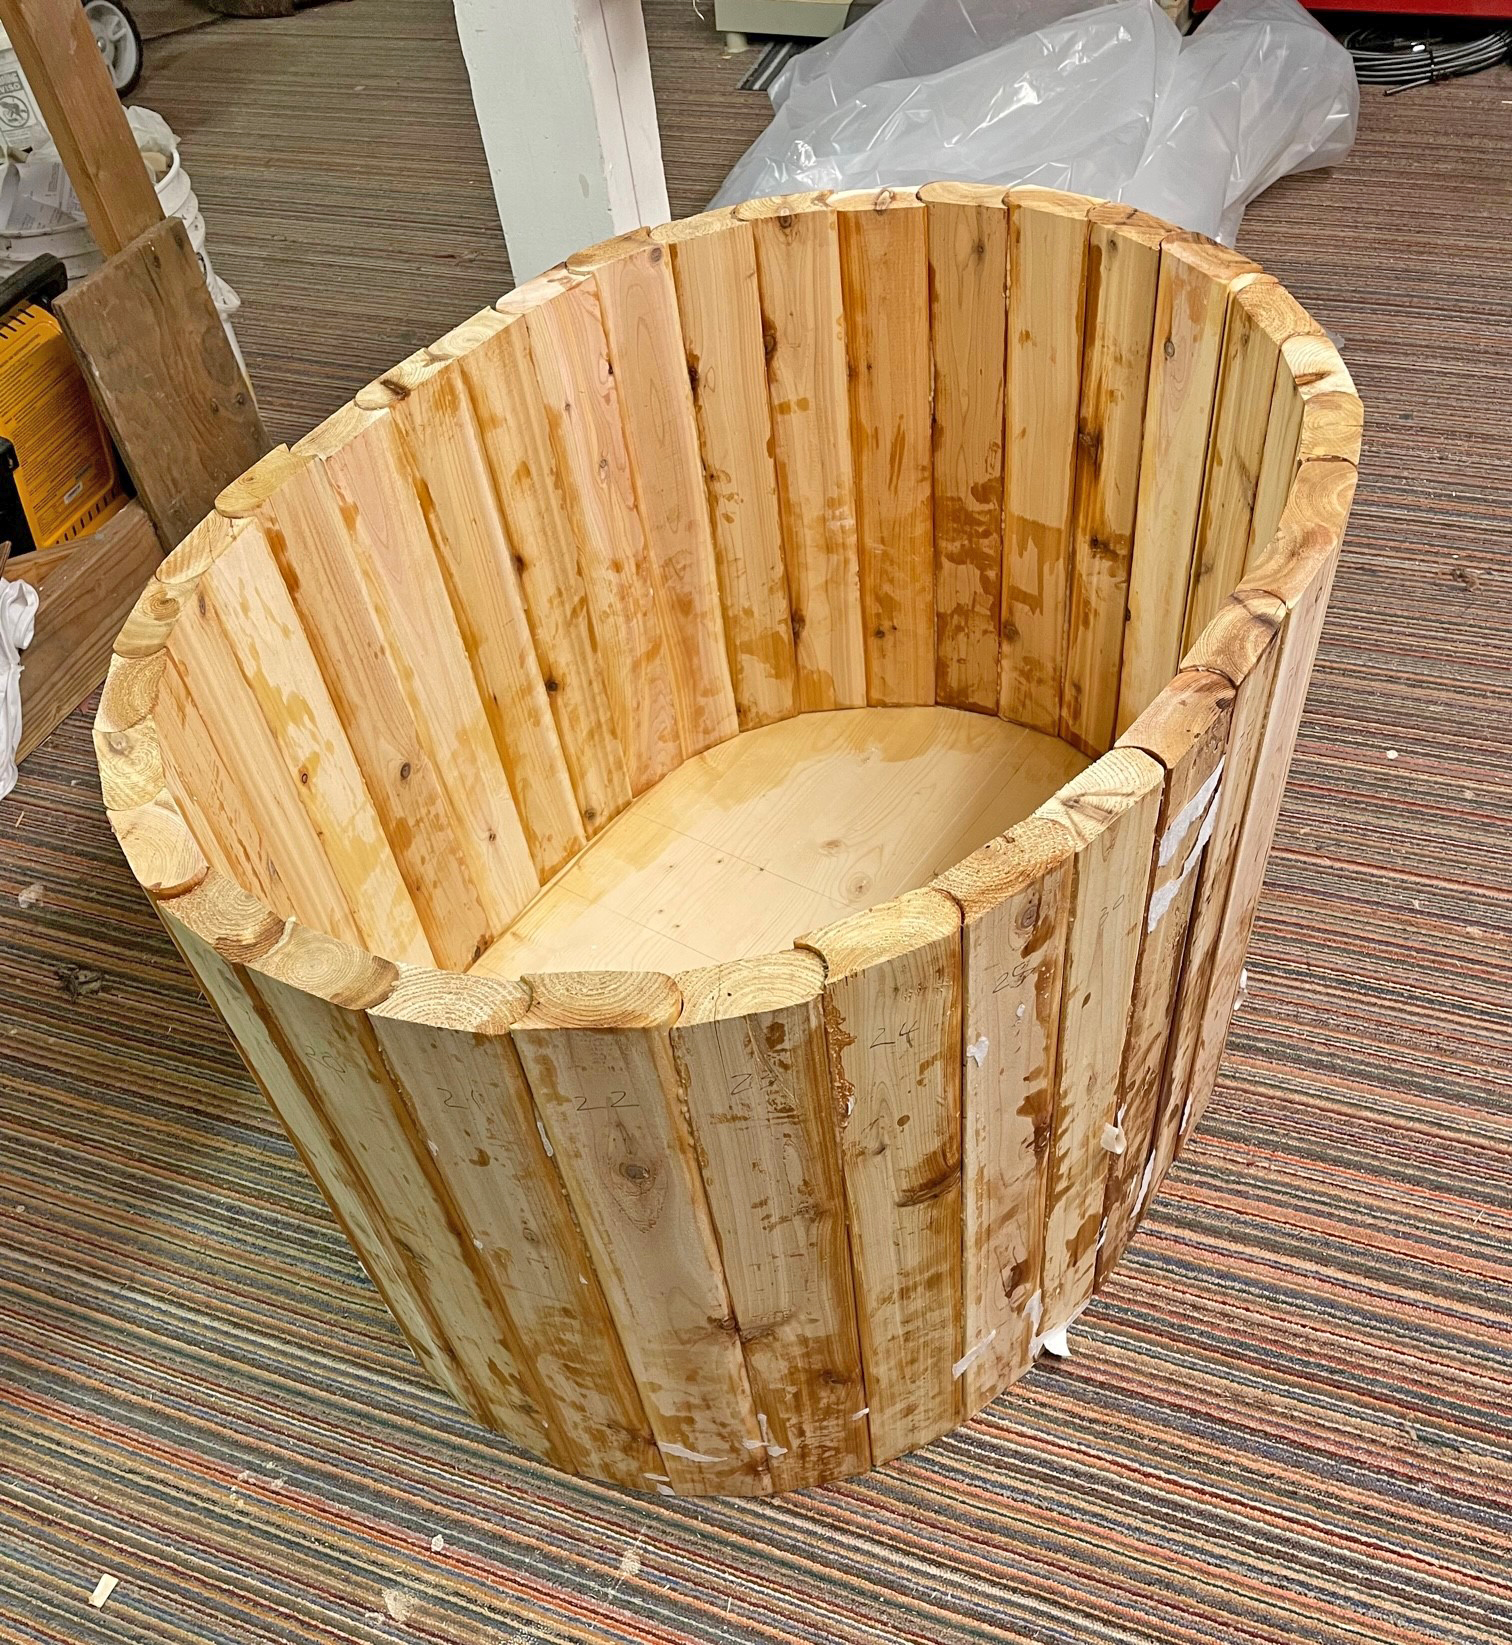
I fabricated the vertical strakes from cedar 2x4s. The 2x4s were cut into 24″ lengths and a bead and cove edge was routed onto the long dimensions of the strakes. Bead and cove is familiar to cedar strip canoe builders—it enables the construction of curved shapes, with convex bead edges, to fit into concave cove edges. Finding appropriate router bits and cutting these edges proved
to be the most challenging part of the build.
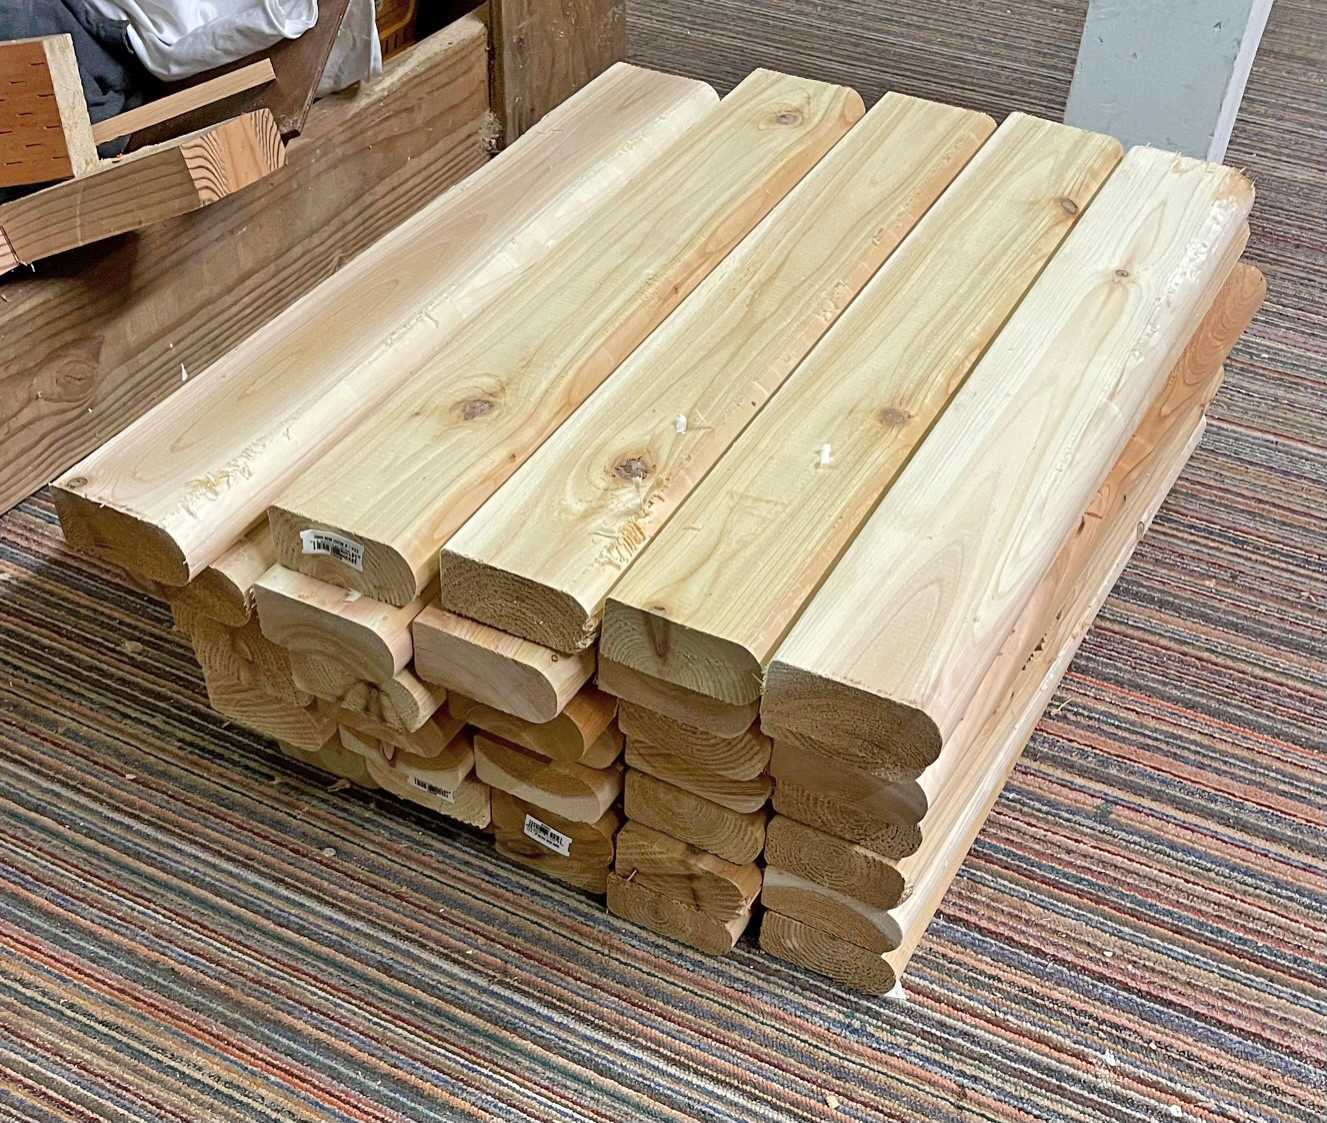
Once my 36 strakes were cut to length and routed, it was time to cut my dado. The dado would receive the bottom of the tub so that way the strakes would be mostly self-supporting during assembly. 1″ in from the end of each strake, I cut a ½” deep by 1 1/2″ wide dado with the table saw. The tub was then dry assembled on a large worktable. During planning, we did not take the time to calculate the circumference of the tub so that each strake would end up the exact same width. This left us with a gap between the first and last installed vertical strakes. I custom trimmed and routed an additional strake a little narrower to fit this remaining space.
Because of the sheer number of linear feet of edges to be epoxied, I knew the glue-up was going to be difficult. I surveyed a wide range of adhesives to find a product that would be waterproof and give me enough working time during assembly. I concluded that using WEST SYSTEM 105 Epoxy Resin with 209 Extra Slow Hardener would produce the working characteristics I needed, when combined with 404 High-Density Filler and 406 Colloidal Sillica Fillers for my adhesive mix.

For the glue-up, I started by wetting out all of the edges to be epoxied with unthickened 105/209. I then applied my adhesive mix to the concave edges and the dado slot. Standing the strakes on end, the tub began to take shape one strake at a time. At this point the strakes were loosely assembled, attached only on the bottom. I wrapped painter’s paper around the tub, then fitted two rachet straps around the tub to draw the strakes together.
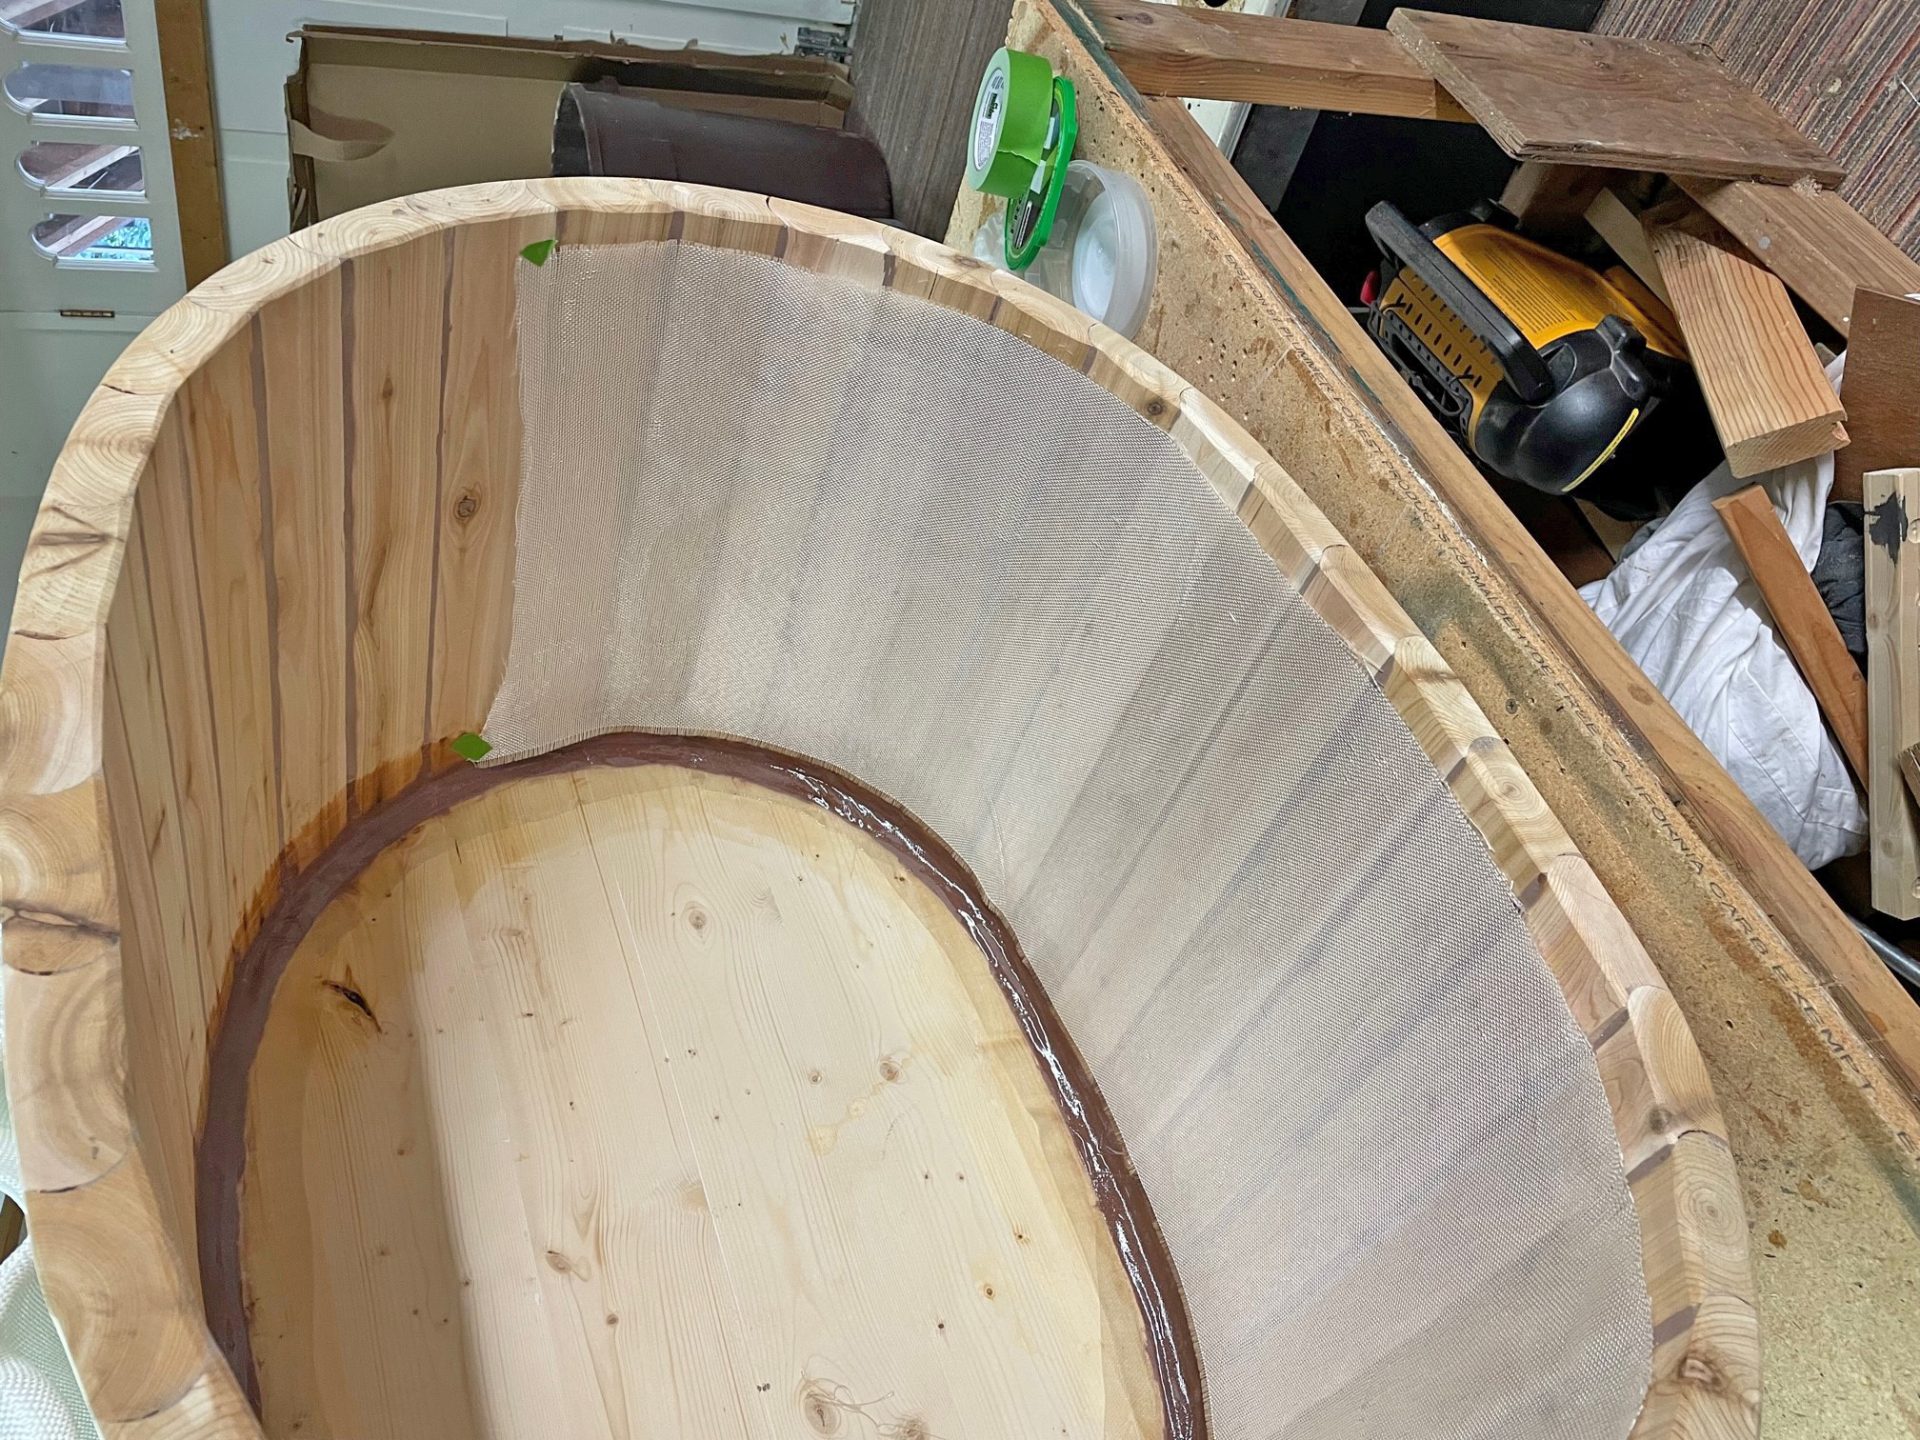
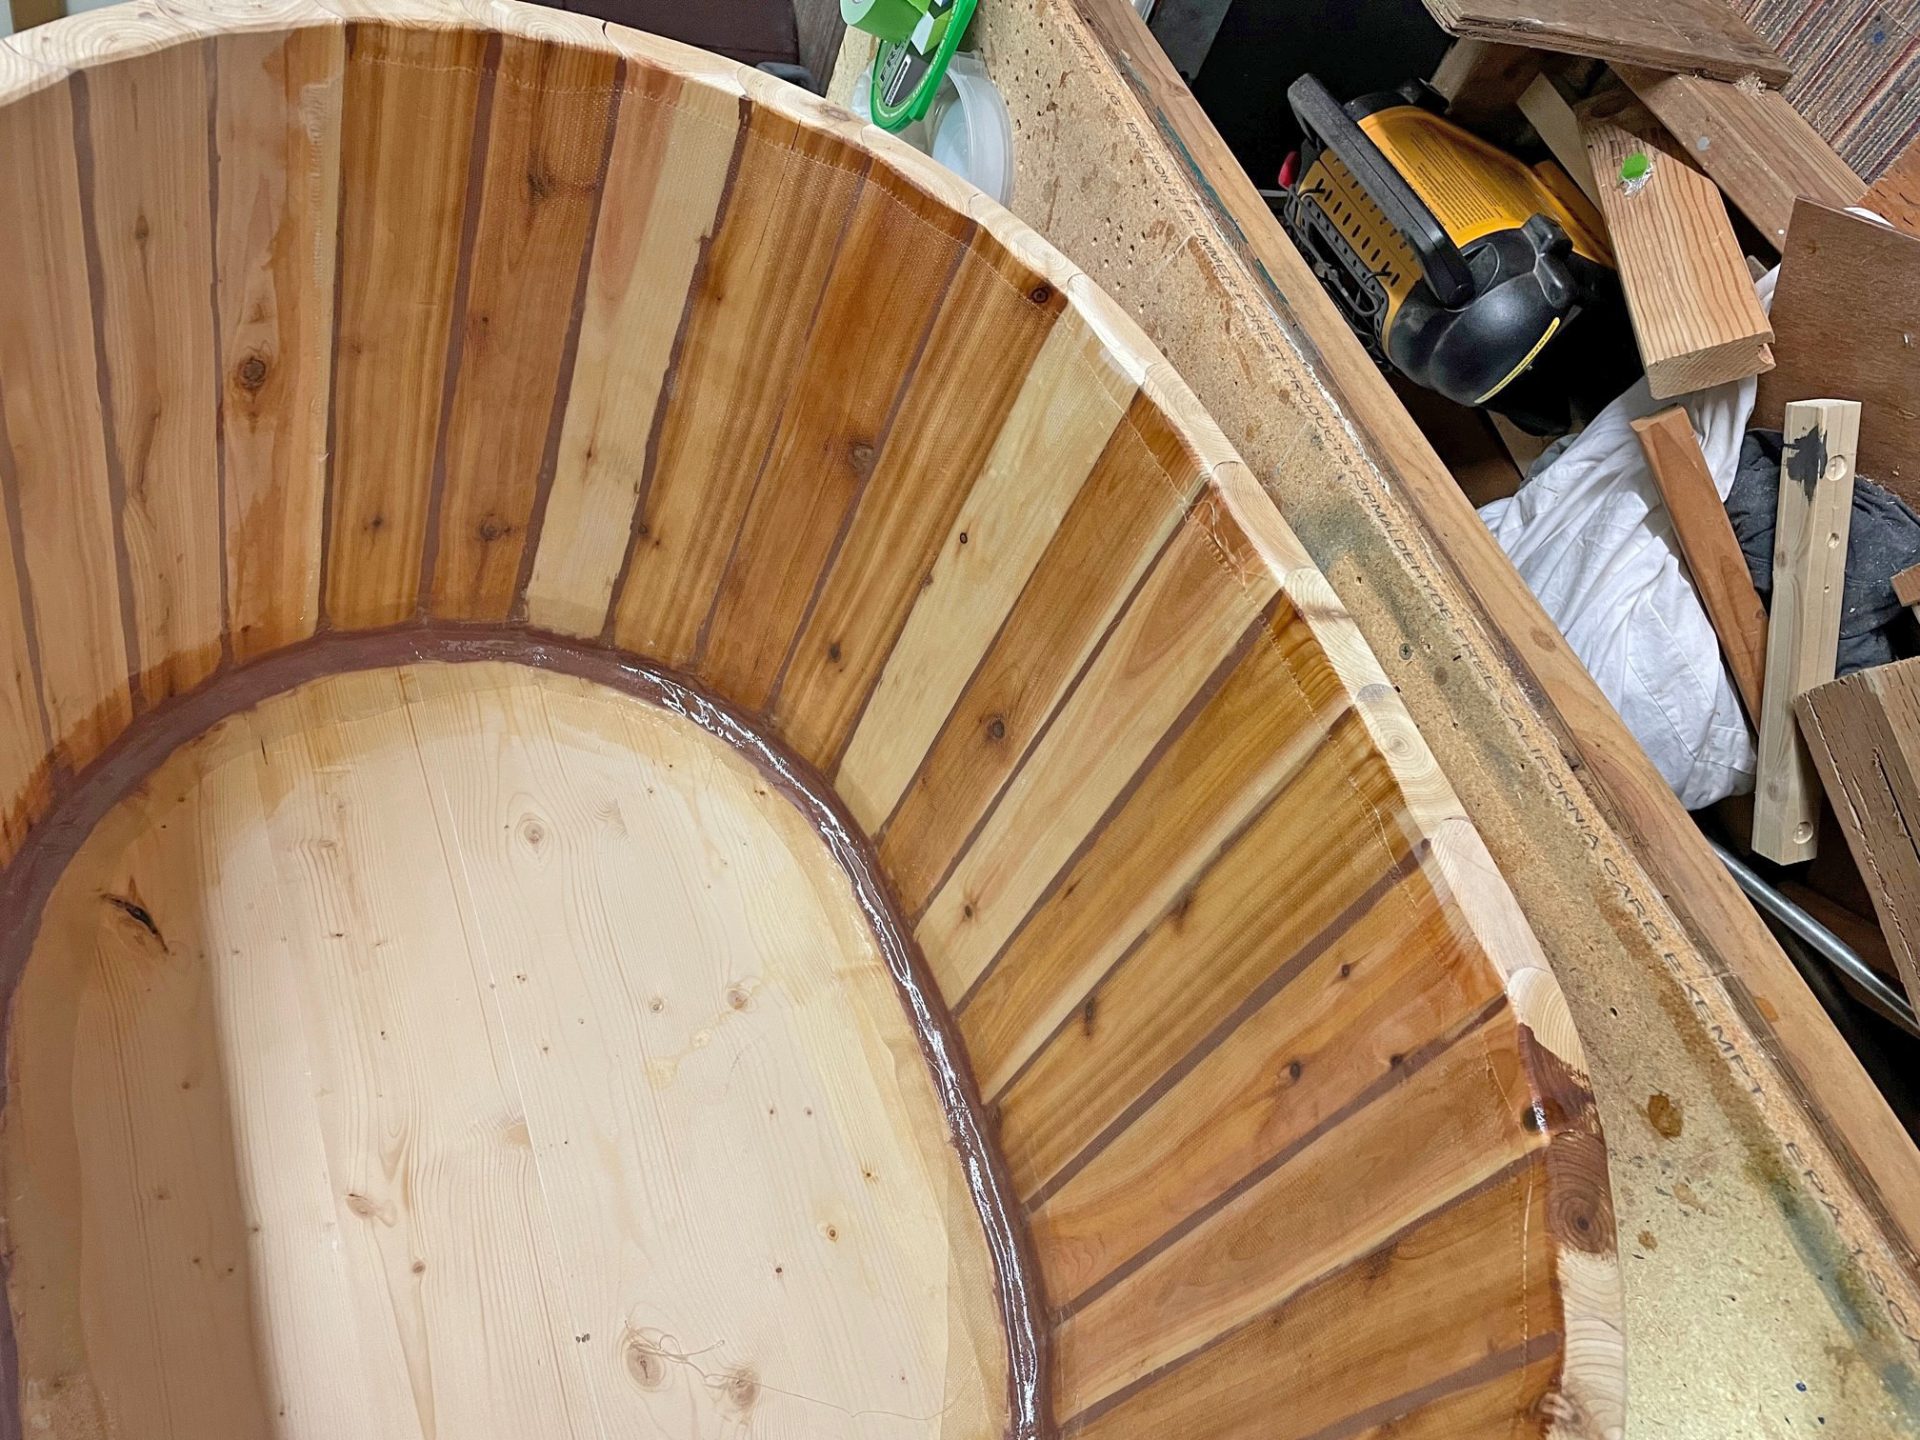
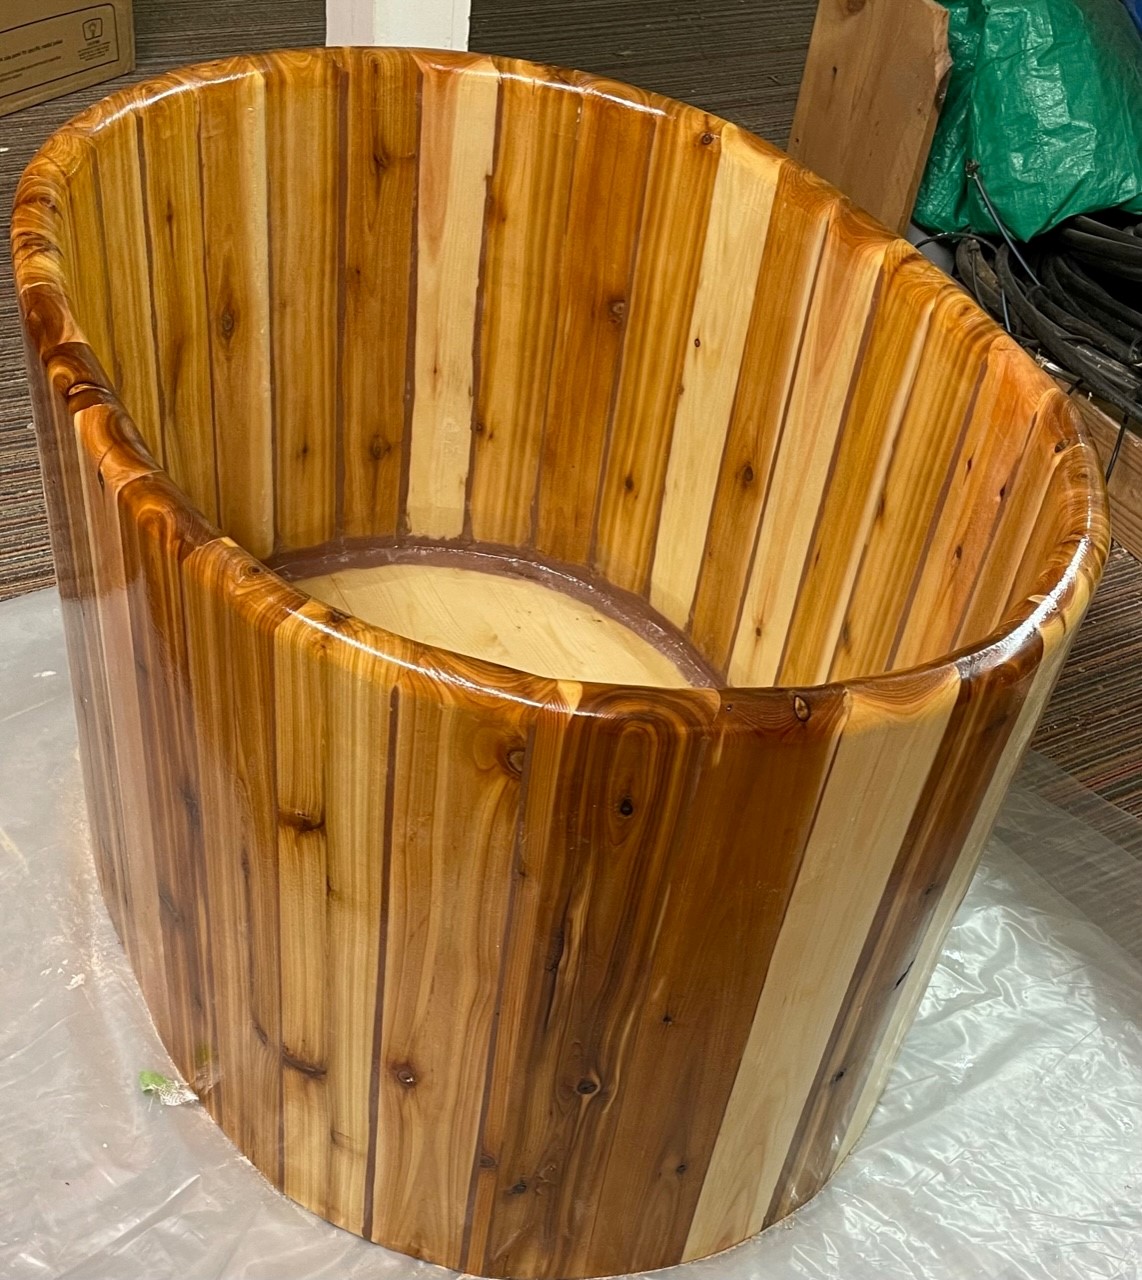
The final steps to finishing the tub were quite similar to building a small boat. I added fillets to reinforce the joints, laid fiberglass tape over the fillets, applied 4 oz. fiberglass to the interior of the tub, rolled fill coats of epoxy over the fiberglass, and coated the entire tub with 105 Epoxy Resin and 207 Special Clear Hardener®.
Once the drain was installed in the tiny house, its location was marked on the tub bottom. I used a router with a top bearing, guided by templates, to cut the countersink for the drain fitting. I used a hole saw to drill the 1 1/2″ hole through the tub bottom. The drain holes were then coated with epoxy and allowed to cure before installing the drain fittings using conventional gaskets and plumber’s putty.
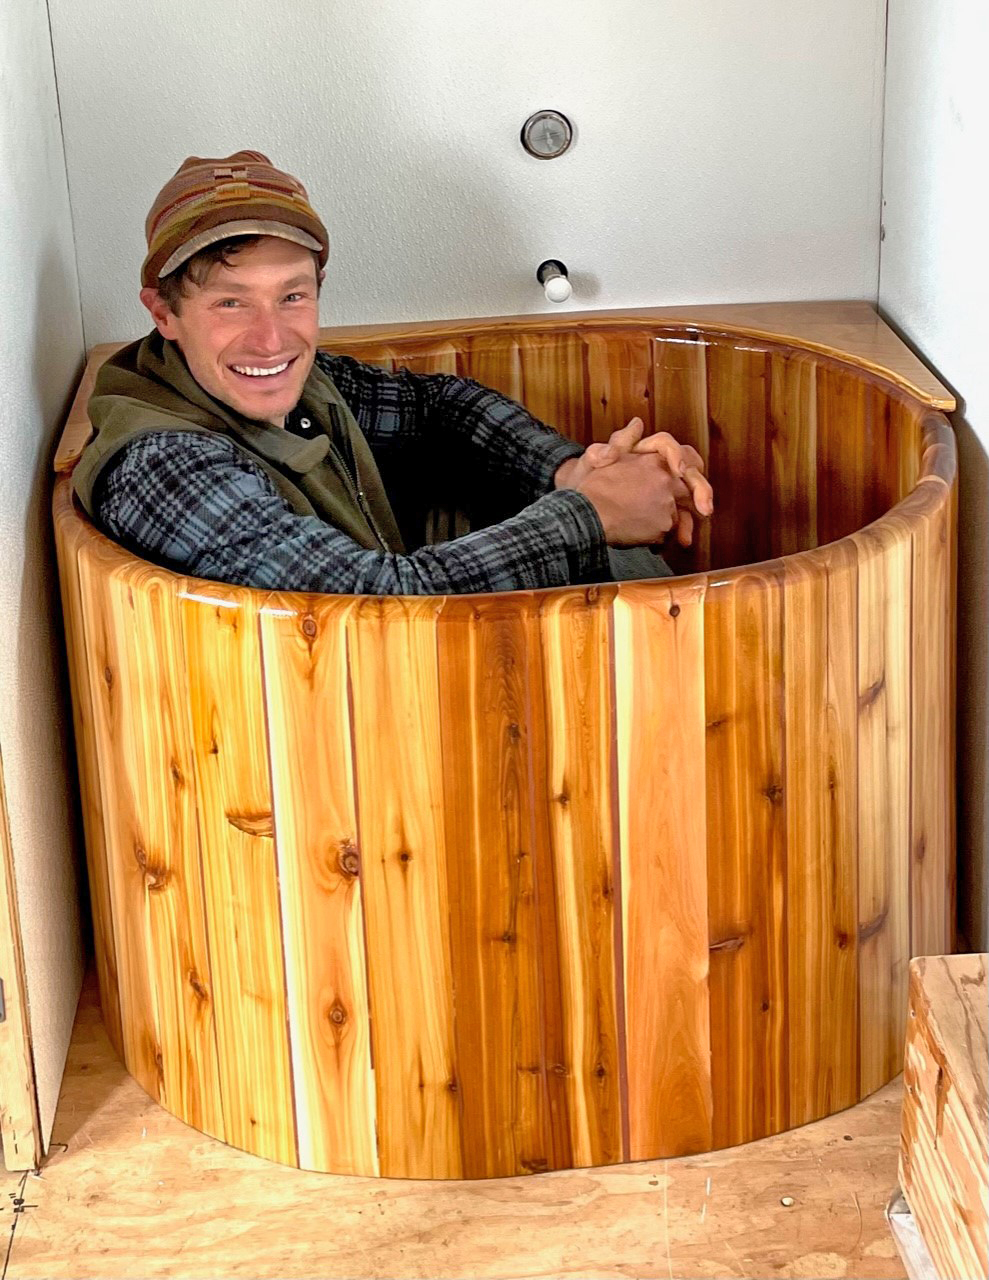
As you can tell by his smile in the picture, my son is thrilled with his custom, tiny house tub. This adds a lot of character to the house, and is built sturdy enough to be enjoyed for years to come.