Designing & Building the Rudder and Motor Bracket
by Captain James R. Watson
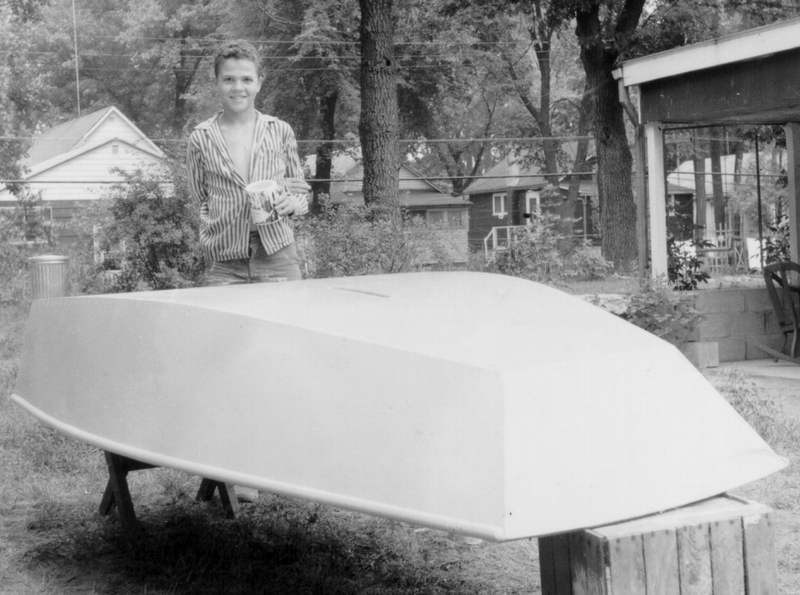
Above: The plywood sharpie is the latest in a long line of boats that Captain James R. Watson has built over his lifetime. Here he is at age 12 with a plywood dinghy he built himself.
Building the rudder
The sharpie’s main reason for existence for over a hundred years is its fine operation in shallow water. However, the conventional sharpie rudder is notorious for causing squirrelly steering, often becoming totally ineffective when the craft heels more than 20°. Most sharpie sailors simply accept the handling aggravations of the conventional rudder in trade for its wonderful steering ability in the shallows. I decided to resolve the traditional faults in steering by installing a special rudder and steering system that has evolved and is used on some contemporary boats. This system will yield maximum control over a wide range of wind and sea conditions while retaining the sharpie’s shallow water virtues.
Designing a new rudder system
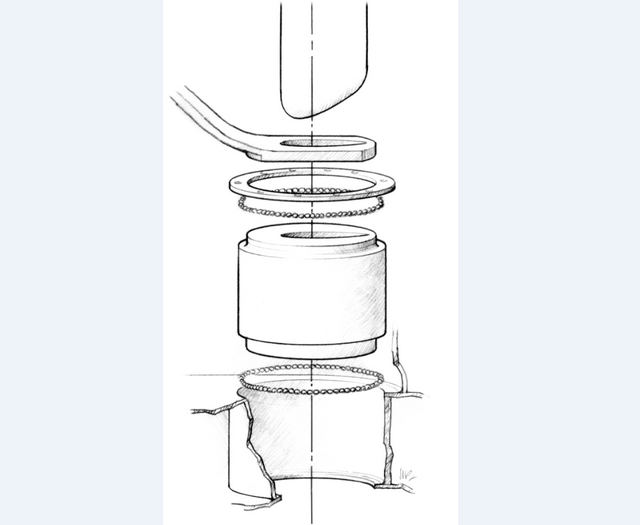
The steering system is comprised of a rotating cylindrical canister with a rudder blade that passes vertically through it. The canister is housed in a cylindrical case that is fixed to the hull (a cylinder within a cylinder). The canister turns (via tiller) within the case on ball bearing races located at the top and bottom of the case. The rudder blade may be lowered to whatever depth you want (like a daggerboard) or totally removed. The blade retains the same amount of balance regardless of its depth in the water. The bottom of the rudder canister blends cleanly with the bottom of the boat, producing minimal turbulence.
Nothing is for free. You can only use the canister-type rudder configuration on craft such as the plywood sharpie with fairly flat sections where the rudder is located. If there were a lot of deadrise in the bottom, the canister’s exposed edges would create too much turbulence when turned. Another negative with this type of rudder is the damage that might occur if you run aground at speed with the blade down. This rudder system may also be somewhat heavier and more difficult to build than a conventional system.
Building the plywood sharpie’s rudder
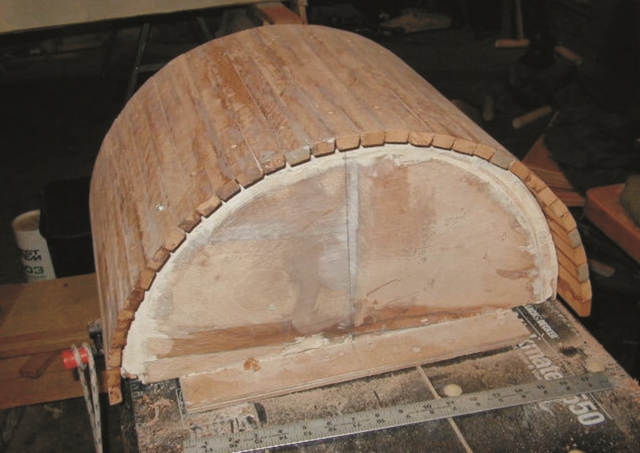
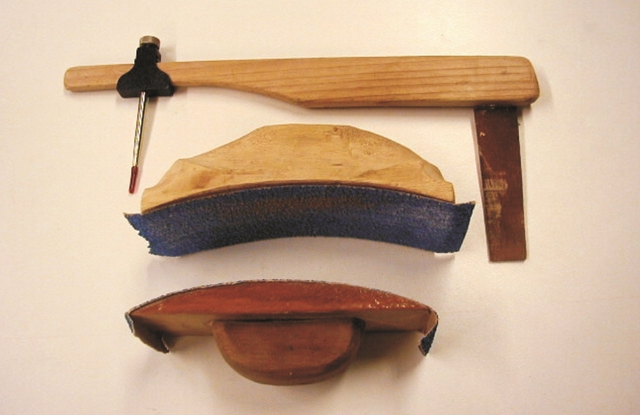
I used 1/2″ thick mahogany to strip plank the round case and the canister halves over half molds. Since the case and canister must be quite accurately rounded, I made custom sanding blocks to match the inner and outer curves of the canister and case. I used them to smooth the surfaces of the case and canister halves after the strips were bonded together over the molds.
I also made a specialized tool that pivots about a hole in the center of the mold which I used to accurately apply fairing compound to the inside of the surface of the case halves. When I joined the halves, I was assured of a smooth accurate cylinder on the inside. After a final smoothing with a custom sanding block, I covered each side of the components with 6 oz fiberglass fabric to improve torsional strength.
Making the ball bearing races
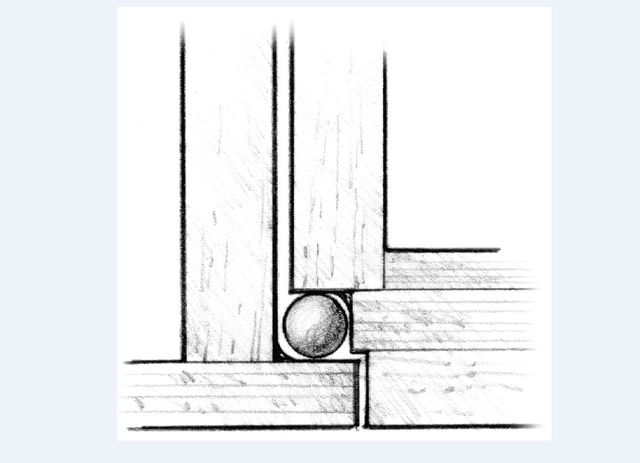
I planned to use ½” diameter Delrin ball bearings and needed to form a race on the canister and the case slightly greater than the radius of the balls—in this instance 1/8″. I formed a race on the top and bottom edges of the rotating canister by bonding a plywood disk, with a diameter ¾” smaller than the end cap, to each end cap.
The case is joined to the hull’s bottom planking. Tolerances have to be close enough to prevent balls from dropping out of the race and to prevent irritable slop.
I fashioned fillets in the corners of the races using epoxy with 420 Aluminum Powder added to make a tough wearing surface. When the fillets cured, I sanded them smooth.
Designing the rudder blade
The rudder blade’s chord length (width) is limited by the diameter of the canister and further by the amount of desired balance/counterbalance. The greater the diameter of the canister (within reason), the greater the potential chord length for the rudder blade. A certain amount of area is needed for steering and you hate to achieve that by simply making the rudder deeper. Greater chord length is desirable but comes by pushing the amount of counterbalance. Counterbalance is that portion of the rudder blade located forward of the point of rotation. The point of rotation in this case is the center of the canister’s rotation (above). Typically the point of balance (center of rotation) falls about 22% of the rudder blade chord length back from the leading edge, although we’ve seen it pushed as far back as 32%. The impetus is to get as much rudder blade area forward of the point of rotation as possible. However, the consequence of excessive counterbalance is that the rudder may lose feeling or may even develop lee helm. Raking the blade aft reduces some of the counterbalances. In this instance, I have chosen to take the risk and set the counterbalance at 30%, knowing I may have to modify this after sailing the craft.
The choice of rudder blade section is important when heavily balanced. In this situation, it is better to have a section where maximum thickness is further aft than normal, 50% in this case. For information on calculating foil sections and building rudder and centerboards, see our publication 000-448 Building Rudders and Centerboards or Theory of Wing Sections by Ira H. A. Abbott and Albert Edward von Doenhoff.
Building a motor bracket
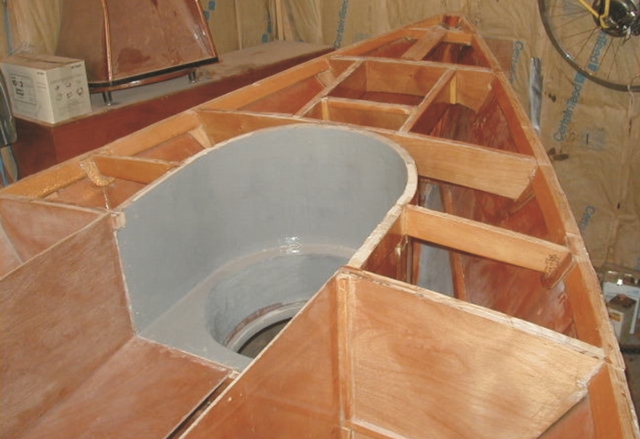
Chapelle says wide side decks on a sharpie improve seaworthiness, and I agree. This hull is essentially a decked-over lifeboat and wide side decks provide stability in a knockdown. The wide side decks also result in space below sufficient to house an outboard motor well to one side.
Sharpies existed prior to the invention of the internal combustion engine. To get home, you either sailed, rowed, or used a sweep. Today, an auxiliary motor is nearly mandatory on cruising boats so you can make time with or without wind. Modern four-cycle outboards are quiet, economical to operate, and clean. I wanted an auxiliary outboard motor and I wanted it in a well where I had convenient access to it.
The Mercury 9.9 four-cycle motor penetrates the hull with an arrangement that is flush when retracted and protrudes only from the cavitation plate down to the prop when motoring. Motor wells can allow a lot of flooding which reduces the potential displacement of that area of the boat, so the goal was to minimize well size. Clean running and well size have been dealt with in one way or another in a number of designs, most notably in the production Schock 40 sailboat and I used their approach as a guide.

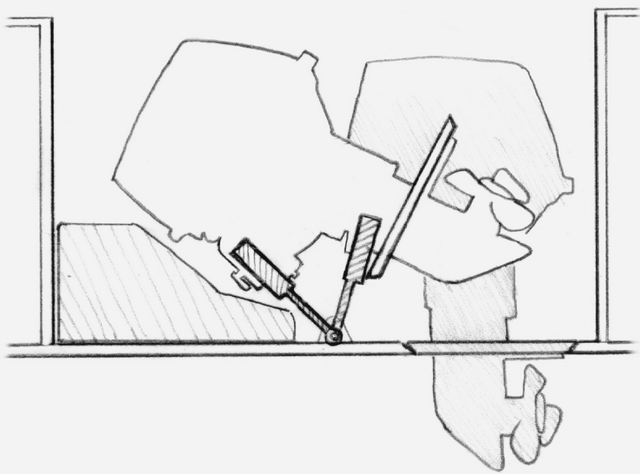
I mounted the motor to a welded stainless steel bracket. When the motor is lowered, a plywood plate fixed to the motor fits the hole and seals off, exposing only the motor’s cavitation plate and prop. Control cables for shifting and throttle lead to the cockpit wall. Manual starting is routed for access from the cockpit.
The motor bracket has stainless steel legs with a fitting that allows it to pivot. I used stainless steel rod end bearings for this. Bolts pass through the bearings and screw into nuts bonded into wooden blocking (photo and illustration, above left). This configuration allows the motor to be pulled vertically from the well, minimizing the hole size in the bottom of the boat. The length of the legs allows the motor to lie forward of the hole. To minimize flooding, I made the well as small as possible. The space under the raised motor is taken up by a fuel tank which further reduces the amount of flooding in the well and restores some of the displacement. In addition, when the motor is raised, I insert a plug into the open space.
Be sure to read my previous article, Building a Wood/Epoxy Sharpie, Phase I.

