Build Your Own Billiard Table
Spring 1993

GET STARTED
FREE PRINT & DIGITAL EDITIONS
Spring 1993
I thought a billiard table would be a nice addition to my basement rec room but began to rethink the possibility after talking price with the local pool table dealer. Since I had the necessary skills and tools, I decided to build my own. The result was a high-quality billiard table at a fraction of the price of a new one.
The key to building a billiard table that will remain flat and level for years is a stable playing surface and structure. By bonding and coating with WEST SYSTEM® Epoxy, the dimensional changes caused by variations in humidity are greatly reduced.
Because the techniques used to build this table require only basic to intermediate skills, this article will not give a detailed description of its construction. Instead, a generalized discussion of the structure, materials, and construction methods along with some drawings should provide you with enough information to complete a solid, good looking table.
The playing surface of a good quality pool table consists of slate covered with a fabric made specially for the purpose. Slate is chosen for its dimensional stability, ease of machining, and weight which provides the necessary mass to dampen any bumps or vibrations. The slate is available in three piece sets or a one piece slab, ground flat, and with the pocket cutouts already made. Some of the one piece models are even available with billiard cloth installed before delivery. Dimensions range from ¾” to 1″ thick, with widths anywhere from 3′ to 5′ and lengths ranging from 6′ to 10′.
Since slate is available in so many sizes and thicknesses, it is wise to purchase it before construction of the table begins. Critical dimensions necessary to build the table can be obtained directly from the slate if you already have it in your possession. To determine the size that will suit your needs and fit your space, allow 4′ to 5′ clearance around each side of the table.
The rails (cushions) are constructed of billiard cloth, wood and hard rubber. The geometry and the required dimensional precision make them difficult to build, so I suggest you purchase pre-fabricated rails that fit the slate. Also purchase the leg levelers before construction begins. Since the playing surface needs to be 29¼” from the floor, you will need to subtract the length of the levelers from the length of the leg.
It is my opinion that a one piece slate is preferable to a three piece set. Aligning three pieces of slate to form a single plane is time consuming and construction of the support structure becomes more complicated. For these reasons, this article will address building a table with a one piece slate. However, if you want to use a three piece system, refer to an excellent article in Fine Woodworking #75 describing construction techniques as they apply to three piece systems.
If your budget doesn’t allow for slate, a reasonable substitute can be fabricated by bonding two pieces of countertop grade particle board together, cutting the notches for the holes, and applying at least three coats of epoxy to all surfaces. A top built in this manner, if sanded flat and properly supported, would certainly meet the criteria that make slate a good choice.
Once you have the slate, the rails, and the leg levelers you can begin building the table. It consists of two components: a support structure made of construction grade material and a case made of higher grade material to conceal the structure underneath. The case also serves as an attachment point for the rails.
The support structure is two plywood box beams with legs bonded into them and several 1x6s bonded across the top of the beams to evenly support the slate. The legs, made of doubled 2x4s, are bonded to the inside of the plywood box beams as the beams are built. It is important that the legs be well bonded to the plywood sides of the beam to provide the rack resistance necessary for a stable structure.
Since construction grade materials are being used, it’s a good idea to let them adjust to conditions in your work area for a week or so to release any stresses in them. Coat the entire support structure with several coats of WEST SYSTEM Epoxy to keep it dimensionally stable.
Construct the case out of any material that you like the looks of and can afford. Natural finished wood is the traditional material but particle board with plastic laminate or painted wood are acceptable options.
The structure of the table must be strong enough to support the slate, which can weigh as much as 400 pounds. Additionally, a player may sit on the edge of the table to make a shot; so add another 200 pounds. As you can see, a solid support structure is necessary.
The construction of the box beam assembly begins by laminating the four legs. They are made of two 2x4s bonded together to produce a 3″x3½” post. These are cut to length so the playing surface measures the correct distance from the floor. Be sure to allow for the thickness of the slate, the height of the levelers, and the 2×4 top chord of the beam when you are calculating the length of the legs. Remove any epoxy that squeezes out during the bonding operation before it cures, and install the leg levelers.
Once the legs are fabricated and cut to length, the box beam assembly can be built. Figure 1 illustrates the concept.
The following items are important construction notes:
Construct the beams of ¾” A/C fir plywood and construction grade lumber. Dimensions are 11¾” high by slate length plus 4″ (2″ extend past the end of the slate on each end). As you build the beams, coat the inside of each with WEST SYSTEM epoxy to provide a moisture barrier.
Trim the ends of each beam at a 15° angle.
Set legs back about 12″ from the end of the beam.
Install the legs, making sure they set firmly against the 2×4 top chord and are bonded with lots of thickened epoxy. There is no diagonal bracing on this table so the rack resistance is determined by how well the legs are bonded to the beams.
Once both beam assemblies are built, stand them up and temporarily brace them plumb about 24″ apart center to center. Bond two ¾” plywood gussets between the beam assemblies for lateral support. Cut enough 1×6 boards to support the slate about 12″ on center. The 1x6s will also support the sides of the table, the wood apron, and the top so the slats must be long enough to project past the edges of the slate by 3¾”.
Coat each board with epoxy and bond each one to the top of the beams so an equal amount extends beyond each beam. Finally, bond a 1×4 board around the perimeter of the 1×6 slats to form a “box” that the slate will set in. Be sure the inside dimensions are larger than the slate. Saw the pocket cutouts in the perimeter frame at the appropriate spots. They can be a little oversize because later a pocket liner will be placed in the hole.
This is probably a good time to install ball returns if you choose to use them instead of leather pocket cups. They consist of a sloped ramp (about 3/8″ per foot) running directly under the pockets to a central collection area at one end of the table. The ramp is attached to the bottom of the perimeter frame. The collection area is simply a piece of plywood tilted slightly towards the end of the table and bonded between the beams. After a ball is sunk in one of the pockets it runs down the ramp to the end of the table, makes a 90° turn, continues down another ramp, goes through the box beam (notch it if necessary) and into the collection area. Cut an access hole in the end of the table to retrieve the balls.
Cover the inside of the return with billiard cloth before it is installed to reduce the noise the ball makes as it rolls down the ramp. Additionally, a thin piece of high density foam rubber attached to the lower end of the return where it turns 90°, acts as a cushion and further reduces the noise level of the return system.
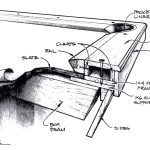
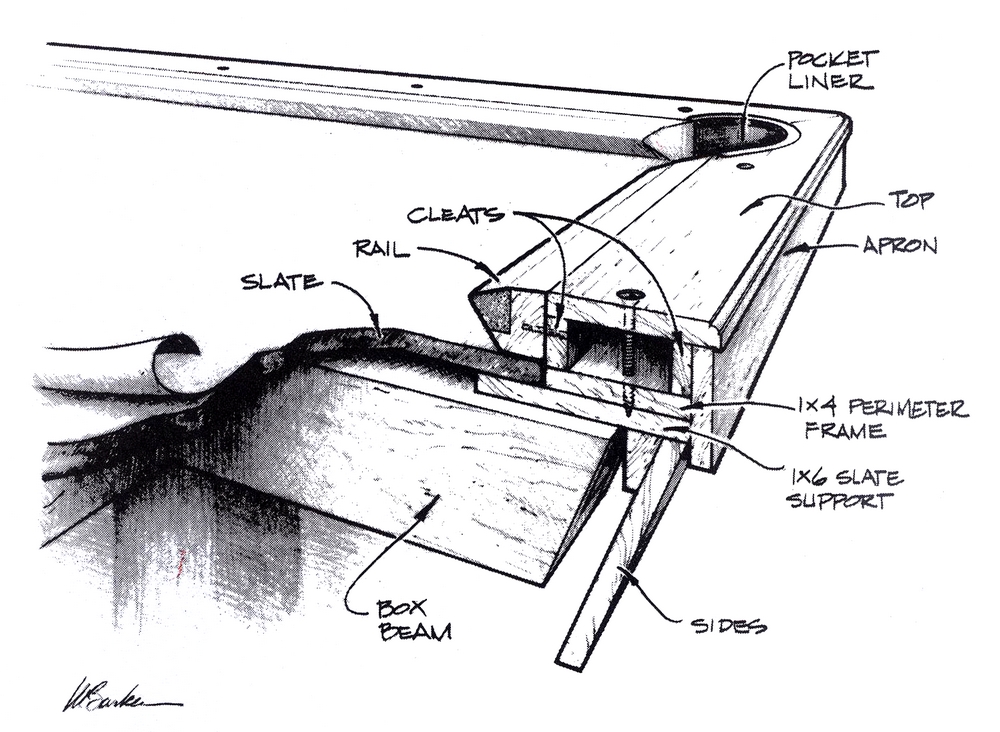
The top, apron, and sides of the table can be as fancy or plain as you want. Since the case is mostly cosmetic, ¾” thick material is sufficiently strong. The cutaway in Figure 2 shows how the top/apron assembly goes together. The entire assembly is anchored to the perimeter frame with heavy, flat-head wood screws which have been countersunk and located under round inlays (sights). Pre-finish the assembly before it is fastened to the table structure.
The sides incline 15° and are mounted to the bottom of the perimeter frame. To hide any fasteners you may use, the sides should be installed before the top and apron assembly are set in place. If you want to miter the corners, a compound miter will be necessary. Cutting miters on long pieces of wood is best done with a radial arm saw. Set the arm of the saw at 17°, tilt the blade to 43½°, and make the saw cut twice, the first time just a little bit long and the second cut right on the mark. A spline cut in the miter makes aligning the miters during assembly easier and makes a stronger joint as well.
The table top thickness is determined by the height of the pre-built rails which set on the slate. As you can see by studying the cutaway (Figure 2), the top needs two cleats to rest on. The thickness of the cleat plus the thickness of the top must equal the height of the rail. One cleat acts as the support for the rails and the other supports the back edge of the top and serves as an anchoring point for the apron. Use the pocket liners to mark the radius of the pocket cutouts and locate them using the ends of the rails.
To cover the slate, begin by placing the slate on saw horses so the edges overhang the horses. Install the cloth by using contact adhesive applied to the bottom and edges of the slate. Lay the cloth over the slate and, starting at the center pockets, pull the cloth tight, wrap it around the edge of the slate and anchor it in the contact cement. Ignoring the pocket cutouts for now, work the cloth toward the corner pockets pulling the cloth smooth as you go. When the cloth has been anchored the full length of both sides, perform the same operation to both ends. Then cut radial slits in each pocket area and stretch the cloth to conform to the pocket cutouts.
Place the covered slate on the 1×6 bed.
Attach the rails to the pre-varnished top/apron assembly and lower it over the table structure.
Anchor the assembly to the table structure with large flat head screws that have been countersunk in the top of the table. The countersinks get plugged with round plastic inlays.
Build and install a decorative covering over the 2×4 legs.
Locate and install the center spot which indicates the rack location
Level the table using the leg levelers and rack-em up.