Bubble-Free Epoxy Coating
Spring 2012

GET STARTED
FREE PRINT & DIGITAL EDITIONS
Spring 2012
WEST SYSTEM® Epoxy has long been a popular choice for clear coating tabletops, and for these applications, you’ll want a bubble-free epoxy coating. Epoxy works great as a buildup coat and a moisture barrier. It also showcases the beauty of wood grain and fiber weaves. Formulated with boat building in mind, WEST SYSTEM Epoxy is not intended as a final finish coating. You may find it a bit more difficult to achieve a perfect surface with epoxy than with a coating formulated specifically for final finishing, such as varnish. Here’s how to make sure your epoxy coating is bubble-free.
However, WEST SYSTEM offers some distinct advantages. It builds up quickly: a single coat of 105 Epoxy Resin® with 207 Special Clear Hardener® offers about four times the thickness of a typical coat of polyurethane varnish. WEST SYSTEM epoxy is also an excellent moisture barrier, stabilizing the surface so your final finish coat will look beautiful longer.
When coating a surface that will be used outdoors, it’s important to put a UV-resistant clear coating over the epoxy. While 207 Special Clear Hardener contains a good UV inhibitor, it will still need additional UV-resistant coats to withstand the degrading effects of sunlight on epoxy.
Since you will need to sand down the epoxied surface and coat the epoxy with varnish, getting a perfect coating isn’t strictly necessary. But the better shape it’s in, the more easily you will achieve a beautiful, bubble-free finish. The key is creating the smoothest, flattest epoxy surface possible. This will save you a lot of sanding later.
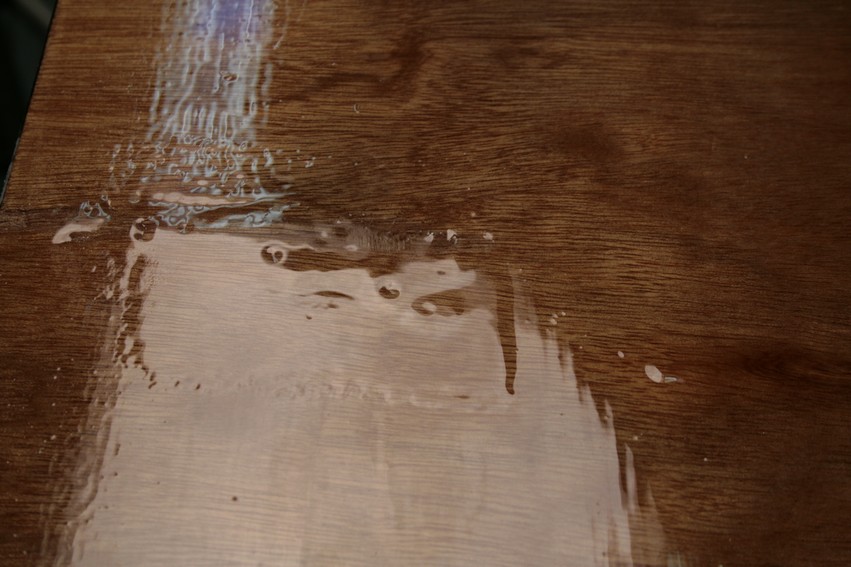
Last summer here at the Gougeon shop, we laminated a 35-year-old conference table with carbon fiber and WEST SYSTEM 105/207. We experimented with different methods of achieving a smooth, even, bubble-free epoxy coat to reduce the need for sanding prior to the final finish coating. (Editor’s note: 10 years after this article was written, that carbon-fiber conference table still looks terrific.)
Proper surface preparation is one of the most important steps in using epoxy. Make sure the surface is clean of contaminants such as wax and paint. Sand the surface smooth. Avoid using solvents immediately before applying the epoxy.
Getting a perfectly smooth surface starts with clearing the air of small particles. These particles may seem harmless, but once they are on a glossy surface it will not look nearly as good as it could. Avoid using tack rags. Vacuum the surface before coating.
Before coating bare wood, heat the wood and apply the epoxy while the wood is cooling. During cooling, the air in the wood contracts, drawing the epoxy in for a bubble-free epoxy coating. The opposite happens if you coat wood as it’s warming (such as in the morning, in the sunlight, near a heater or anytime ambient temperature is rising). The air in the wood will expand and “outgas” while the wood’s temperature is rising, resulting in bubbles in the curing epoxy coating.
Be careful when using WEST SYSTEM Epoxy over commercial stains. Some stains prevent epoxy from penetrating into the wood. The result can be epoxy that fisheyes or peels off after final cure. Always perform a test before using epoxy over a stain.
It’s easy to avoid the inert, waxy residue that is sometimes a byproduct of the curing process and is commonly called “blush.” Simply use WEST SYSTEM 207 Special Clear Hardener. It cures blush-free. It’s also formulated for excellent wet out and self-leveling. It cures extremely clear and without color.
If you are using WEST SYSTEM 205 Fast, 206 Slow, or 209 Extra Slow Hardener, blush might develop on the surface, depending on working conditions. It’s easily removed after the epoxy cures with plain water and a light scrubbing with a Scotch-Brite™ pad. These hardeners are not normally recommended for clear coating.
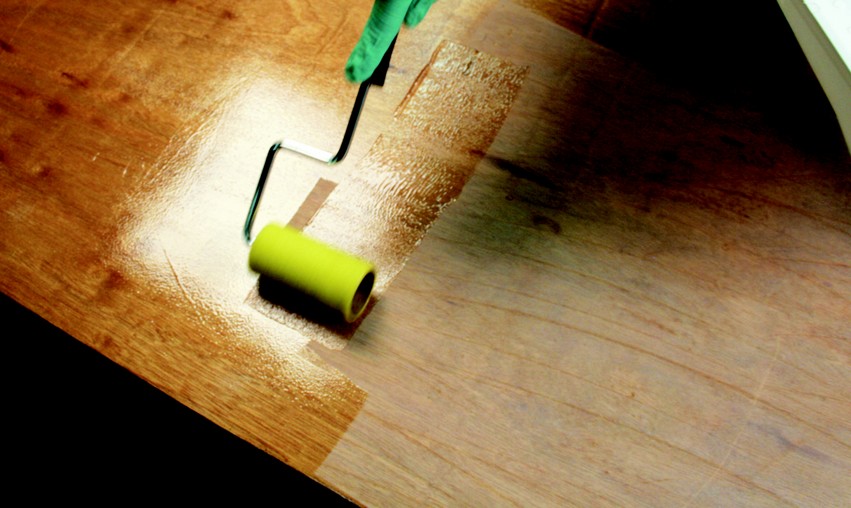
The only recommended way to coat vertical surfaces with epoxy is the roll and tip method. Roll the epoxy on with a foam roller, then “tip” by dragging another roller across the surface to smooth the epoxy layer.
This is the best method for encapsulating items in a bubble-free epoxy coating. The fewest bubbles result if epoxy is poured from the bottom of a container. A word of caution: Never pour a single layer of epoxy thicker than ¼”. Thicker amounts can quickly overheat or “exotherm” during cure, resulting in quite a mess on your lovely surface. If you want a final thickness greater than ¼”, wait until the first layer is cured to the point where it’s firm and about as “tacky” as masking tape then apply the next coat on top of that.
If encapsulating items such as coins, medals, bottle caps and photos on a flat surface, affix them in place with decoupage glue such as Mod Podge® (readily available at craft stores). It’s compatible with epoxy and will prevent your items from floating around. Use it to pre-seal photos and other paper items.
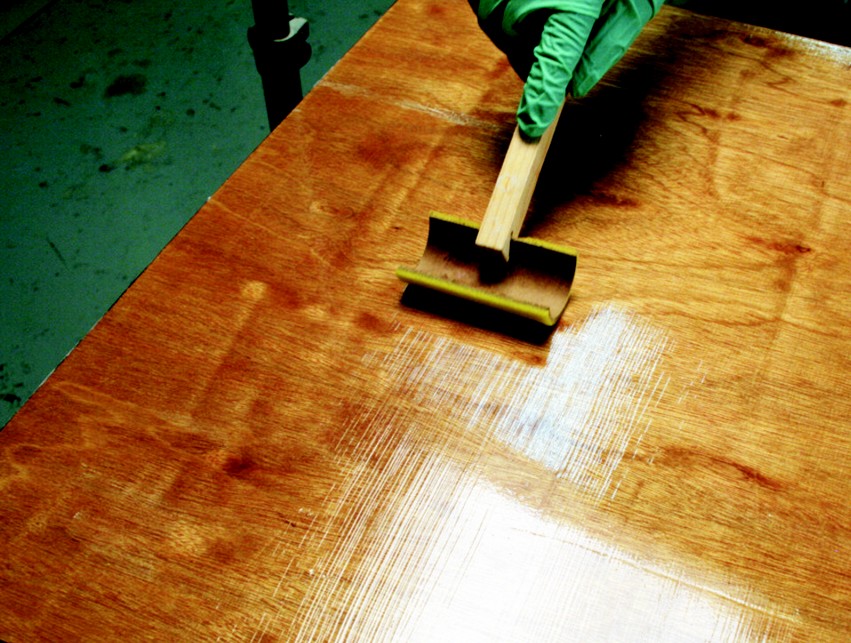
This method of achieving a bubble-free epoxy finish has been used for years by technical advisors at Gougeon Brothers. Not only is it effective for removing air bubbles from the surface, it also lowers the viscosity of the surface and flattens it out a bit. Be very careful when using this technique because leaving the flame over one spot for too long could cause bubbles to appear. We don’t recommend using a propane torch over epoxy-coated bare wood. Doing so may cause outgassing into the epoxy layer.

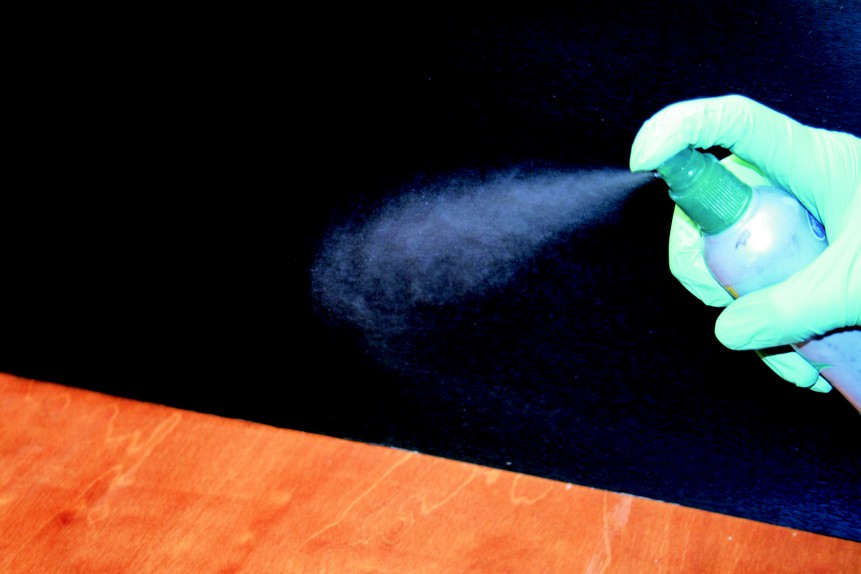
Spraying a fine mist of denatured alcohol over the surface will pop air bubbles as well as lower the viscosity of the surface and flatten it out. There is little risk in this method because denatured alcohol evaporates fairly quickly and does not cause air bubbles to propagate. A fine mist is critical. To get the fine mist we purchased a bottle of hair spray with a push button pump (a Windex™ sprayer is not fine enough) and replaced the hair spray with denatured alcohol.