
By Don Gutzmer – GBI Technical Advisor
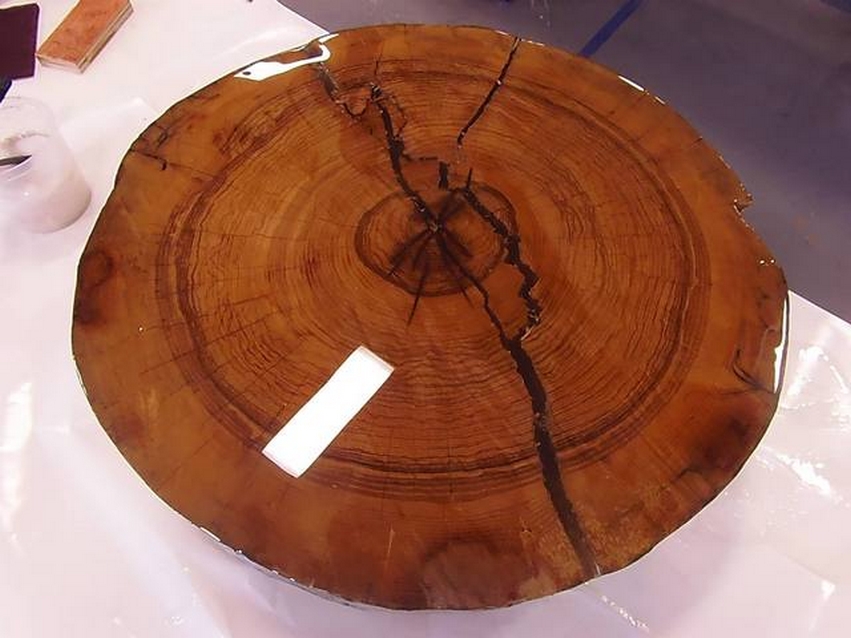
Customers often ask us to recommend a WEST SYSTEM product for filling cracks and knotholes in wood. The best choice is 105 Resin and 207 Special Clear Hardener. Used properly, this product combination produces a strong, transparent casting. I will use large logs with huge voids to demonstrate the best practices for achieving a clear, bubble-free casting with 105/207.
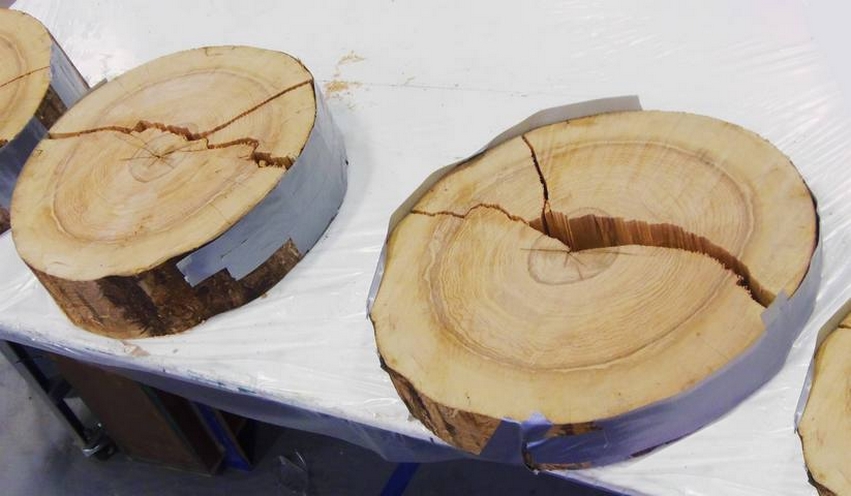
Dam the cracks
The first step is damming the cracks and voids; I used multiple layers of duct tape. This will contain the epoxy in the log’s cavity. Take your time to make sure the cavity is well sealed. Speaking from experience, it’s a real pain to see your epoxy dripping on the floor as you rush around trying to seal an area now coated with wet epoxy.
To seal a crack or knothole in the wood, you can use duct tape or just about anything that is flexible enough to cover the crack, hold the wet epoxy in, will stay put when exposed to wet epoxy, and can be removed after the epoxy cures.
Coat the casting surfaces
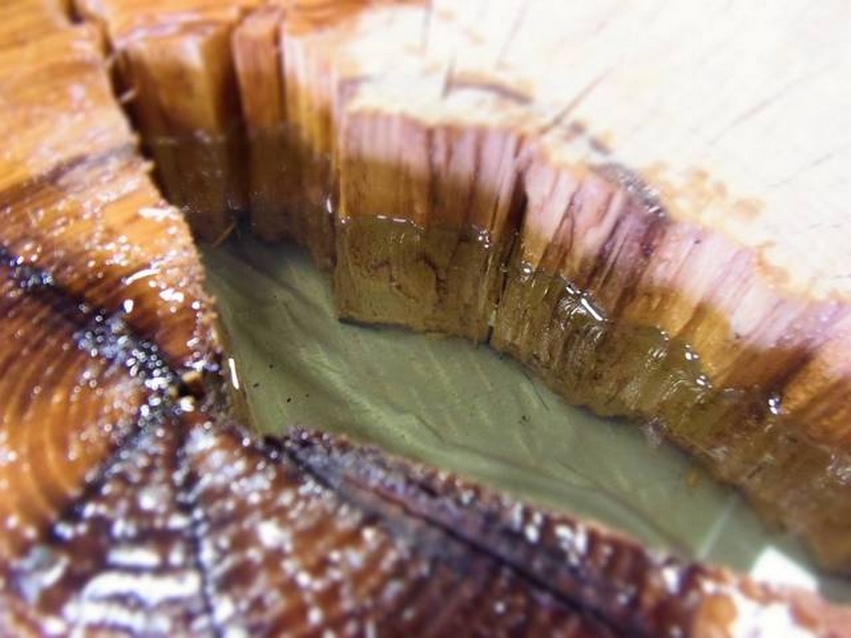
Unsealed grain may trap air bubbles along the edges of the wood. Wood can also “outgas” or release gasses as it warms, creating bubbles that get trapped in the epoxy. To prevent this, brush one or two thin coats of epoxy onto the wood’s surfaces. Don’t coat any higher than you plan to cast within 18 hours of this seal coat’s cure, unless you don’t mind sanding the seal coat between coating and casting.
Allow the seal coat to cure for about 6 hours, or until gelation.

Preventing uncontrolled exotherm
As epoxy cures, it generates heat due to an exothermic chemical reaction. (See Controlling Exotherm in Epoxyworks 39.) A mass of uncured epoxy can quickly get out of control, smoking, bubbling, and spoiling your project. Even if it doesn’t get completely out of hand, excess heat can discolor the epoxy.
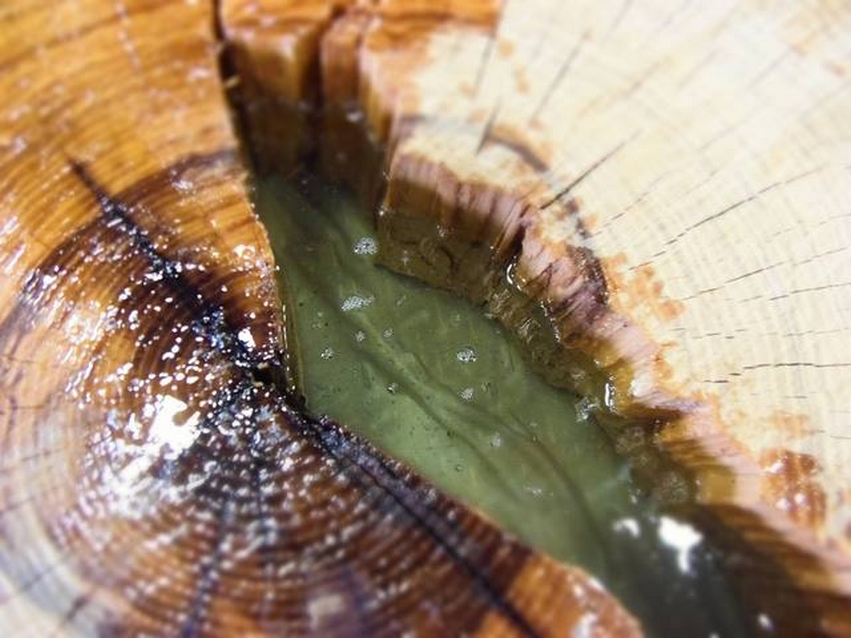
To reduce the amount of heat the epoxy can generate, plan on pouring multiple thin layers of epoxy at about ¼” deep per pour and allowing the epoxy ample time to set up between pours. For narrower cracks (¼” wide or less), you can pour the epoxy to ½”-3/4″ deep per pour because this smaller amount of epoxy shouldn’t overheat.
Consider the temperature of your work area when deciding how deep to pour. At warmer ambient temperatures, the epoxy will cure faster and generate more heat. Limit the depth of each pour, especially when working in warm conditions.
Before pouring, be sure the piece of wood is level so that the epoxy casting depth will be uniform and won’t build up a heat-generating epoxy mass on one side.
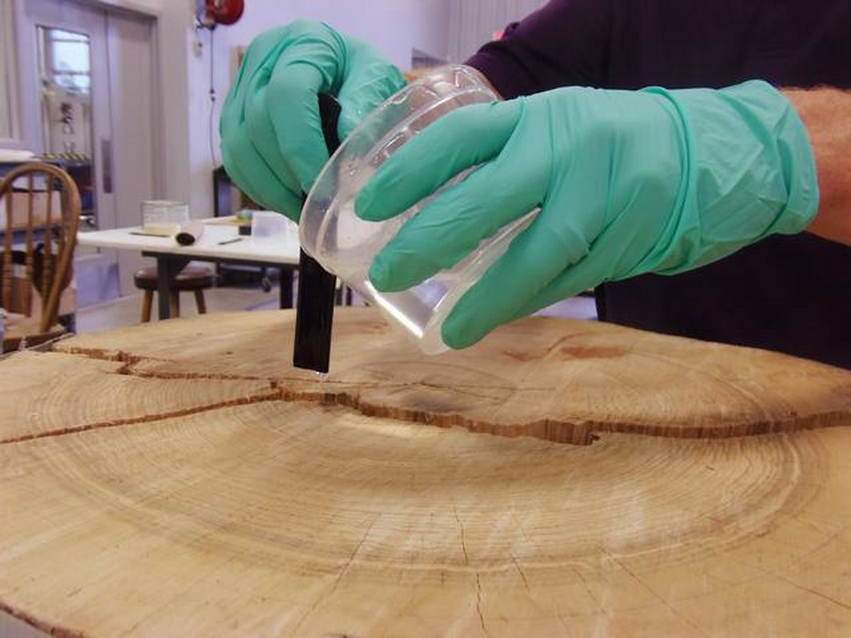
Minimizing bubbles
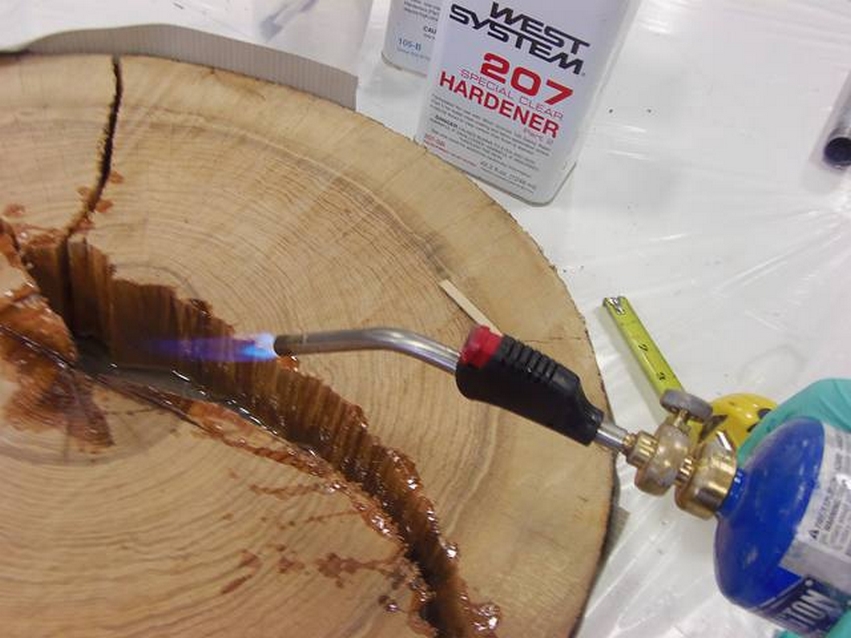
To minimize the bubbles introduced while mixing the resin and hardener, keep your stir stick against the bottom of the mixing pot. Mix thoroughly for one minute, but don’t lift the stir stick as you scrape the bottom and sides of the pot. To remove any air bubbles after mixing, pour the epoxy onto the slope of a roller pan and quickly pass a propane torch flame over the epoxy as it runs to the bottom of the pan. Pour the bubble-free epoxy from the corner of the pan into the prepared crack or void. To direct epoxy into the bottom of the cavity, pour it along the mixing stick.
Colored castings
The epoxy can be tinted with pigments or dyes. At a 2% loading by weight, most dyes, tints, and liquid pigments have little or no effect on the bonding strength or hardness of our cured epoxy systems. See “Adding Pigments to Epoxy” in Epoxyworks 21 for details.
Control pour depth
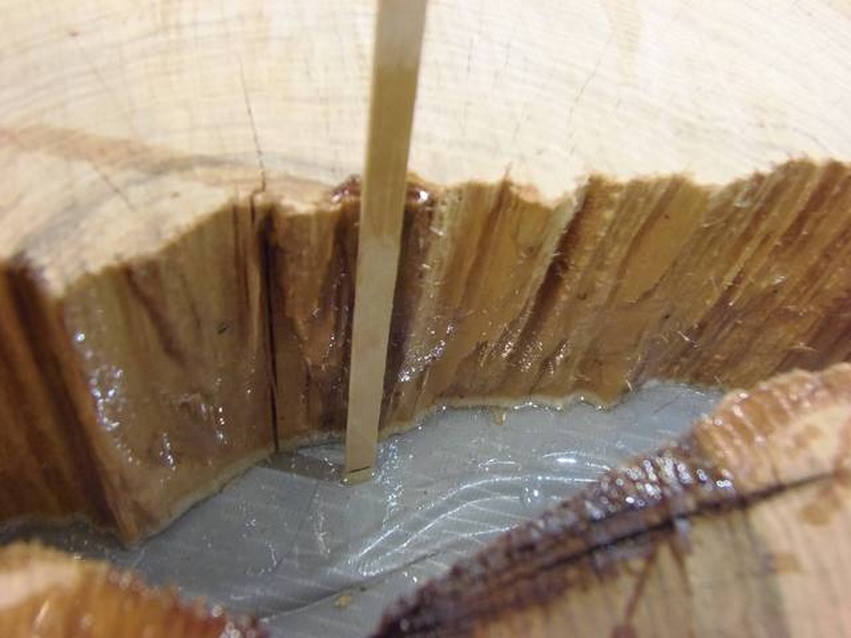
It can be hard to judge a ¼” depth by looking into a 3″ cavity. To prevent pouring too deeply, mark a stir stick at ¼” and use it to measure each pour. Let the epoxy run down the stir stick to direct the material into the cavity.
Remove bubbles from poured epoxy before cure
A handheld propane torch can be used to break the epoxy’s surface tension and help remove air bubbles. First, give the poured epoxy a couple of minutes to self-level. The bubbles should rise to the surface. Then move the heat source rapidly over the area (at roughly one foot per second) to avoid overheating the epoxy. You don’t want the heat source to make the epoxy gel or smoke.
Minimize the need for sanding
To avoid sanding between pours, make your next pour 3 to 12 hours after the previous pour (when working in temperatures of 70°F-75°F or 21°C-24°C). Adjust these times per the cure-time/temperature guide on the hardener container.
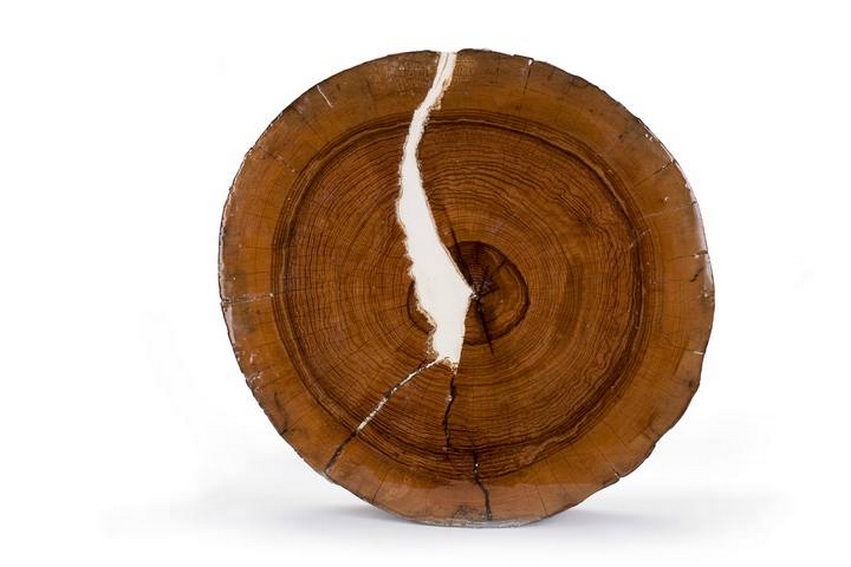
Final finishing bubble-free casting
For best clarity, allow the final epoxy pour to cure for 24 hours before sanding. The epoxy should sand to a dust. 105/207 is compatible with many varnishes and polyurethanes. If your casting project will be exposed to sunlight, you’ll want to add the UV protection of a good varnish or 2-part polyurethane topcoat.
After many pours over multiple days, I’d filled cracks ranging from 3.5″ to 7″ deep in my logs with clear epoxy. With the proper techniques, WEST SYSTEM 105 Resin and 207 Special Clear Hardener is a great option for clear epoxy casting.