
Male Mold Plug and Composite Shell Construction Techniques
By David M. Sianez Ph.D.
After many years of pursuing techniques for male mold plug creation and composite shell construction, I’ve developed a method that is inexpensive and fast. It calls for sheets of rigid foam insulation stacked and screwed in multiple layers to achieve the desired mold shape, then covered with multiple layers of carbon fiber and Kevlar cloth. WEST SYSTEM® Epoxy is used to bond the composite structure and cured at room temperature.
Composite shell construction became a pursuit for me following a visit to the Smithsonian National Museum of American History. While walking through the exhibits I came across a human-powered speed vehicle called The Gold Rush. It had been ridden by cyclist Fast Freddie Markham, the first person to exceed 60 mph on a faired bicycle. Going that fast under human power alone was an idea that challenged me, and later became my passion.
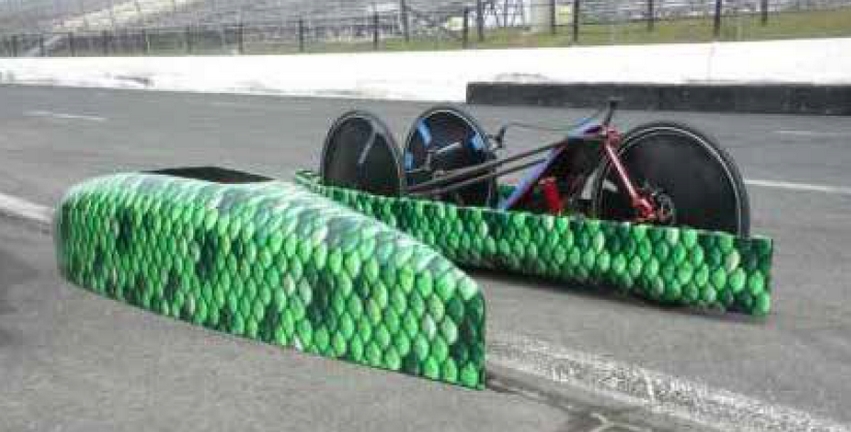
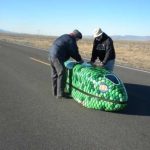
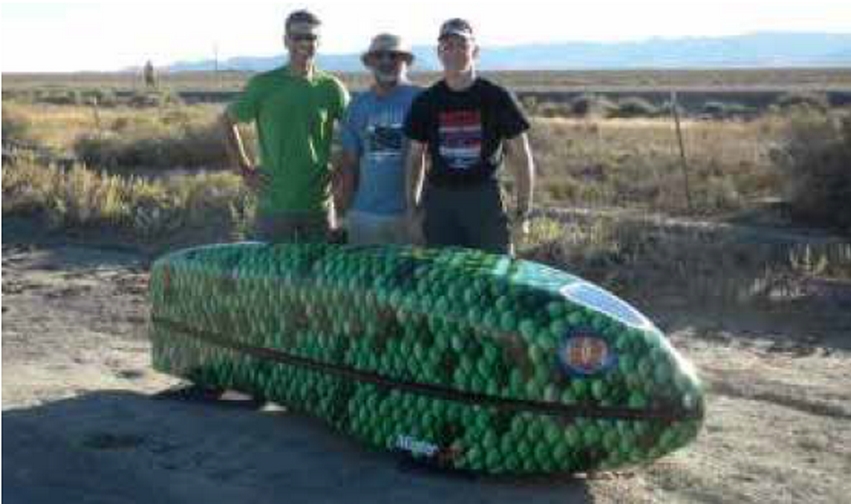
The step-by-step male mold plug process is illustrated here through the construction of a speed trike called “Big Nose Pete.” “Big Nose Pete” was designed to compete at Battle Mountain, Nevada in the 2013 World Human Powered Speed Championship. It is a tadpole trike (multi-track category) with two wheels in the front and one drive wheel in the rear. All three wheels are 29-inch with the rider in a recumbent position. The top speed for this vehicle was 46.5 mph.
Thousands of students from secondary schools and universities compete yearly in national and international vehicle competitions designed to academic content with hands-on design and building experience. This offers students an opportunity to explore, succeed, fail, and re-design through topics including Computer Aided Design (CAD), Computer Aided Manufacturing (CAM), machining practices, 3D printing, composite construction, materials analysis, aerodynamics, and welding. Giving students a common goal that incorporates science, technology, engineering, art, and mathematics expands their education.
This article will explain how to construct composite shells for vehicle competitions efficiently and effectively in the face of common limitations on time, finances, and skill levels. The techniques discussed here are by no means the only way to build mold plugs, but they have been refined through trial and error over many years and have proven appropriate for single-product composite shell construction.
Mold Selection
Both male and female molds can be used to create vehicle shells. The major difference between a male mold and a female mold is what side of the finished product will have a smooth surface.
When you apply fabric over a male mold the interior of the part will have a smooth surface. Fabric laid over a female mold results in a part with a smooth exterior. The choice for building a vehicle shell seems obvious: a female mold for a smooth exterior. However, we soon discover that this isn’t necessarily the most logical decision.
Building a female mold is typically a two-part process that begins with constructing a male mold plug and then using the male mold plug to create the female mold. Unless you have access to high-quality CNC equipment that will allow you to directly create a female mold, you are stuck constructing the male mold first.
This is where real-life steps in. Designing and constructing vehicles for competitions is usually done in a one-year cycle. Your team has a finite amount of time to design, build, test, fix, and prepare the vehicle for the event. And an academic year is much shorter than 365 days due to summer break and other obligations like going to class. Factor all of this into your decision, and remember to include the skill set of the group of individuals working on the project. Consider also that the team will want to implement new designs on a regular basis, so the female mold will most likely be used for no more than two years before being discarded.
If you do decide to create a female mold, expect to spend more time and resources during the mold construction process but your final part will look more like a finished product.
Keeping these factors in mind, especially time constraints, I build most shells over male mold plugs. The finished product requires additional exterior finish sanding to create but the time savings is a major benefit. The method covered here is the construction of a single-use male mold plug that will be destroyed when it is removed from the final shell (This is the same process described in the article Pedal Car.)
Selecting Materials
The materials you select to create molds will depend on your abilities, funding, time constraints, and the machinery you have on hand. The key is finding materials that are easy to work with and don’t cost a fortune. Many molds can be constructed from inexpensive and readily available materials such as paper, plywood, foam, and aluminum. Other materials may require special ordering and delivery.
Unless you are planning on performing production runs with your mold you will probably use it once, then it will take up space in your work area. However, many projects have been doomed by cheaper materials that quickly warp or disintegrate. Building a mold is time-consuming and challenging, and when you’re done they can be hard to get rid of. Only spend as much money as needed to complete your mold to the required specifications for the specific project.
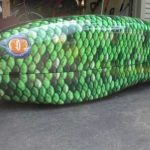
For Big Nose Pete we used Owens Corning FOAMULAR® insulation board, 2″ thick and 8′ long by 2′ wide. This reasonably priced material is easily machined and hand sanded. Other companies offer similar products in different colors which work equally well. Thirty sheets of foam were required to construct Big Nose Pete at a total foam cost of $600.00. When purchasing foam, look over each sheet to avoid damaged pieces. I like to purchase an entire pallet that is still shrink-wrapped. The top pieces may be a little deformed from the pallet straps, but the rest of the foam is typically damage-free.
Selecting Tools
We all like tools that make the job easier, more efficient, and precise. The first vehicle mold our team created was built using common hand tools. That mold took one year to build with hundreds of construction hours and assistance from many people. It was essentially carved by hand with power tools and Stanley Surform planes and shavers. With CNC machines and experience, that same job can be performed in less than 30 hours.
Speed versus cost is always an issue. You can hire someone to build your mold plug design and get it done quickly or you can spend the time building it yourself and save some money. The same applies to the tools you purchase. An appropriate CNC machine is expensive but will save you a tremendous amount of time after you learn how to use it. The shaping method you choose will be determined by the tools you have available and your skillset. There are many high schools, colleges, universities, and maker shops that have CNC machines capable of machining molds, but you may have to take a class or pay a nominal fee to get access to these resources.
Safety Considerations
Safety is more important than the finished product. Be aware of any health hazards associated with the materials you select to construct your molds and final designs. Read the material safety data sheets (MSDS) prior to using any material. If you are working with high school or college students be diligent about health and safety precautions. Young adults may not recognize the long-term health risks that can be associated with short-term exposure to some materials or chemicals. Provide guidance and set good examples with personal protective gear and proper cleanup and disposal procedures.
Working Environments
An appropriate workspace is vital to project success. Whether your crew is working in a closet or has an entire building, the work area must provide proper lighting, ventilation, dust collection, and enough space to accommodate the task at hand.
Time Management
The amount of time needed to complete this type of project is often underestimated. One seasoned race coordinator told me that design and engineering competitions were actually management events. The successful teams learn what can be accomplished over the allotted time frame and select reasonable objectives that will allow them to finish a vehicle and compete at the event. There is nothing more disappointing than spending all of your spare time on a project over the course of a year and coming up short on time and unable to compete. Time management is the main event.
Male Mold Plug Construction
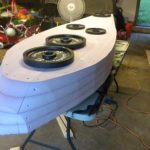
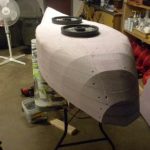
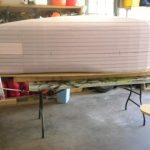
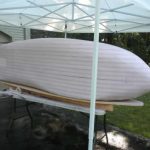
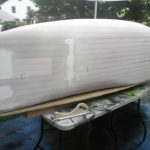
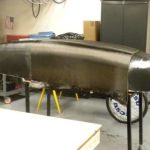
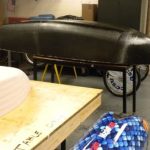
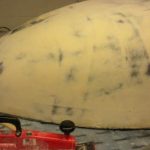
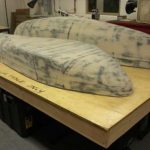
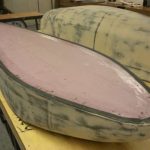
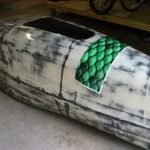
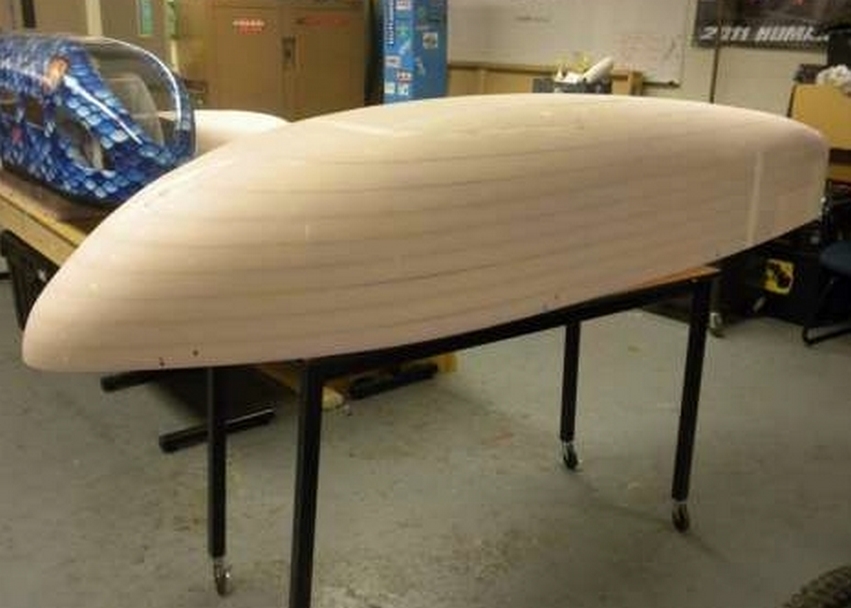
A male mold plug was used to create Big Nose Pete’s shell with Owens Corning FOAMULAR insulation board that was 2″ thick and 8′ long by 2′ wide. Thirty sheets of foam were CNC machined on a 4’x 8′ router and then stacked and joined with 3″ exterior grade deck screws. The widest section of the mold was greater than 24 inches so each layer was made from more than one foam section when required. The foam plug assembly was block sanded by hand to create the desired final look and shape. The plug was covered with one layer of Kevlar cloth and two layers of carbon fiber cloth to provide a durable and strong shell in the event of a rollover. WEST SYSTEM® Epoxy was used to bond all composite materials at room temperature. The exterior of the shell was faired with WEST SYSTEM® Epoxy blended with WEST SYSTEM® 410 Microlight fairing compound to achieve a uniform smooth finish.
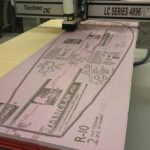
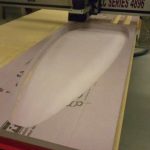
CNC Machining
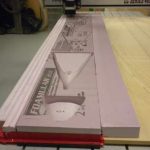
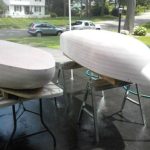
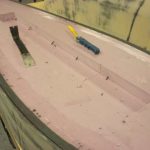
The mold plug was designed using a computer aided design (CAD) software package to create a three-dimensional solid model. The CAD model was sliced horizontally into sections 1.8 inches thick in preparation for machining the 2-inch thick foam sheets. The CNC router table has a vacuum system that holds down the pink foam and keeps it flat to the table while cutting it with a ½ inch ball end mill. Once each piece is shaped, the top surface of the foam is machined down flat to bring the thickness from approximately 2 inches to exactly 1.8 inches thick.
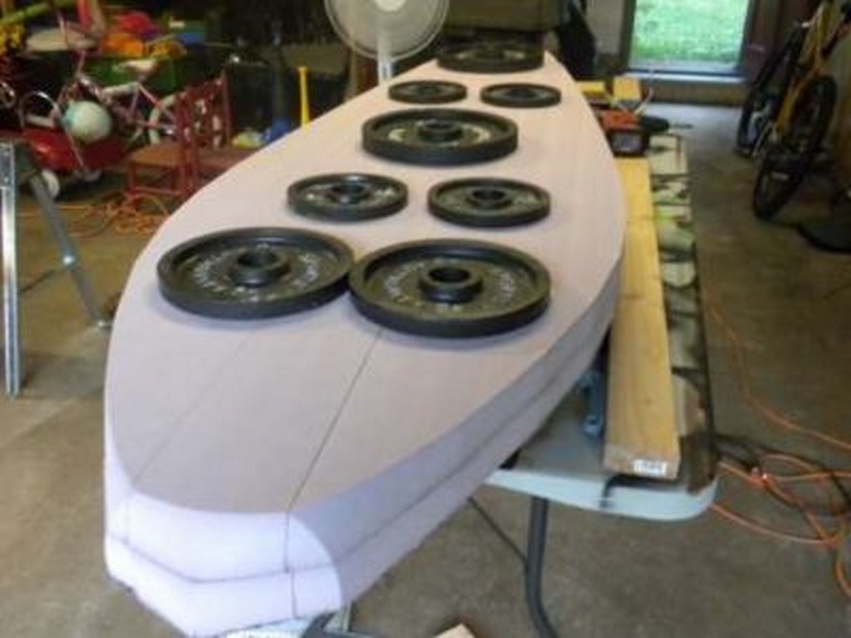
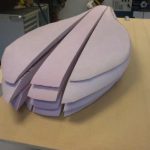
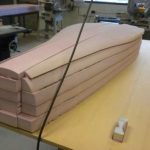
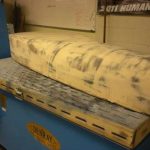
Joining Layers with Screws
I used to build molds by gluing together each horizontal section to prevent movement and misalignment. This was a messy process that made it difficult to remove the solid mass of foam from the shell. I switched to 3″ deck screws to join each layer of foam together. They go in quickly and hold really well. This is a rapid process and allows a layer to be easily removed if there is an alignment issue or machining error. It also speeds up the removal process which will be discussed in a later section.
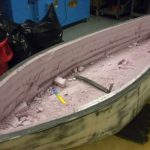
A stable platform is created from MDF or other similar material and provides a flat surface for the first foam sheet to rest on. This is vital to prevent the mold from warping or curling. Once a few layers are attached together, movement is minimal due to the rigidity of the foam sheets.
Each layer is weighed down prior to screwing in order to maintain a flat surface throughout the assembly process.
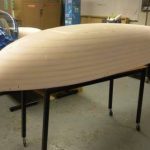
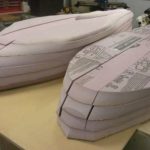
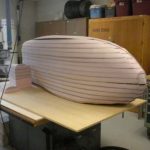
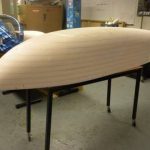
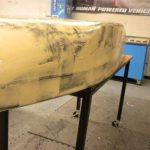
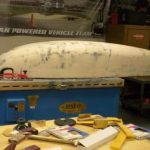
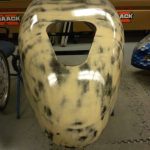
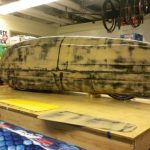
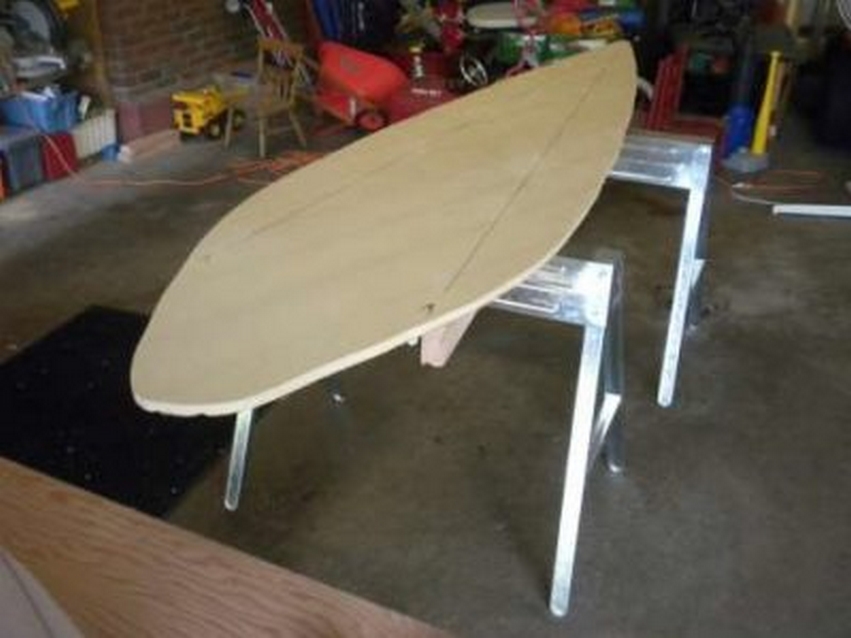
Fairing the Foam Plug
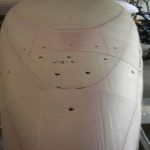
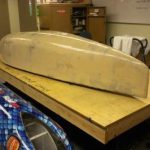
The mold sections have been screwed together and are ready to be faired. Take care not to dig into the mold when moving it (fingernails and tools) or take too much material off while sanding. Errors can be fixed at a later stage, but will just mean more time spent working on it.
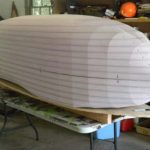
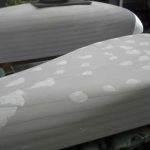
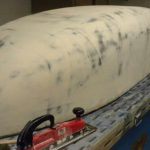
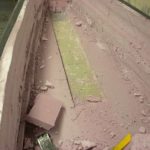
I was an automotive paint and body man in a past life and those skills are relevant at this stage. Your final finish will depend on a number of steps in this process and a lot of sanding. This is not hard work, but it requires patience. Pick up a longboard sander from an auto body and paint, and 100 grit sandpaper. The longboard helps keep the mold plug straight and true while you remove machining marks and raised areas on the foam.
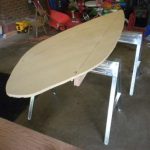
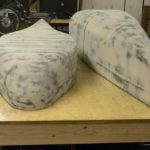
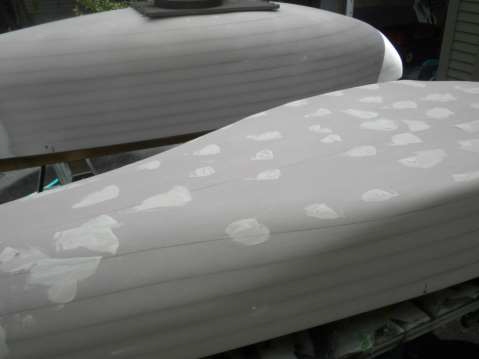
There will also be low lying areas and recessed screw head holes on the mold plug. These are easily filled in with drywall joint compound. Use it sparingly and remove excess compound with a moist sponge before it dries. The compound sands off rapidly like dust, so use a light touch. A second or third application may be required to fill up an entire area.
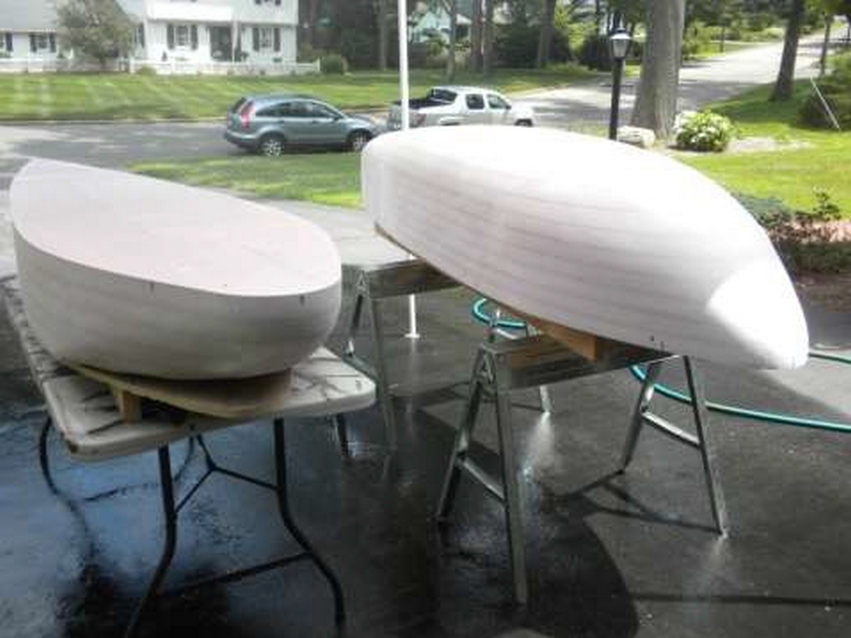
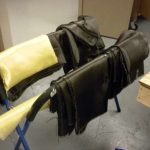
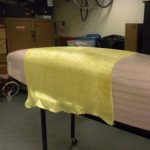
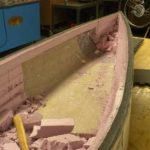
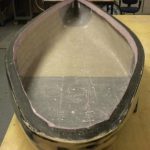
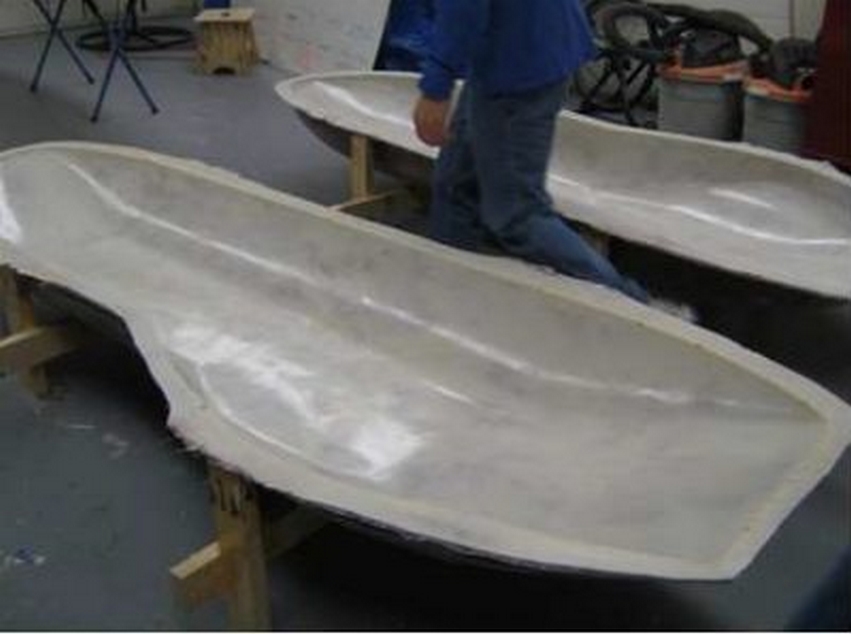
Once the plug is faired, the upper and lower sections can be separated and waxed in preparation for applying Kevlar and carbon fiber cloth.
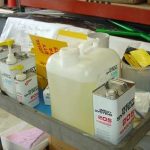
WEST SYSTEM® Epoxy
All of the lamination and fairing processes we used with Big Nose Pete done with WEST SYSTEM® Epoxy, additives, and application tools. Cost, availability, dependability, ease of use, and customer service are just five of many reasons I continue to use the product line. Please refer to the WEST SYSTEM User Manual & Product Guide for proper usage and disposal procedures.
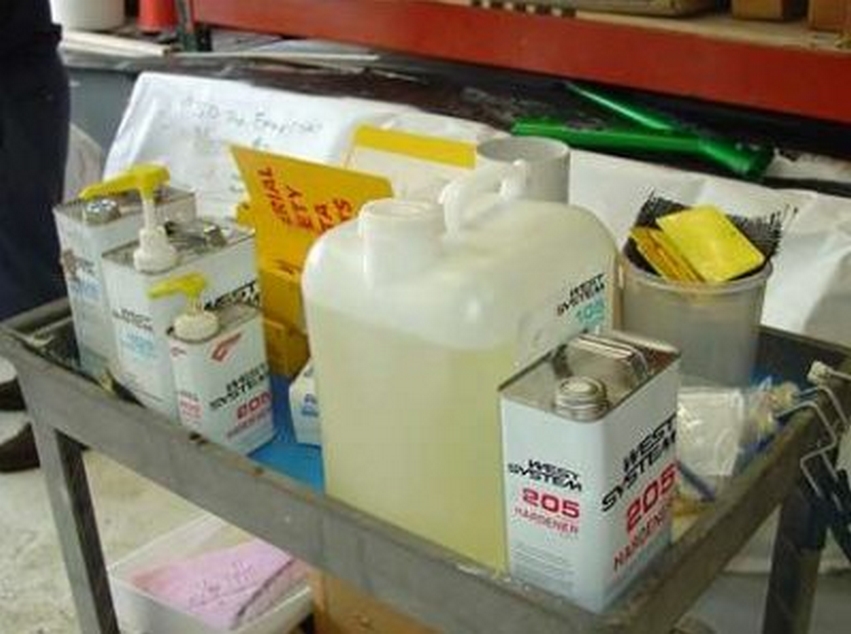
One thing that will enhance your experience is a mobile epoxy cart that contains all of the epoxy supplies to create your shell. This will save you much time searching for supplies and allow you to bring the epoxy to the project versus the project to the epoxy. The cart need not be fancy but must provide a stable platform that will not flip over when in motion. You can build a custom cart or re-purpose an existing one.
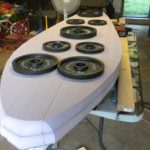
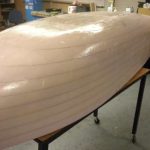
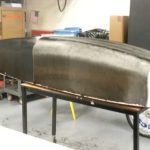
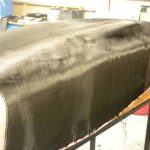
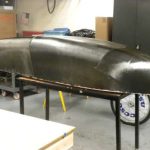
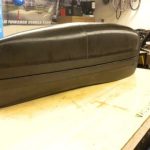
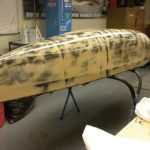
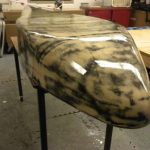
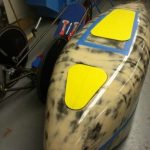
After the foam plug assembly was sanded to create the desired final look and shape, the plug was covered with one layer of Kevlar cloth and two layers of carbon fiber cloth to provide a durable and strong shell in the event of a rollover. WEST SYSTEM Epoxy was used to bond all the components at room temperature. The exterior of the shell was faired with WEST SYSTEM Epoxy blended with WEST SYSTEM 410 Microlight fairing compound to achieve a uniform smooth finish.
The author provided us with an extensive photo gallery that we could not include in the print version of this article, but are able to share below. -Ed