

By Jenessa Hilger
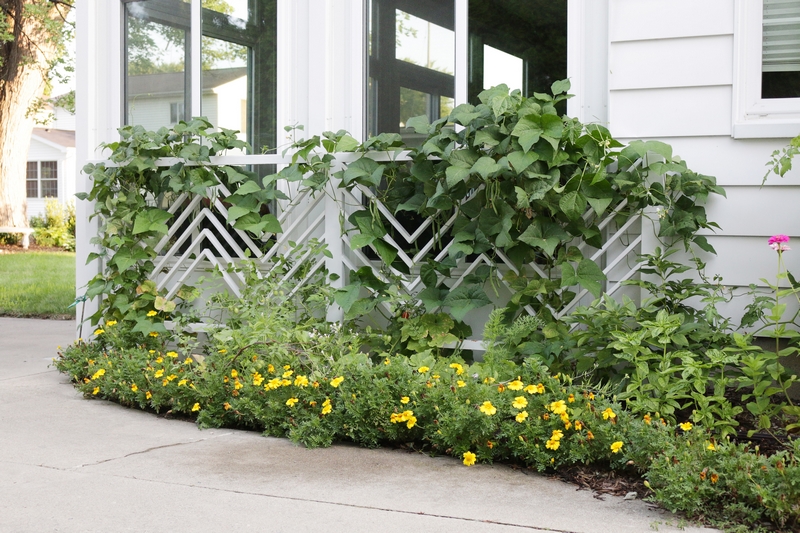
Over the past few years, I’ve been cultivating an increasingly larger vegetable garden. Last year was my first attempt at growing cucumbers but by mid-summer, they had climbed halfway up the screens on my sun-porch windows. That’s when I decided I needed a trellis.
Because my trellis would be located right in front of my sun-porch windows, I wanted something with a little more personality than the standard lattice pattern. It also needed to be low enough to allow light to shine through.
The trellis I designed had free floating zig-zag rails. This was a bit of an engineering challenge because the rails needed to be strong enough to support fruit- and veggie-laden plants while spanning a five-foot section unsupported. I knew fillets would be a necessity and hoped they would make it strong enough.
I cut the pieces and attached everything together with finishing nails to hold it in place. On the inside corner of all the joints, I created fillets with 105/205 thickened with 406 Colloidal Silica to a peanut butter consistency. The rounded end of an 808 Mixing Stick was the perfect radius for my fillets.
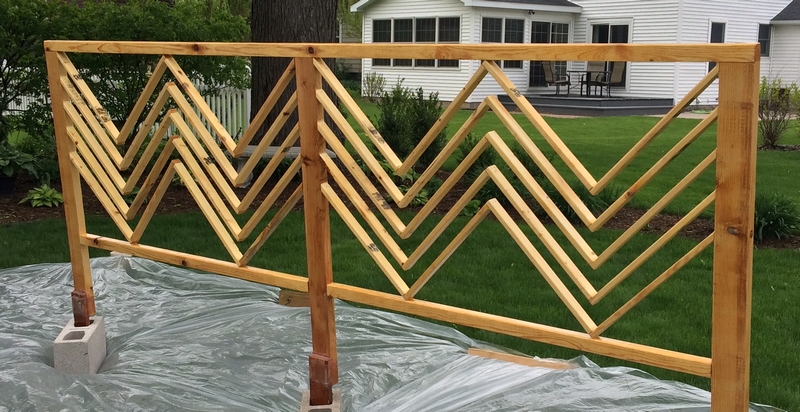
After the initial application cured, I filled any remaining gaps with thickened epoxy for added strength and to make it more aesthetically pleasing. I wanted to minimize the visibility of the joints after the it was painted.
Pleased with how solid the fillets made the trellis, I applied a couple coats of neat epoxy to the entire thing. I paid close attention to the end grain of the posts that would be embedded in the soil, and areas that were likely to see standing water. After a couple coats of spray paint, the trellis was ready to be installed.
My cucumbers and pole beans seem to really be enjoying the trellis. As am I.


