

By George Gish
My sunflower project began after I’d brought home from the farmer’s market three sunflowers planted in a small barrel. I placed the flowers on the patio outside my kitchen’s sliding glass door. Every time I sat at the kitchen table, I looked out at this bright splash of color and felt pleasantly relaxed. That happy, soothing view ended two days later when deer ate the sunflowers. I wanted my view back, but knew that buying more flowers would just provide another meal for the deer. I decided to re-create the flowers in something they couldn’t eat: glass and bronze.
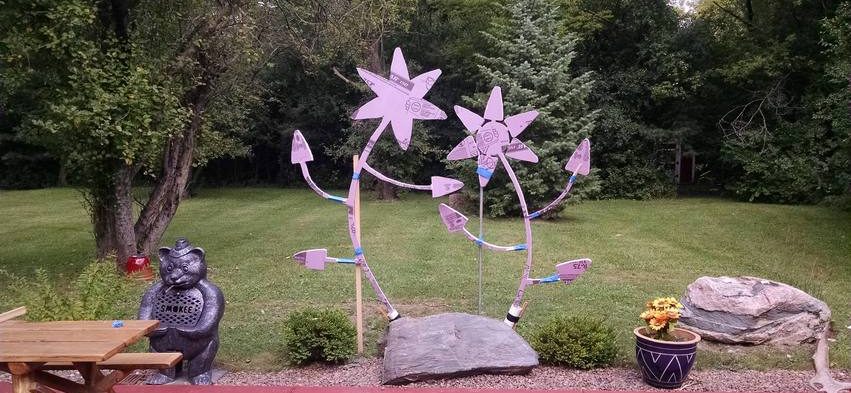
I began by making a few rough drawings to get an idea of what I wanted. I would make two stalks, each with three limbs and three leaves. I drew life-sized flowers, stalks, limbs, and leaves on cardboard and adjusted angles and limb placement to find a design I liked. Next, I made a model of my flowers out of 4’x8′ sheets of foam insulation. I placed the foam model on a 2,000-pound boulder I had selected for the base and made more adjustments until, when I stared at it from my kitchen window, the flowers finally “felt” right.
For the flower parts, I bought two 1-1/8″ diameter silicon bronze rods for the stalks, two 5/8″ bronze rods for the branches, and sheets of bronze of varying thicknesses from Atlas Metals in Colorado. A small local foundry bent the bronze rods to exactly match the bend in my foam model. The bronze-to-glass bonding brackets were cut out for me by a waterjet company. I’d had some work done with lasers, but preferred the way the rougher edge, created by the waterjet, accented the dyes.
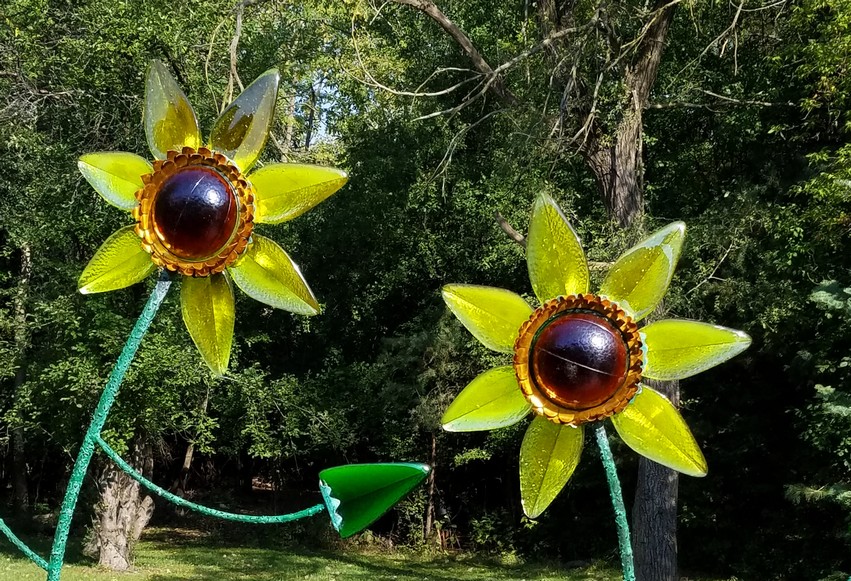
From Kokomo Opalescent Glass Company I ordered six yellow glass petals for each flower (with four extras in case I damaged some), and eight pieces of green glass for the leaves. Getting these petals made took a number of months. Each petal is 10″ long, 5¼” at its widest point, 2½” at the thickest point, and weighs about six pounds. Each leaf is 10½” long, and 6¾” at the widest point, 23/8″ at its thickest point, and weighs 7 pounds. The brown seed head in the middle of the sunflower is 8½” in diameter, 3″ thick in the center and weighs 9½ pounds.
Holding a glass petal toward the sun, I determined that any movement over two degrees changed how the glass reflected light. In my final plans, I made certain that no two glass surfaces were installed in the same plane. The appearance of the sunflowers should change every few minutes as the sun passes by and the angle to the sun changes.
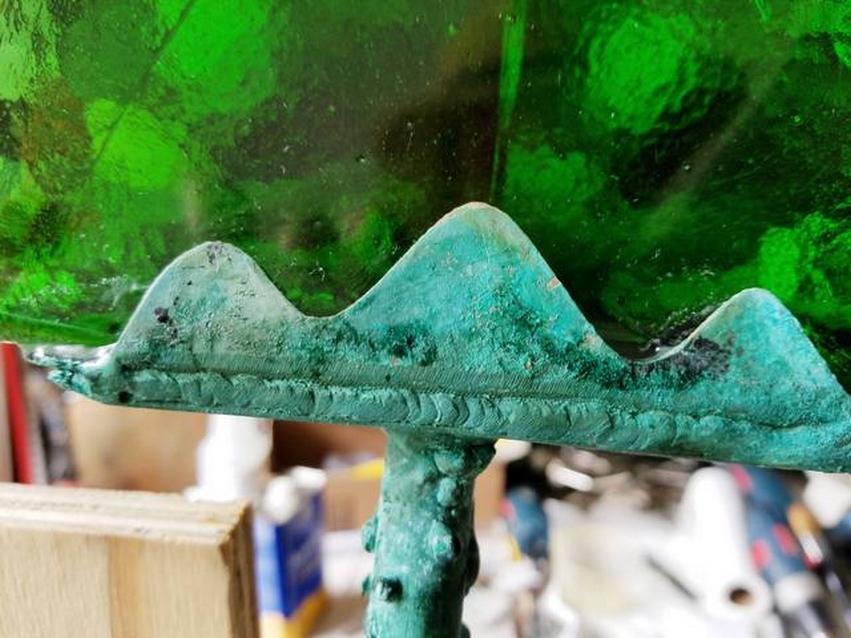
How can I make sunflowers out of all this incredible raw material? Simple. I took three semesters of welding classes at Macomb Community College and bought MIG and TIG welders. From Sculpt Nouveau in California, I bought acid to spray on the bronze and turn it green. Various dyes and stains were used to further color the bronze. Using small sheets of bronze, I made a “storyboard” (like wood finishers use) to record exactly what I used to attain each of the colors I wanted so I could replicate them on the sunflower parts.
I drove to Gougeon Brothers, Inc. to meet with Tom Pawlak, who became my learned and experienced advisor. After talking with him, I decided to use G/flex 655 Thickened Epoxy Adhesive for smaller parts of the flower like the golden fringe around the glass seed head, as well as the petals and leaves. G/flex will flex appropriately with changes in temperature and will withstand movement caused by high winds.
The bronze, glass, and epoxy sunflowers actually do flex, in fact, they appear to dance in the wind. I took some parts to Gougeon Brothers, Inc., including some pieces I had epoxied together, so Tom could strength-test the joints. The glass and bronze parts for each flower, excluding the stalks, weigh about 80 pounds. Each flower with stalk and leaves weighs about 160 pounds, so the stresses are substantial. The sunflowers will be outside in very cold weather, very hot weather, rain, snow, ice, and wind.
With Tom’s expert advice and a little field experience, I learned that adequate surface preparation is essential. Rubbing 80-grit sandpaper on glass is not enough. The epoxy has to have something to “key” into, as Tom would say. I bought and tried diamond drills, diamond hole saws, Dremels, engraving tools, angle grinders and anything else I could find that would scratch bronze and glass. I changed my original design for epoxying leaves and petals to bronze after learning how components can peel apart under extreme stress.
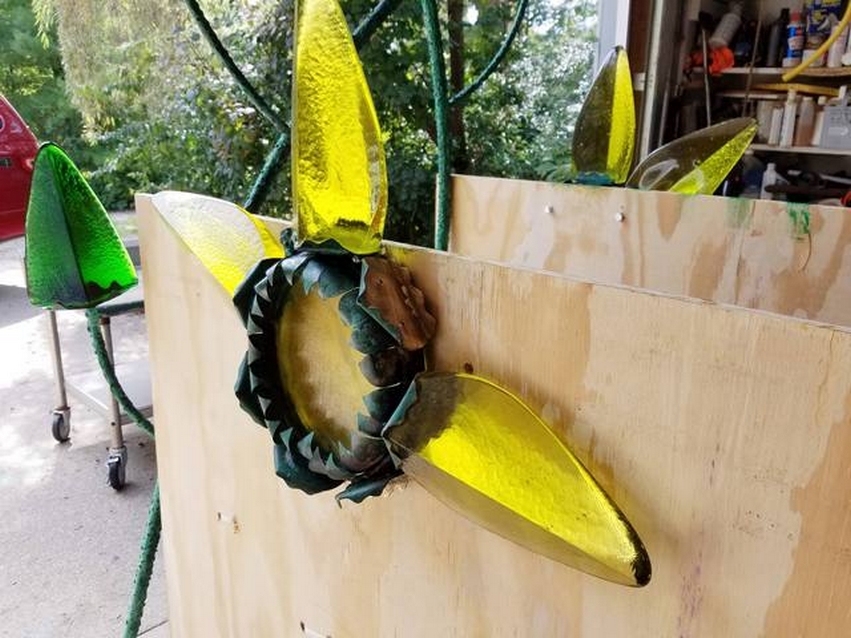

I showed Tom some bronze holders I made to epoxy the leaves and petals in place on all sides. These bronze-to-glass brackets were welded to the limbs and the sunflower frame to fix the petals and leaves in place. I drilled a few holes in the base of these holders, then used a larger bit to drill halfway through the back of these same holes. This allowed the epoxy to form a head, kind of like an “epoxy rivet” which helps prevent peeling.
The bronze brackets, after acid and dye had been applied, enhanced the appearance of the sunflower. I also welded hundreds of random beads of metal onto the bronze stalks and limbs to provide texture and create a more organic appearance. I dyed the tops of these beads darker for accent.
Every surface that was to be epoxied was first deeply abraded using a combination of sandblasting, scratching with diamond-impregnated bits, and small saws. With magnifying glasses, I inspected all surfaces for adequate abrasion. I wiped and cleaned the surfaces with acetone before applying epoxy.
Using a syringe, I injected epoxy into small openings in parts of the flowers. The weight of the glass provided sufficient clamping pressure. I turned all bronze surfaces straight up, applied epoxy to the bronze and the glass and then lowered the glass onto the bronze, wiping off any excess epoxy immediately. It worked extremely well. No mechanical clamps were required.

It’s best to apply acid and other dyes before applying epoxy. The acid runs when you spray or brush it on. The dyes are also not epoxy friendly. I applied all finishing media before applying epoxy, and avoided spraying acid or using other hazardous finishes indoors. For spraying, I went outside and wore goggles, a high-quality mask with filters, and protective gloves.
After the finishing and welding were done, the flowers were screwed onto the stalks. Threaded holes were drilled in the tops of the stalks and the bottom of the structural bronze on the base of the flowers, and a 9/16″ threaded stainless steel rod was screwed into the tops of the stalks. The flowers were then screwed onto the stalks. The joints were welded for additional strength.
Before drilling holes in the boulder for installing the stalks, I placed wooden stakes in the ground at exactly the angle I wanted so I could slant my drill at the correct angle. I drilled a slightly larger hole than needed and gouged the sides of the hole to create small epoxy reservoirs to hold the heavy flowers in place without slippage. This also left room for excess epoxy to escape from the hole.
I covered the boulder to keep epoxy from spilling on the rock surface. Tom advised me to pour epoxy into the hole before installing the stalk, and let the excess epoxy run out. I’d saved some boulder dust to mix with the epoxy to patch the gaps between the bronze stalk and the sides of the hole. It matched well.
The best advice I can give for a project like these bronze, glass, and epoxy sunflowers is to think everything through. Surprises and problems are the last thing you want when applying epoxy to glass and bronze. I made task lists so, at 77, I would not forget some critical step. One slight mistake can take a heavy toll on your work.
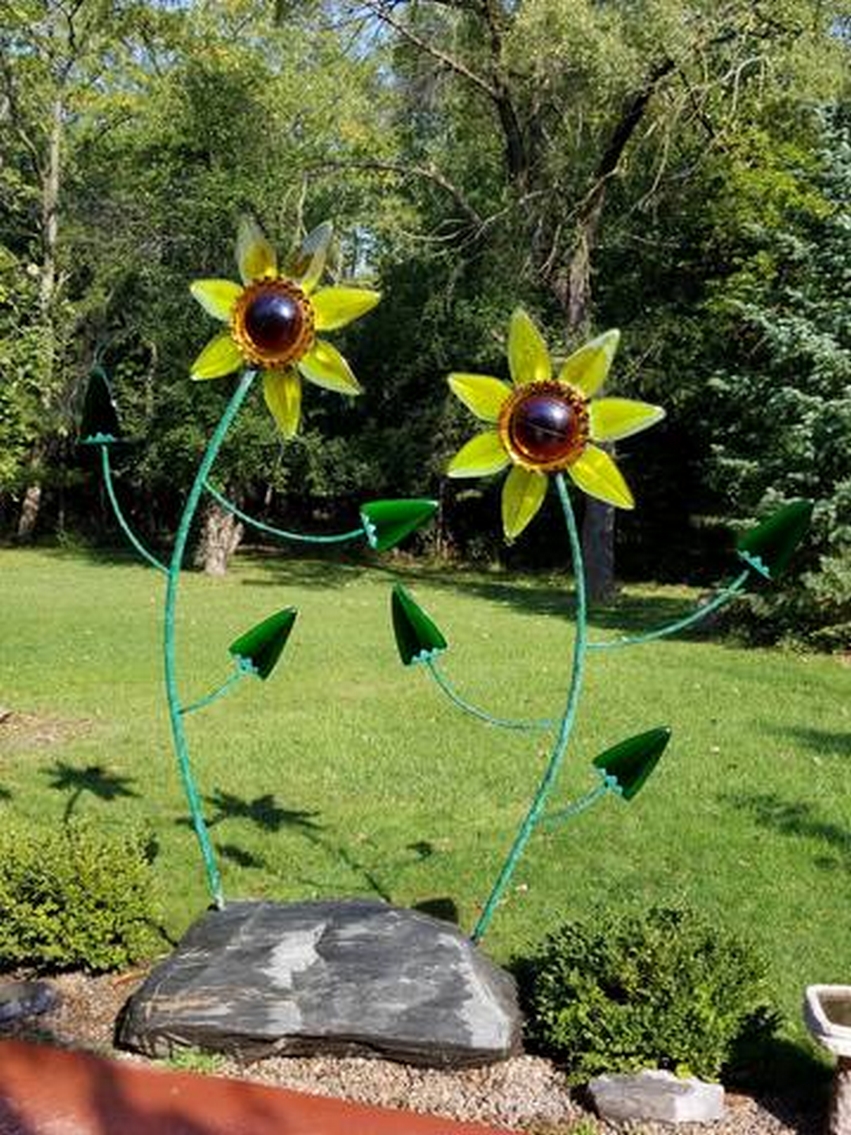
When I finally finished this three-year project, I invited some friends to see the flowers. The completed sunflower display is 9′ ½” tall by 8′ 4″ wide. One lady who saw the sunflowers from my kitchen said, “Oh, they look so happy—like they’re dancing. They make me happy.” Even squirrels run up the stalks to try to eat sunflower seeds. Redemption! Maybe all this work was worth it.
I will make a time lapse video this summer as the sun passes overhead so people can see the light show. I plan to donate the sunflowers to a hospital for children to see and enjoy.


