

By Don Gutzmer – GBI Technical Advisor
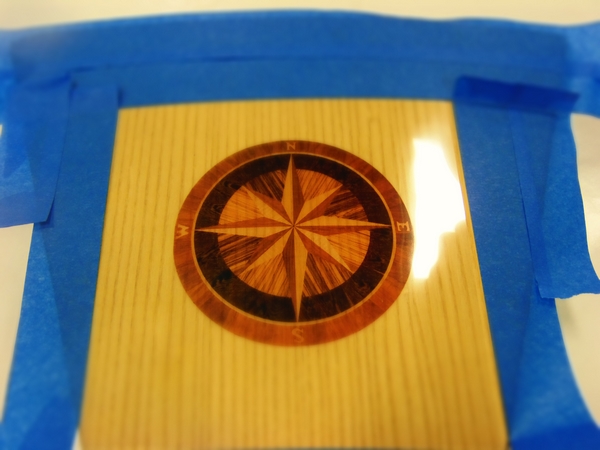
Wood inlay marquetry has been around for a very long time, and I am always looking for different ways to use epoxy. I have learned that it is possible to use a laser jet printer with a clear transparency film to print an image, then transfer that image onto a substrate coated with WEST SYSTEM Epoxy, resulting in the look of marquetry without all the cutting, fitting and craftsmanship. (Inkjet printers do not work with this process because the ink does not transfer to the transparency film.) The image could be a picture of a wood inlay or whatever you can imagine. Here is the process I have found that works the best.
- Wear gloves to avoid leaving oils on the surface of the transparency film which can jeopardize the transfer of the ink to the film. Keep in mind the image will be reversed when transferred to the epoxy coating.
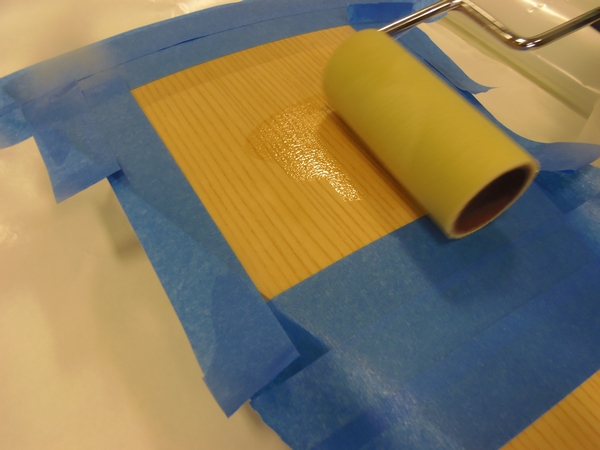
- The substrate needs to be sealed, especially if you are using bare wood. WEST SYSTEM 105 Resin with 207 Special Clear Hardener is recommended for clear wood finishes. The epoxy can be applied with an 800 Roller Cover and tipped off by dragging a section of foam roller cover over it.

- After the epoxy coating cures, sand the surface dull with 120–220 grit.
- Apply tape around the perimeter of the location where the transparency film will be placed. This will keep the surface clean. On one edge of the transparency film, apply a strip of cellophane tape to make it easier to start peeling off the transparency film after the epoxy cures.
- Coat the surface with 105/207. This could be done with an 809 Notched Spreader to create a good buildup of epoxy. To ensure that there are no air bubbles in the coating, run a propane torch over the coating moving at 12-18 inches per second to break any bubbles.
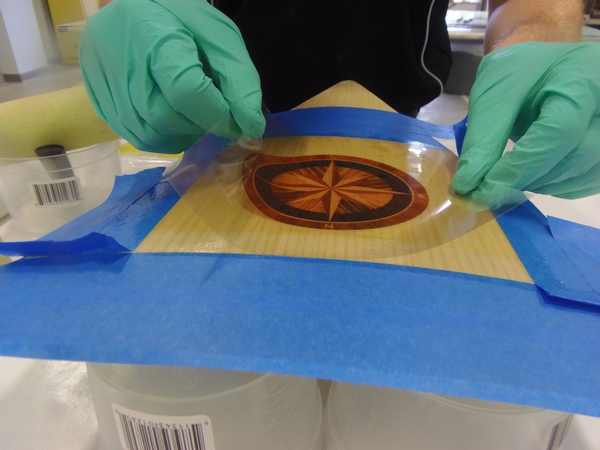
- Lay the transparency film carefully into the wet epoxy coating, making sure the printed side is down. The image will be reversed when transferred to the epoxy coating. This is especially important if writing is involved. The third photo on the right shows the transparency being applied center first so that so any entrapped air can be worked to the edges of the film. The film also could be rolled onto a PVC or cardboard tube for application.
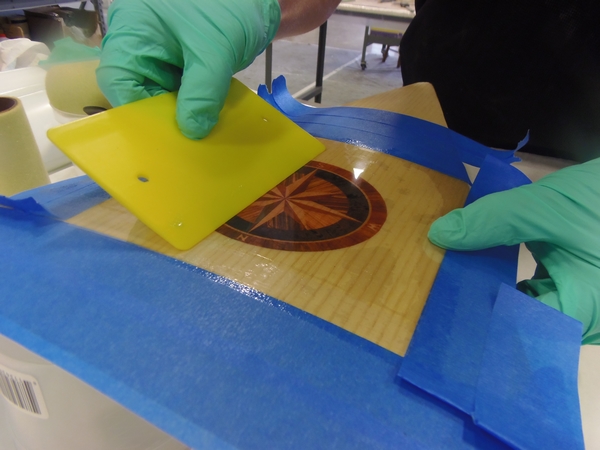
- Use a plastic spreader with light pressure to remove air bubbles trapped under the transparency film. Force the air to the edge, taking care not to push all of the epoxy out from under the film—you need a sufficient amount of epoxy under the film. Pull the tape away around the outside of the film and remove any excess epoxy that was squeezed to the edges.
- Let the epoxy cure for about 8 hours at room temperature before removing the transparency film. The image will be embedded in the epoxy. The surface may be wavy because the transparency floats on the liquid epoxy.
- Avoid sanding the image away when preparing the surface for more epoxy or another coating. Even an abrasive pad can remove the image. Apply more epoxy without any surface preparation within 18 hours (at 72°F) of the previous coat to achieve primary bonds with 105/207.
- 1 Sanding is now possible because the surface has a thicker coating applied over it and the image will remain unblemished in the epoxy coating. UV stable top coats, such as polyurethane or spar varnish, should be applied for long term protection.
Enjoy the new look you achieved. I recommend you experiment to get the technique down before attempting this process on your project.


