Gelcoat Blister Repairs
Spring 1994

GET STARTED
FREE PRINT & DIGITAL EDITIONS
Spring 1994
by C. Joe Parker, Michael D. Arndt & Tim Atkinson — Senior Chemist
In Epoxyworks #3 (Fall 1993), Robert Monroe discussed the idea that polyester is subject to degradation in much the same way as wood is affected by rot. Many cases of blistering are actually much more than a blister directly under the gelcoat. These blisters may be the first sign of laminate degradation. Once this degradation begins, it may be as difficult to stop and just as damaging as rot is in wood.
Now that the industry is gaining a better understanding of what is actually happening to the laminate, we are better able to prescribe proper repair techniques. And, there is always new information about the causes of blistering. With this article, we will explain the most recent developments in blister repair technology. We also hope to provide you with an understanding of the reasons for specific steps in the repair procedure.
Much of the recent blister research here at Gougeon Brothers, as well as at other labs and boatyards around the world, has focused on the issues that may cause a repair to fail, resulting in re-blistering or delamination of the hull skin. We have also been studying the effects that various preparation techniques have on the success of a blister repair job.
In a classic case of gelcoat blistering, the blister is formed directly under the gelcoat at the interface with the laminate. In many of these cases, the blisters will be contained at this interface, and the repair will be straightforward. However, as this blister develops, it may also begin to extend deeper into the laminate. If this begins, the situation is beyond blistering, and is now laminate degradation.
The term used to describe the process of laminate degradation is hydrolysis, which literally means “split by water.” As moisture enters the laminate and blister cavities form, water soluble materials in the laminate mix with that moisture and create an acidic blister fluid. As the process continues, this mixture attacks the polyester resin in the laminate, and the laminate is compromised. Chemical bonds that hold the resin matrix together are severed and the links that bind the resin to the fibers are broken as well. The resin is breaking down and becoming part of the blister fluid. Unfortunately for the boat owner, this condition is not reversible. Any hydrolyzed laminate left on the boat will absorb moisture at a much faster rate than a sound laminate will. This leads to continued degradation of the laminate, and in some instances, re-blistering of the bottom. Remember, even the best coatings are not completely waterproof. There is always some moisture passing through the barrier coat and into the laminate. The goal for a successful repair is to limit the moisture in the laminate to a level that will not cause damage to the laminate.
It is not easy to see the warning signs of potential problems on a hull. The only way to be confident the boat is or is not undergoing hydrolysis is to remove the gelcoat. Removing a small section of the gelcoat first and examining the laminate beneath it will help determine if any laminate needs to be removed along with the remainder of the gelcoat. In some severe blistering situations, it is advisable to cut a hull core sample and send it to a composites testing lab. The lab will do a ply-by-ply analysis of the laminate to identify the exact moisture content, interlaminar adhesion, presence of water soluble materials, and degree of hydrolysis.
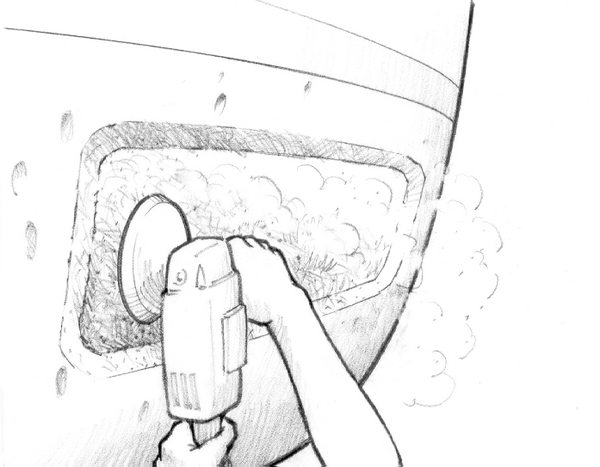
Once the decision is made to remove the gelcoat, there are several ways to complete the task. The most common is to grind or sand the gelcoat. The main advantage to grinding or sanding is the average boat owner has access to the necessary equipment and there is very little expense involved. The disadvantage is that this technique is very labor intensive and the surface will need a substantial amount of fairing once the grinding is done.
Another popular method is to sandblast the gelcoat. This will remove the gelcoat and open any blister cavities. If there is damaged laminate below the gelcoat, those areas will be swept away quickly by the blast media. If blasting is employed, it is very important to have the work done by a competent operator. It is easy to blast a hole right through the laminate, even if it is in good condition. Also, use a blast media that will not become imbedded in the laminate. If grit is left in the laminate, it will act as a surface contaminant. If the bottom paint is still on the boat, remove the layer of paint first with a quick pass of the blast media. This will prevent particles of bottom paint from being embedded in the laminate when the gelcoat is removed. Blasting is also a dirty, messy job. Clean up and disposal of the blasting media and materials removed from the boat is difficult. Having said all that, when done properly, blasting can be a very effective preparation technique.
Peeling is now considered the most efficient and effective method of gelcoat and laminate removal. However, the work must be done by a contractor because the machines are rather expensive and a certain level of skill is required to operate the equipment. The peeled surface is very smooth, and will require sanding with 80-grit paper just to rough up the surface so subsequent layers of laminate or barrier coat can adhere to it. The real advantage of the peeling operation is that any bad laminate is easily visible and the depth of cut can be adjusted to remove it along with the gelcoat. Also, the surface remains fair. This makes determining the extent of damage easy and re-laminating or fairing is simplified because of the uniformity of the surface.
Once the gelcoat is removed, wash the surface with a high pressure washer or a hose and a scrub brush. While the laminate is wet, look at it closely to determine its condition. If fibers are not visible, and the laminate appears translucent, there is little or no hydrolysis taking place. A hydrolyzed laminate will appear white and have visible fibers that are not encapsulated in the resin matrix. These may not show up until moisture evaporates from the laminate, or after several water washes. Severely hydrolyzed resin sometimes appears like sugar granules. Frequently, a laminate with hydrolyzed resin is mistakenly diagnosed as having been improperly wet out.
If the hydrolysis is allowed to continue, the laminate can be very severely damaged and delamination may occur. Once the process of blistering has progressed to the stage where laminate is being affected, we recommend removal of the affected laminate. In some cases, new layers of laminate may be necessary to replace those which were removed. Generally, any structural reinforcement (woven or stitched fabric) that is removed should be replaced. The new layers of fiber reinforcement may be applied with epoxy resin.
After removing the gelcoat and any damaged laminate, allow time for the hull to dry completely. Wash the hull with clean, fresh water to remove any water soluble materials on the surface. Glycols and other water-soluble materials contained in the polyester laminate may migrate to the surface and act as a surface contaminant that could compromise the adhesion of new laminate or barrier coat to the hull. These materials are also hygroscopic, which means they will attract moisture. This attraction of moisture to the surface of the laminate will slow or stop the drying process. If they are not removed, the boat may never dry properly.
If the bottom has been washed, and the boat still is not drying in ambient conditions, active drying techniques may be necessary. Infrared heat lamps or tenting and dehumidifying are a couple of practical ways to dry the hull in less than perfect conditions. Also, keep the inside of the boat dry and well ventilated during the drying process, as well as after the repair is completed, to prevent moisture from entering the laminate from the inside.
While laminate hydrolysis is the primary cause of failure for a blister repair, using chemical paint strippers or solvents to prepare the hull can also contribute to a failure of the barrier coat.
Chemical paint strippers are often used to remove bottom paint. We do not recommend them, because of their potential to damage other components of the hull laminate. Paint strippers are effective because they soften the existing paint layers, allowing for easy removal. Although using a chemical paint stripper can make the removal of the bottom paint easier, these paint strippers can also affect fairing compound, gelcoat, and even the polyester resin in the laminate. The use of chemical strippers may create “paths” through which moisture can penetrate into the laminate and initiate hydrolysis or blister formation.
In addition, by-products of the chemical paint stripper, including dissolved paint and resin, form a mold release-like film. This film can result in widespread adhesive failure of any coating applied over it. Even if this waxy material does not result in a complete adhesion failure, the adhesion of the coating will be weakened. The poor adhesion between the epoxy barrier coat and the substrate will greatly increase the chances of another blister and/or delamination problem. Without adequate adhesion, epoxy may partially release from the surface and create “hidden” voids. Such voids not only compromise the moisture exclusion properties of the epoxy, but also allow for an area where water soluble materials, styrene, water, and glycols can collect. This area is where a new blister can begin.
Remember a clean, properly abraded surface is essential for proper adhesion of WEST SYSTEM® Epoxy. To insure that your surface is properly prepared, simply sand the surface with 80-grit paper, then remove dust and other contaminants using water and plain white paper towels.
Solvents are used to clean surfaces because they dissolve waxes and oils better than water and they evaporate very quickly. It is possible, however, that rather than remove contaminants, solvents can spread them over the entire surface. When the solvents evaporate they can leave deposits of the waxes and oils on the bonding surface. To avoid spreading contaminants over the entire hull, work on small areas and frequently switch to clean paper towels. Wipe the area until the paper towel maintains its clean appearance.
Also, residual material on a rag used to apply solvent or to wash the hull can contaminate the bonding surface and result in poor adhesion. Laundered rags may appear clean, but fabric softeners used in laundering may leave behind silicone components that can contaminate the surface. By using plain white paper towels and changing them frequently, you will always have a clean cloth, which is a major step towards guaranteeing a surface free of contamination.
For an in-depth understanding of how to best deal with gelcoat blisters, download a free PDF of Gelcoat Blisters: Diagnosis, Repair & Prevention.


