Balance
Spring 2016

GET STARTED
FREE PRINT & DIGITAL EDITIONS
Spring 2016
I have always been fascinated with balanced objects. Buildings, stones, sculpture—the more impossible a balanced item looks, the more intriguing. I have been thinking for a long time about how to bring almost unbelievable centers of gravity into objects that are practical.
A good floor lamp is hard to find, so after our children destroyed our paper-lantern shaded floor lamp while playing hide-n-seek, we went shopping and found nothing. I decided I wanted to build a balanced and beautiful custom floor lamp. Lamp construction is very approachable. Lamp-specific hardware elements are readily available for next-to-nothing on a few well-run internet stores. Aside from these standard fittings and castings, any material can be incorporated and the design possibilities are endless.
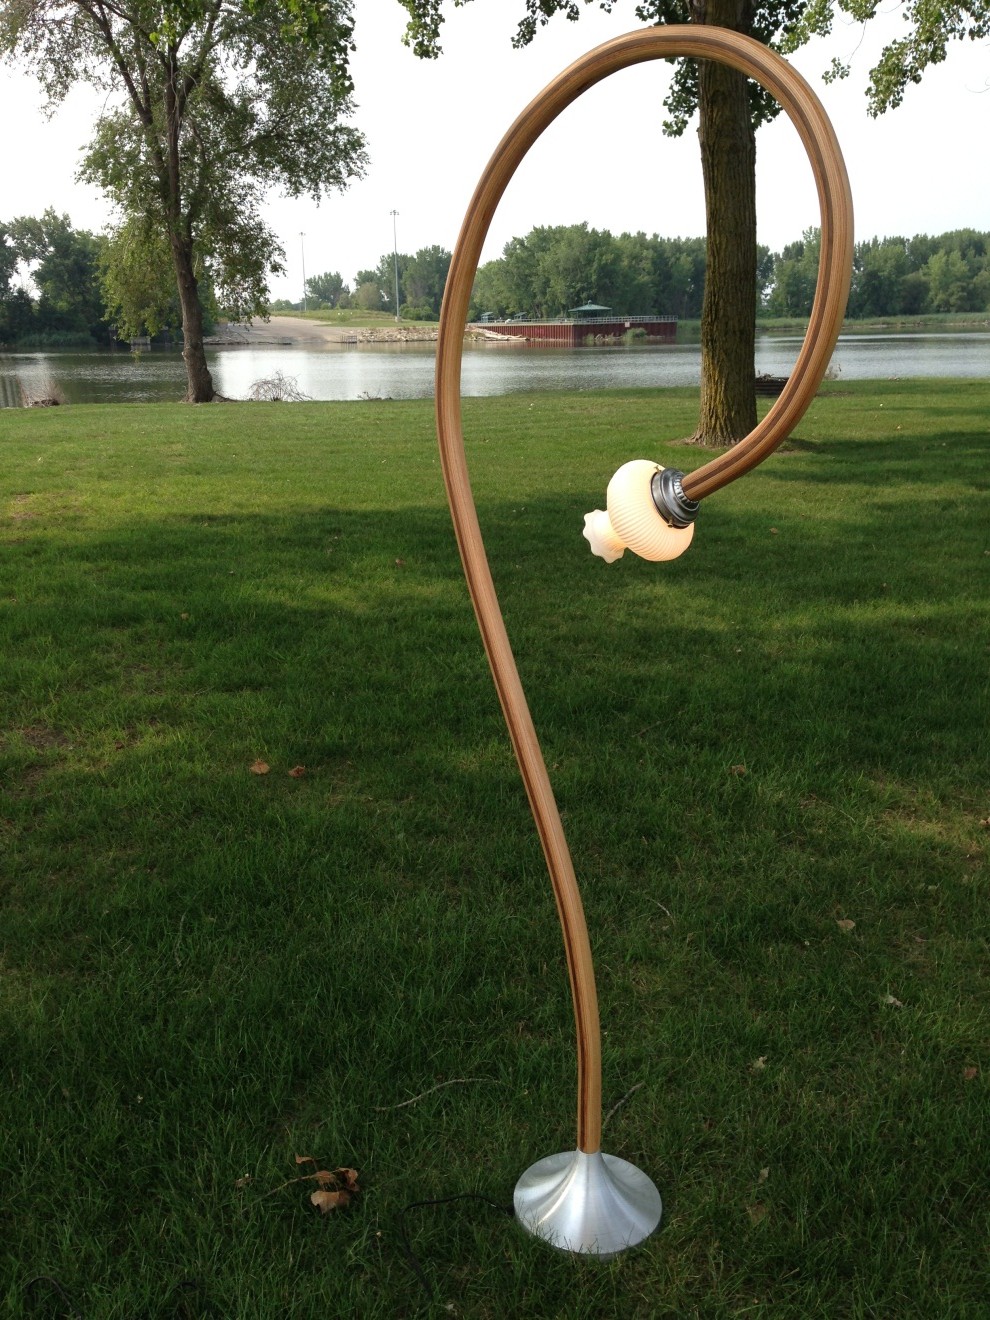
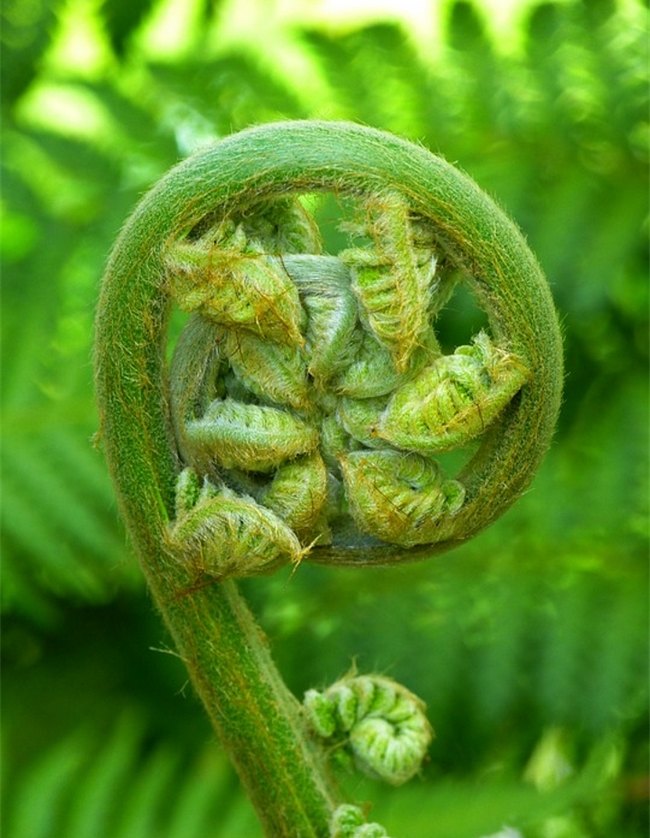
The inspiration for this lamp would be a Fiddlehead Fern. Aside from being a tasty forage food, they have a very interesting balanced structure that I have always admired. The materials would be maple wood and aluminum as I like mixing organic and industrial materials in the mid-century tradition.
I sat down with my trusty ¼” grid graph paper over corkboard and set a workable scale of ¼”=3″. I determined the space available for the lamp would require it to fit into an imaginary rectangle 2′ wide and 6′ high. I knew the general shape of a Fiddlehead so I used a piece of plastic cut away from an egg carton lid as a fairing batten. As the shape I wanted began to form, I fixed the curves with push pins plunged into the underlying corkboard. I picked easily scalable points on the graph paper grid where I could. Once I got the shape refined and the pins in place, it was time to study the balance element.

Finding balance is a matter of placing material or mass at distances off of a neutral axis or centerline so the forces cancel each other out (like a seesaw). I knew my centerline and then calculated the mass of my materials on each side of the centerline. As the wood structure element was a relatively fixed mass per foot, some simple math was all that was required. I set out to keep the top curve material about equal on each side of the centerline. I used the glass lamp shade and bulb components on the right side to balance the more vertical material on the left side of the centerline.
I needed to get the very distinct recurve and spiral elements so I set out to steam bend the wooden element. To keep this brief, it was a terrible failure. First, the maple snapped and then the substituted ash snapped. Suffice it to say steam bending is best accomplished with green/air dried very straight-grained stock of a species with excellent cross-grain strength. At the 10′ lengths required for this project, there was no such stock to be found locally.
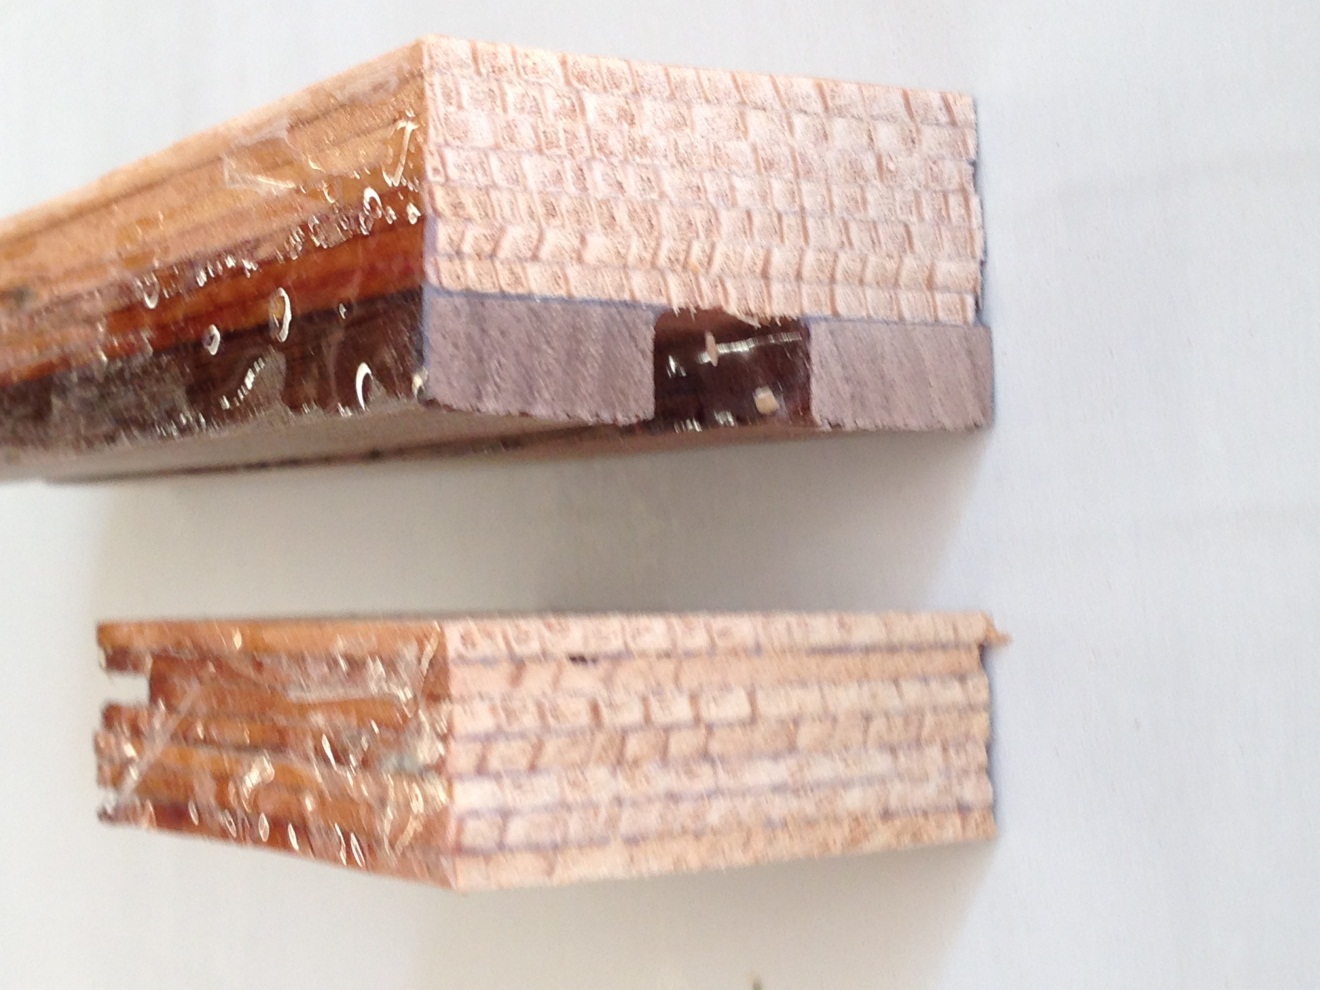
Laminating veneers was my fallback plan. I needed to get the lamp cord inside the 1 ½” x 1 ½” lamination so I decided on a three-step process. I would laminate a 5/8″ inside member, a ¼” center member with a hollow for the lamp cord, and a 5/8″ outside member (totaling 1 ½” thickness). Thus I could run the lamp cord inside the lamination and then bond the three members. I found some (+-) 0.1″ spruce veneer at the required 10′ length in our Technical Center. I ripped these down to 1 ½” wide and determined that 7 veneers each would give me roughly the 5/8″ thickness I was looking for in the inside and outside members. I further determined the ¼” center member would be walnut as a dark contrast to the much lighter spruce.
With stock prepared I set out to build the bending jig. Two layers of ¾” MDF were laminated with WEST SYSTEM® G/5 Five-Minute epoxy and an 809 Notched Spreader using the 1/8″ tooth to keep the jig lamination thickness constant at just a little greater than 1 ½”. I transferred the grid from my design sketch to this jig blank. From the grid, I laid out the series of known points from the design sketch and lofted the curve with a stiff batten. I then cut carefully with a reciprocating saw and fine-tuned for fairness with a sanding block. I used a large hole saw in the drill press to make the clamping holes.

With the jig ready it was time for the inside member lamination. I mixed a small amount of 406 Colloidal Silica filler into WEST SYSTEM 105 Epoxy Resin/207 Special Clear Hardener to maintain some glue joint thickness and rolled it onto the veneers with an 800 Roller Cover. Once all the veneers were wet, I stacked them, wrapped them in polyethylene plastic sheeting, and taped it snugly. The polyethylene wrap simplified transportation to the jig and protected the jig and clamps from epoxy squeeze-out. Starting at one end, bar clamps were applied at logical intervals and tightened sequentially until epoxy squeezed out from between the veneers. This inside member was left to cure in the plastic sheeting.
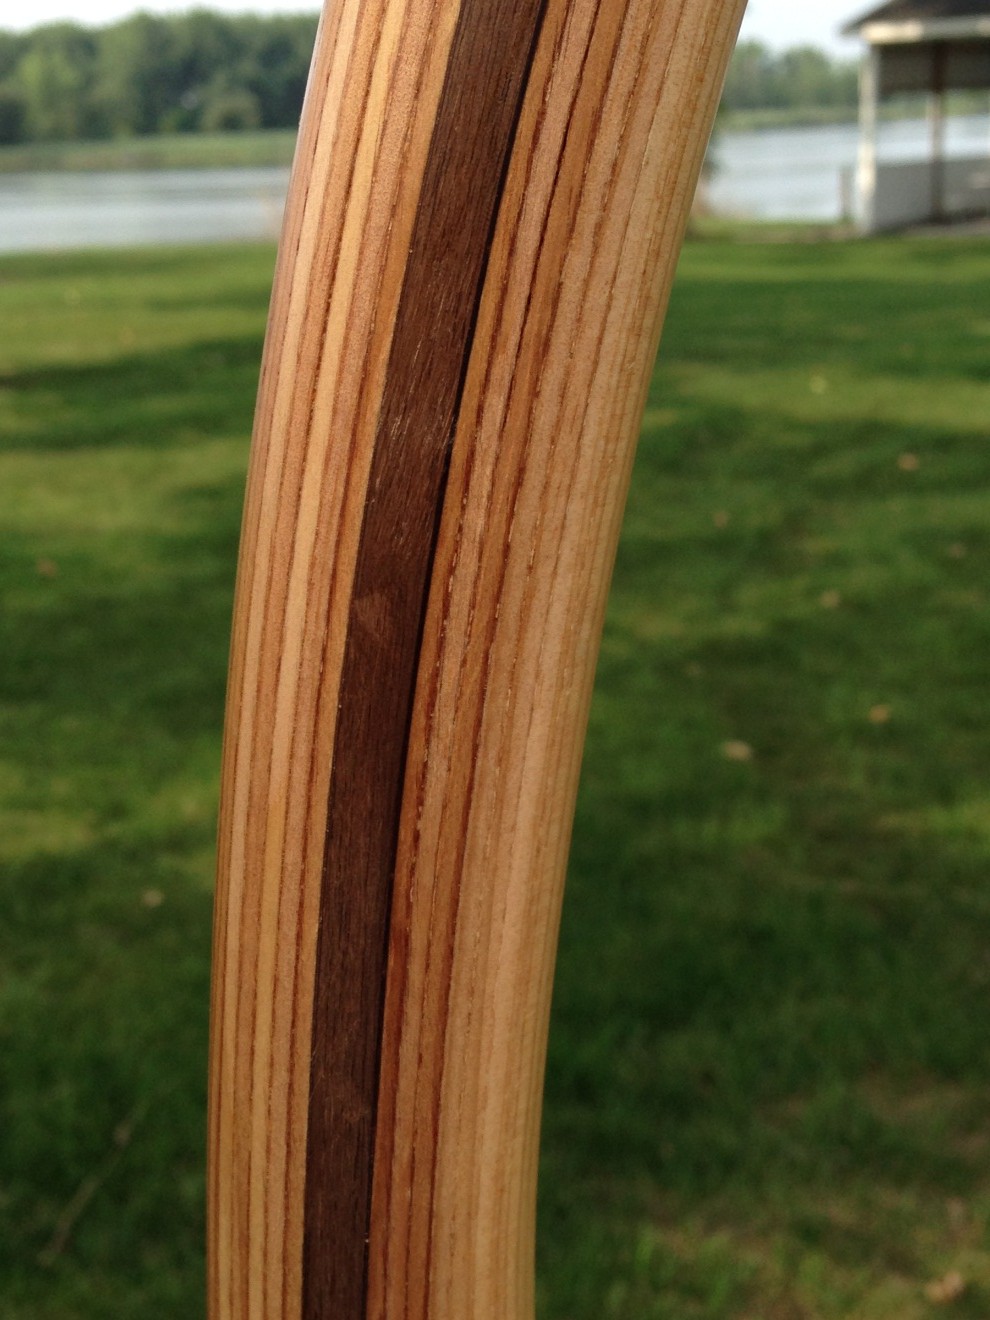
The next day I removed the sheeting and put the lamination back on the jig. The ¼” walnut accent strip was laminated to the inside member. The accent strip is comprised of two pieces of wood each ¼” thick but only ½” wide. When placed at the top and bottom of the lamination they would leave a ½” recess slot in the middle of the lamination for the future installation of the lamp cord. It is important to point out that each member or layer of the finished lamination has a different shape. The radius of the inside member is the smallest with the center member radius slightly larger and finally, the outside member is the largest radius. Each successive member was laminated on the former rather than the jig itself.
Next, I prepared the outside member in the same fashion as the inside member including the polyethylene wrap. This was important because, in order to run the lamp cord, I needed to laminate against the now combined inner member and center member without actually gluing to it. Once this was cured I had two “halves” of my finished, laminated 1 ½” x 1 ½” blank.
I prepared the blank for lamp hardware by square cutting the two ends and installing the hollow threaded lamp nipples. I ran the cord along the slot in the walnut accent strip and then took the pieces back to the jig to glue the two halves together again with my 105/207/406 laminating mix.
Once the epoxy had cured I began sanding. I scribed some reference marks on the blank with a compass and began the process of turning a square blank into a round piece. I started with a coarse grit on a belt sander and changed to increasingly finer grits on an orbital sander. Finally, I faired with a hand-held sanding block.
During the course of my sanding marathon, I got just a bit overzealous and experienced some grain tear-out where the innermost veneer was getting thin from being worked down toward something round in shape. This has happened on other projects so I have learned to save the fine sanding dust from the orbital sander’s dust bag. With some G/5 Five-Minute Epoxy and sanding dust, I made my own custom filler putty. I knifed in this mix, let it cure, and continued sanding. When mixed very rich with sanding dust, and barely wet, a better filler putty cannot be found. I challenge you to find the grain tear.
After many sweaty hours of hand sanding and fairing, I coated the nearly round piece in Sanding Sealer, let it dry, and sanded it down to 320-grit. Next, I applied three coats of satin polyurethane and the woodwork was complete.
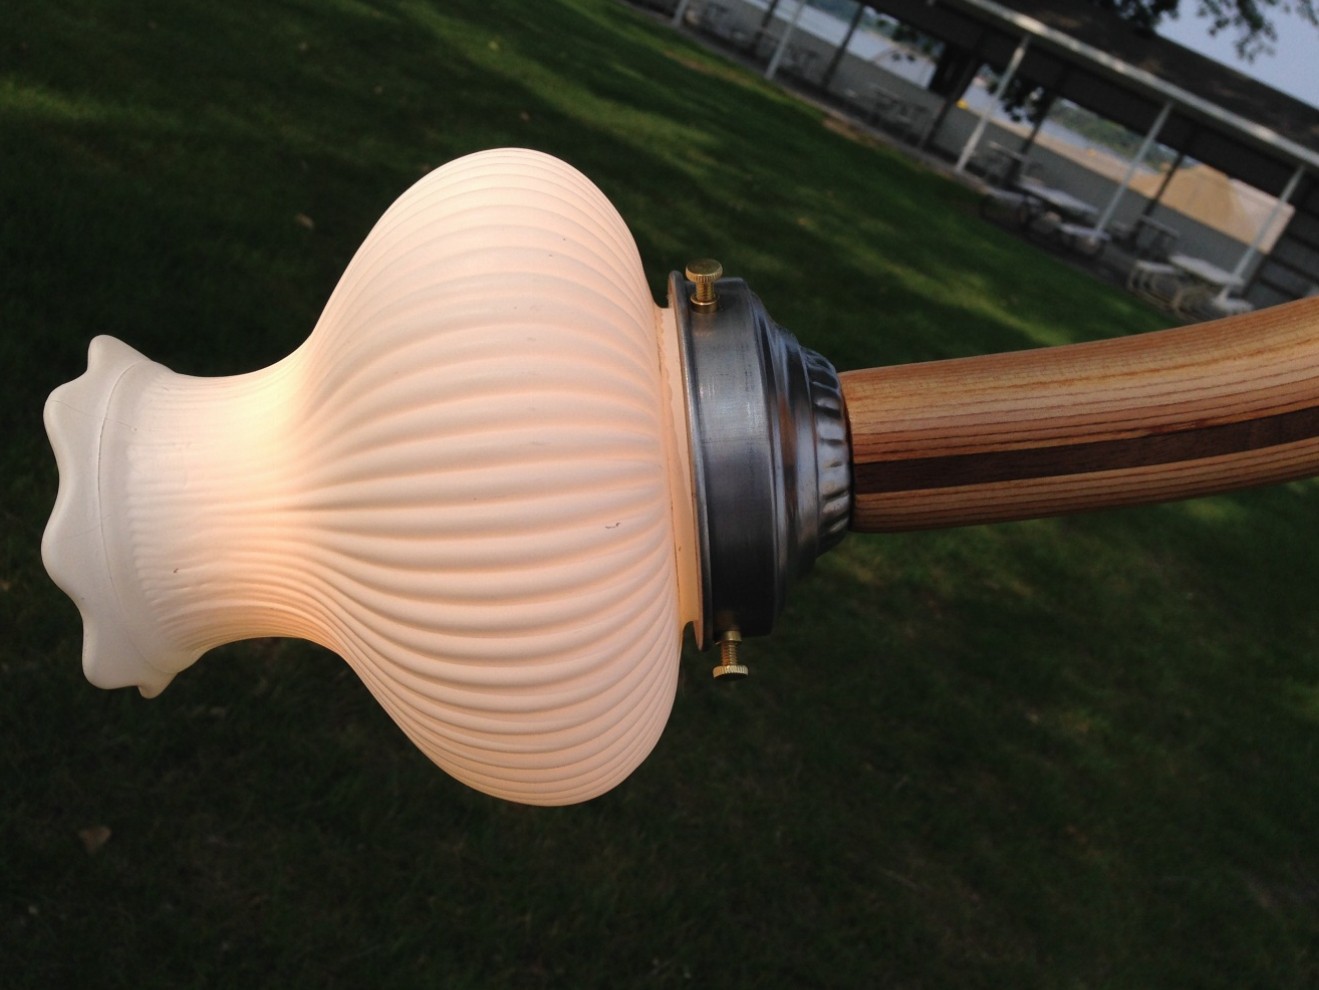
The lampshade holder and base were installed and fine fitted to the wood piece. I checked for balance and could not have been more pleased. The light-gauge and hollow aluminum base, at only 11″ at its widest, provided for a very stable floor lamp. That being said, the fact that this floor lamp was destined for a carpeted room with three young children inspired me to fill the aluminum base with a combination of 105 Epoxy Resin/209 Extra Slow Hardener loaded with beach sand. The sand-filled base lowered the lamp’s center of gravity, ensuring it would not topple over if jarred during some intense game of hide-n-seek. I was able to cast such a large volume of epoxy without fear of excessive exotherm as the shop temperature was mild and the 209 Extra Slow Hardener produces very little heat as it cures. This allowed the thermal mass of the sand to absorb much of the heat generated by the slow curing mass of epoxy.
With the base filled, the lamp was wired and the bulb installed. I found the unique frosted flower bulb-shaped glass shade at our local antique shop to complete the lamp.