

by Patrick Ropp—GBI Technical Advisor
My oldest brother, Jeff, was searching for a small boat to take his kids out fishing and just messing about. Since he had more money than time, and I had more time than money, we pooled our resources. I would build two boats and he would buy the materials. We looked at numerous plans and finally found one of Harold “Dynamite” Payson’s (Phil Bolger’s design #516) Instant Boats that appealed to us. The Rubens Nymph is a beamy (4′ 6″ wide), 7′ 9″ long, double chined, rowboat. The Nymph looked easy and quick to build due to a modified stitch-n-glue technique.
Since I planned to make more than one boat, I transferred the lines of all the parts to scrap bathroom wall board to create full scale patterns. The plans were very basic, although more detailed instructions were available. However, since I am not one to look at many directions anyway, I opted not to get them. After building two boats, I have realized there are dozens of assembly methods that could be used. Between the two boats, I have used three different methods—hot-melt glue, cable ties, and 5-minute epoxy (to tack the panels together).
Dynamite Payson’s modified stitch-n-glue method, on this particular boat, involved tacking the panels together primarily with hot-melt glue. Even though the hot glue didn’t possess much strength, all it really needed to do was keep the parts together long enough to get WEST SYSTEM® epoxy and fiberglass tape around the joints. If there is time for the hot-melt glue to “creep,” or if the boat is jarred, the hot-melt glue may not hold adequately. One of my hot-melt glue joints failed when I was fairing a bilge panel with a hand plane. I fixed the joint with G/5 5-minute Adhesive, temporarily clamping it with cable ties until the epoxy cured. This worked out very well. Any method of temporarily fastening panels together would work—hot-melt glue, cable ties, soft wire, 5-minute epoxy, brad nails, etc.
I built the Nymph upside down, as the simple instructions said. The sides were bent around the frames, and I used different methods (hot glue and spring clamps) on each boat. The original plans called for the frames to be left in, but I deviated from the design and eventually removed them. I found that adding an additional layer of tape along all the seams made the boat plenty stiff. Removing the frames made the Nymph a little cleaner in the interior and the frames would not get in the way of movement in the boat. This would also allow me to install a “glass bottom” panel at a later date.
After attaching the sides and bottom to the transoms and frames, I faired the chines easily with a plane. When using cable ties on the second boat, I found it easier to fillet and tape some of the interior corners at this point because they were exposed without the bilge panels installed (photo 1). Then I scribed and cut the bilge panels to shape. They were also tacked into place with hot-melt glue and/or wire ties. I faired and rounded the exterior chine corners so the fiberglass would lie nicely over them (photo 2). Since all the seams were externally taped and internally filleted and taped, this joint did not have to be as perfect as I made it. The instructions actually said gaps of up to ¼” were acceptable. Any type of stitch-n-glue method is fairly forgiving because the plywood is there for shape, and the fillets and epoxy/fiberglass taped seams give the strength.
After the corners were rounded, it was time to tape all the seams. I laminated two layers of 15 oz. WEST SYSTEM® 727 Episize™ Biaxial Tape on the external corners (photo 3). The +45°/-45° biaxial fiberglass was an excellent material for this because both layers of fiberglass crossed the seam. If standard 0°/90° cloth tape were used, only one weave of the fiberglass would cross the seam; the other would run parallel to it. The biaxial fiberglass tape made a very tough joint. To saturate the fiberglass tape with epoxy, I constructed a “wet out” table by covering a scrap board with plastic on which I could wet out the tape with a squeegee. I then transferred the epoxy-saturated tape to the boat and squeegeed to remove entrapped air. When the epoxy had gelled, I faired out the raised fiberglass tape edges with fairing compound (mixed epoxy with 407 Low-Density Filler and 410 Microlight™). After an overnight cure, I sanded and faired all of the seams in preparation for completely fiberglassing the hull (photo 4).
I precut the fiberglass and draped it over the boat dry. Since the fiberglass was narrower than the girth of the boat, I cut a slit in the center of the fiberglass and pulled its outer edges to the gunnels of the boat, making a “football” shaped hole in the center. Then I placed a patch in this area to complete the external layer of fiberglass (photo 5). Since the patch’s joint was on the bottom, it was not as noticeable as if it were on the sides. The fiberglass was wet out with epoxy. I was able to use the 205 Fast Hardener because I made relatively small batches, about 7-8 pump strokes of resin/hardener. Since the boat would be painted, clarity wasn’t an issue. If I were going to varnish or clear coat instead of paint, I would have used the 207 Special Clear Hardener. I poured mixed epoxy onto the fiberglass and squeegeed it in with a plastic spreader. By holding the spreader at a low angle, I was able to keep bubbles to a minimum. When the epoxy gelled, I filled the weave of the cloth with two more coats of epoxy.
Once the fiberglass cured, I installed the gunnels/rub rails (photo 6). These would help keep the boat’s shape when it was flipped over. The gunnels/rub rails were laminated mahogany, coated and glued together with 105/207, which was finished bright with varnish. Although 207 Hardener is formulated for clear coating, its physical properties are about the same strength as the other resin/hardener combinations. I then popped the Rubens Nymph off the frames and turned it over.
After a little clean up, the interior was ready to fillet and tape. I could be a little creative when filleting, both in selecting thickening fillers and application tools. WEST SYSTEM® 406 Colloidal Silica, 407 Low-Density Filler or a combination of the two can be used as thickening fillers. 403 Microfibers are another option (it mixes faster into the epoxy than the other two) since these fillets would be taped and it didn’t matter if the filleting blend was smooth or not. For the most part, I used a 406/407 combination. The round end of the standard tongue depressor is a good application tool, but other round items can be used as well—soup can or yogurt cup edges, film containers, plastic spoons, modified squeegees, etc. I used a bright pink plastic ice cream spoon because it had a little larger radius than a tongue depressor. Filleting was fairly easy, as I glopped the epoxy along the edge and then dragged the filleting tool across it. As long as the tool touched both panels and there was adequate thickened epoxy in the corner, I made a decent fillet. One of the trickiest parts of filleting is judging the amount of epoxy needed and making smooth starts and stops; like anything else, there’s a learning curve.
Once the epoxy fillets gelled, I began taping, using the wet-out board and transferring the wet-out fiberglass tape to the boat. I then faired the tape to the hull and rolled and coated the entire interior with three coats of 105/205 epoxy.
The seating arrangement in the Rubens Nymph is a little different than most with the bench seat positioned fore and aft. The seat would normally sit upon the transverse frames, but since I took them out, I had to make supports for it to rest upon. In addition, I added three compartments, which would act as buoyancy chambers (photo 7). Since the boat is wood and is naturally buoyant, these compartments could also be used as storage areas for fishing tackle, made into an ice chest, or serve as a battery box if an electric trolling motor were used. Installing the seat completed triangulation and added stiffness and rigidity to the entire boat (photo 8).
Only a few more items had to be installed on the Rubens Nymph. I scribed the keel, cut and installed it with fillets. Then I installed transom boards to stiffen the bow and stern and to aid in hardware mounting. They too were coated with 105/207 to be finished bright.
Next, I washed the entire boat with fresh water and a 3M Scotch Brite™ pad to remove any amine blush that may have formed and sanded with an orbital sander. I applied the final finish, installed the hardware, and the boat was ready for the water.
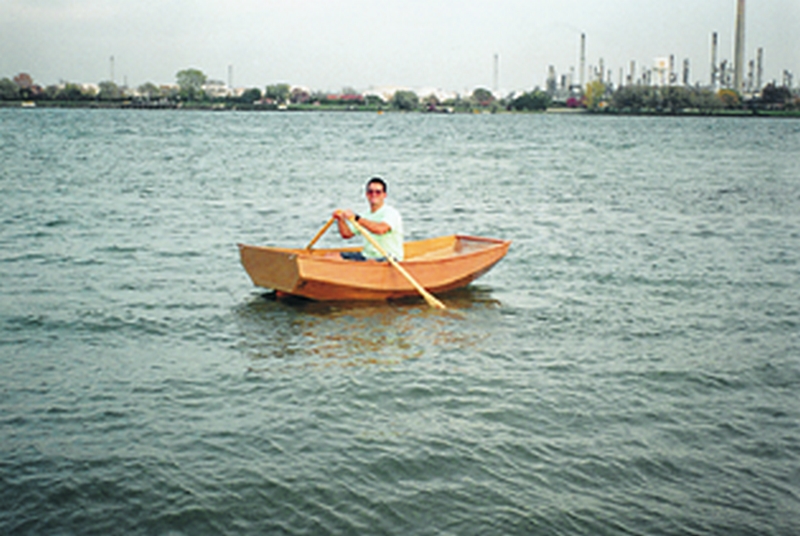
The Rubens Nymph was extremely responsive to oars and fit three adults fairly comfortably. The vessel was stable enough that I could stand on the bilge panel without water flowing into the boat!
I have considered making a few other modifications to the boat. The first is adding a bottom mounted viewing window for the kids to see down into the water. Another idea is to install a small wheel in the bow and holes in the stern transom to insert the handles of the oars so that the boat can be transported easily like a wheelbarrow. I’ll let you know how it turns out…
The Rubens Nymph was easy to build. Dynamite Payson and Phil Bolger have done their homework, making these Instant Boats really instant. My modifications made building a little less than “instant”, but each boat was still very easy to complete in about a (full) weekend’s time.
For plans, patterns, articles and books on instant boats, visit Dynamite Payson’s instantboats.com.


