Repairing a Cracked Plaster Ceiling
Spring 2003

GET STARTED
FREE PRINT & DIGITAL EDITIONS
Spring 2003
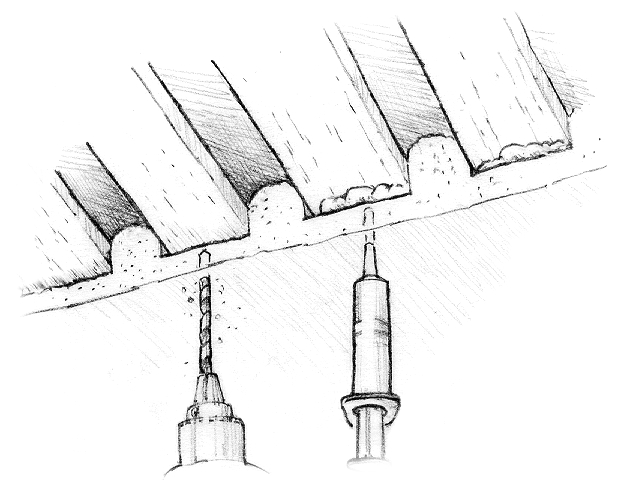
Above: Tom’s approach to repairing cracked plaster involves Drilling into the lath and injecting thickened WEST SYSTEM Epoxy.
A 100-year-old friend called in tears because her living room ceiling had cracked and she was afraid that the plaster was going to fall. I did my best to calm her and offered to come over and take a quick look.
I took my 4′ aluminum straight edge so I could determine if the plaster had pulled away from the wood lath. The straight edge revealed about 1″ of sag in one corner of the ceiling. I carefully pressed upon the plaster and verified that it had pulled away from the wood lath layer. I assured her that it could be repaired without tearing the ceiling down, then went home to get the necessary supplies for repairing cracked plaster.
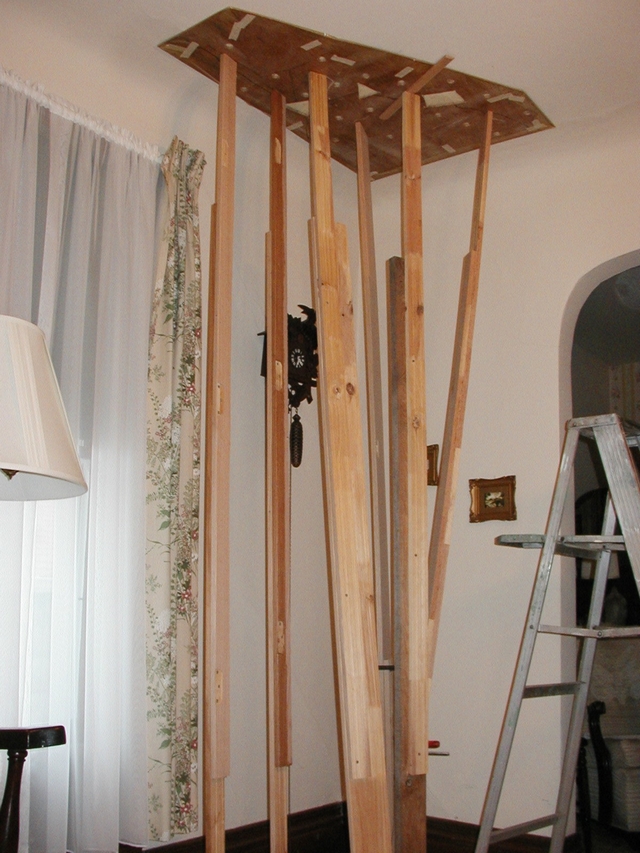
My plan was to drill a series of holes through the plaster, inject some thickened epoxy into the holes, and force the plaster back into position with a plywood caul (a sheet of plywood to provide broad support) and prop sticks to hold it up, and let it cure. The repair went off without a hitch.
I tapped all around the repair listening for dull sounds that would indicate poor adhesion. Thankfully, all of the repaired spots had a nice crisp, solid sound to them. The surrounding area beyond the drilled and filled area sounded a bit off-key, so I drilled more holes and injected a bit more epoxy into the surrounding area. I wanted to be certain that the ceiling would not come away from the wood lath in the future.
At this point in the repair, I could have proceeded with conventional patching spackle but I decided to proceed with epoxy so the repair could be finished quickly.
I used a syringe and thickened epoxy to top off all of the previously filled holes and to fill the cracks. I thickened epoxy with 410 Microlight® because the ceiling had a swirl texture which would make the cosmetic repair a bit of a challenge. 410 Microlight thickens to a smooth troweling consistency and can be carved and sanded easily, if need be, after the epoxy cures. Using a plastic spreader (that had been intentionally nicked up with a hacksaw to leave furrows and ridges), I spread the epoxy in a swirling motion, which provided a texture similar to the rest of the ceiling.
The epoxy was allowed to cure for about three hours before painting. I chose Benjamin Moore’s™ Fresh Start (100% Acrylic Latex) Interior/Exterior paint primer. Most fast-drying house paint primers (the kind that dry in 45 to 90 minutes) can be applied successfully to green epoxy (while it is still a bit soft). KILZ™, Bulls Eye™ 1-2-3 Primer/Sealer and Cover Stain™ Primer/Sealer also work well for this. An hour and a half later I applied the latex topcoat paint to finish off the repair.


