The Limitations of Statues
Spring 2006

GET STARTED
FREE PRINT & DIGITAL EDITIONS
Spring 2006
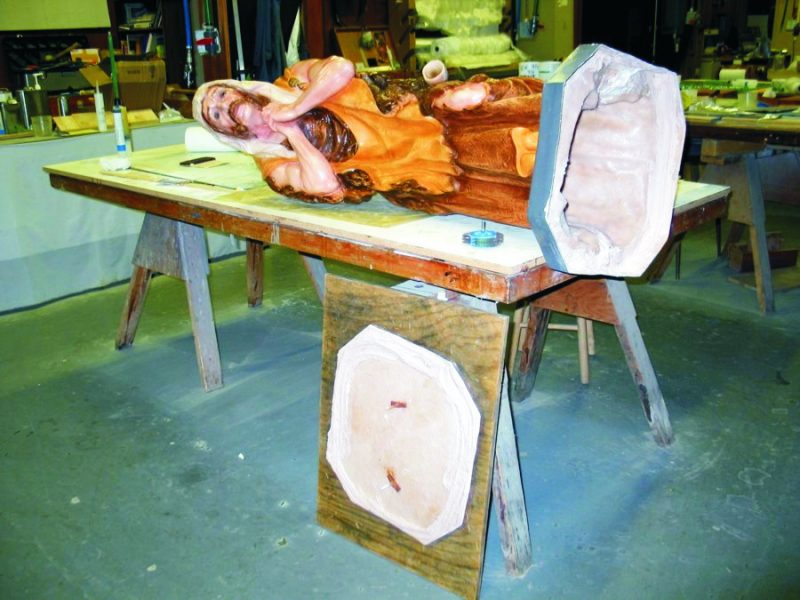
Above: Statue repairs are underway on “Shep,” a molded fiberglass figure that was knocked off its base and belongs in the outdoor nativity set of St. Luke’s United Methodist Church in Essexville, Michigan.
Creating lasting outdoor art has challenged humans since the dawn of time. One has only to think of the pyramids (still there), Stonehenge (mostly there), the Colossus of Rhodes (long gone), or the Easter Island monoliths (surviving, but then two heads are better than one). In more recent times, there’s Mt. Rushmore, Stone Mountain Georgia, and the Statue of Liberty. The goal is nothing less than perpetuity. But of course, outdoor sculpture needs to be done right or it won’t last. Making statues, e.g., permanent structures that look like people, is particularly difficult.
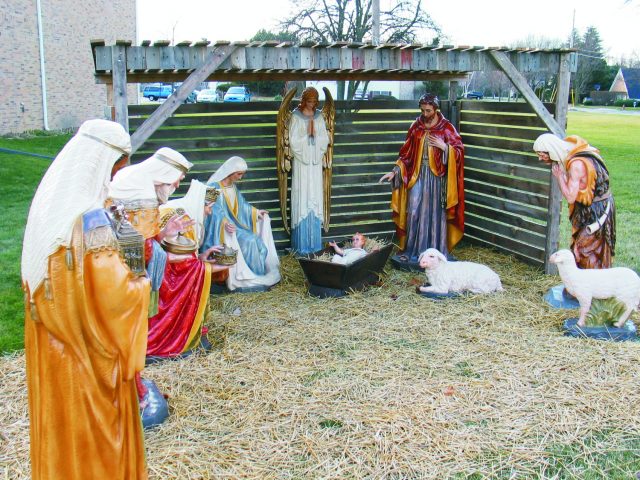
One recent December, I received a call from a fellow member of St. Luke’s United Methodist Church in Essexville, Michigan. St. Luke’s was attempting to deploy an outdoor nativity scene composed of a number of life-like, molded-fiberglass figurines. The problem was that the shepherd figure was damaged and could not take his watch.
The figurines were high-quality pieces with intricate detailing, made by a local Christmas ornament firm. However, while they had been manufactured to very high artistic standards, the figurines were structurally unsound for outdoor use. The manufacturer provided no means for anchoring them down. In previous years, volunteers had simply attached each to a plywood slab with big toggle bolts through a thin bottom panel. They then spiked the slab corners into the ground.
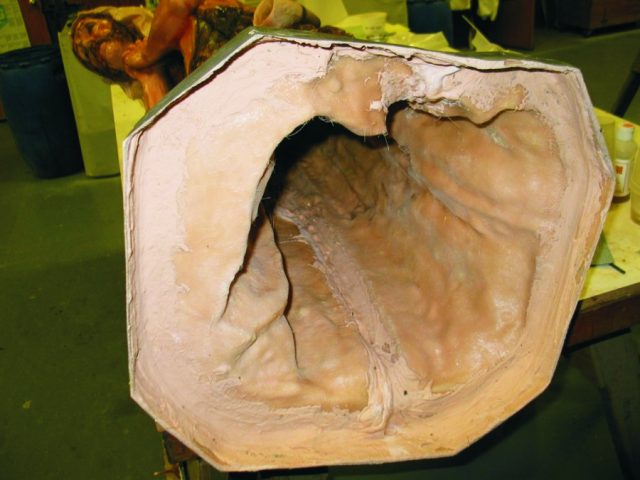
In due time, a typical Michigan winter froze Shep to the earth as if cast in concrete. A hasty post-season shove, intended to release him, instead fractured the tenuous joint between the sides of the pedestal and the bottom panel engaged by the toggle bolts. Shep had broken off all the way around the edges of his pedestal (Photos 1 at top, & 2). It was not a premeditated crime. The charges were “baseless.”
I got the call because it was known at St. Luke’s that I work for an epoxy company. (Few are aware that my specialty is testing composite materials to destruction. I am much more experienced at breaking structures, to measure their strength, than at repairing them.) However, I knew our knowledgeable GBI technical staff might be able to devise a repair strategy that I could handle.
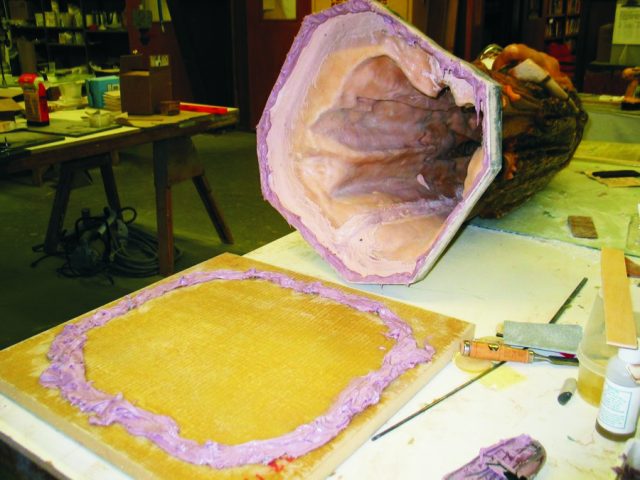
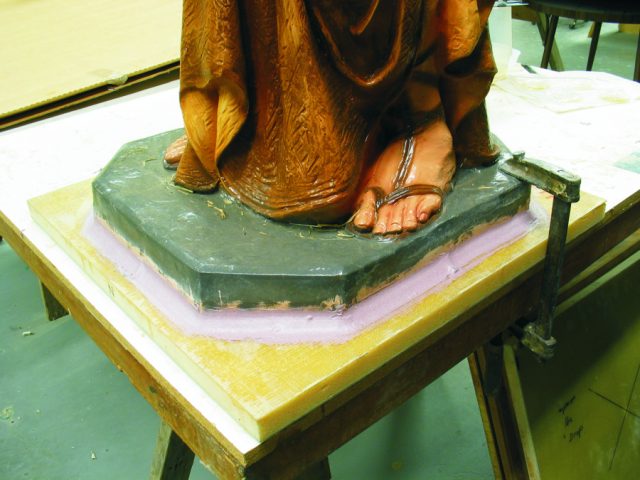
It was clear that the base/pedestal joint needed to be redone with WEST SYSTEM® epoxy. The old polyester-encrusted base was discarded and replaced with a sandwich composite panel leftover from past GBI test programs. I found an undamaged two-foot-square panel with a foam core and thick fiberglass face sheets.
In order to effect a rugged, epoxy bond to the sandwich panel, it was imperative to take full advantage of the generous surface area afforded by the pedestal sides. GBI’s Tom Pawlak emphasized the need for good, pre-bond surface preparation. He produced a wire wheel tool with which to scuff the perimeter to create a fresh bonding surface (Photo 3).

Thus began a series of lunch-hour work sessions. I kept at it until I got below the paint and into the glass fibers. I cleared enough width to accommodate a generous fillet of filled epoxy. The plan was to go with WEST SYSTEM 105 Resin/206 Slow Hardener containing enough 407 Low-Density Filler to create a mayonnaise consistency, ideal for filleting.
Before mixing the epoxy, I placed Shep on his new base with the textured side up and traced around the sides of the pedestal with a permanent marker. Removing Shep, I had a guideline that would permit me to trowel on filled epoxy with enough precision so that the glue could grip the inside of the pedestal as well as the outside. The inside blind fillet would effectively double the joint strength.
While I was tracing the perimeter, Tom had a quietly brilliant suggestion: install a series of stainless deck screws just inside the perimeter line to be engulfed by the epoxy, further enhancing the grip. It was done in minutes.
It was my idea to through-bolt the sandwich faces in several areas to discourage the start of a peel that might separate the upper joint face from the foam core. For drainage of internal moisture and condensation that might accumulate in the field, I drilled a ¼” hole in the middle of the base. I also drilled an 1/8″ hole under each of Shep’s elbows to allow air pressure to release during bonding. These holes would also allow equalization whether Shep was on winter display or in summer stand-down in a hot storage shed.
To complete the surface preparation for bonding, I used the wire wheel to abrade the textured glass surface of the new base on either side of the pedestal outline. We applied epoxy to the base and to both the inside and outside of Shep’s pedestal rim (Photo 4). With the new base face up on the workbench, we lowered Shep into position and crafted the exterior fillet (Photo 5).
The finishing touch was to coat the foam edges of the new base with neat WEST SYSTEM105/206. After an overnight cure, Shep was ready to return to St. Luke’s. Thanks to WEST SYSTEM epoxy, the complete display was back online, with still twelve days to go before Christmas Eve (Photo 6).