A Walnut Gunstock Repair
Spring 2008

GET STARTED
FREE PRINT & DIGITAL EDITIONS
Spring 2008
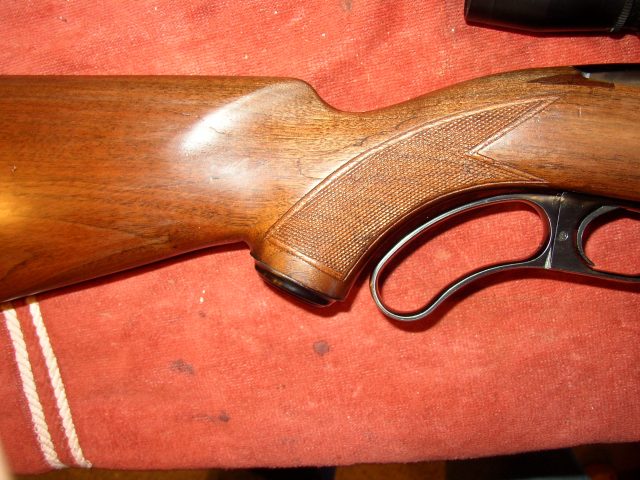
Above: The repaired and refinished walnut gunstock.
This is how I repaired an obviously serious break in the gunstock of a 1956 Winchester Model 88 rifle using a WEST SYSTEM® 101 Handy Repair Pack.
I soaked the broken ends of the walnut gunstock in acetone for about 5 minutes and brushed with a toothbrush a couple of times to remove any gun oil from the wood surface. Besides the breaks, the grain on the back gunstock had splintered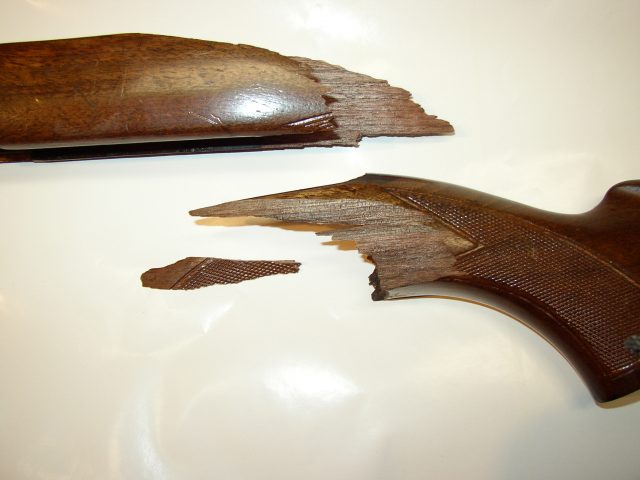
I started with the major breaks first. I mixed some walnut sawdust with a mixture of 105 Resin/205 Hardener and added a little 406 Colloidal Silica filler. I gave all of the surfaces a thick coat of epoxy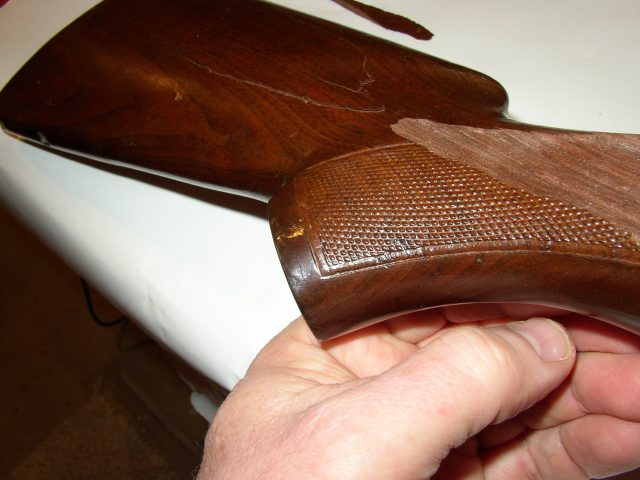
The 30 minute working time was needed, as aligning some of the splinters in the checkering of the gunstock was difficult
Although some of the clamps are big, very little clamping pressure was used to avoid driving too much epoxy out of the joints. I cleaned up the epoxy that did squeeze out with a paper towel.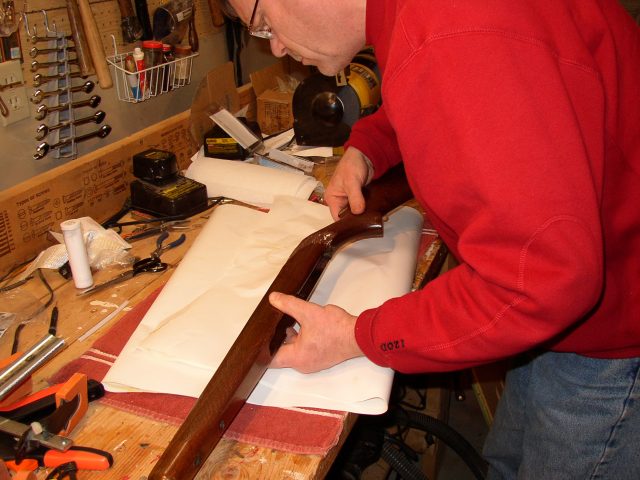
It was tricky to get clamps to hold. The surface is round, the epoxy is slick, and I used plastic wrap to keep the clamps from adhering to the repaired gunstock.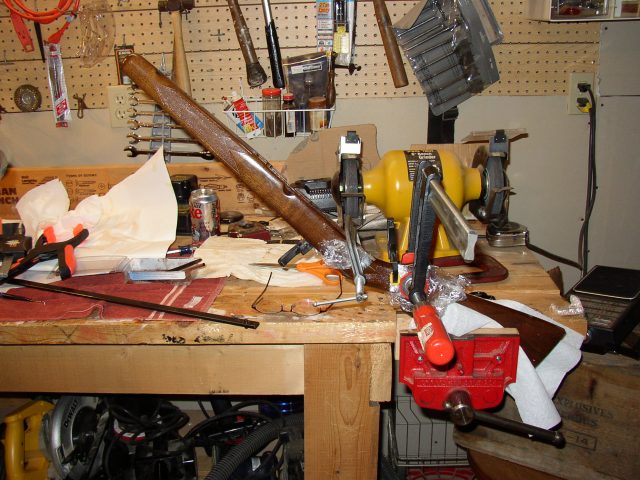
With the gun stock back together, I put a 105 Resin and 205 Hardener packet in warm water before mixing to increase its flow rate. The mixed epoxy was poured into the raised grain cracks and then lightly clamped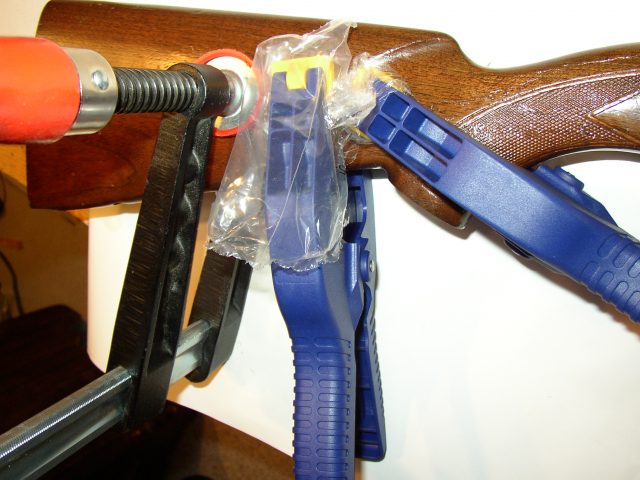
The repaired walnut gunstock is still raw here but came out looking very good. I used dental tools to clean up the checkering and used a furniture stripper on the old polyurethane finish. A fine sanding with 400-grit paper completed the stock preparation 
To complete the gunstock repair, I sealed the stock with 20% tung oil and 80% mineral spirits. Then I sanded it 6 times with 50% tung oil and 50% mineral spirits. I waited 1-2 days between each application and sanding. Lastly, I used a rubbing compound to knock down the gloss and bring out the satin finish
After one box of shells, the finished walnut gunstock is still holding solid. The worst side of the break and the repairs look great. I don’t think it could look any better given the nature of the breaks. I am very pleased with the outcome.


