
By Rhys Nye and Dan Zaklan
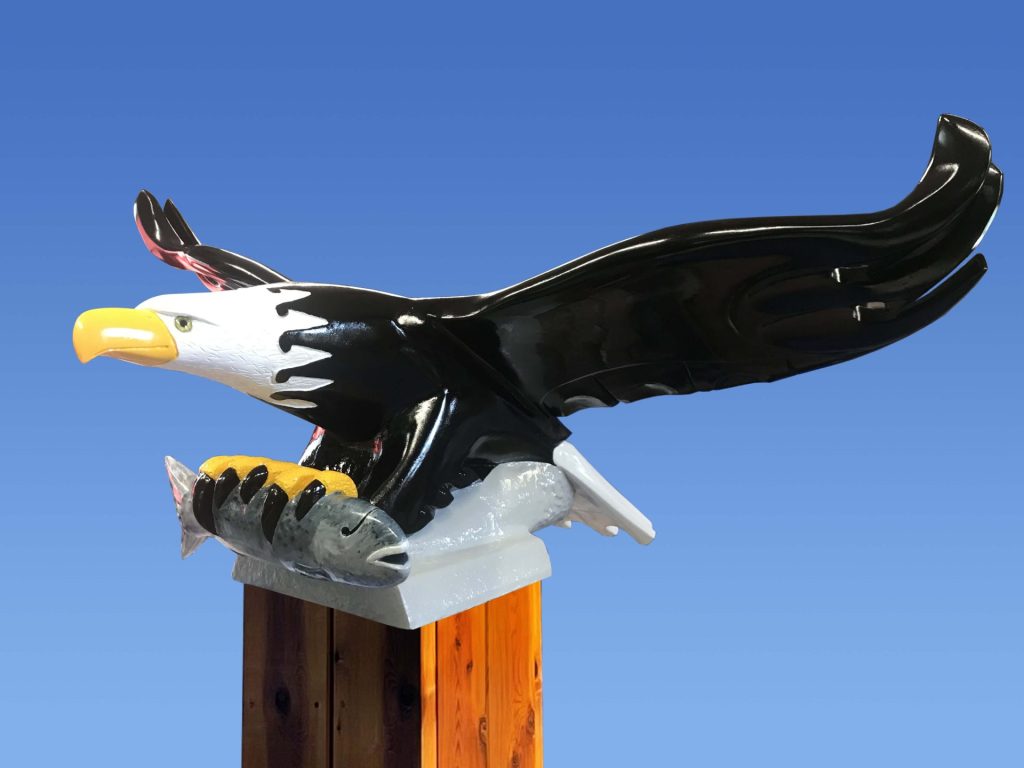
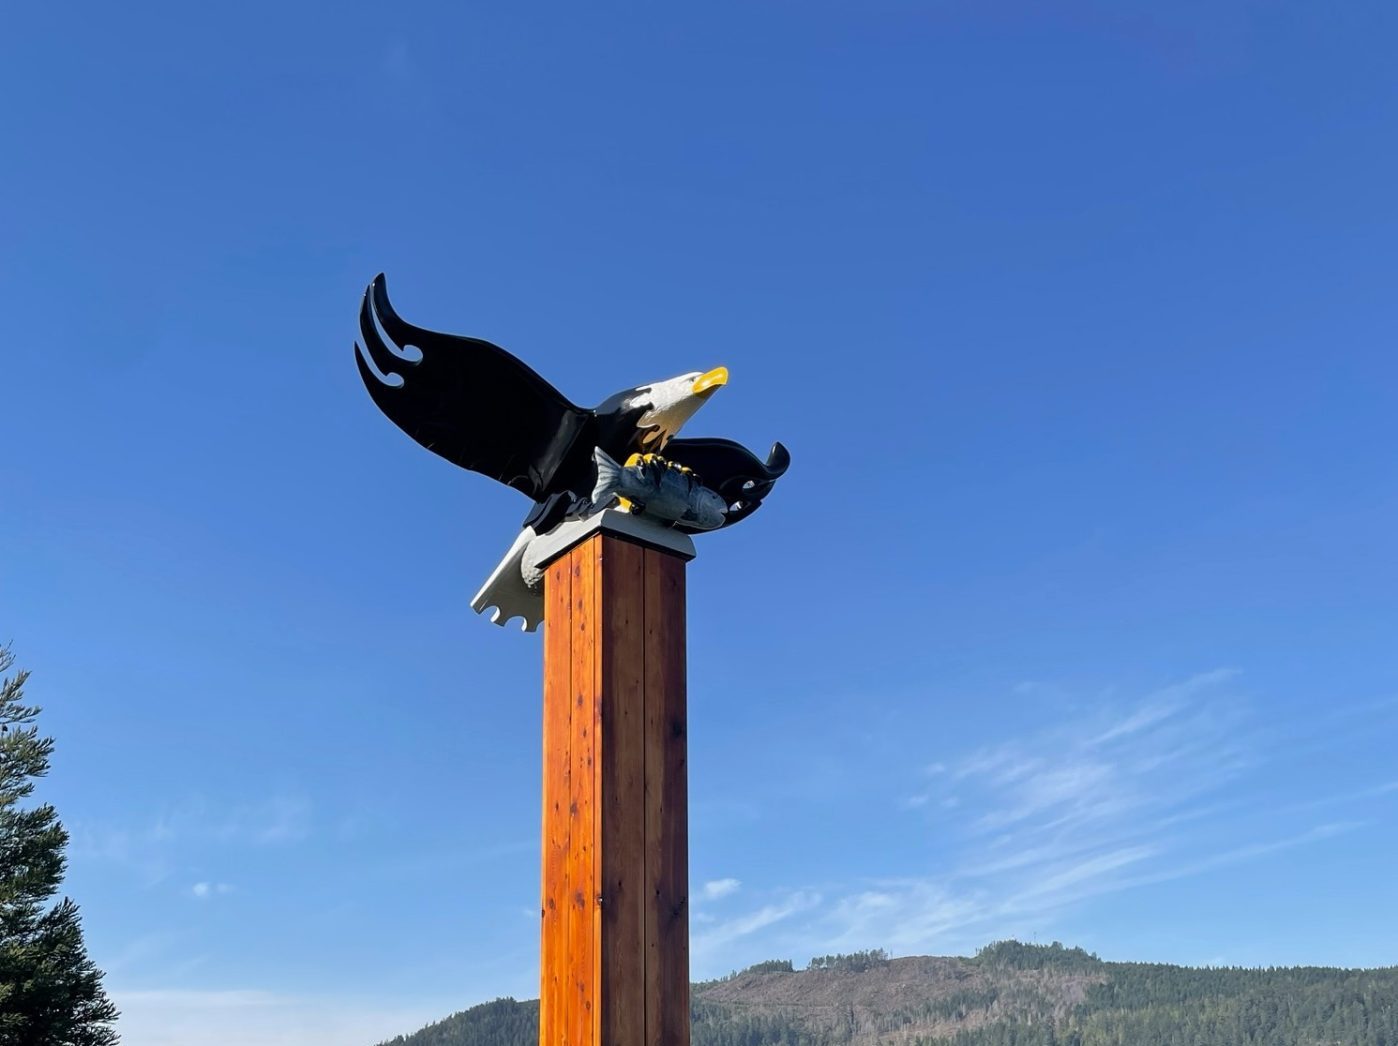
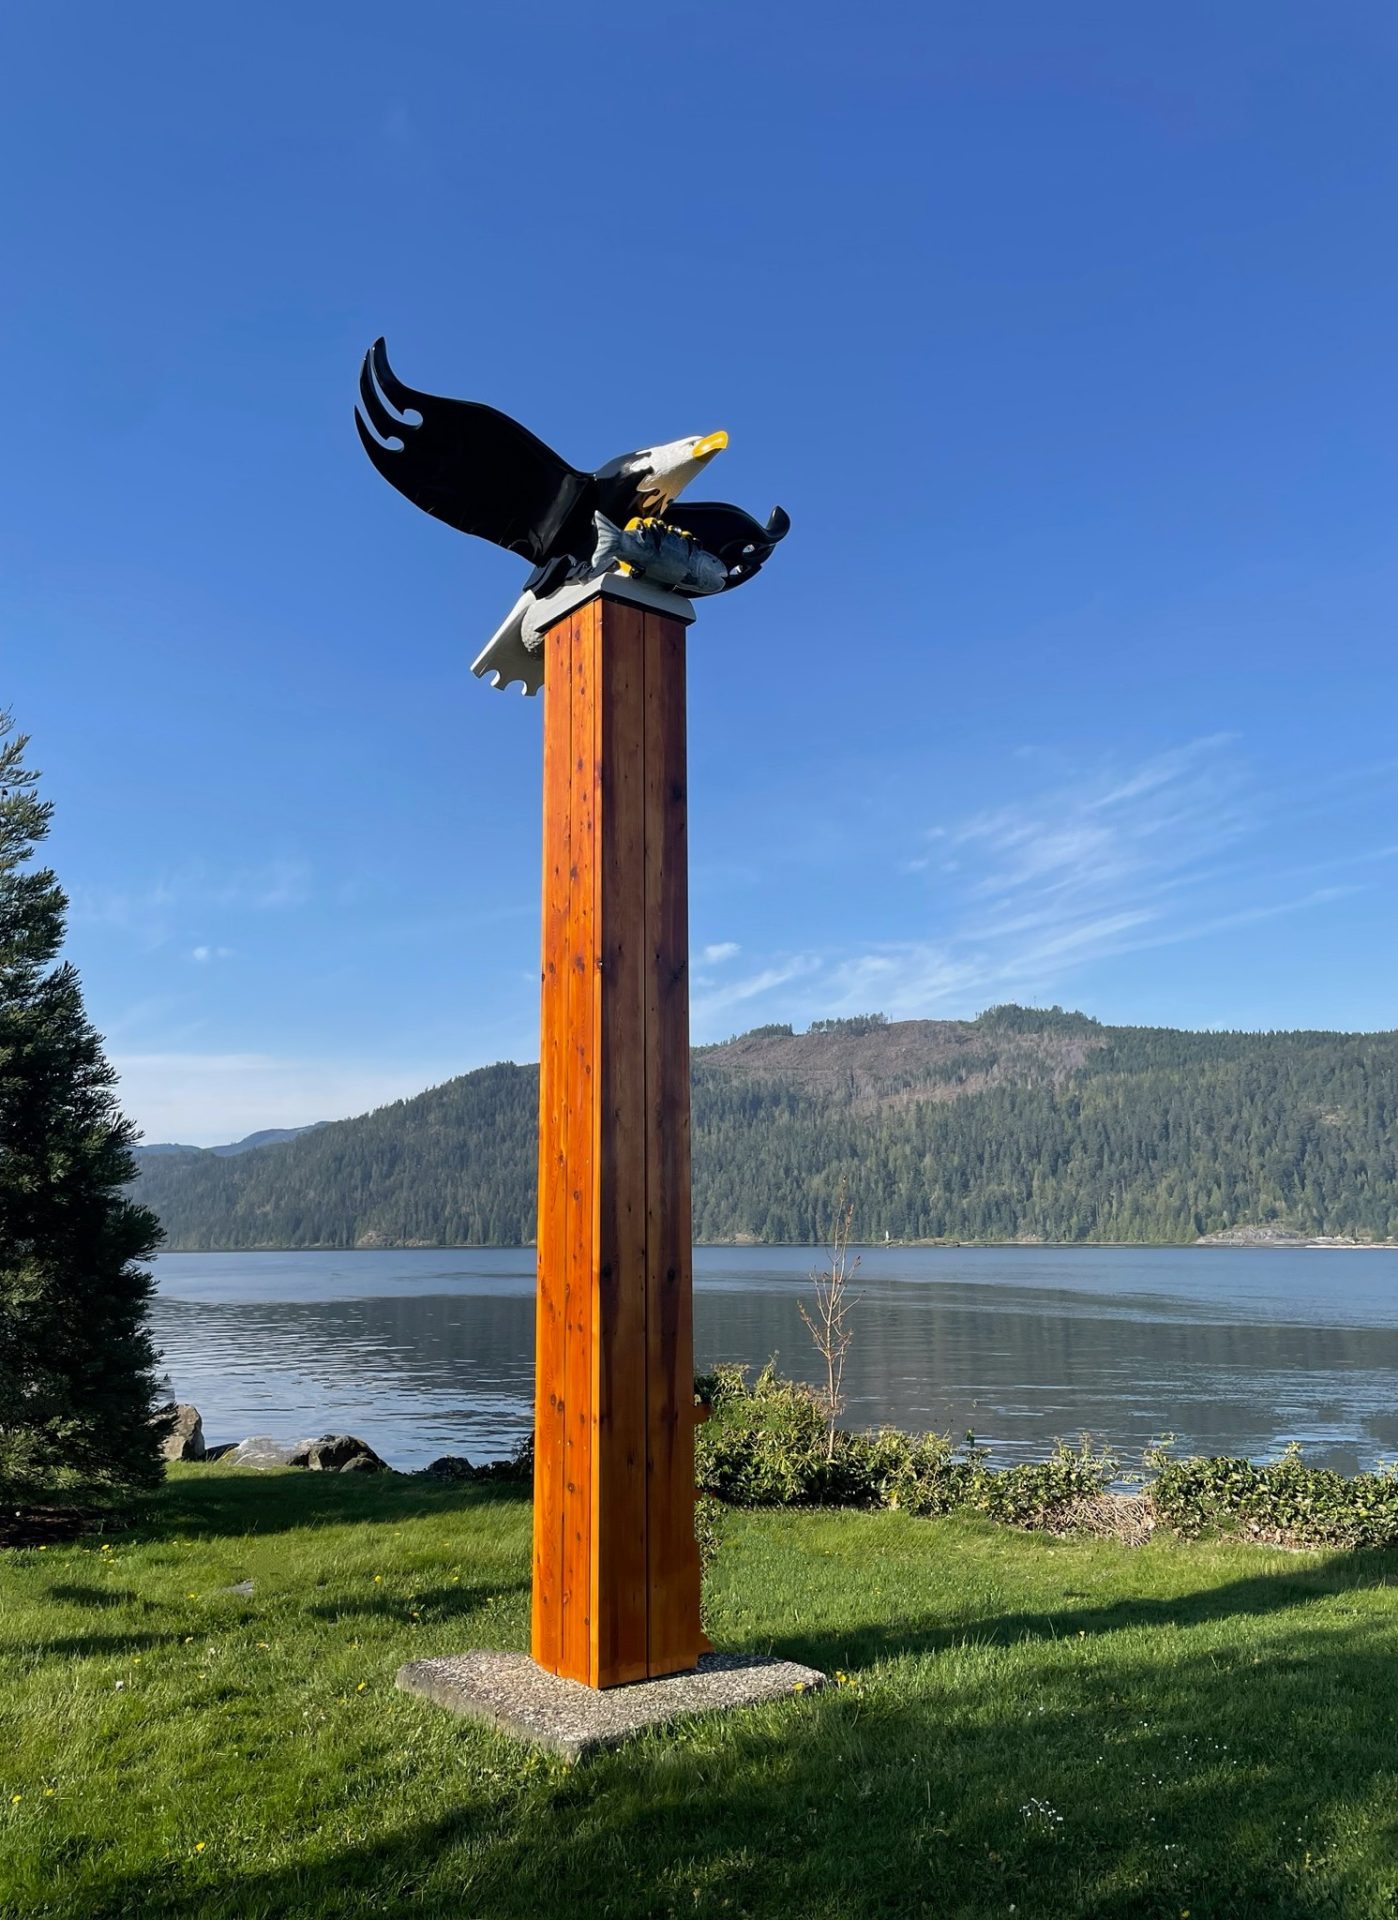
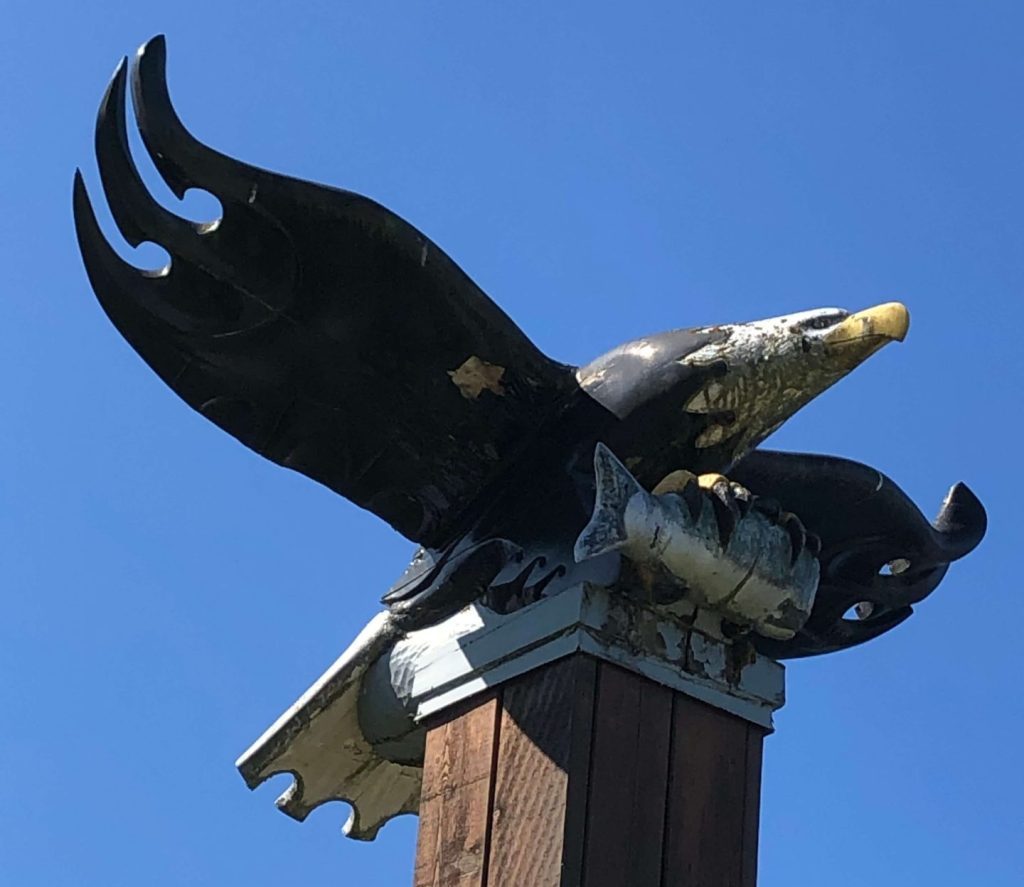
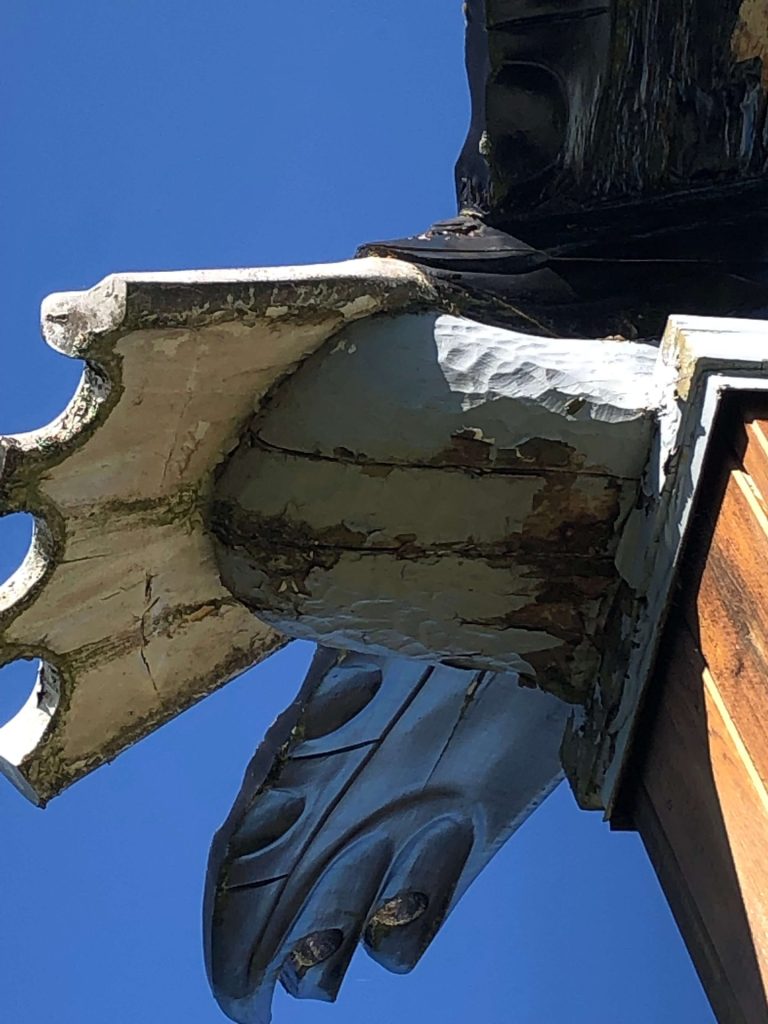
The Port Alberni Harbour Quay is located on the west side of Vancouver Island—on the wet west coast of Canada. With an annual rainfall of about 6 ½'(1.88 M) and summertime temperatures reaching nearly 100°F (37°C), it’s a tough environment for wood. The Harbour Quay Eagle carving, an almost 8′ (2.4 M), has been perched on top of a 20′ (6 M) tower overlooking the Harbour for the past 36 years. Local artist Bill Maxon originally carved the piece in partnership with Fred Graham, a Māori carver from New Zealand. The carving was commissioned for the World Expo 1986, hosted in nearby Vancouver, British Columbia. The years have taken their toll on the carving. In 2010, some repairs were undertaken by city staff, but now the Eagle needs a major restoration.
Volunteers undertook the project to restore the carving to its original condition. They worked with the Port Alberni City Parks Crew, who arranged transportation to and from the sculpture and the city to cover the material costs. The materials comprised WEST SYSTEM Epoxy, carving-grade Western Red Cedar, an epoxy primer coat, and Epifanes® two-part polyurethane in various colors. Great Central Milling provided the kiln-dried cedar at a reduced cost.
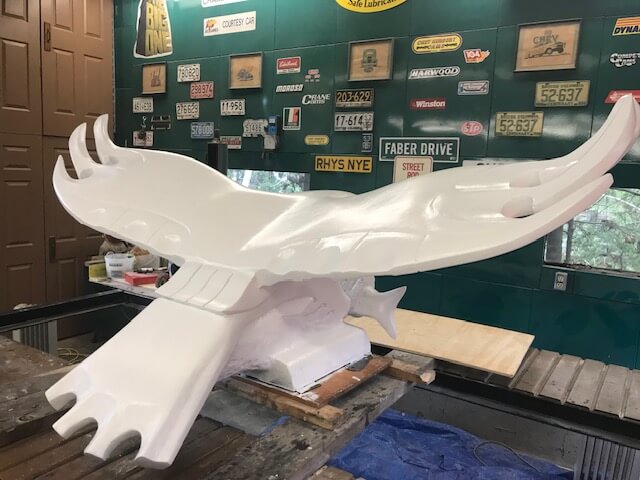
Once the Eagle arrived for restoration, it quickly became apparent that the project was much more involved than expected. Even though the Eagle was on top of a tower, with adequate air movement, the wood became waterlogged. The larger concern was the abysmal condition of the bird. Although the damage seemed minimal based on what we could see while it was 20′ in the air, upon closer inspection, there was significant rot throughout the piece. The rot was especially severe within the body of the Eagle. Several pieces of the sculpture had fallen off, including the wing tip, and the head and tail of the salmon.
We realized work could only begin after the wood was under 10% moisture content. We moved the bird indoors for a more controlled environment. The drying process had to take place slowly to avoid unwanted cracking. Fans and direct heat were not initially used. After about six months, the core of the body remained stubbornly wet. To remedy this, we drilled several ¾” (19 mm) holes vertically through the body and installed fans with gentle heat to reduce moisture. After about one year, the Eagle was ready for restoration to begin.

The Eagle was moved into the shop and placed upside down on an automotive hoist. This strategy turned out to be exceptionally good, as the Eagle could be raised or lowered to create the ideal work height.
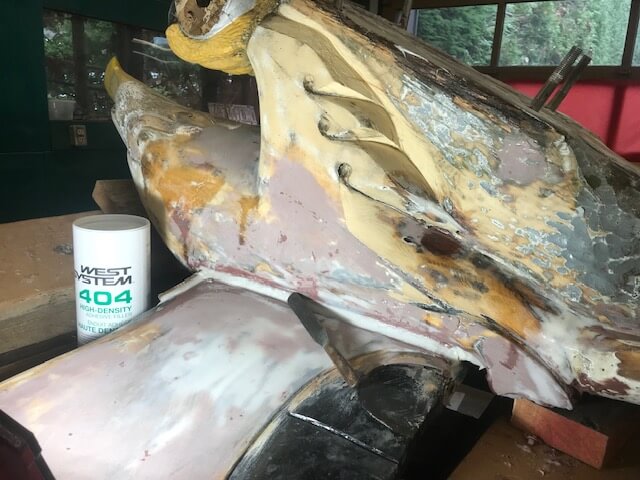
Initially, our plan to repair the body was to solidify compromised wood with a wash of 105 Epoxy Resin® and 206 Slow Hardener®. Then, we would fill any voids with 105 / 206 mixed with 404 High-Density Filler. After considerable assessment, it became apparent that the voids were too large to simply fill with epoxy. Instead, the better method was to fill the voids with new wood, which would reduce epoxy use. This would decrease costs and reduce unwanted heat buildup during curing.
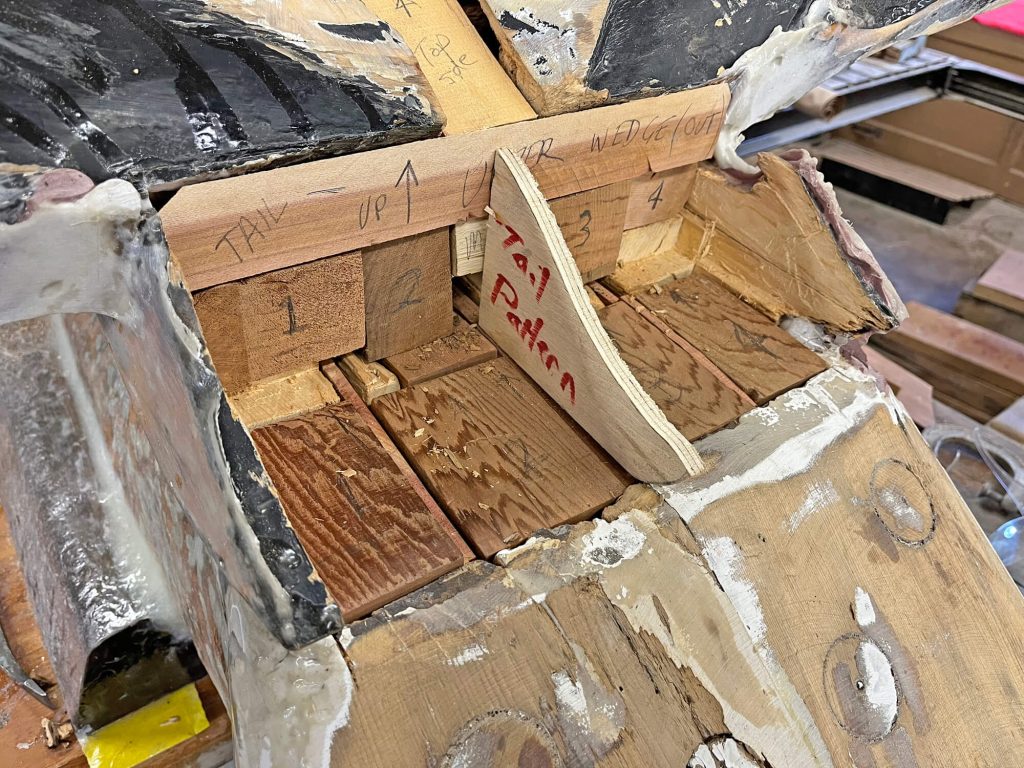
The plan was to rebuild the sculpture from the base up, paying meticulous attention to every detail. A new wood base was laminated together and cut to size. The final fitting was a daylong endeavor to carefully carve and chisel the base to fit the original bird. Once the base was completed, it was set aside to allow access to the main body of the sculpture.
We began by removing rotten wood. Rotten areas, mainly within the body, were chiseled out into random cubic-shaped voids. These voids were filled with new wood blocks. We noted the grain direction of the surrounding wood and oriented the blocks to match. The body repairs consisted of about 25 individually shaped blocks that filled the voids—similar to a 3D Tetris puzzle. After the epoxy was applied to the walls of the void, each wood cube was epoxied in place with a mixture of WEST SYSTEM 105 / 206 and 404 High-Density Filler. For the large repairs on the wings and body, we mixed 18 pumps of both resin and hardener. Gradually, we mixed in 3 ½ cups of the 404 High-Density Filler.
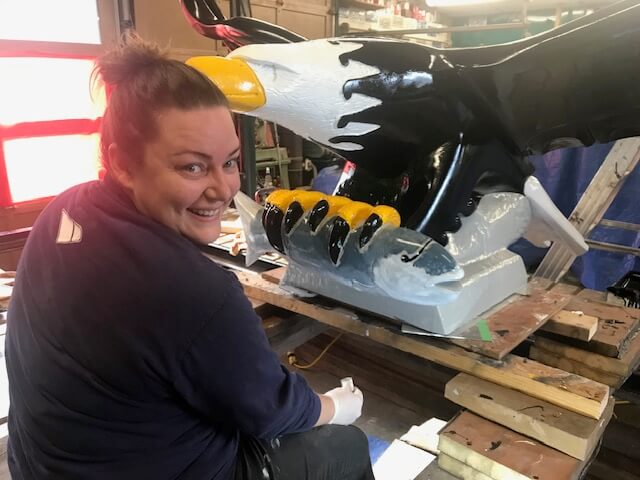
Throughout the restoration process, careful attention was paid to following the original details of the sculpture. Construction of a new fish head required making a proportionate grid from a historical picture, then scaling it up and transferring it to wood for carving.
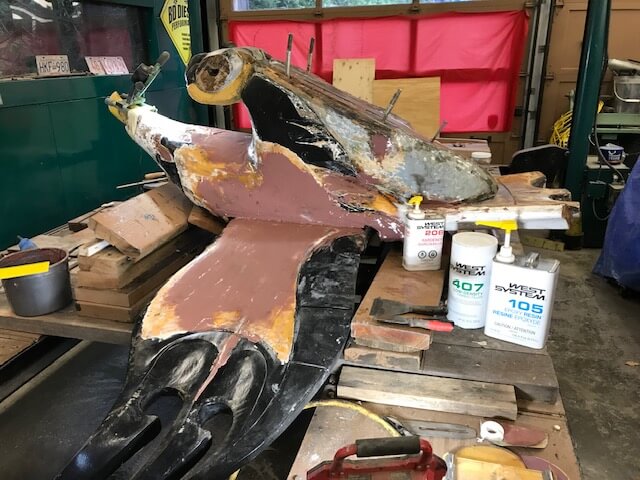
G/Flex was used on the top side of the wings because of its flexibility and better adhesion to the stainless-steel structural plate. We abraded the stainless plate with a 40-grit resin disc to ensure adhesion. We used 105 / 206 with 404 High-Density Filler to rebuild the basic shape of the sculpture and anywhere strength was required. For areas that had surface details and didn’t require a lot of strength, we used 407 Fairing Filler, which has a red coloration and is easier to sand. Generally, we found the WEST SYSTEM products were easily sanded, faired, and more forgiving than polyester products.
With the shape restored, we needed to coat the Eagle with epoxy to protect it from future damage. We stripped the original paint finishes from the sculpture so the epoxy coating could bond to the wood surface. This took considerable time and care while keeping the original detail intact. All surfaces that did not require repairs were coated at least once with 105 Epoxy Resin and 206 Slow Hardener.

All the repaired surfaces received a layer of protective fiberglass and epoxy. This included the underside of the wings, the body, and the top of the wings. Rather than draping cloth over complex surfaces, which could cause the original carved surface to become rounded and softer, we cut the cloth into smaller pieces. Using the patterns we made of all the surfaces to be fiberglassed, we carefully trimmed the cloth to fit around the sculpture details before applying epoxy. This precision took longer, but we endeavored to maintain the original carved surface.
Epoxy resins require protection from ultraviolet light. To solve this, the Eagle would get a fresh coat of paint. We carefully washed all the epoxy surfaces to remove the amine blush. When the blush was removed, it was easy to tell as a clean, non-slippery surface replaced the waxy film. Then, we used Interlux® 202 Fiberglass Solvent Wash to remove any potential contaminants. Care was taken to maintain a clean edge on the cotton wipes. Then, we lightly sanded it to improve adhesion and lightly cleaned it with the fiberglass solvent wash.
With the surface prepared, we applied two coats of Interlux Epoxy Primekote with a brush and a small roller. This was followed by two coats of epiphanies and two-part polyurethane. We did the second coat within 24 hours of the first, so no sanding was required. Brush thinner was added to allow the finish to flow out. The final touch was to epoxy in the new glass Eagle eyes.
The end result was beyond expectations. The Eagle now has an estimated life of 10 to 12 years before repainting is required. Once again, the Harbour Quay Eagle is soaring over the picturesque Port Alberni Harbour Quay.