Joining Plywood
April 25,
2018

GET STARTED
FREE PRINT & DIGITAL EDITIONS
April 25,
2018
Many boat parts require plywood lengths greater than the standard 8 feet, so joining together two panels of plywood is an important step. The most common methods of joining plywood are the butt joint with backer block, the scarf joint and a hybrid between the two. Each method offers its own distinct advantages and disadvantages in certain applications so it’s important to be aware of each joining method.
A wooden butt block joint provides a simple way to attach two adjoining pieces of plywood together. A butt block joint is made by edge gluing two pieces of plywood together and adding a backer block to one side of the seam. The width of the butt block should be a minimum of 16 times the thickness of the plywood you are using.
Although a butt block joint is a fast way to joining the plywood, it does have many disadvantages:
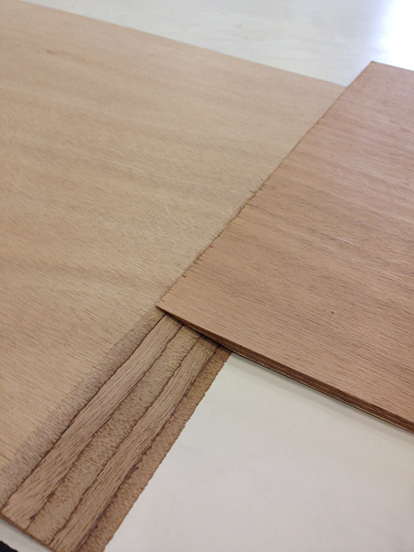
Although there are several different kinds of scarf joints, we advocate using the simplest and most reliable approach, fabricating identical bevels at the ends of the pieces of plywood to be joined. Dry fit these matching bevels, and then permanently bond them with WEST SYSTEM® Epoxy. In many boatbuilding situations, we recommend a ratio of 8-to-1 to determine the size of the bevel. For example, when using 1/2″ (12.5 mm) plywood you need a 4″ long bevel.
The advantage of scarf joints is that they are strong, lightweight, and reduce stress concentrations. In demanding situations, extra strength can be gained by increasing the length of the scarf and they are even less likely to produce a hard spot that could result in an uneven surface when bent. The disadvantage is that fabricating a scarf joint will take more time and skill compared to the butt block and also reduce the length of the plywood.
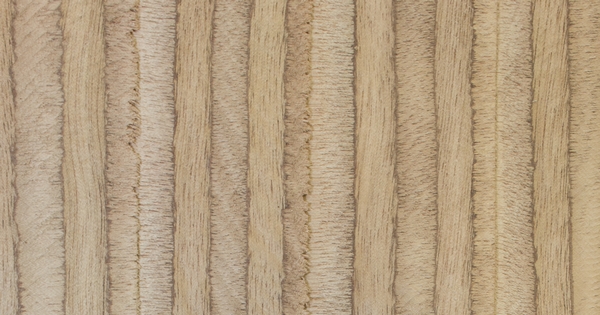
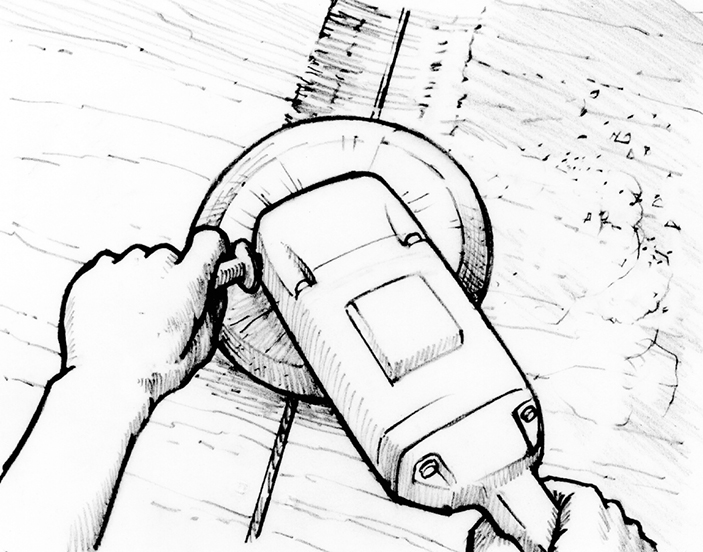
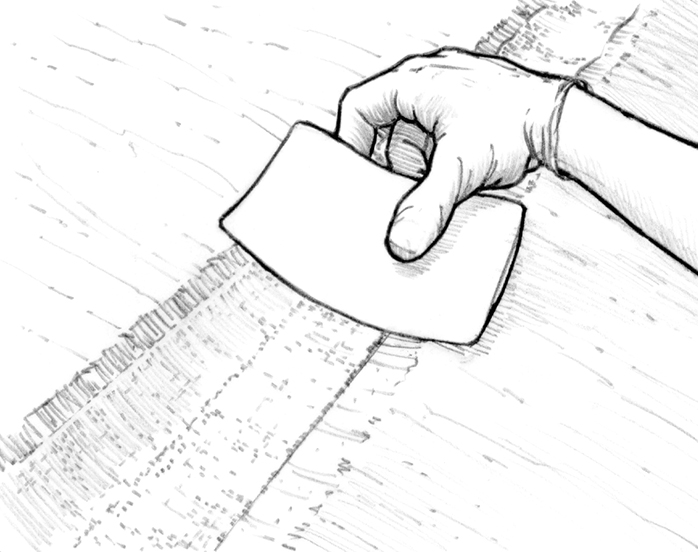
Making a scarf joint by hand, the basic tools require a block plane and a smoothing plane. Using a power plane or belt sander can save a lot of time in roughing the scarf bevel down close to its intended dimension, but without this luxury use a smoothing plane with a sharp, deep-set blade to remove a majority of the stock as quickly as possible. Then use a more finely set block plane to finish off the scarf bevel, being careful to keep the bevel straight and flat as you proceed. For best results keep the plane blades sharp at all times. If you have any unevenness on the scarf joint be sure to sand the surface with a hard and flat sanding block. The plane will lose its fine cutting edge quickly when you plane plywood due to the adhesive between plies. The lines created by the various plies in the plywood give a good indication of progress you are making when creating the bevel. Any humps or unevenness in the bevel usually show up as a crooked line when you sight down the glue line between the laminations.
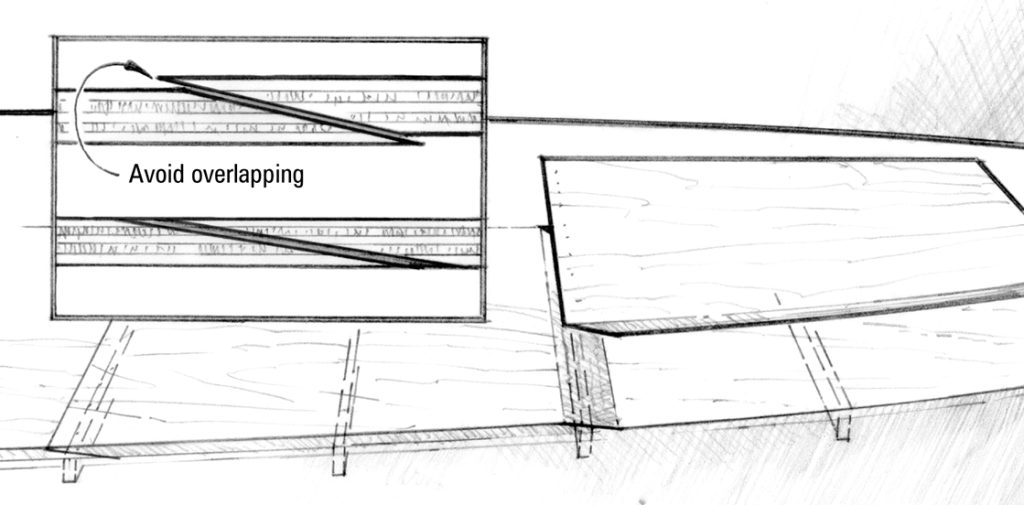
You can save a good deal of time when hand beveling by setting up several panels in a stack for simultaneous block planing. For instance, assume that you want to plane bevels on four 1⁄4″ panels all at once. Draw 2″ bevel lines, which represent 8-to-1 bevels, across all the panels. Stack all four of the panels on top of one another on a flat table. Place the edge of the bottom panel flush with the edge of the table. Then place the second panel with its edge matching the bevel line of the first panel, and the third panel with its edge matching the bevel line of the second panel, and so on. Clamp the whole stack to the table and plane one continuous bevel over all of the panel ends.

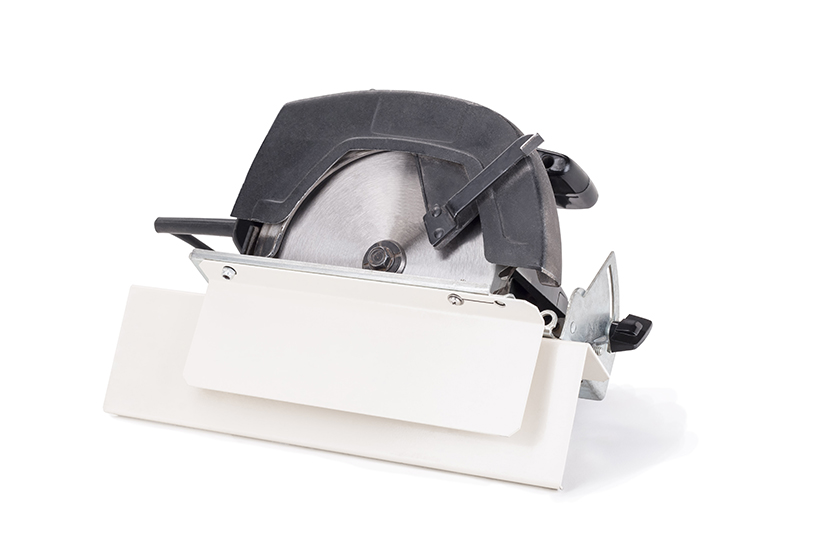
The 875 Scarffer circular saw attachment is ideal for working with plywood up to 1/4″ (6 mm) thick, and with minor hand finishing may be used on panels up to 1/2″ (12 mm) thick. Bevels cut with the 875 Scarffer attachment can be more accurate than hand-cut joints, especially if you have little experience making scarfs by hand.
A hybrid joint would be another possible method of joining plywood panels together. For this method, edge glue the plywood together, create a shallow bevel along the joint on both sides of the plywood and then reinforce the joint with a layer or two of fiberglass on each side of the joint. Bi-axial fabric is a good choice for this application.

The hybrid joint provides some distinct advantages. For one, the plywood panels maintain their full length. Also the joint is less likely to produce a hard spot when bent into shape because the original thickness of plywood is maintained. The disadvantages are that it can take more time to reinforce both sides of the joint with fiberglass and requires some skill/effort to sand the shallow bevel on the joint.
For more detailed information about Scarfing visit our website for a free downloadable issue of Gougeon Brothers on Boat Construction Chapter 12 on Scarfing.
Featured Image (top)—When you sight down the glue line between the laminations the lines should be straight. Humps or unevenness in the bevel usually shows up as a crooked line.


