Joining Plywood
May 31,
2014

GET STARTED
FREE PRINT & DIGITAL EDITIONS

May 31,
2014
A long time ago, I was building a 16 foot William F. Crosby design—a plywood, skiff-like sailboat. I was having trouble figuring out what to do because the plywood was only half as long as my boat was going to be. (Up to that point, all the boats I’d built were 8 footers.) I thought my prayers were answered when I heard that a distant lumber yard had some “special stuff” 16 feet long. But when I arrived at the yard, I thought I had been deceived. The “special” 16 foot plywood had been made that long by joining two standard 8 foot sheets, with a joint that looked pretty vulnerable and weak. I reluctantly bought the material on the assurance that it was plenty strong and I was not being deceived.
I learned that this joint was a scarf—sometimes called a splice or matching bevel—and is quite a common method of joining lumber and plywood. Scarf joints have actually been around for a long time and, when properly done, are considered quite reliable. How it was fabricated was beyond me. So was my new problem, how to carry four sheets of this long stuff on my dad’s car. (That’s another story, one I’ll tell you about when our editor initiates a comic section.)
Many projects, especially boats, require wooden parts or plywood panels of greater length than are available. It’s important to know your options, how they’re produced and what you can expect from them. The most common methods of joining plywood are variations of the butt joint and the scarf joint. Each method offers advantages in certain applications. Some methods are labor intensive, requiring more skill and/or machinery to fabricate than others. Others are much easier, but trade-off strength or bending qualities. Let’s examine these joining methods, how they’re produced, where they’re best used and what problems may be associated with them.
The butt joint is the easier method, but you cannot simply butt two pieces of plywood. The joint requires reinforcement. There are two methods of butt joint reinforcement, the butt block and the butt strap.
A common butt joint reinforcement method employs a wooden “butt block” attached to the two adjoining parts. It provides several advantages. It’s simple, it helps alignment, it can serve as a frame for support, and it permits joining where there is not access to both sides.
Butt blocks provided several advantages in the construction of my 27’ trimaran, ATOM, built in 1977. I’d built the amas in my attic, knowing they’d be too long to remove unless cut in half. I took them close to completion, then sawed them in half between the bulkheads. I removed them from the attic and bonded butt blocks to one half of the joint. The butt blocks were plywood, 30% thicker than the planking thickness. (The planking was ¼”-thick, so the butt blocks were 3/8″ thick.) The face grain of the butt blocks ran the same as the planking. I made the butt blocks 20 times the planking thickness, thus they were 5″ wide. Because the amas were closed, I pre-coated the non-bonding surfaces, especially the end grain. I bonded these to the inside surface of one side of the joint, with half of the butt block exposed. Arranged like this, the butt blocks helped align the two halves. Placed halfway between the bulkheads, they served as additional reinforcement; sort of an intermediate frame. This gave the screws something to bite into so I could draw the skin flush as the epoxy cured.
I used butt blocks to install a 3mm plywood deck on my lightweight catamaran. I did not want to install this deck in one piece because, at 18’ long, 12″ wide and 1/8“ thick, the deck would have been unwieldy. It was simpler to install in 8’ sections. And, putting the deck on in sections would allow me to clean away some of the excess epoxy that squeezed from the deck beams and sheer clamps as each section was completed, saving some non-functional weight.
There are some disadvantages to butt blocks.
I used butt blocks as intermediate frames to stiffen the hull panels in my Bolger-designed Micro, MODERN GIRL, in 1987. I used ½” blocks where ¼” would have been better. The abrupt increase in material thickness made the panel more difficult to bend, and created a flat spot which had to be faired. The planking was ¼”, and the external butt joint seams were dished slightly with a grinder and covered with 6 oz. fiberglass. (See illustration.) Without reinforcing material on the outside, a tension crack could have developed when the panel was bent to a tight curve.
Another way to reinforce a butt joint is the butt strap, also known as butt tape. In this method, fiberglass tape is bonded to both sides of the adjoining plywood. For years, designers and builders Joe Dobler and Harold Payson and others have used this method successfully.
Polyethylene sheeting is laid on a flat surface where the joint is to be bonded. Glass tape is cut to the length of the joint in the panels—the width of the tape is determined by the thickness of the plywood being joined. The epoxy-wetted tape is laid on the polyethylene, the plywood surfaces are wetted and carefully laid onto the wet tape with the joint centered on the tape. Then the top surface of the joint is covered with wetted tape. Butt straps are easy to produce and don’t weigh much. As long as they are used on plywood ¼”-thick or less, they are as strong as they need to be.
For thicker plywood there is a hybrid method of the butt strap. The butted plywood can be dished out and filled with multiple layers of fiberglass cloth. Biaxial fabric is a good choice for this application. It does not take a great deal of skill to produce such a joint, but it’s not all that fast. It takes a lot of glass and epoxy—more than it does to produce a scarf.
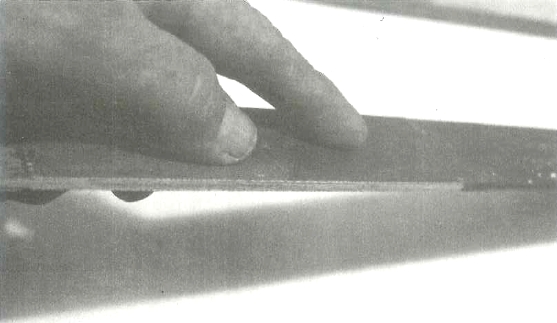
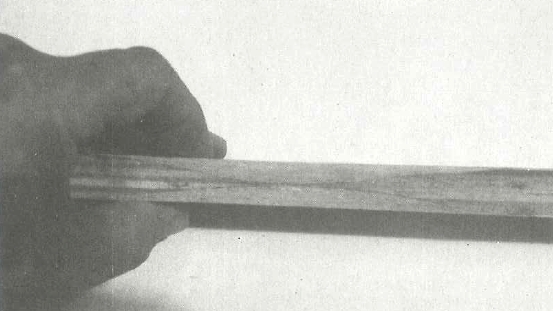
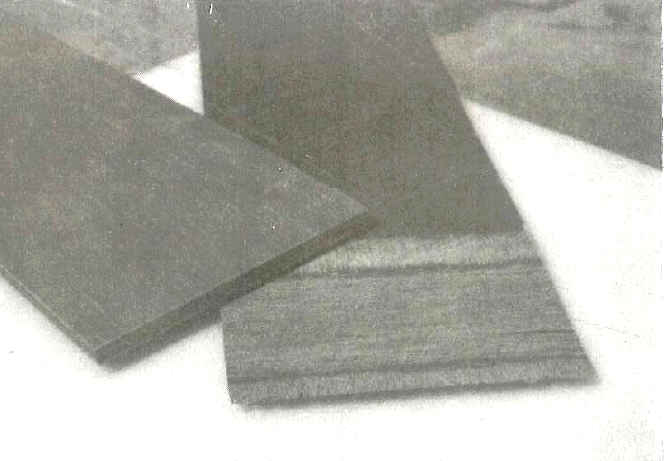
There are many different kinds of scarf joints. The one we refer to is also known as the matching bevel. In this joint, the edges of the two panels are beveled to create a much larger interface or bonding surface between the panels than a butt joint. The larger the bonding surface, the stronger a joint will be, because loads are spread over a larger area. Compared to other kinds of joints, a properly made scarf joint provides a very large bonding surface, and is therefore much stronger than other joints. In most cases it is stronger than the solid sections of the wood it’s holding together.
Scarf joints are strong, light, and they reduce stress concentrations. They are less likely to produce a hard spot that could result in an uneven surface when bent.
However, scarf joints are difficult to fabricate and to align, they shorten total panel length (because the two panels overlap), and unless a scarf is perfect, it will appear unsightly under clear finishes.
The conventional guideline for scarf joints is that the bevel should be at least 8 times the panel thickness, or a ratio of 8-to-1. Longer scarfs increase bonding area, reduce stress concentrations and result in fairer bending panels. But as scarf slopes become longer, they are more difficult to fashion accurately. The feather edge becomes more vulnerable to damage and the panels become much more difficult to apply clamp pressure to when bonding.
Reducing the angle in attempt to make scarf production easier and quicker, will dramatically reduce joint strength. Short scarfs are very weak when bent and will readily fail when fabricated at less than a 6-to-1 ratio. They can be used if there are multiple layers comprising the completed skin and the joints are staggered.
When bonding scarf joints, the panels must lay perfectly flat. If a curve is bonded into the joint, it can result in dimpled skins on either side of the scarf area, especially on “stressed-skin” hull constructions.
For a complete explanation of how to make scarf joints, see Tom Pawlak’s article Plywood Scarffing Methods.
Every joint option involves trade off, whether of strength, fabrication time, weight, difficulty, aesthetics or logistics. The key is to know your project requirements and select the joint style that will best suit your needs.