

By Robert Monroe
Dave Hatton and I had a January trip planned to the Everglades and the Florida Keys. We decided to use a Feathercraft™ double folding kayak with a sailing rig, but were not very happy with its sailing performance to weather. It has a simple reaching/downwind sail and no effective lateral resistance to give it any bite in the water. It’s a neat boat, but we decided we could improve its performance without too much effort. We would start with a leeboard and look at the rig later. The key problem was how to get hard connecting points for the leeboard onto a soft-sided folding kayak without cutting holes in the skin.
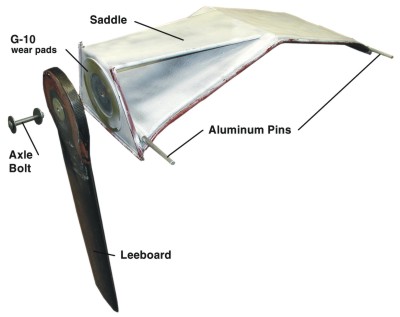
We decided to build a saddle that would sit on the deck between the two cockpits. We would use aluminum tubes to secure the saddle to reinforced webbing loops sewn into the deck seam as part of the deck safety line. This arrangement used existing reaction points, gave the saddle a large footprint on the deck to distribute the loads, and, most importantly, didn’t hurt the kayak if we were horribly off in our thinking.
Building the leeboard
For the leeboard, we started with a cedar blank originally built for a racing dinghy rudder. It was too short so we bonded on a high-density foam blank to form the head of the leeboard. We bird-mouthed the joint to help with alignment and to make a softer transition from the cedar to the foam.
We reinforced the blank with several layers of 702 carbon tape* across the joint and down to the tip. We bonded a piece of G10 laminate (a high-density epoxy/glass “circuit board” laminate) into the tip of the board to provide some hardness for grounding and scuffing. After fairing the blank with 407, we covered it with a layer of 6 oz carbon cloth draped over the leading edge and clamped flat along the trailing edge. When it was cured, we trimmed and coated the board.
Building the saddle
The saddle required a mold to get the proper alignment and angles of the kayak’s deck. We used thin plywood as a stiff surface and lots of plastic sheeting, tented over the deck, as a base to lay up a thicker glass/epoxy mold surface.
We set up the fiberglass mold on a bench top and used vacuum bagging to mold the saddle of medium density foam cores sandwiched between 6 oz carbon skins. We also vacuum-bagged flat sandwich parts for the upright and top panels. For the attachment and alignment points, we fabricated some glass tape tubes over aluminum tube molds.
Then we assembled the saddle on the kayak. We started by positioning the saddle and bonding the fiberglass tubes onto the saddle where it crossed the deck line seam with the web loops. When these glass tubes had cured, we secured the saddle to the deck web loops with the aluminum pins. This located the saddle’s actual position in use. We then positioned and aligned the upright and top panels using the leeboard and a centerline string stretched from bow to stern. We bonded and filleted the entire assembly with a 105/206/406 mixture. After the saddle was cured, trimmed and coated, we bonded G10 wear pads on the mating surfaces of the saddle and leeboard to provide local strength and abrasion protection. We chose a stainless bolt and wing nut to secure the leeboard to the saddle assembly.
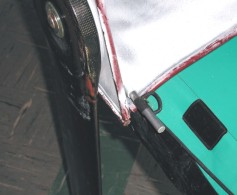
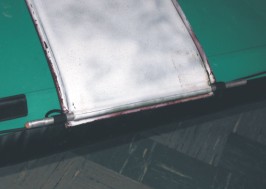
Like many projects, this one was still unfinished the day before leaving. The final assembly job was to bond some plastic rub strips along the perimeter of the saddle to protect the carbon parts from damage and to isolate the saddle from the kayak’s skin while we were sailing. After we bonded on the rub strips, the entire saddle was placed in a large trash bag and thrown on the pile of paddling equipment in the back of the station wagon, twenty minutes after a scheduled 5 PM departure to Florida. Whew.
On the trip south, with increasing warmth and a stronger sun, we remembered that carbon/epoxy parts like a light-colored paint to look and feel their best (to gain empathy wrap yourself in black plastic and sit in the sun for a while). We purchased some fast drying white paint at a megastore in Georgia. I painted the saddle (very poorly) in the parking lot of the Everglades National Park Visitor Center in Flamingo, while David packed the boat. The key here was fast drying paint.
The entire arrangement worked better than expected. The saddle/leeboard combination stood up to stiff winds and bumpy bottom with no problems and no regrets (except for the paint job). The boat is still a folding kayak with a so-so sailing rig (this machine does not scream to weather unless we are paddling), but the new leeboard provided more choices and opportunities for our sailing and paddling adventure in the Everglades.


