Repairing Individual Gelcoat Blisters
Spring 2001

GET STARTED
FREE PRINT & DIGITAL EDITIONS

Spring 2001
Gelcoat blisters can be a serious problem if left unattended. At some point, your hull may need extensive repair, including gelcoat removal and epoxy barrier coats as described in Gelcoat Blisters: Diagnosis, Repair & Prevention. However, if you have isolated blisters and a manageable number to repair individually, we often recommend that you patch individual blisters and continue to use the boat until you determine the cause and extent of the problem.
The causes and seriousness of blister problems vary, influenced by such factors as the quality of the resin used, the quality of the laminating equipment, and the workmanship. Boat model, age, climate, and the amount or lack of ventilation are other important factors. Blisters typically develop slowly. A small number of blisters may be the total extent of your problem or the first sign of something much more serious. You may be able to repair isolated gelcoat blisters and improve ventilation, and thus avoid the need for a full-blown barrier coat job. It may take two or three years of careful monitoring and repairing gelcoat blisters to determine the severity of your problems and decide on the most effective long-term repair strategy.
Gelcoat blisters are best identified immediately after the boat is pulled from the water. If you wait, even an hour or two, fewer blisters may be seen because blisters often deflate over time. The damage is there, just more difficult to identify. To help identify deflated or regressed blisters, lightly sand the bottom paint by hand with coarse sharp sandpaper. Deflated blisters are difficult to see and feel over weathered bottom paint, but if you sand lightly, the sandpaper only hits the high spots on the hull. If blisters are present, you can identify their location as random spots that have been abraded. If the boat has many coats of bottom paint, this method will be less effective and you may have to sand deeper into the bottom paint to identify blister domes, which will still show up sooner than gelcoat unaffected by blisters. The sooner you inspect after removing the boat from the water, the better.
The following repair method is specifically tailored to fixing individual blisters prior to bottom painting. The advantage of this method is that the repair can be completed in a matter of hours prior to bottom painting. It can be used to repair blisters on hulls that have been recently pulled from the water or on hulls that have been out of the water for some time.
1. Open individual gelcoat blisters with a small abrasive tool like 3M’s Rolock™ 2″ diameter sanding disk with 60-grit sandpaper. Make sure that you have removed the entire blister, including the edges of the blister dome.
2
. Wipe the cavity clean with an alcohol prep pad or paper towels that have been soaked in rubbing (isopropyl) alcohol. Be generous with the alcohol and be sure to change towels frequently so the contaminants are removed rather than spread. Repeat the alcohol wipe/allow to dry process until the laminate is dry to the touch. It is particularly important to repeat the alcohol-wipe process on blisters that were fluid filled at the time they were ground away.
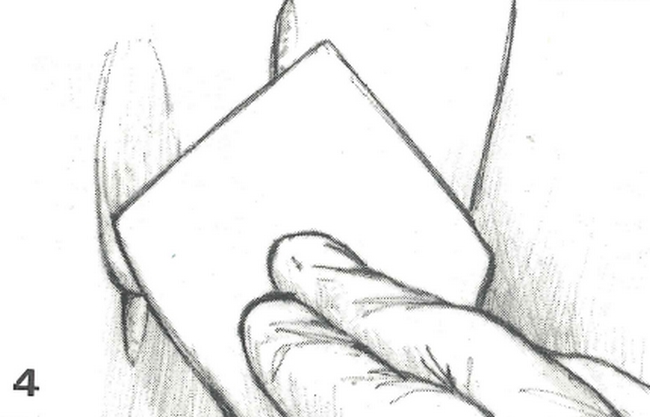
3. Wet out the recently sanded and cleaned blister cavities with an unthickened mixture of WEST SYSTEM® 105/205 or 105/206 epoxy. Use 205 hardener if you are in a hurry. Allow this initial epoxy coat to gel slightly. This will lessen the likelihood of the thickened epoxy sliding out of the repair. If you don’t have the time or the patience to wait for the epoxy to gel, you can wipe off most of the initial epoxy with dry paper towel or apply moderate heat to accelerate the epoxy’s gel.
5. Wet sand with 80-120-grit wet/dry sandpaper or wash with water (no soap, no ammonia) and sand dull with 100-grit sandpaper. If 105/205 epoxy has been used in warm conditions, sanding and bottom painting can be done later the same day. With slower hardener or in cooler temperatures, allow the epoxy to cure overnight.
Apply your bottom paint of choice.
Go Boating!
This method of repairing individual gelcoat blisters uses 406 Colloidal Silica, a high-density adhesive filler, rather than a low-density fairing filler. It works well because epoxy thickened with 406 resists moisture permeation better than epoxy thickened with low-density fillers. Our Low-Density filler is recommended for blister repair in our Gelcoat Blister manual because the epoxy/low-density filler mixture sands easily and it will be coated with a very effective epoxy barrier coat. If you plan to skip the barrier coat process after filling blisters, 406 Colloidal Silica is your best choice for creating thickened epoxy putty. Epoxy thickened with 406 is also more difficult to sand, so limiting its use to isolated blister repair is more practical than using it on larger jobs that may require a lot of fairing.
Ventilation is crucial
The first sign of blisters is a wake-up call, warning you that the hull is not happy. While a few blisters are usually not enough reason to get involved in a full gelcoat removal and epoxy barrier coat job, you do need to do what you can to improve the conditions to which your boat is exposed.
One of the most overlooked causes of gelcoat blistering is poor ventilation. If your boat smells stale or musty after being closed up for a while, you probably have inadequate ventilation. You may be providing a breeding ground for future gelcoat blisters. Sometimes people call us about blisters that are isolated to specific locations on the hull. These localized blister formations are often caused by moisture trapped inside compartments inside the hull. By installing small vents to these compartments, you can improve your situation.
Passive vents rely on wind to circulate air within the boat. They work best in opposing pairs or in conjunction with an active vent. A great source of active and passive vents is Fisheries Supply Co. in Seattle, Washington.
For more information on ways to provide fresh air inside your boat, see Joe Parker’s article on ventilation.
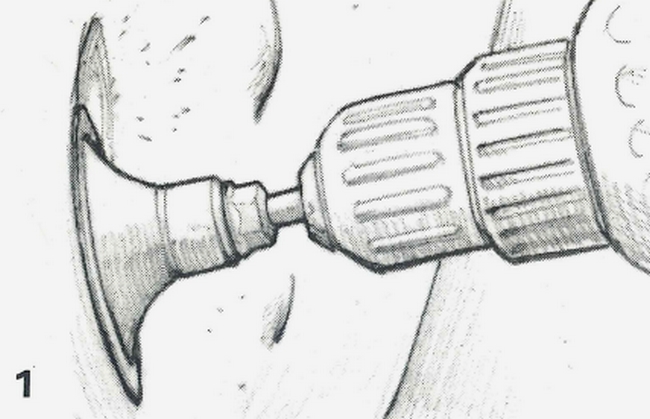
 1. Open individual gelcoat blisters with a small abrasive tool like 3M’s Rolock™ 2″ diameter sanding disk with 60-grit sandpaper. Make sure that you have removed the entire blister, including the edges of the blister dome.
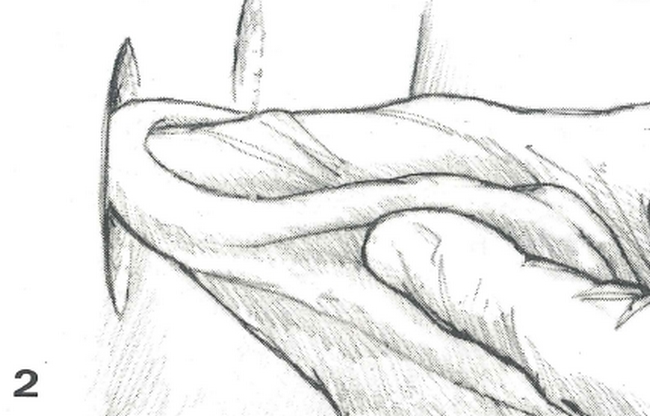
 . Wipe the cavity clean with an alcohol prep pad or paper towels that have been soaked in rubbing (isopropyl) alcohol. Be generous with the alcohol and be sure to change towels frequently so the contaminants are removed rather than spread. Repeat the alcohol wipe/allow to dry process until the laminate is dry to the touch. It is particularly important to repeat the alcohol-wipe process on blisters that were fluid filled at the time they were ground away.
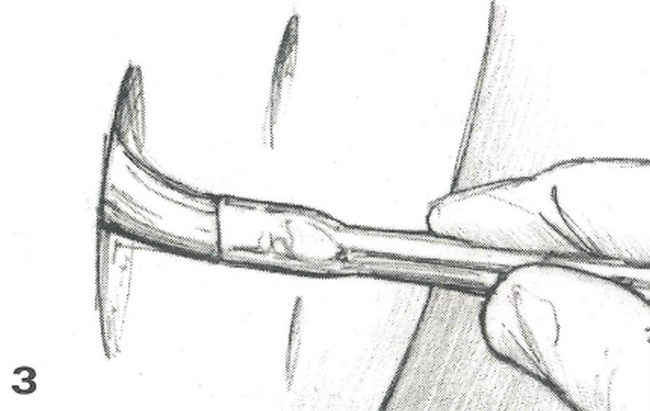
 4. Fill the cavities with epoxy thickened with 406 Colloidal Silica filler. (Note: This method is only for repairs that will not receive epoxy barrier coats prior to bottom painting.) Use enough filler to create a creamy non-sag paste that will feather out nicely with a plastic spreader or drywall taping knife. Avoid overfilling the cavities because 406 thickened epoxy is difficult to sand. On larger cavities where the epoxy may generate exotherm (heat buildup), add more filler to the mix to increase viscosity. The extra filler helps to resist sagging at elevated temperatures caused by exotherm. Allow the epoxy to cure.
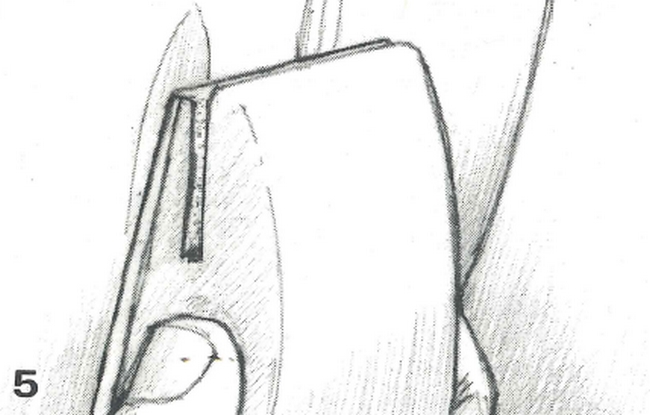
 5. Wet sand with 80-120-grit wet/dry sandpaper or wash with water (no soap, no ammonia) and sand dull with 100-grit sandpaper. If 105/205 epoxy has been used in warm conditions, sanding and bottom painting can be done later the same day. With slower hardener or in cooler temperatures, allow the epoxy to cure overnight.


