
with WEST SYSTEM Epoxy
By Tom Pawlak — GBI Technical Advisor
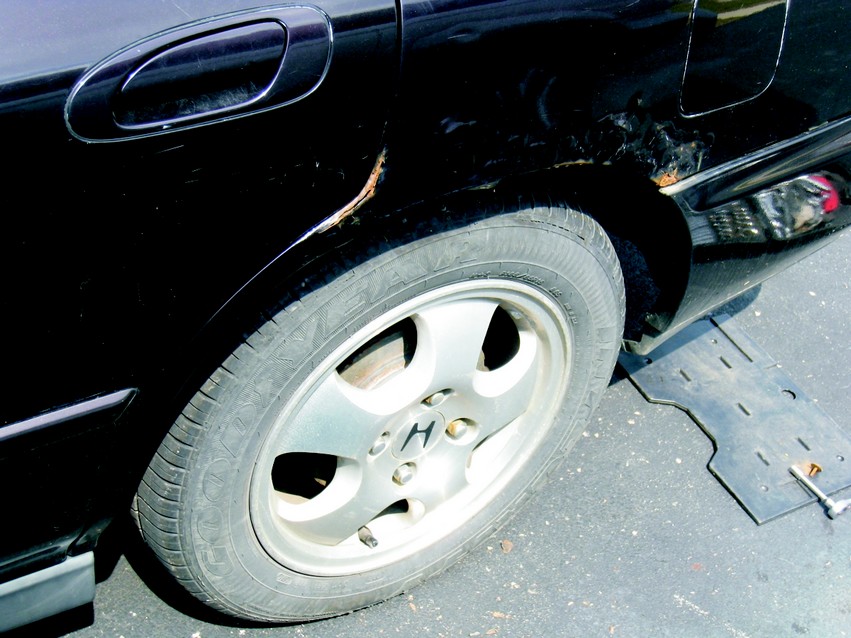
Ten years ago the rear fender on my son John’s 1991 Honda Accord was damaged just forward of the wheel. It had been repaired at a local body shop, but four months later the same fender was rusting. I took it back to the body shop. The manager apologized and agreed to redo the job, but said there wasn’t much metal for his technicians to work with because the car had rusted significantly prior to the accident. He couldn’t guarantee that it wouldn’t rust again.
I asked him if he would consider painting both rear fenders in exchange for me rebuilding the problem fender, and he agreed. I planned to rebuild the fender myself with epoxy, and also rebuild the rusted fender on the other side. I knew I’d be able to do a much better job with WEST SYSTEM Epoxy and fiberglass than with the polyester-based putties the auto body repair shop had used.
A month later, I showed up at his shop with John’s car. Both fenders had been rebuilt with fiberglass and epoxy, faired to the best of my ability, and covered in a high-build epoxy primer. A few days later I was delighted to see the results. The paint shop manager must have been happy too because he asked if I was looking for work.
John drove his car for five years after the fenders were repaired, then sold it to a friend who drove it a couple more years. The fenders still looked great with no signs of rust working under the epoxy and fiberglass repair. This is significant because we apply lots of salt to our highways in Michigan during the winter months and that typically wreaks havoc on repaired metal auto body panels.
How I went about this fender repair
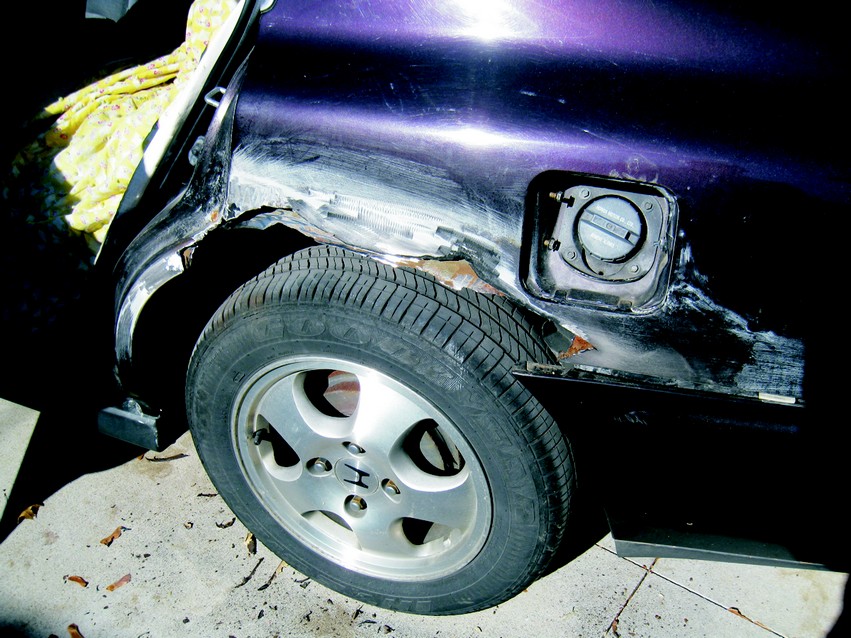
The fenders were still in good shape (aesthetically speaking-no pieces were missing, no major rust holes) allowing me to use them as male molds to make new, thin fiberglass/epoxy laminates to recreate the fender shape. These would later be glued to the metal after all the compromised steel that surrounded the wheel well was cut away.
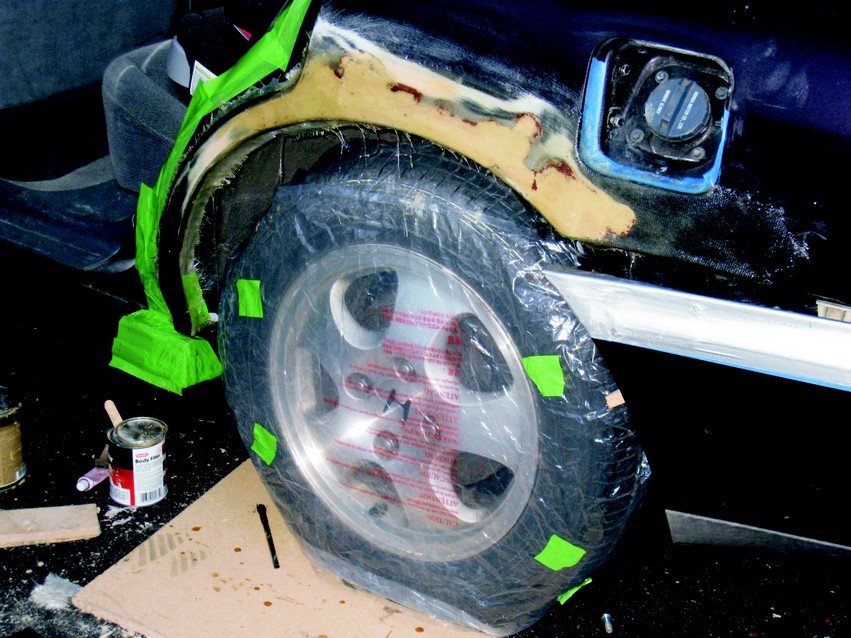
To prep the mold, I applied duct tape around the perimeter of the wheel well, extending the tape beyond the inner edge of the fender (inside the wheel well) so epoxy and fiberglass would not get trapped behind it. I waxed the fenders with multiple coats of paste-type mold release wax and applied a couple of light coats of aerosol hair spray (water-based plastic) in place of PVA (polyvinyl alcohol). The hair spray and PVA are waterborne plastics that act as a backup mold release for the paste wax. Using these reduced the risk of sticking a fiberglass part on the fender mold.
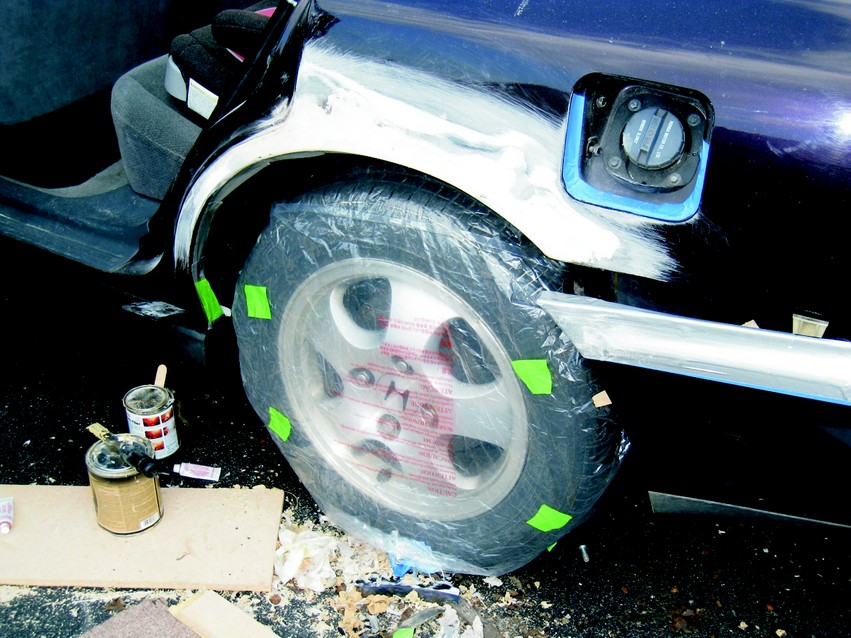
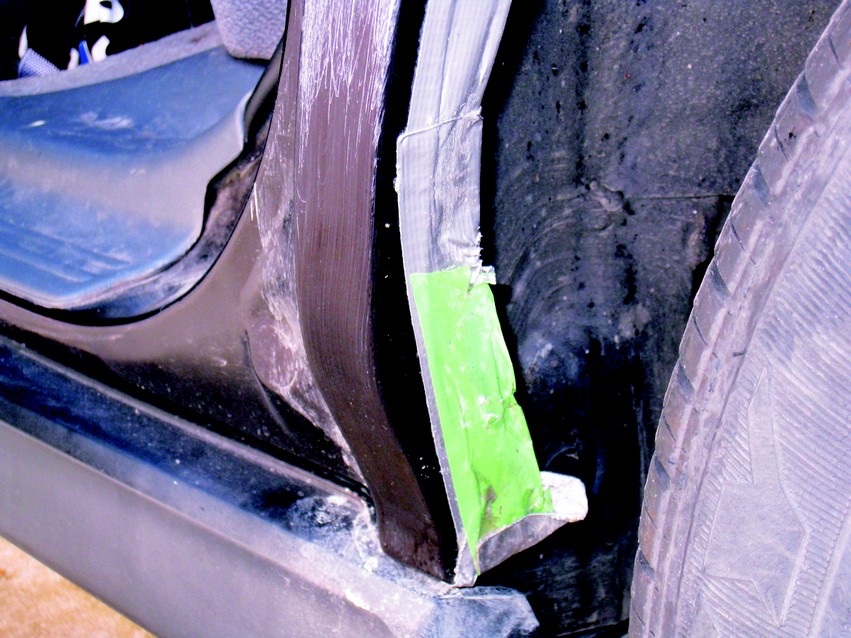
I repeated the process on the opposite side of the car. Here I had to temporarily fill a small rust hole with polyester body putty prior to waxing the fender and making an epoxy/fiberglass copy using the same process. After the hair spray dried, I applied three layers of 4 oz fiberglass cloth with WEST SYSTEM 105 Resin/205 Fast Hardener®. I chose this light buildup to recreate the shape and reduce overall thickness. This made fairing the fiberglass panel into the surrounding fender easier once it was glued in place. I allowed the part to cure overnight, then drilled a couple of small holes at either end of the panel to help position the part when it would be glued back into place. I worked wedges under the perimeter to pop the part free.
With the new fiberglass fender panels complete, I cut away all rusted and thin metal along the perimeter of the wheel wells and ground away the paint a couple of inches back from the edges to prep for gluing on the new fiberglass molded replacements. I made the laminate light and thin so it would be easier to fair the 1″ overlap into the surrounding fender. This also allowed me to reinforce it with more layers of fiberglass and epoxy applied from the backside of the fender after the molded part was glued in place. The extra fiberglass reinforcement tied the inner fender and outer fender together and created a very rigid repair.
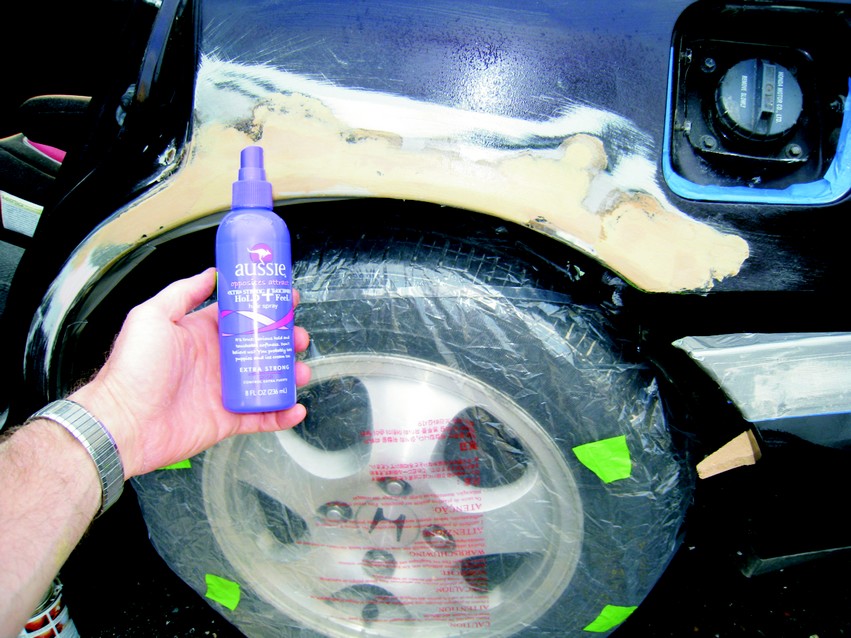
I glued the new fiberglass parts to the steel with a mixture of 105 Resin/206 Slow Hardener thickened with 404 High-Density filler. If I were doing the work today, I would use Six10® Adhesive instead to make the job easier. During the gluing operation, I used spring clamps to hold the molded fiberglass part in place. The holes drilled previously at the front and back end of the panel made it easy to position on the fender during the gluing process. In addition, I applied a few strips of masking tape laid across the joint while dry fitting as witness marks that I could use for alignment while assembling.
After the glue cured, I sanded the perimeter of the new section to break the corners and to sand the glue that squeezed out smooth and dull. The area was faired with an epoxy fairing compound made with 105 Resin/205 Hardener thickened with 407 Low-Density filler to a mayonnaise consistency.
I tied the fiberglass part to the inside fender by laminating strips of 15oz bi-axial fiberglass fabric and epoxy that extended from the back of the fiberglass fender lip to the inner fender, overlapping by about an inch. Tying the inner and outer fender this way made for a very strong and rigid new fender.
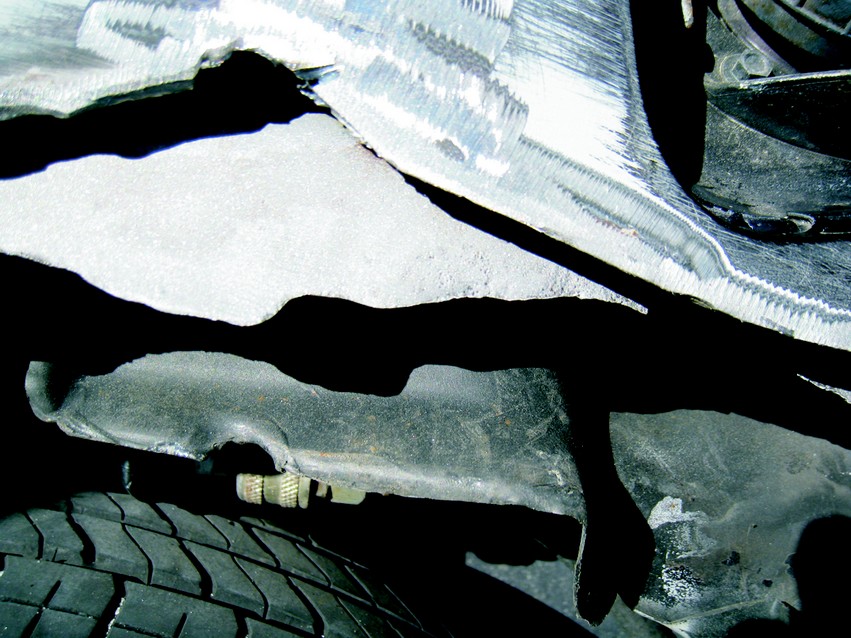
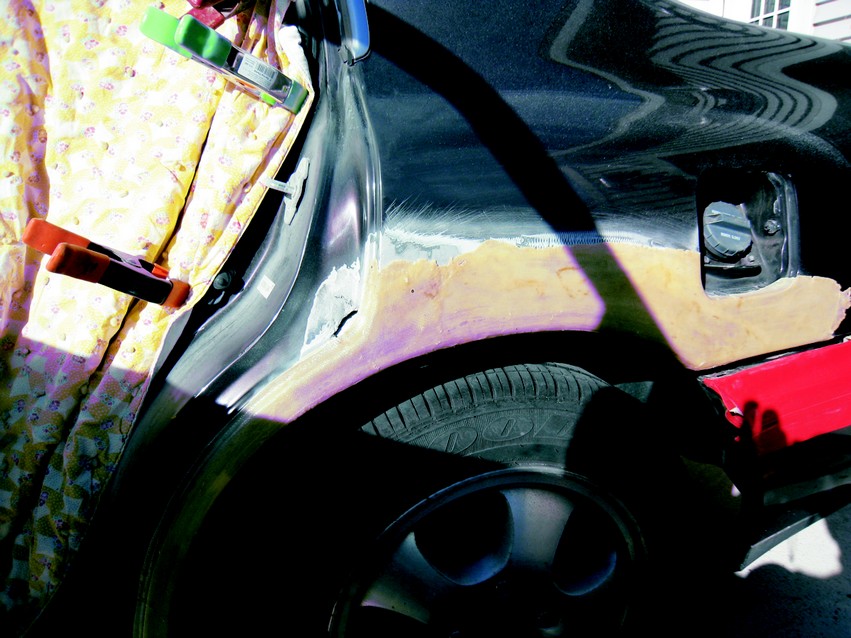
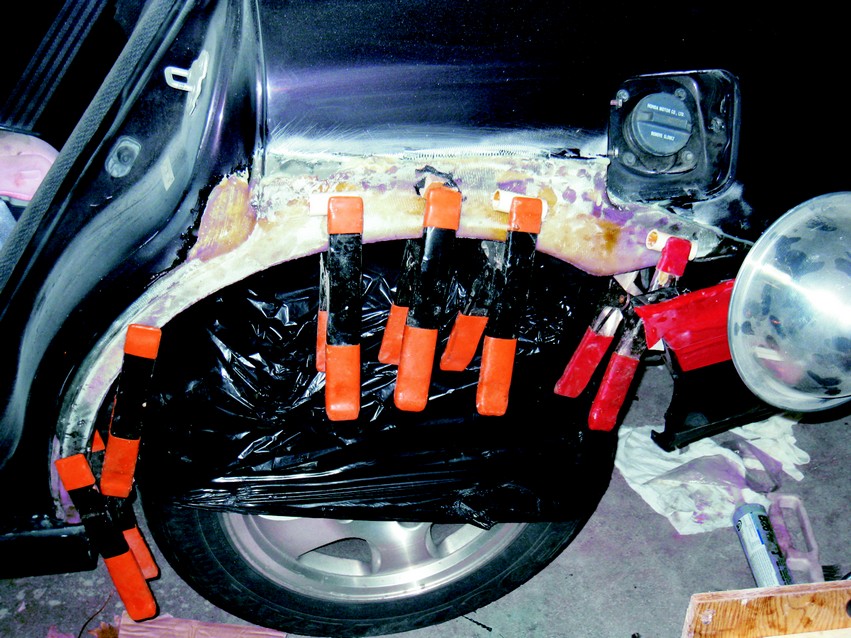
Areas that were difficult to sand properly were abraded by grit blasting with Black Beauty blasting slag. Epoxy was applied to freshly abraded steel to maximize adhesion. After abrading the bonding areas of the fender and sanding the backside of the fiberglass part, the part was dry-fitted prior to gluing. The part had faded due to a month-long exposure to sunlight between the time the part was molded and when it was finally fitted. The new fiberglass part is glued in place with 105/206/404 High-Density filler. Spring clamps worked great for holding it in position during cure. The following day the edges were sanded and the area was faired with 105/206/407 Low-Density filler
After the fairing had cured solid, I used heat lamps to warm the fender to 150°F for several hours to post-cure the fiberglass. This step is important because the car would be painted dark brown. Dark colors get very warm in the sun and can cause fiberglass repairs to “print,” meaning the weave of the fiberglass becomes visible. Heating the epoxy/ fiberglass repair like this forces the fiberglass fabric pattern to print or telegraph to the surface a few thousandths of an inch. This fabric print was sanded away prior to applying an epoxy primer. Some people wait to post-cure until after their high-build primer is applied.
Another approach to preventing fabric print is to paint the epoxy repair with a dark primer and then position the car in direct sunlight during warm weather for a few days. That way the print will occur and can be sanded out just prior to applying the final paint. Post-curing assured John’s car would look good for the long haul. Before taking the car to the body shop for painting, I liberally treated the inside of the fender with auto panel rust inhibitor spray that was applied by gaining access through the trunk.
Unfortunately, I was not good about taking pictures of John’s car repair, but I did take a picture three years ago of a similar repair done on a newer Honda. The sequence of photos used in this article is from that repair. Like before, I just made a light fiberglass part off of a quickly patched fender prior to cutting away all the bad metal. I repaired the damaged fender just enough with polyester putty so the shape would be close enough to mold a fiberglass part.
Regrettably, I never got a photo of the finished fender. I am confident that wherever the car is and regardless of the condition of the rest of it, the fender is holding up well.


